

Christmas card displays range from a free bundle of backyard twigs to a sixty-dollar wire tree, and the right choice depends on whether you need the cards visible from the hallway or readable from the sofa.
The catch is weight: a standard greeting card is heavy enough to sag real pine branches after six or seven cards, which rules out half the Pinterest-ready looks before you start.
The 3-foot wire tree I tried crowded into unreadability at twenty-five cards, while a leaning ladder with grosgrain ribbon needed an overnight wait for the fibers to settle before the center row stopped brushing the floor.
1. Christmas Card Display Tree
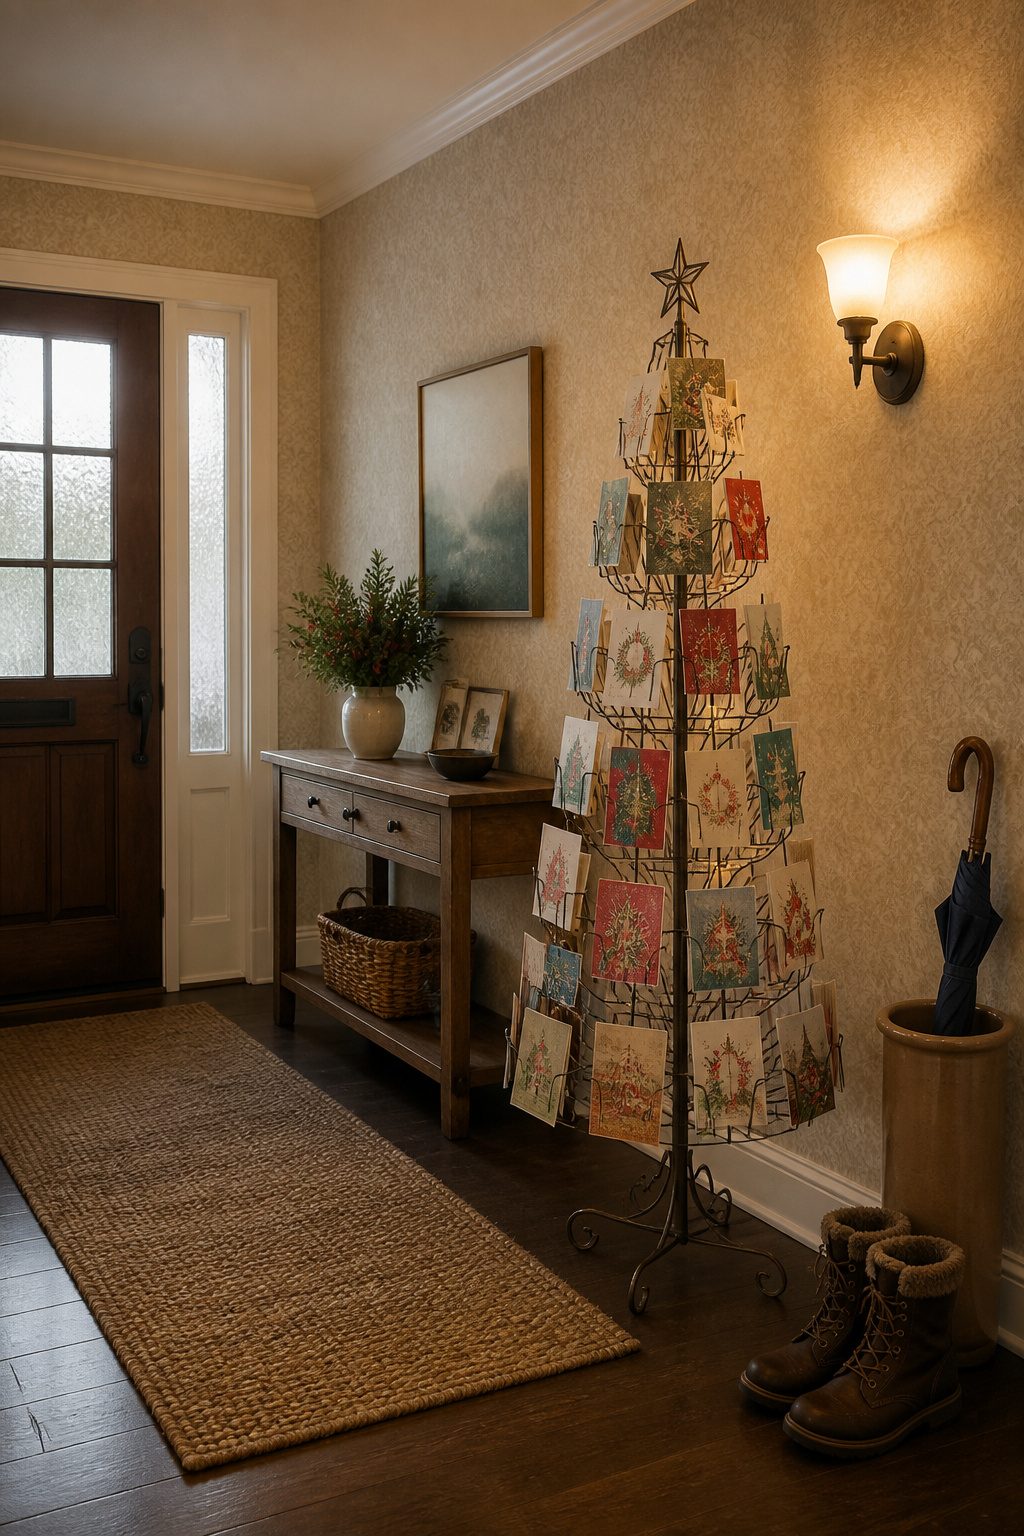
Freestanding card trees usually run 3–4 feet tall in the wire versions and up to 5–6 feet for wood frames with staggered slots.
The wire ones clip cards face-forward so both sides show; the slotted wood styles ask you to tuck cards in sideways, which hides half the design but keeps them from spinning.
Either way, crowding starts around 25–30 cards, and by forty the whole thing reads as a green blob from across the room, not a display of anyone’s actual handwriting.
I bought a five-footer two years back without measuring my entry alcove, which has a soffit dropping the clear height to 84 inches. The tree’s finial scraped plaster.
It also sat right where the front door swings wide, and the base plate caught toes every time gloves or bags came off.
A 3-foot model on a console table against the wall held fewer cards but stayed visible and out of the traffic line.
For renters, that smaller footprint is the safer bet: no ceiling gamble, no tripping liability, and it folds flat by New Year’s.
2. Ribbon and Ladder Display
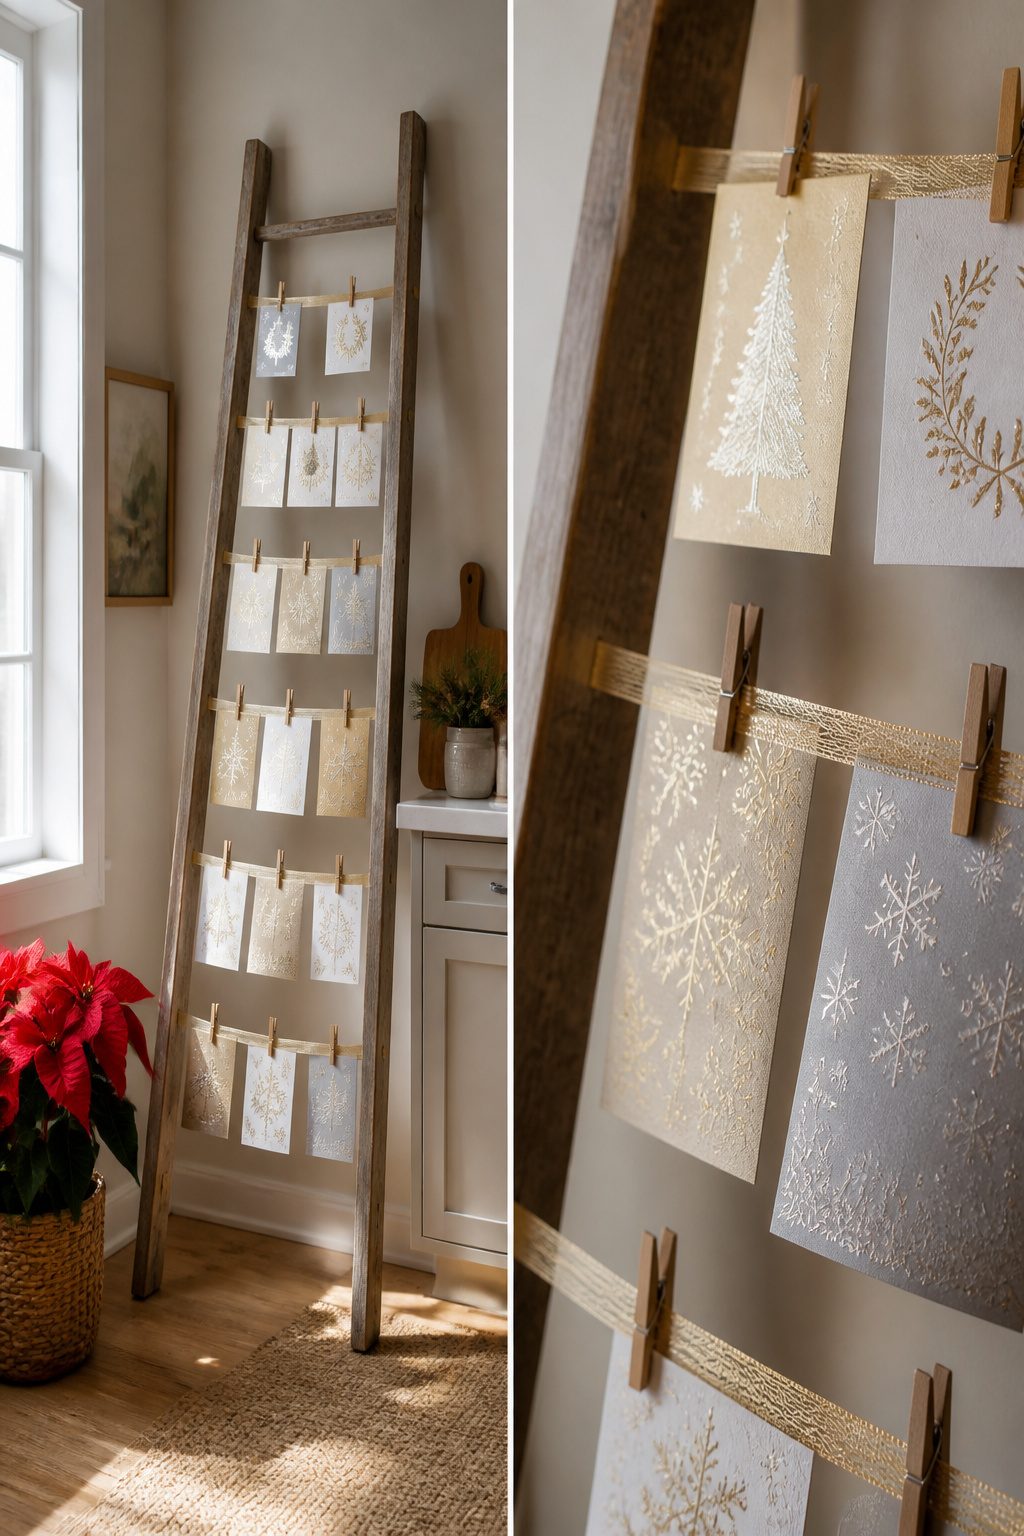
A leaning ladder with ribbons strung between the rungs turns a blank wall into something seasonal without a single nail hole.
I like grosgrain ribbon here, about 5/8 inch wide, because satin slips and anything narrower lets cards twist and stack on top of each other. The texture matters more than the color.
The ladder needs to lean at roughly 15 degrees from vertical, maybe a touch more, so the feet bite into the floor instead of sliding.
On hardwood, felt pads on the back legs keep the thing from skating backward when someone bumps it; the front feet can stay bare for grip.
I tried rubber pads on all four once and watched the whole frame walk itself across the room over an evening.
Ribbon stretch is the part nobody warns you about. I pulled mine taut at bedtime, clipped two dozen cards, and woke to find the center ribbon sagging enough that the lowest cards brushed the floor.
Natural fibers relax overnight, especially in dry winter heat. Now I string the ribbons, wait until morning, then tighten and clip.
The extra ten hours of settling saves you from rehanging everything twice.
3. Present Door Display
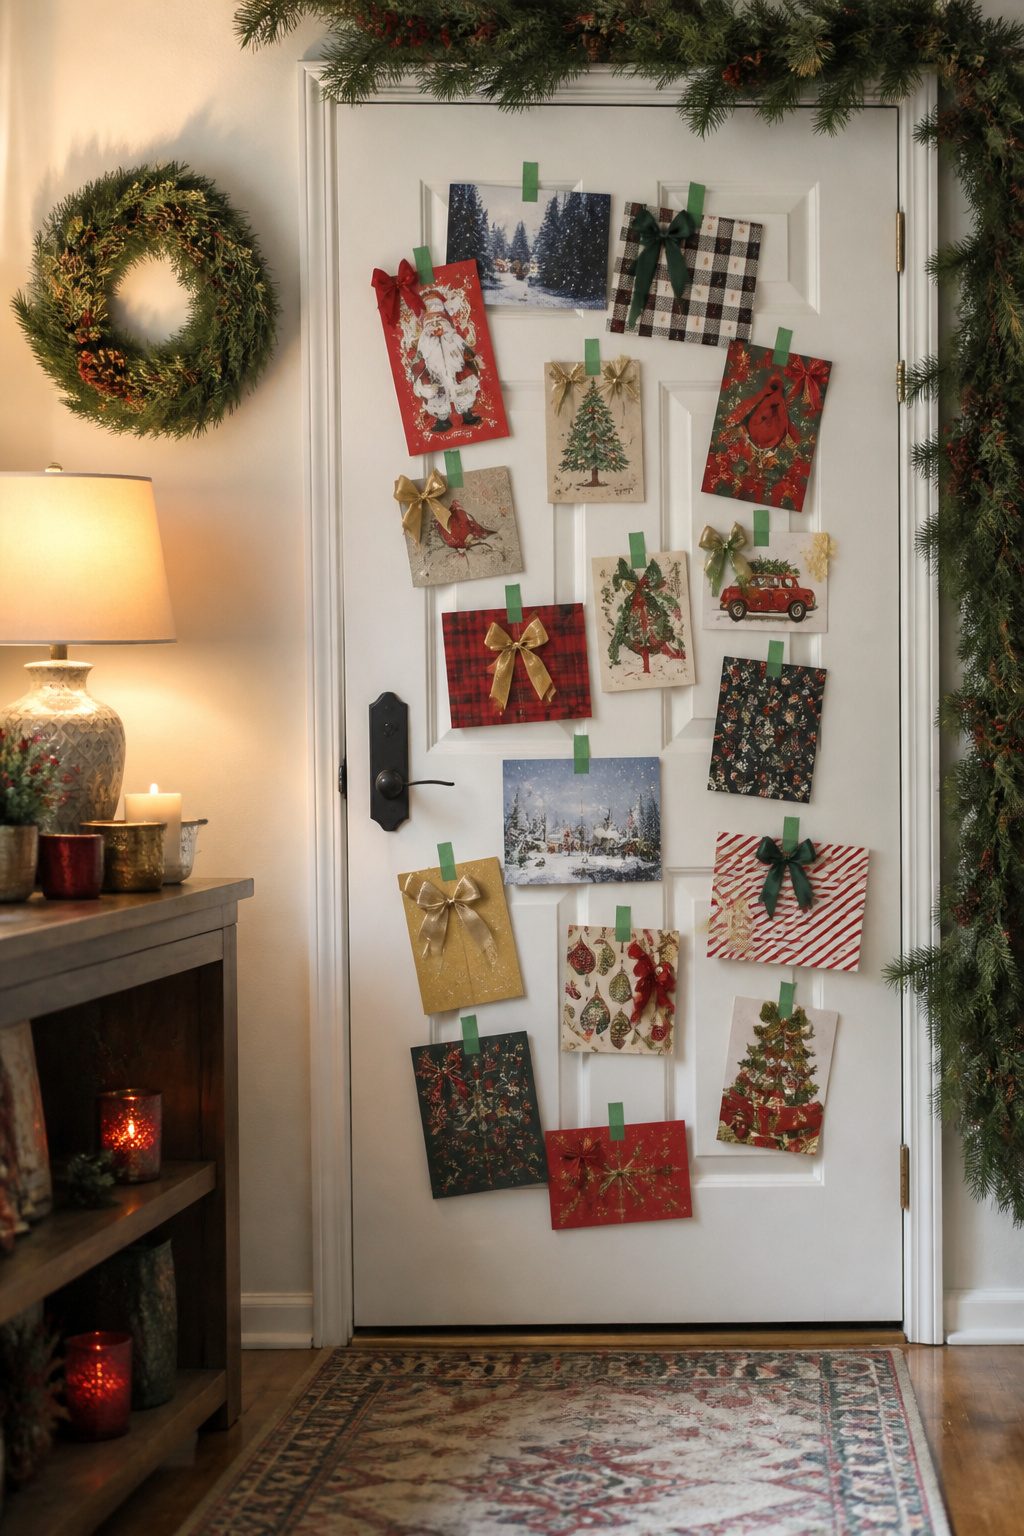
A door covered in cards arranged like stacked gift boxes reads from the hall as actual presents waiting to be opened.
The trick is alternating card orientations so the colored envelopes face out, creating the wrapped look instead of a sea of white rectangles.
Ribbon bows pinned at the corners sell the illusion, though one good door slam and the magnetic ones slide or the taped ones scatter.
Painter’s tape rated for 14-day clean removal is the only kind that comes off in January without lifting the paint underneath.
The cheap stuff in the junk drawer hardens in two weeks and takes the finish with it; learned that the winter I spent an afternoon touching up a rental door in January.
Foam mounting squares work on hollow-core doors but fail on textured panels, so the tape test matters.
Plan on forty-five minutes to lay out the grid the first time, and another twenty when the mail carrier’s enthusiasm for the door knocker undoes your top row. The redo goes faster if you photograph the layout before anything moves.
4. Cards Hung Like Ornaments
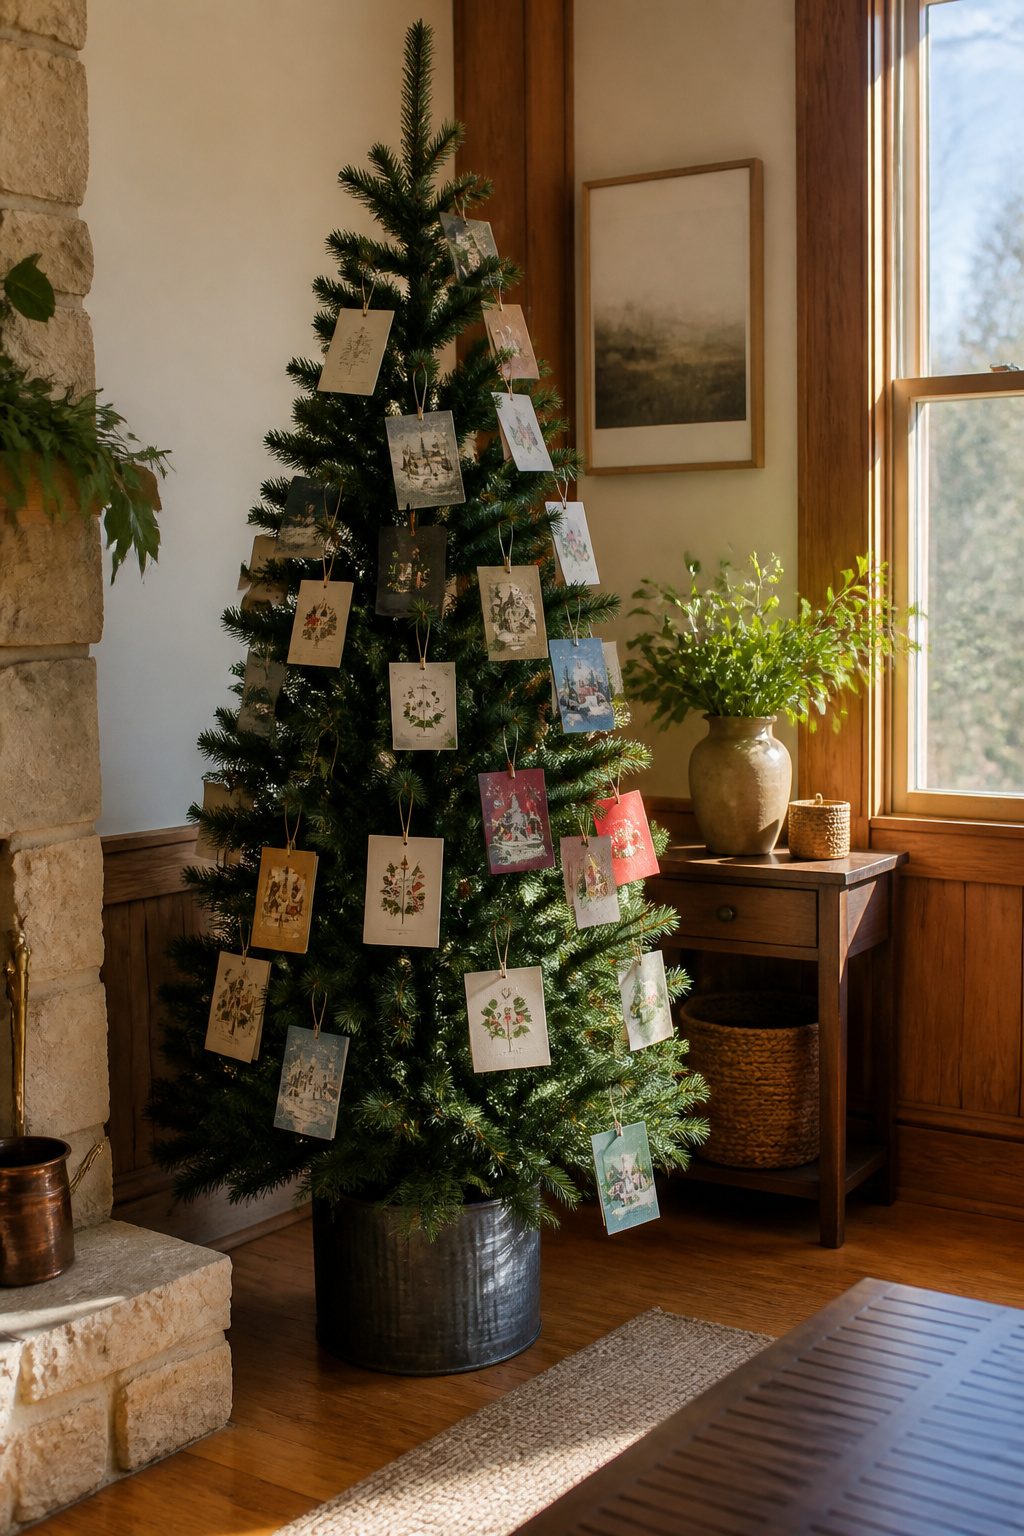
Ornament hooks turn any card into something that hangs, which sounds simple until the branch starts to bow.
A standard greeting card weighs enough to sag real pine branches after about six or seven cards, so artificial trees with wired limbs hold up better for this.
The metal hook type matters more than you’d think; the cheap wire ones with the sharp curl at the end will punch through card stock if someone brushes against the tree.
I learned that after finding three cards on the floor Christmas morning with torn top corners.
Ceiling hooks along a beam work better for heavier cards, though you need to think about the swing radius.
A card on a short hook spins and the back shows; a longer drop looks better but drifts in any air current.
The year I tried fishing line instead of hooks, the cards hung invisible and straight. That part worked.
What I did not plan for was the line tangling in the vacuum head every weekend in January, or the single strand I found wrapped around a table leg in March.
Monofilament meant to disappear does exactly that until it catches on something.
5. Hoop Wreath Holder
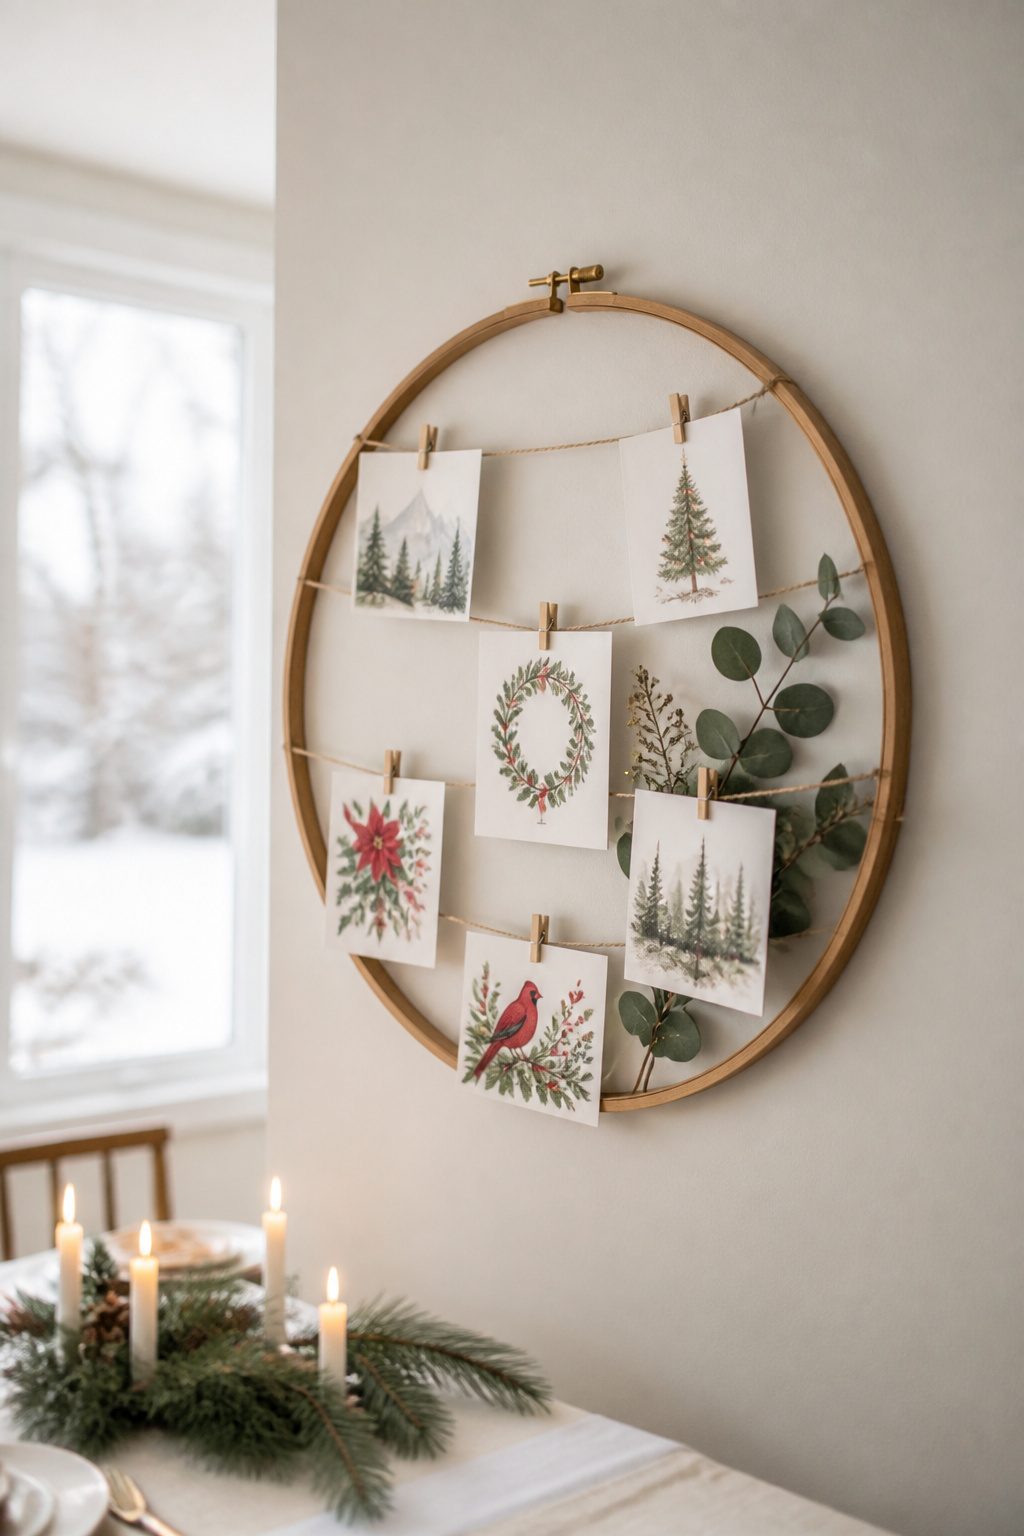
An embroidery hoop or metal ring with twine pulled across makes a clean, round frame for cards without building anything permanent.
An 18-inch hoop fills a standard mantel width without crowding the stockings, and two rings in graduated sizes stacked slightly offset reads as a deliberate set rather than a mistake in scale.
Twine droops into a V the moment a card clips on if you do not tension it hard against the screw hardware.
The trick is threading it through the outer adjustment gap and wrapping twice before knotting, so the metal takes the strain, not the wood.
Ribbon works too, but grosgrain stretches over a month; baker’s twine holds its line and costs next to nothing.
Greenery tucked behind the twine risks swallowing the cards whole.
A few sprigs of dried eucalyptus or seeded cedar pinned to the inner rim, pointing inward like spokes, keeps the frame feeling alive while the cards stay readable from three feet back.
Wire the stems low, below the card line, and the green reads as a base rather than a curtain.
6. Winter Branch Holder
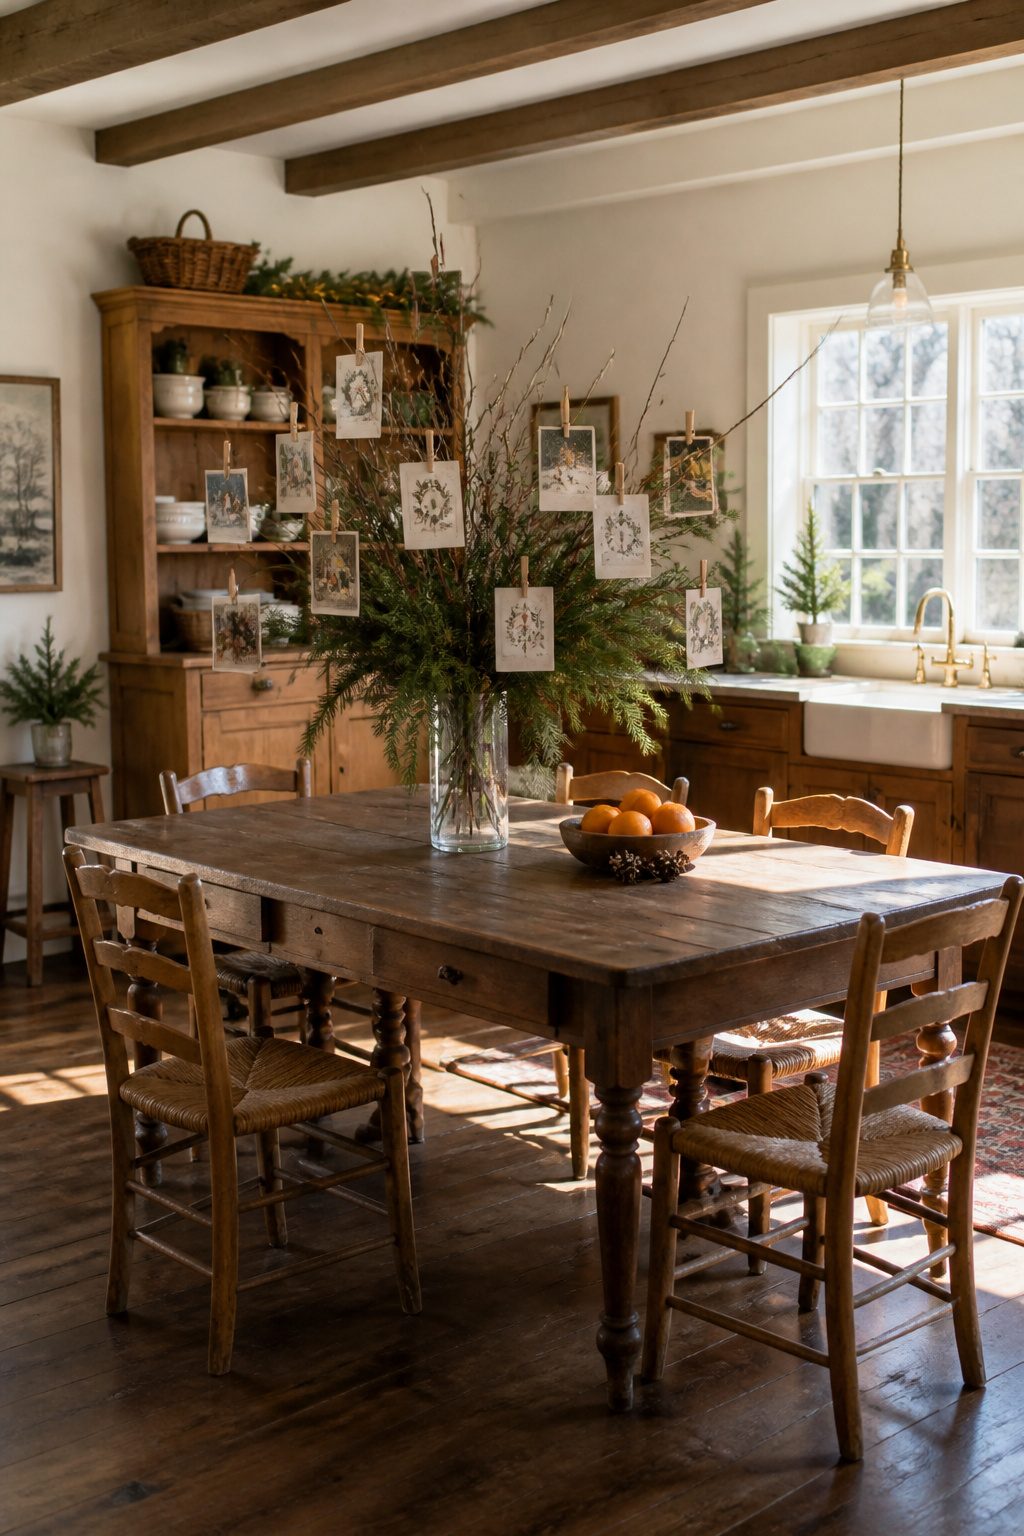
Bare branches from the yard, sprayed metallic white or left natural, stand in a vase or weighted container with cards hung from twigs by twine and clothespins.
The whole setup takes about half an hour, and the materials cost next to nothing if you already own spray paint and string.
The real question is how long those branches stay presentable. Deciduous twigs without needles will simply dry out and get brittle over three to four weeks; evergreen branches drop needles within two weeks once cut and brought indoors.
Weight is the problem most people miss: a heavy card on a thin twig makes the branch sag or snap, so balance larger cards closer to the main stem and keep lighter ones on the outer tips.
A narrow vase tips easily with top-heavy branches, so fill the base with rocks, sand, or a plaster weight, or switch to a low, wide vessel that won’t rock when someone brushes past.
Wintry branches are beautiful on their own and easy to arrange in a large vase or vessel, and are even more festive when you decorate them with the notes you receive from friends and loved ones.
That line from Homes & Gardens catches why this works: the branches do the visual labor, and the cards become ornaments rather than clutter.
For a renter’s small entry or a sideboard, this is display and storage in one piece, and it composts cleanly come January.
7. Candlestick Card Holder
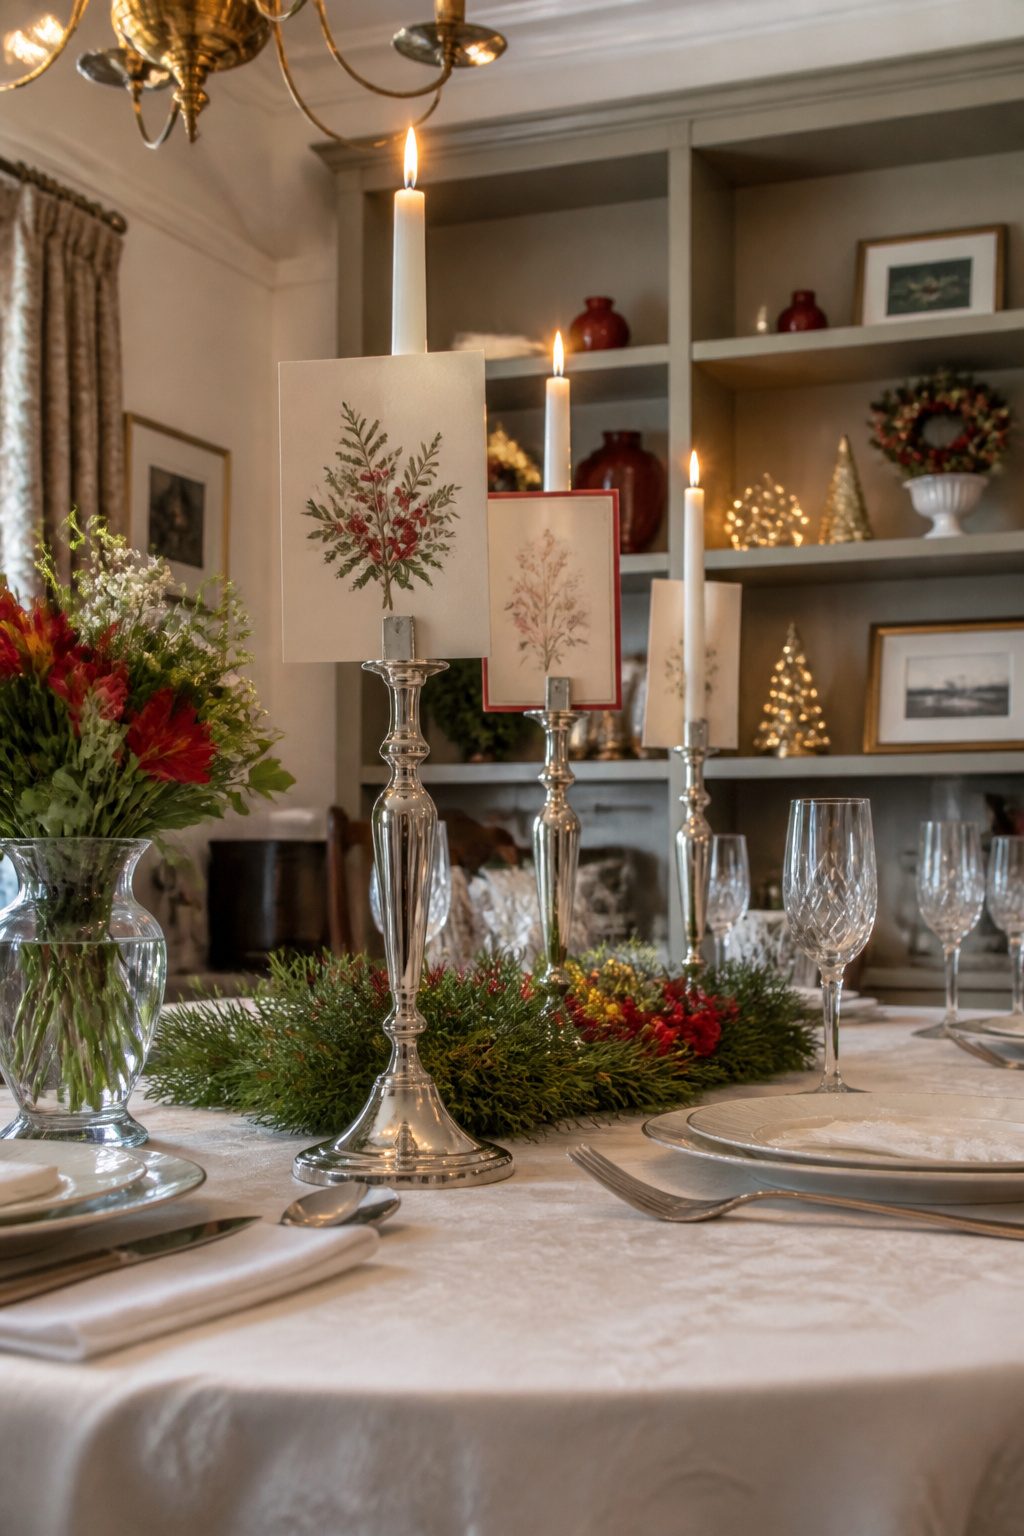
Brass candlesticks with a stem diameter between 3/4 and 1 inch sit steady enough to take a clip without rocking on the table.
Any thinner and the weight of the card pulls the whole thing off-center; any thicker and you’re hunting hardware meant for curtain rods instead of tabletop pieces. Height matters more than I expected.
Twelve inches keeps the cards visible above a centerpiece without putting a wall of metal between you and whoever’s across the table.
I learned that the hard way at a dinner where fourteen-inch sticks turned into a partition nobody could see over.
The tarnish caught me off guard the year I used unlacquered brass.
By January the card edges where they’d touched the metal had turned a pale green, and two of the handwritten notes from my grandmother were stained enough that I ended up scanning them instead of keeping the originals.
Now I stick to nickel-plated or lacquered brass if I’m clipping cards directly to the metal, or I slip a small clear sleeve over the corner first. The sleeve adds maybe a quarter inch of bulk but saves the paper.
8. Gilded Deer Holders
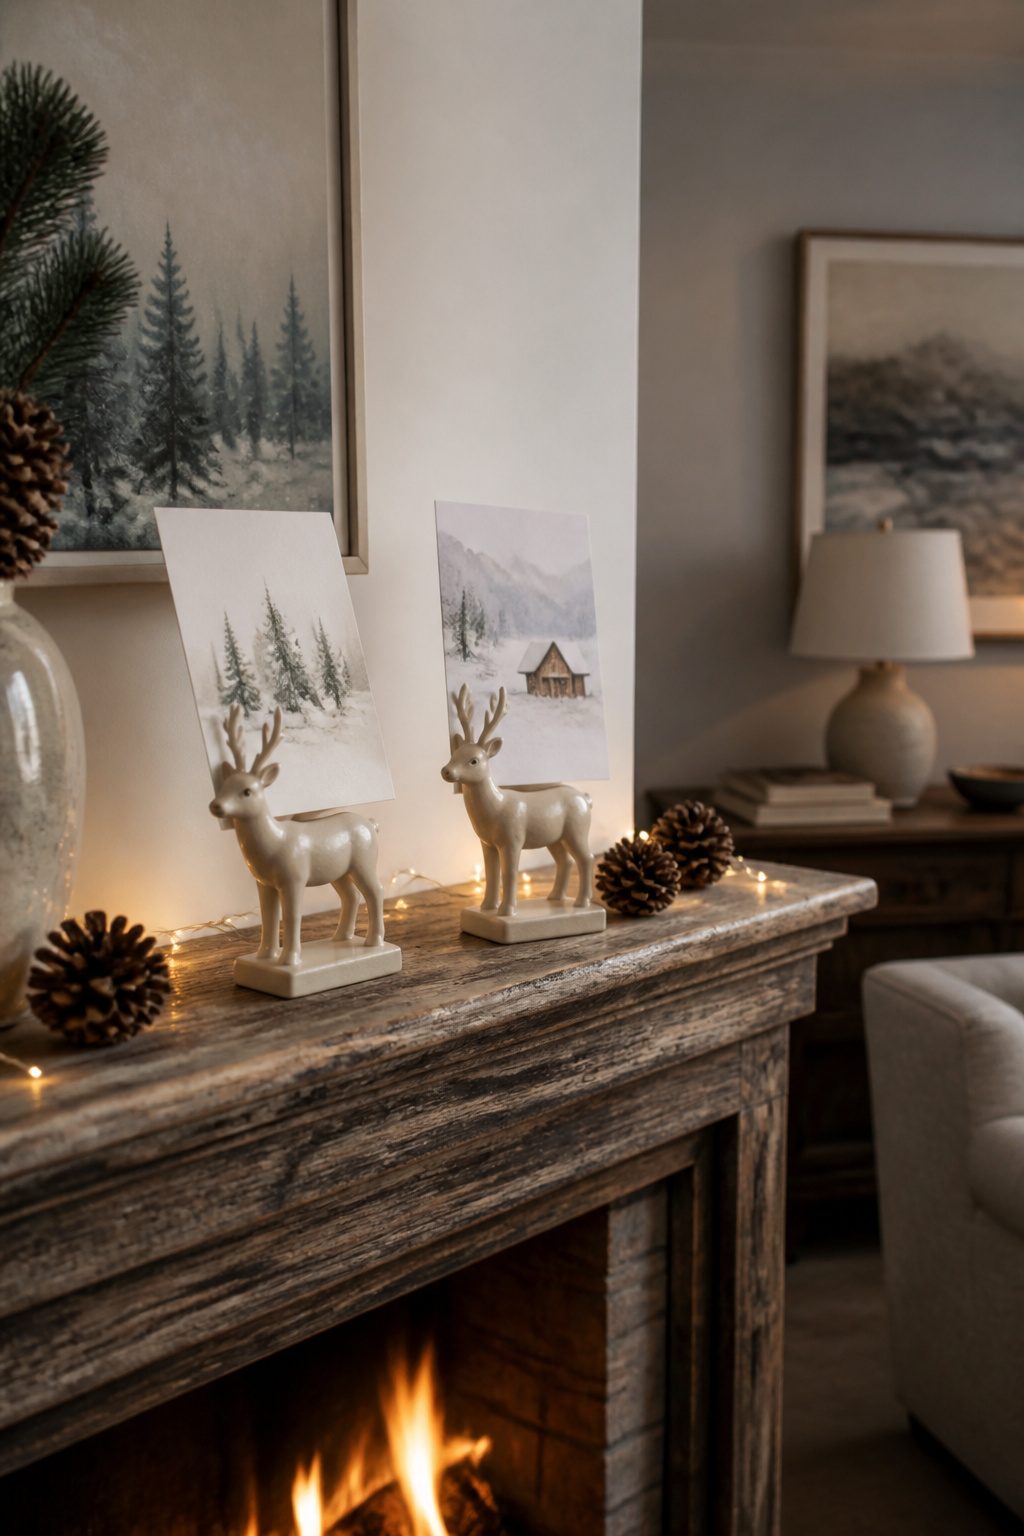
Small ceramic deer with wire antlers or slotted backs arrived in my cart two years ago because the mantel felt empty after I boxed up the usual garland.
The pair holds cards at a slight angle, which keeps signatures readable from across the room.
What no product photo showed was the felt pad peeling off the base by mid-December; the bare resin left pale scratches on the painted mantel that took a Magic Eraser and some patience. **Two deer look like a found collection.
Six read as a holiday storefront**, so I stop at a pair flanking a candle and call the grouping done.
9. Chalkboard Display
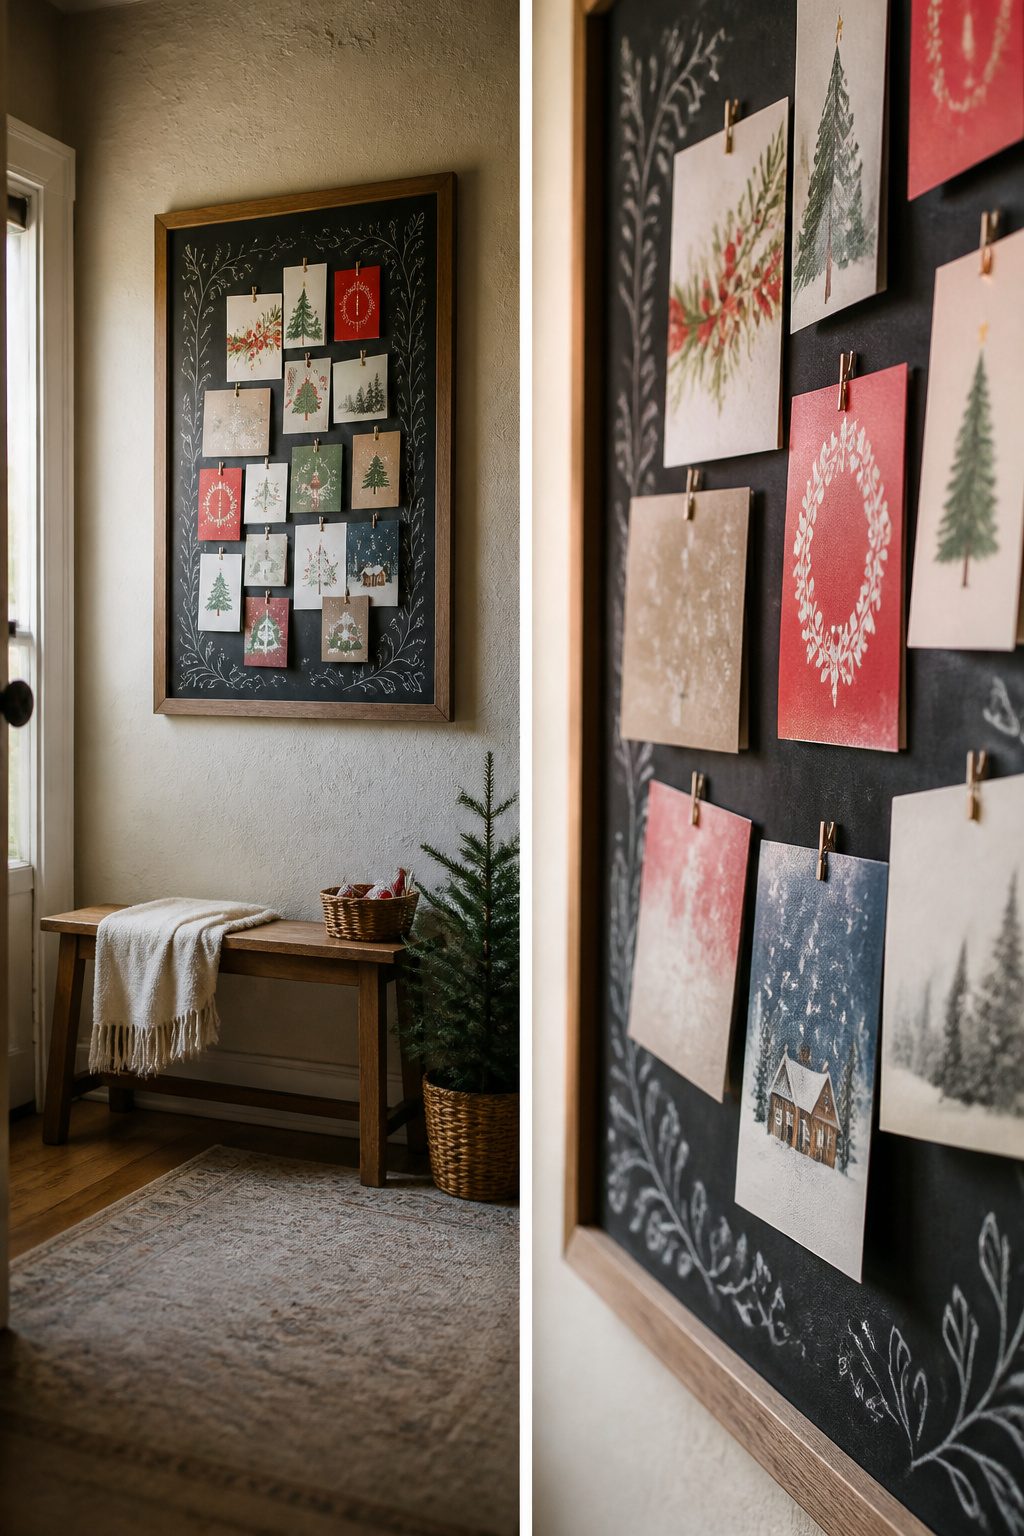
A framed chalkboard gives Christmas cards a place to live for the season without committing a wall to them permanently.
I learned the marker distinction the hard way: chalk markers labeled "wet erase" wipe off with a damp cloth, while "permanent" chalk markers need ammonia or a magic eraser and will survive a sneeze.
For a board you redraw every December, wet erase is the only sensible choice.
The frame itself is worth doing the math on. A ready-made chalkboard in a 20×30 frame runs about $45–65 at craft stores, but a thrifted frame plus a $12 piece of chalkboard panel from the hardware store usually lands under $25.
You will need to cut the panel to fit, which takes a jigsaw and five minutes.
Arrange the cards inside the frame shape, not across it like a bulletin board.
A tall frame wants two columns of cards; a wide one wants a row across the middle with sketches of holly or a simple border above and below.
Light painter’s tape rolled into loops behind each card holds them flat without residue, and the chalk art fills the gaps so the whole thing reads as one piece rather than cards pinned to a board.
10. Wooden Ladder Holder
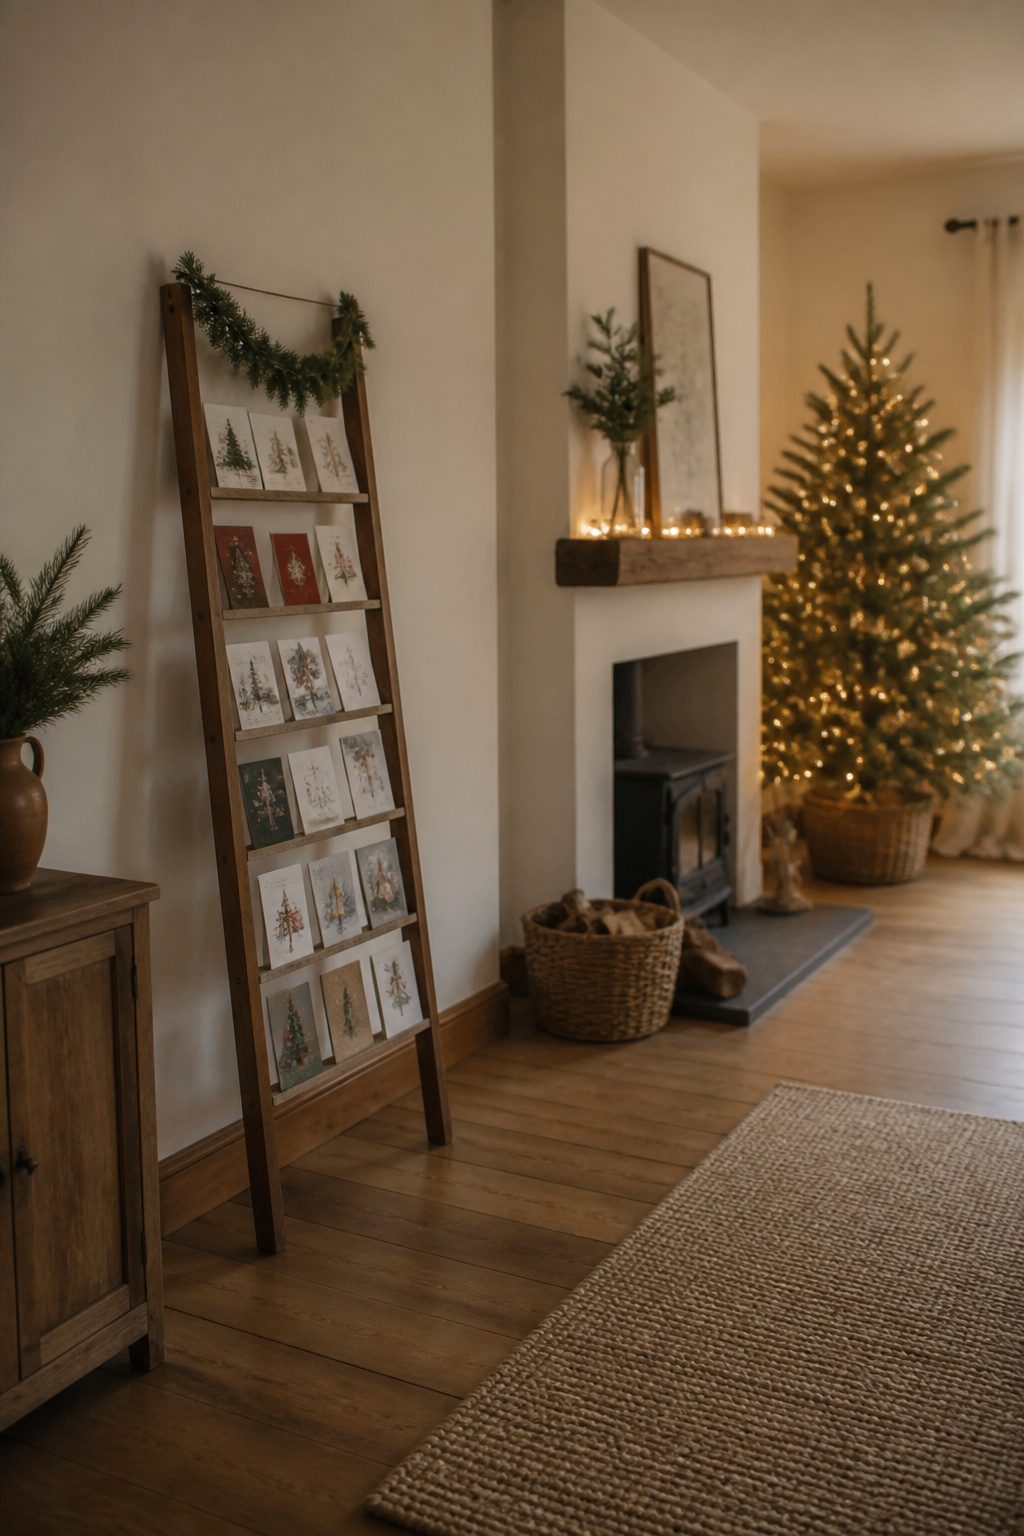
A freestanding ladder with slanted rungs solves the leaning-ladder problem: it does not need a wall. Cards slide between the angled bars and stay put without clips or string.
Rungs spaced about six inches apart fit standard greeting cards without stacking them so tight you cannot read the signatures.
The footprint is what matters in a narrow entryway. A leaning ladder needs tilt space behind it, which steals six to ten inches from the wall.
The freestanding version sits vertical on a base, sometimes no deeper than a large boot tray, so it tucks beside a console table or behind a door that opens against it.
Finish determines whether cards catch. A rustic hand-hewn look photographs well, but splinters and rough grain snag paper corners.
Smooth-sanded rungs with a satin seal let cards slide in and out if you want to rotate which ones face forward. I would take satin over rustic every time for something you handle daily through December.
11. DIY Clay Tree Holders
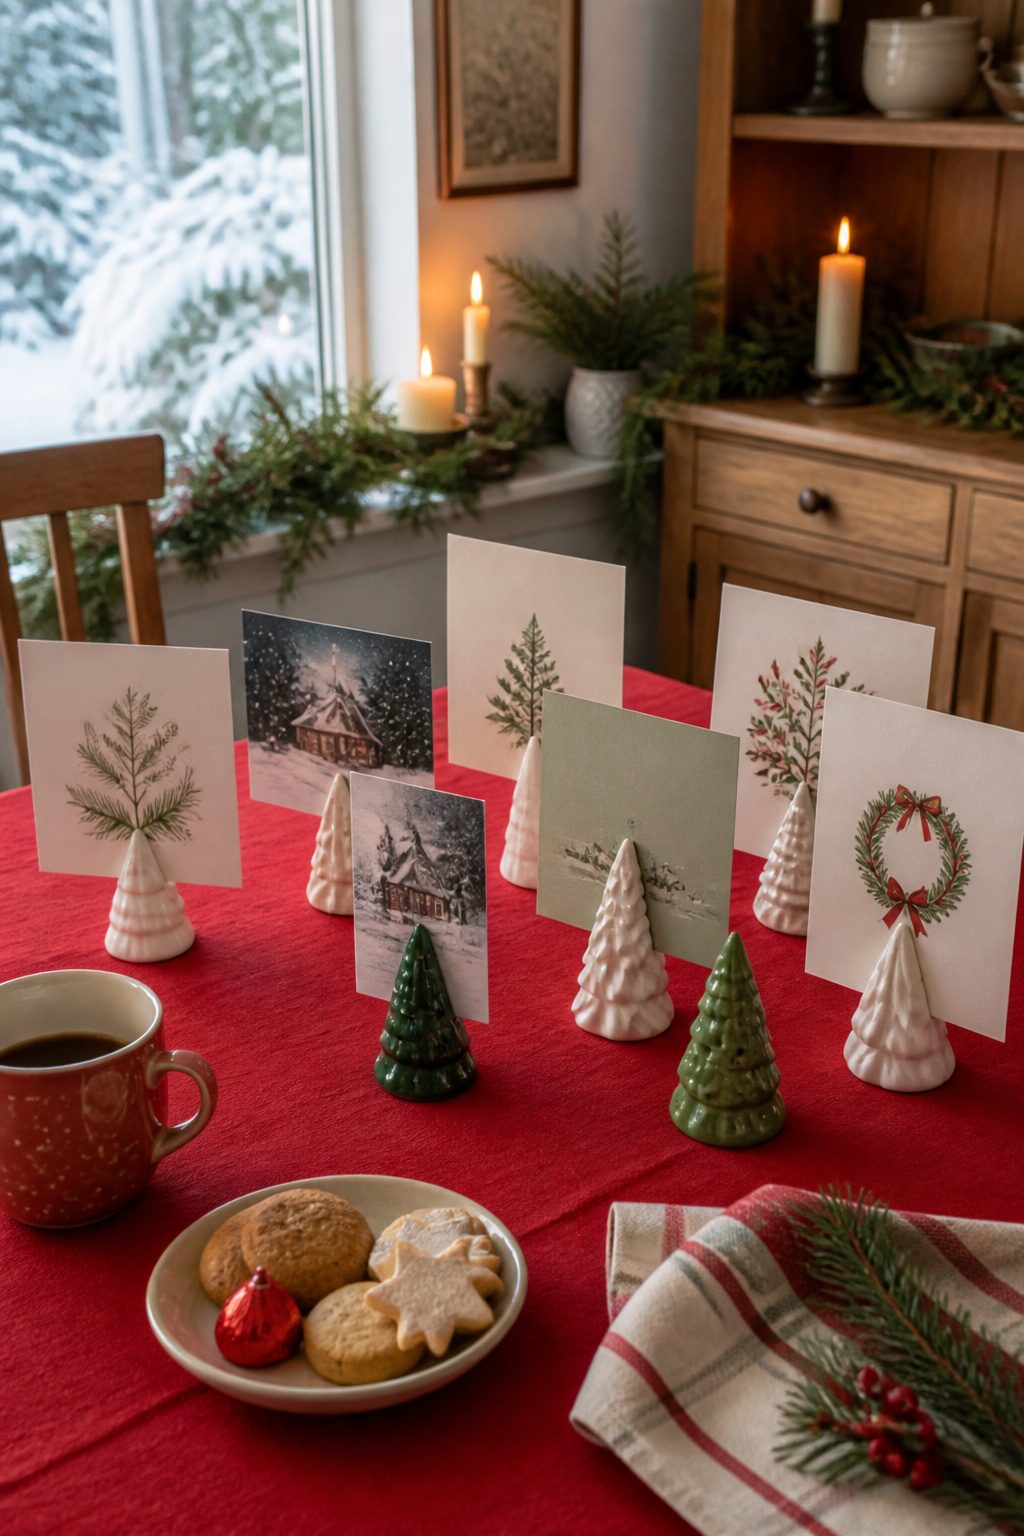
Polymer clay looks friendly until you bake it. The first batch of cone trees I tried warped because I set the oven to 275°F, which is the standard for Sculpey Original, not the 130°F that keeps air-dry brands from slumping.
Check your package; the ten-degree gap matters more than the label suggests.
I rolled the clay to a half-inch thickness, cut small triangles, and slit the tops to hold a folded piece of tin foil. A drinking glass kept the sides smooth.
The foil grips the card without glue, though a support square hot-glued to the base stops the tree from tipping on a crowded mantel.
Fifteen of these on a table reads as charming; forty becomes a forest no one can navigate. The drying time I underestimated was the real cost.
Air-dry clay needed two full days before I could sand the rough edges, not the overnight wait I had planned. Oven-bake sets in an hour, but you trade that for the warp risk.
One tree per card means this scales poorly for the mailbox-heavy years. I keep a baker’s dozen ready and swap cards in as the season goes.
12. Cork Tile Display
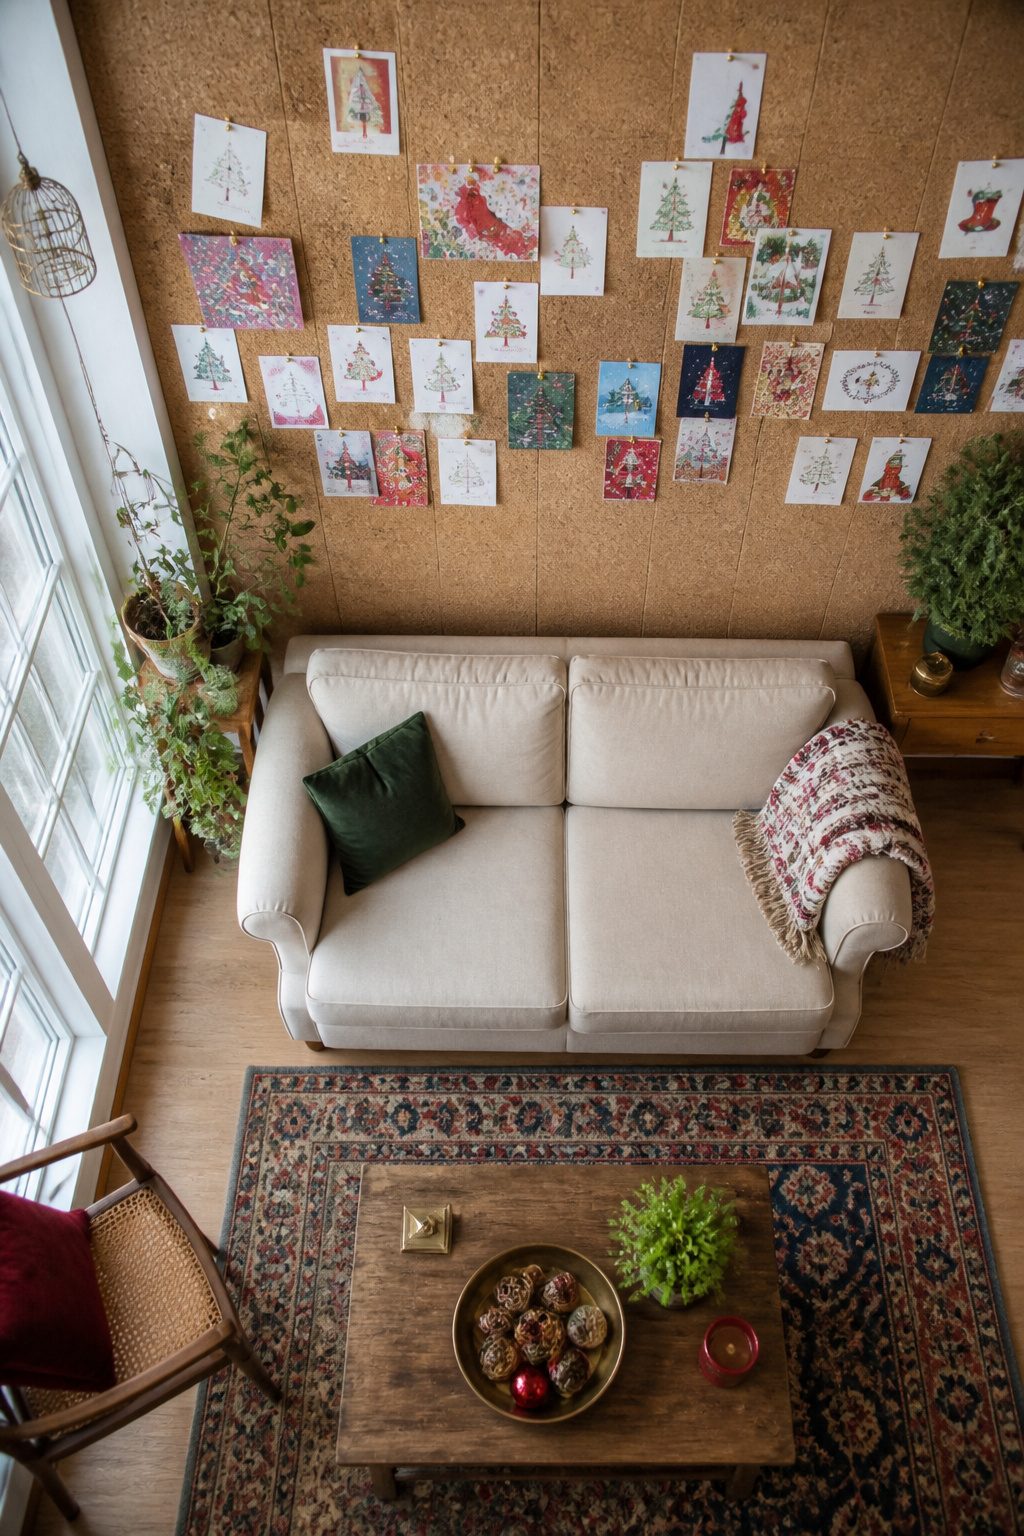
Adhesive cork tiles turn a blank wall or the back of a door into a surface that actually wants your Christmas cards.
The tiles that work are the thicker ones, usually around a quarter inch, dense enough that a pushpin sinks in and stays put without the cork crumbling around the hole.
Thin sheets will shed chunks and look picked apart by January.
The arrangement matters more than people expect. A tight grid of cards reads as one shape from across the room, which helps if the tiles sit in a visible spot like a hallway.
An organic scatter, pinned at different heights, looks friendlier up close but can read as clutter from a distance. I have done both and the grid wins in narrow spaces where you pass by rather than stand still.
The year I mounted tiles on painted drywall, I used the adhesive squares that came in the package. The tiles held fine through the season.
The problem came in January when I peeled them off. The adhesive had bonded to the latex paint itself, not the wall behind it, and strips of paint came up with every tile.
Touch-up was not enough; I had to repaint the whole patch. Command strips or a small nail through each corner spare you that repair, and renters should skip the factory adhesive entirely.
13. Greeting Card Garland
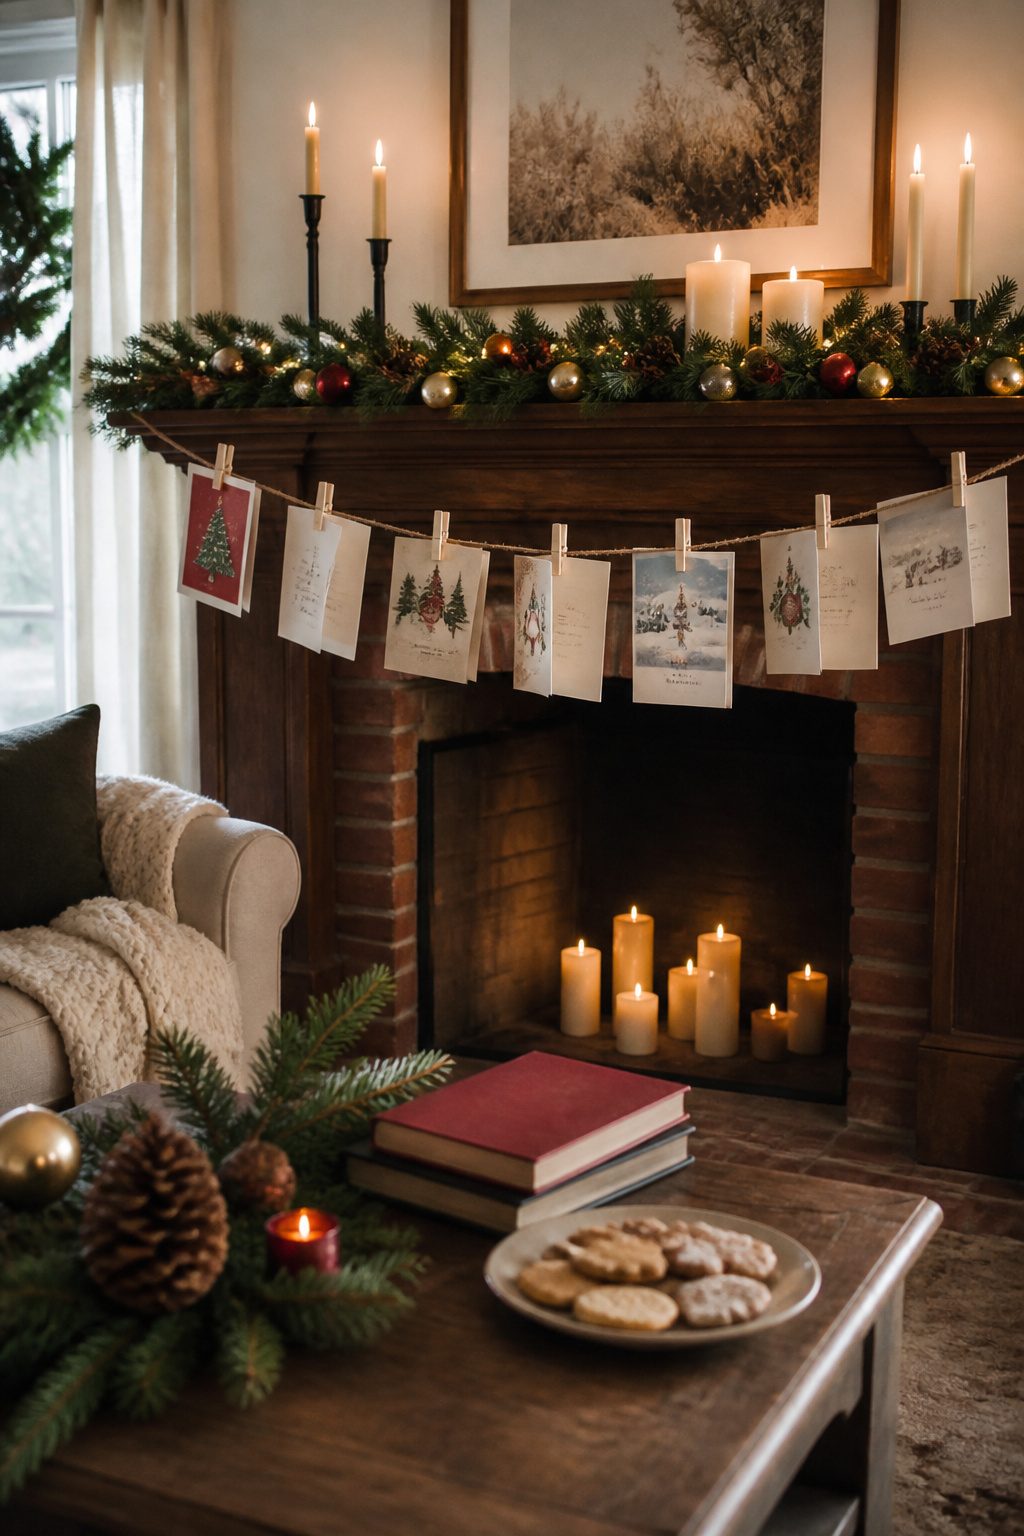
Twine runs flat against a wall only if you pull it drum-tight, which looks neat for about a day before the whole line sags toward the middle.
A six-foot span across my living room dipped enough that cards slid inward and overlapped like a collapsed clothesline.
The fix was a single pushpin at the center, looped over the twine, which split the span in two and kept both halves level without the ribbon going slack.
Leave three inches between clothespins so cards hang open without flipping face-down every time someone walks past. Much tighter and they crowd; much wider and the line looks sparse before late December cards arrive.
For those late arrivals, a slipknot at one end lets you unhook the whole strand, clip on the new card, and re-tie without disturbing the rest.
I learned that after cutting and re-tying twine three times one year, which wastes both string and patience. Ribbon frays less but knots tighter; twine is cheaper and forgives adjustments.
Either way, the center support matters more than the material choice.
14. Twinkly Lights Display
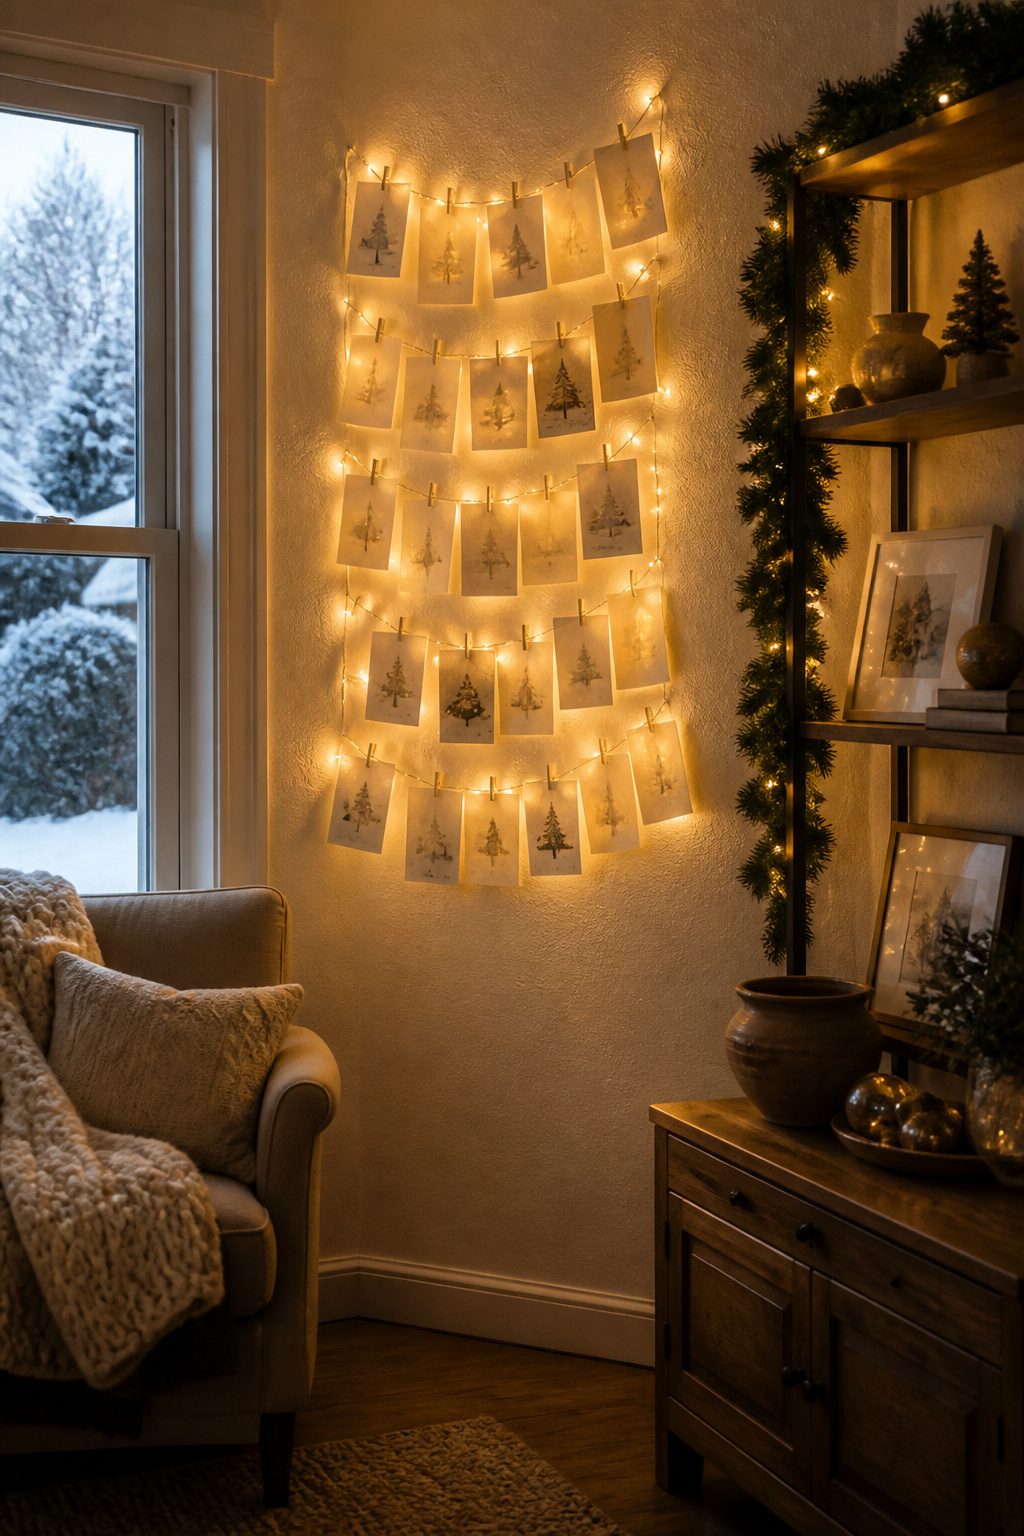
A string of warm-white LEDs behind translucent vellum cards gives off a soft glow without the browning risk that older incandescent bulbs pose to paper.
The heat from modern LEDs stays low enough that cards can sit against the bulbs for weeks, though I still leave a little slack rather than pressing them tight.
Small binder clips work, but the ones with wire loops can pinch through cord insulation if you squeeze too hard. I switched to plastic clothespins after finding a nick in last year’s strand.
For a fifteen-foot run, count your watts before you plug in. Most LED strings draw under five watts per fifty bulbs, so a single outlet handles the lights plus whatever else is already on that circuit.
A power strip with its own breaker adds cheap insurance if you’re running the lights alongside a coffee maker or space heater on the same line.
15. Paint-Stirrer Mobile
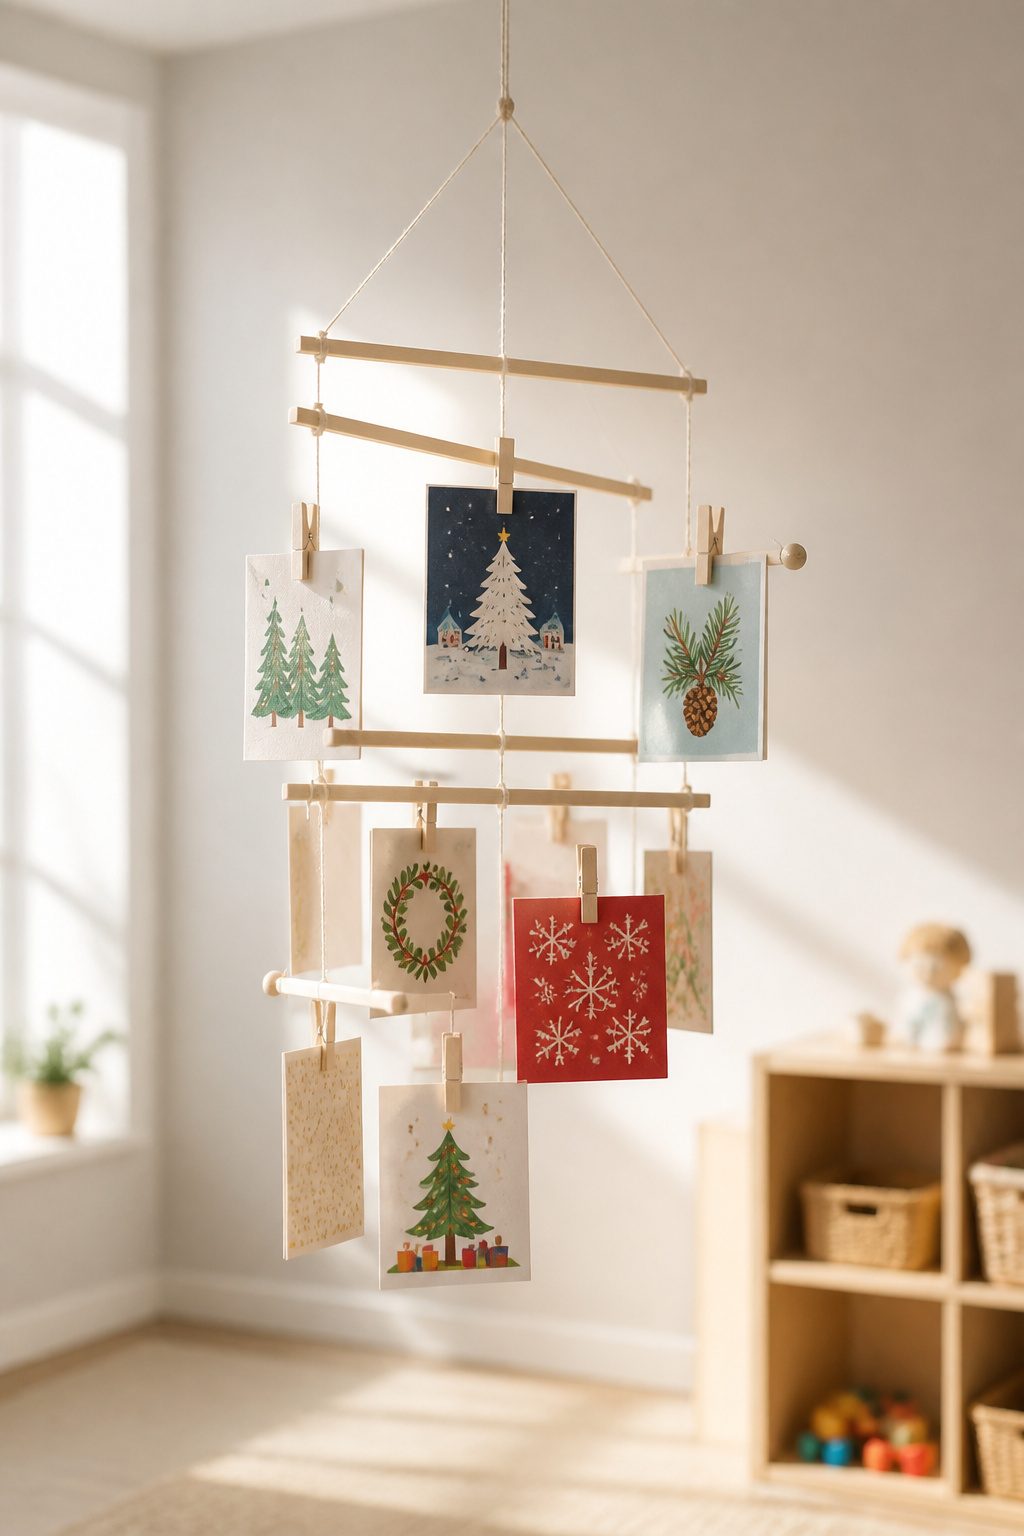
Free paint stirrers from the hardware store bin make the bones of this mobile, the long ones meant for five-gallon buckets.
I crossed two at the center and drilled a small hole through the joint, then strung them up with twine to find the balance point.
That took four tries; the first three hung lopsided no matter how I trimmed the twine, because the stirrers themselves aren’t perfectly uniform and the clip weight shifts with each card you add.
The fix was a fishing swivel, the kind with a snap clip, tied between the twine and the ceiling hook.
It lets the whole thing spin slowly when someone walks past, and the cards don’t tangle the way they did when I tried a plain ring.
Clothespins at the four ends and one in the center hold maybe fifteen cards before it starts to look crowded.
The whole build runs under an hour if you don’t count the balancing, and the cost is whatever you spend on twine and that swivel, usually a dollar or two near the register.
16. Wall Tree Outline
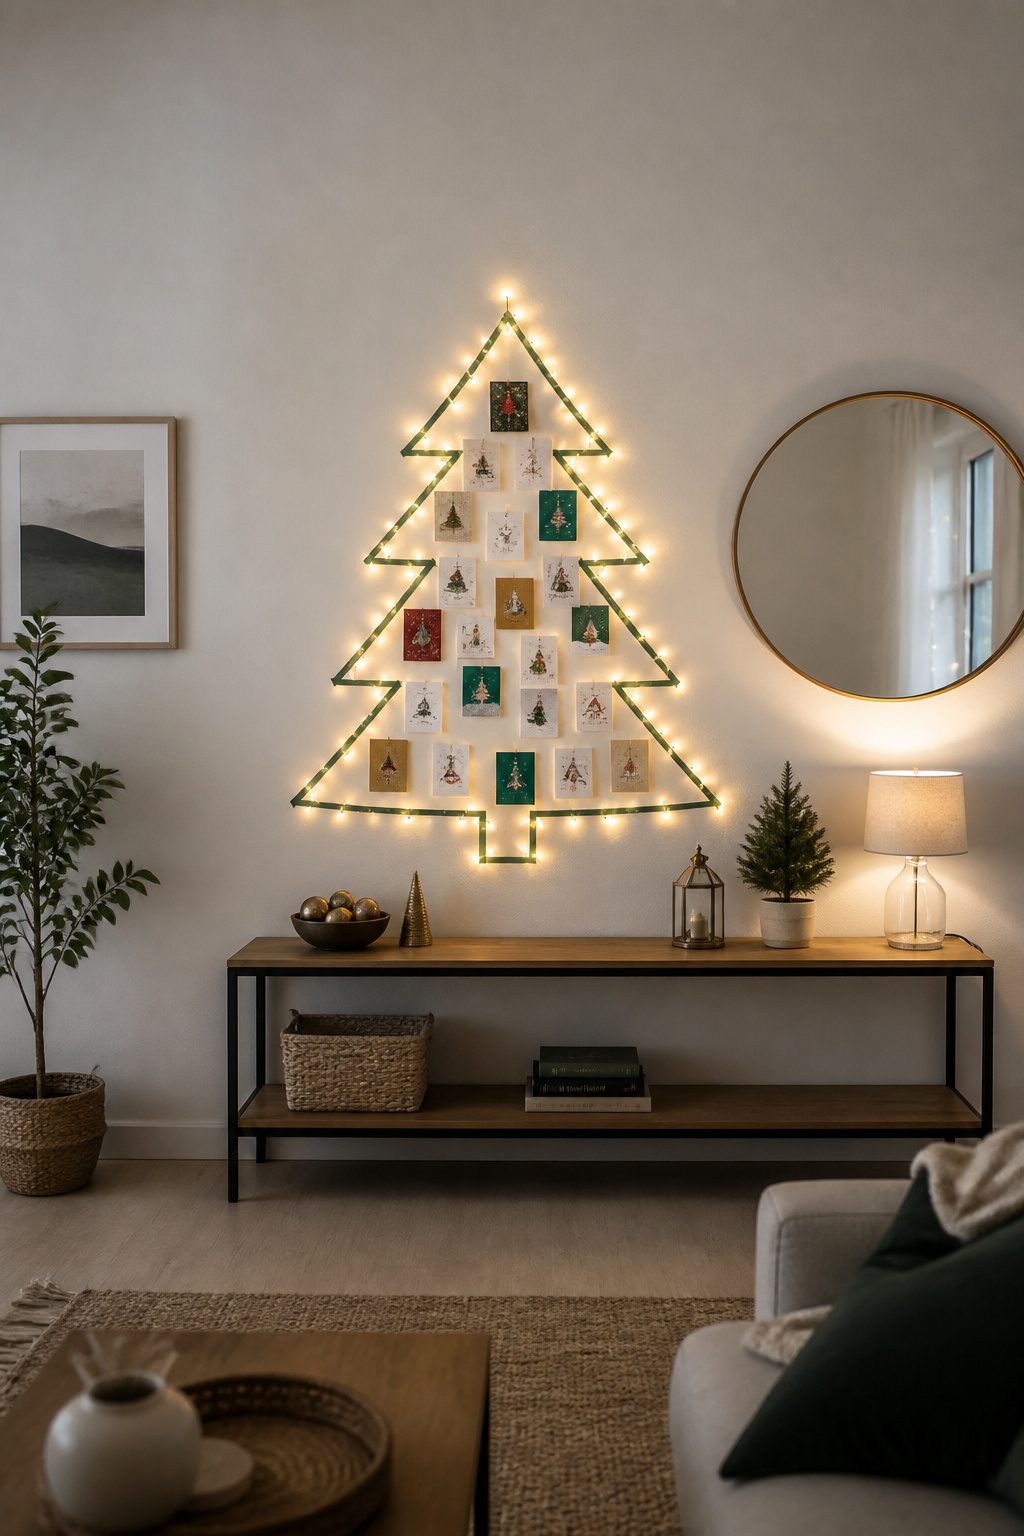
Washi tape that pulls clean after eight weeks on paint is the only adhesive that belongs here, and the 3M Scotch version in the matte paper line has never lifted my eggshell finish.
The tree itself is just the outline: cards taped or pinned inside it, no frame, no board, no ladder taking up floor space.
I drew the outline with pencil first, thinking I would erase it after. The tape covered the lines unevenly, and by mid-December the graphite had smudged through the translucent tape into a gray halo.
Skip that step. Tape the outline directly, eyeballing the proportions: about five feet tall and four feet wide fills the visual field on a standard eight-foot ceiling without crowding the baseboard.
Zigzag twine or tape across for the branches, or keep it minimal and let the cards themselves form the triangle.
Clothespins over the twine give a farmhouse lean, but the tape-only version is faster and lighter. A paper star from card stock tapes at the top.
The whole thing comes down in ten minutes after New Year’s, the wall bare again by January 10.
17. Branch Arrangement Holder
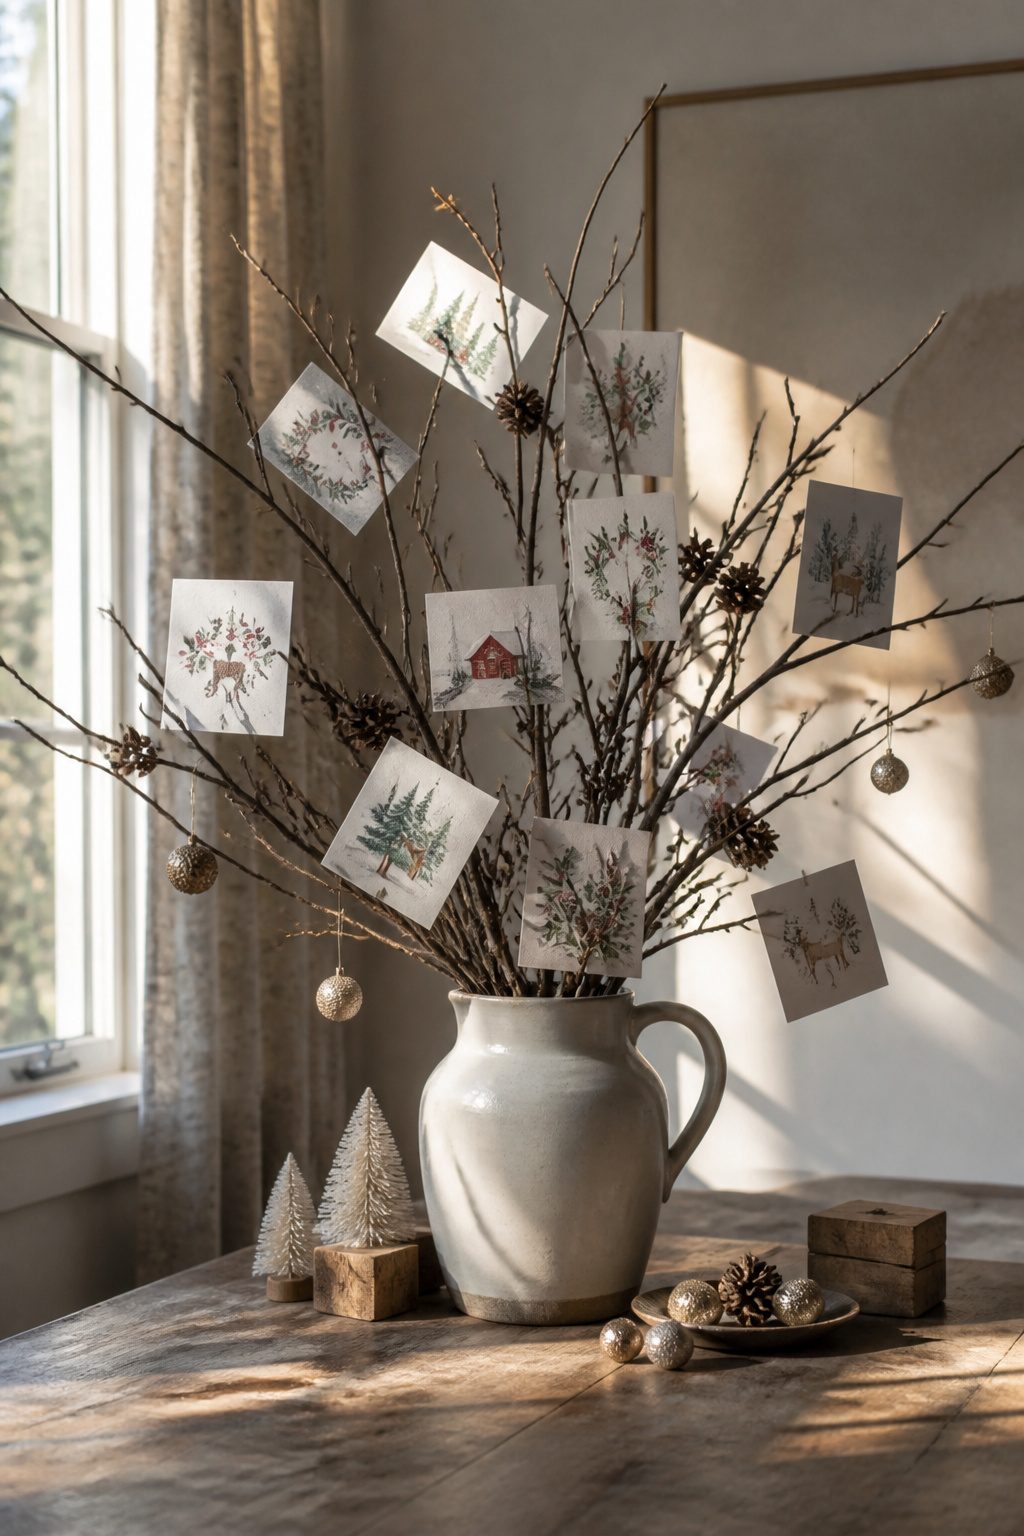
A single branch in a bottle looks spare after the third card. Multiple branches, arranged like a bouquet in a heavy vase or pitcher, fill out naturally and give each card its own fork to rest in.
The wintry look works with bare twigs, though green branches last longer and hold their shape better if you keep the stems in water.
Weight matters more than height.
Branches get top-heavy fast once cards catch air from a vent or a passing sleeve, so a wide-based ceramic pitcher or a thick glass vase with some heft to it wins over a tall, narrow cylinder.
I have seen a metal jug work well for the same reason.
Forked branches grip cards without clips or string. Dogwood, birch, or even sturdy backyard trimmings with natural V-shapes let you tuck cards in at angles that face the room.
Less is more here; the arrangement stays readable when you stop at six or eight cards rather than stuffing every twig.
What You’ll Need for Most Displays
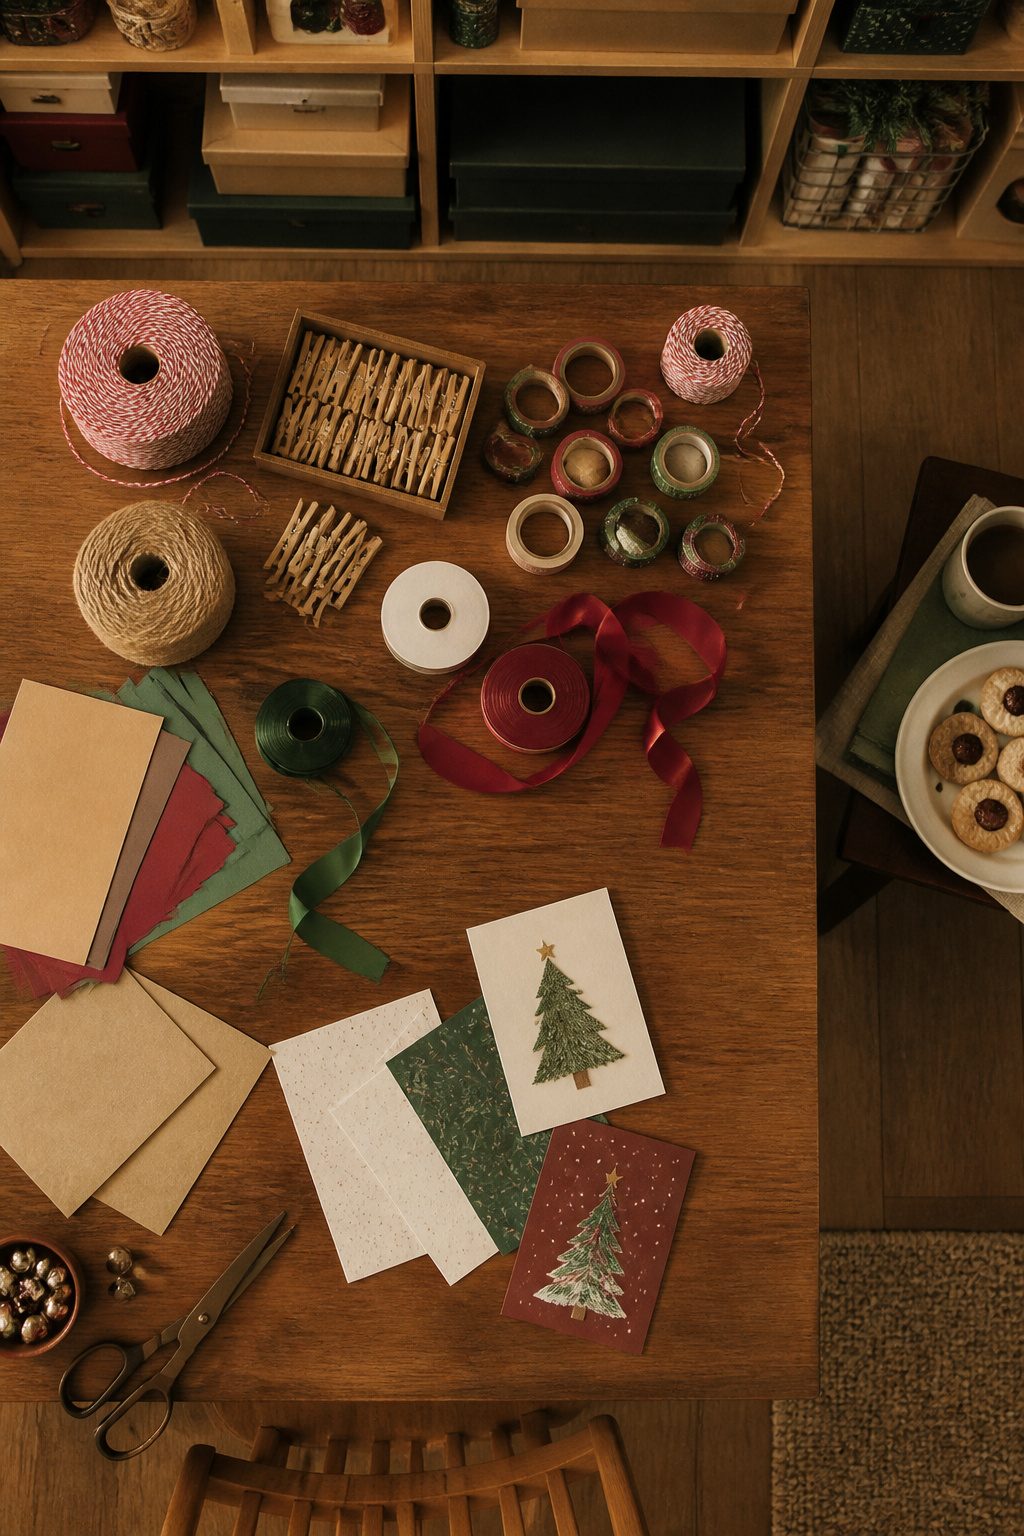
Most Christmas card displays come down to a few staples that cost next to nothing and show up in project after project.
Clothespins in plain wood or plastic are the default fastener: they grip cards without creasing, and a bag of fifty runs a couple of dollars.
Plastic resists humidity better if your display sits near a kitchen or entry; wood looks warmer against twine or branch arrangements.
Twine versus ribbon is really a width question. Twine at its standard thickness disappears behind the cards, which is what you want when the message or the photo matters more than the hanger.
A 1-inch satin ribbon, like the kind sold in 50-yard spools for gift wrap, becomes part of the look itself, good for a ladder rung or a banister where the line travels through the scene.
I would not spend on specialty widths; either commit to the ribbon as decor or skip to twine and let the cards speak.
Tape choices separate the displays that last the season from the ones that peel by New Year’s.
Washi tape pulls off painted drywall cleanly and comes in patterns, but its grip is light; a card with any weight to it, or a humid room, will slide.
Painter’s tape holds firmer and still releases, though the green or blue strip is not pretty and you will want to fold it behind the card.
Mounting putty is the renter’s fallback for corners or odd surfaces, but it oils some paper finishes over weeks, so test a spot you do not mind risking.
When unsure, default to clothespins on twine: no residue, no slip, and you can shift the layout in seconds.
Small-Space Adjustments
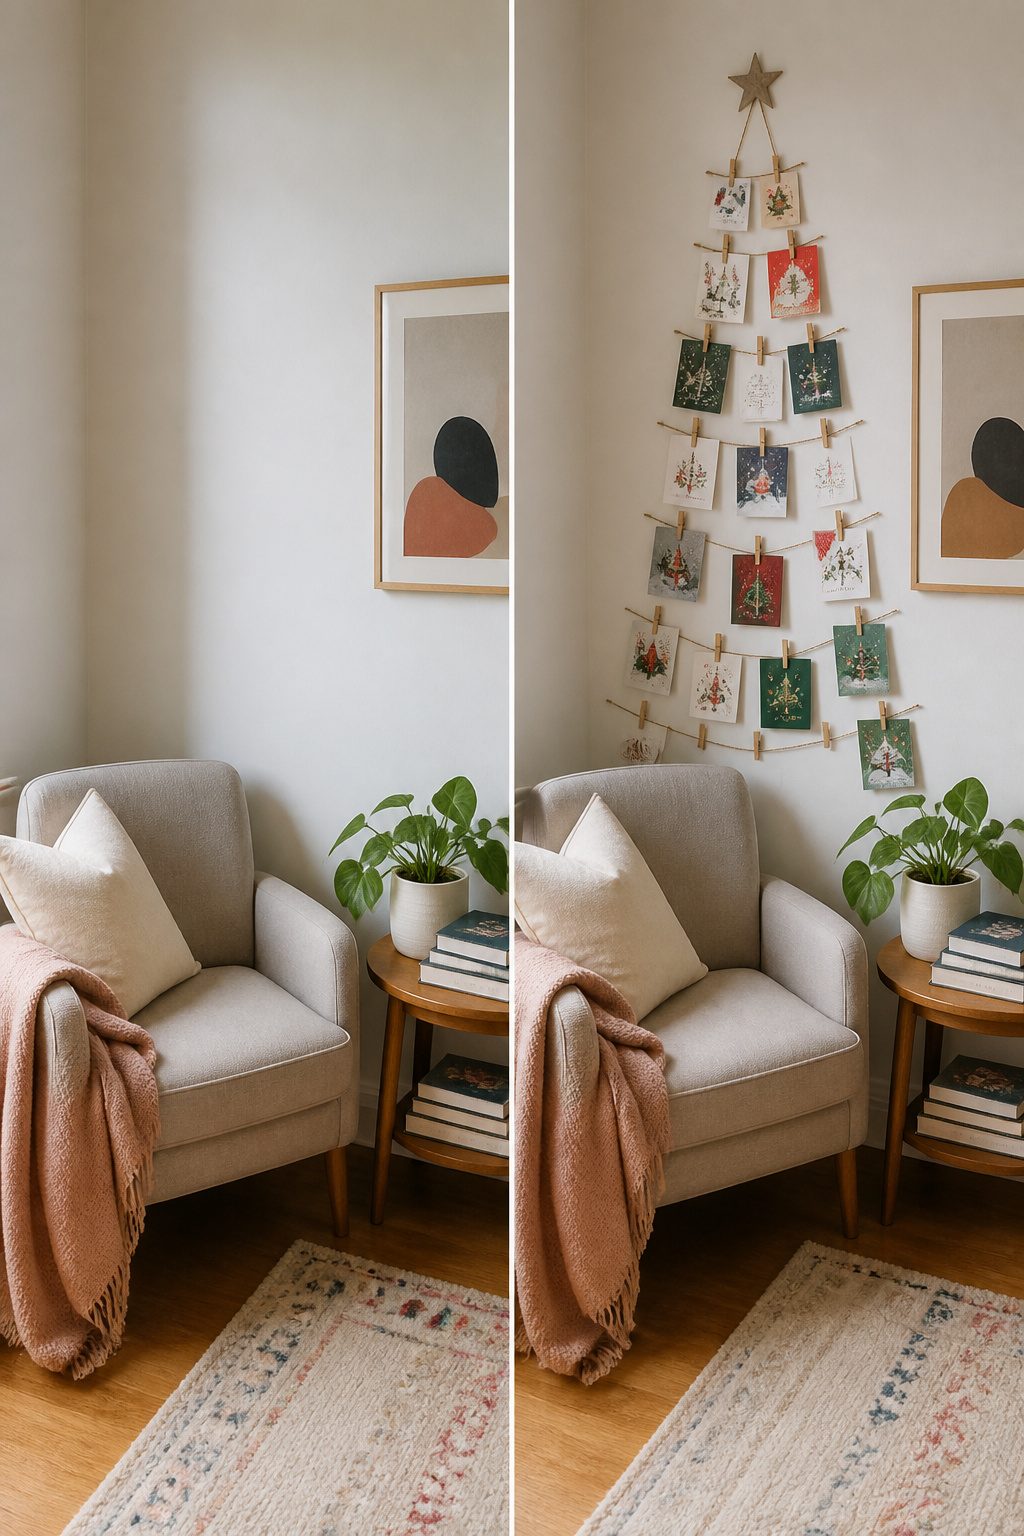
Most Christmas card display ideas assume you own a door frame you can nail into and a mantel deep enough for stockings plus a row of cards. In a rental, that setup is a fantasy.
The wall tree made from twine and clothespins scales down beautifully because it lives on vertical space above a sofa or desk, not on furniture you do not have.
Martha Stewart’s branch arrangement in a vase works the same way: it needs a corner, not a surface, and the cards hang from the twigs with red string rather than demanding shelf depth.
Door displays split into two strategies, and the choice matters. The present-door look, crisscrossed with ribbon like a gift, belongs on the front of a door you open rarely, or the back of one you open constantly.
A pantry door or the back of a bedroom door keeps cards visible to you without cluttering the hallway your landlord inspects.
The doorway arch of twine and cards, strung across the frame itself, needs clearance you may not have; in a narrow apartment hallway, you will brush against wet ink every time you pass.
The stocking trick, tucking cards into already-hung stockings, only works if your mantel is deep enough that stockings hang in front of brick rather than swinging free.
In my first apartment, the mantel was a ledge barely four inches deep; stockings hung at an angle and anything placed inside slid onto the floor. Skip this one unless your ledge can hold a coffee mug without it tipping.
Banister garlands need a banister, which makes them essentially suburban. Wall trees and branch arrangements are what survive the move to a first apartment.
Fitting Cards Into Existing Decor
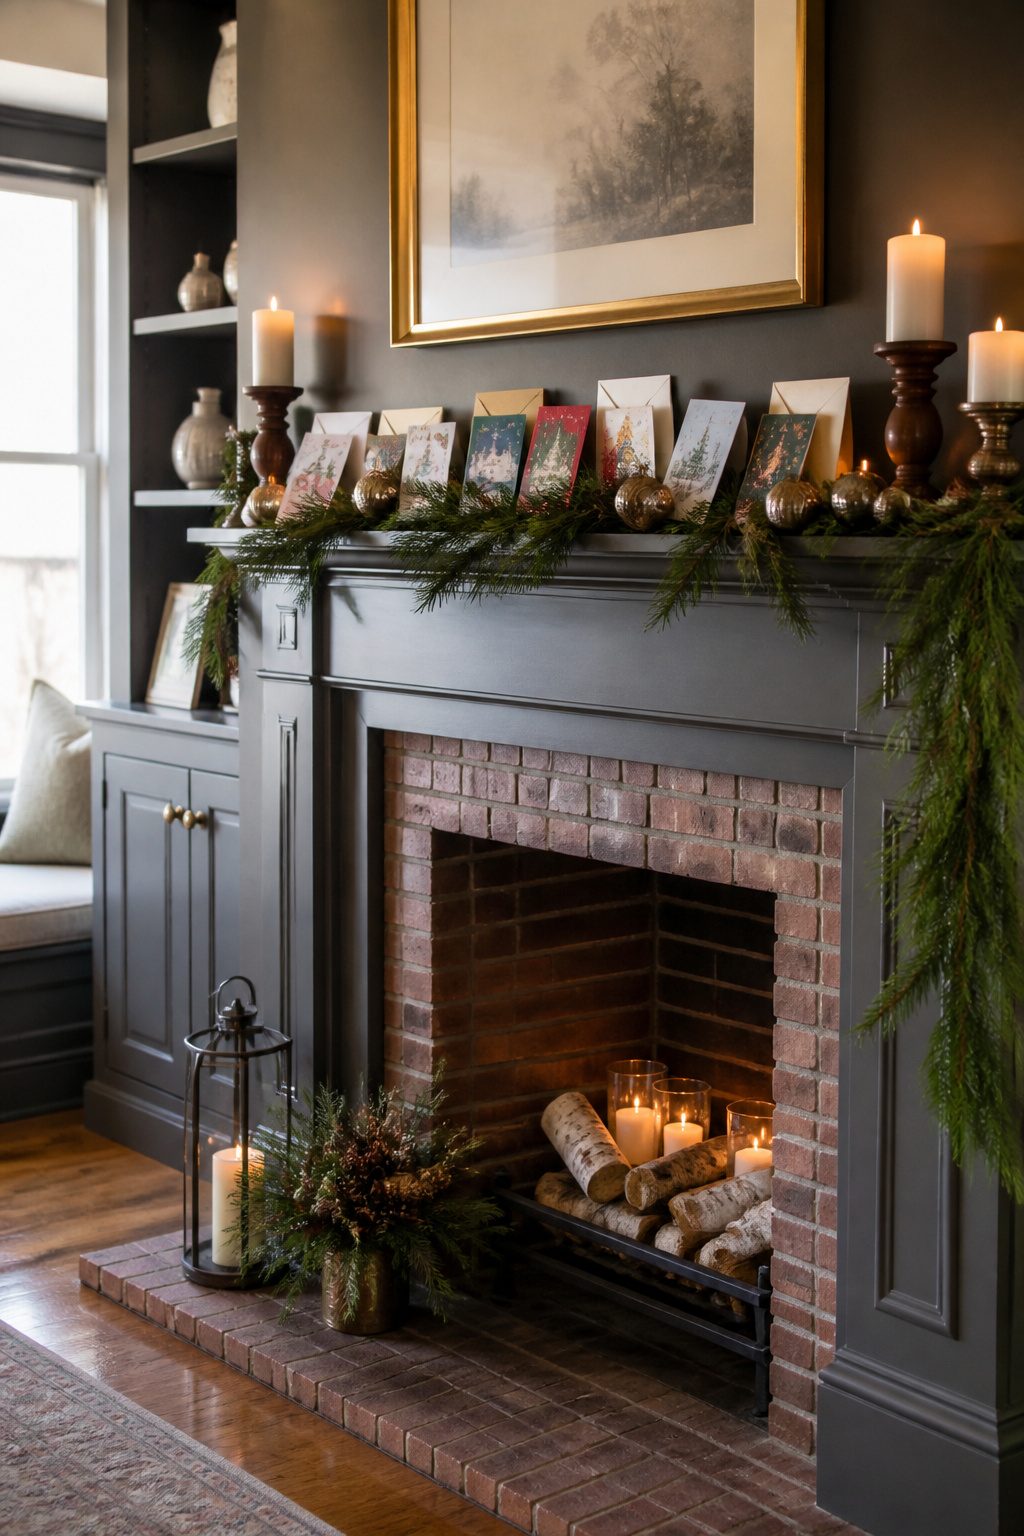
The visual weight of a Christmas card envelope against velvet ribbon or frosted greenery is easy to misjudge. Last year I tucked a dozen cards into a mantel garland already heavy with red glass balls and battery candles.
The cream and kraft paper vanished against the ornaments; the display read as clutter, not layers.
Cards need negative space to register as a separate texture, so I pulled half the garland back and let the brass clips on each envelope catch the light instead.
Greenery already in the room gives you the easiest integration. A vase of wintry branches on a side table takes cards with small clothespins in about thirty minutes, and the bare wood behind the envelopes keeps them readable.
Candles are trickier: the warm light flatters faces on photo cards, but a card propped too close tilts or curls. I keep a six-inch clearance, enough that a draft from the door won’t push paper into flame.
Color palettes already in the room should pull focus, not fight it. A mantel in deep evergreen and burgundy swallows cards with the same tones; ivory or navy envelopes pop against it.
If your stockings hang there already, sliding a few favorite cards into the tops uses vertical space you already decorated, though the trinkets inside can shift and hide the message.
The brass tube ornaments Martha Stewart threads with red string work the same way: crimson against evergreen, hung from a hook already on the wall, so the card display borrows the room’s existing rhythm rather than starting a new one.
Making the Build a Family Project
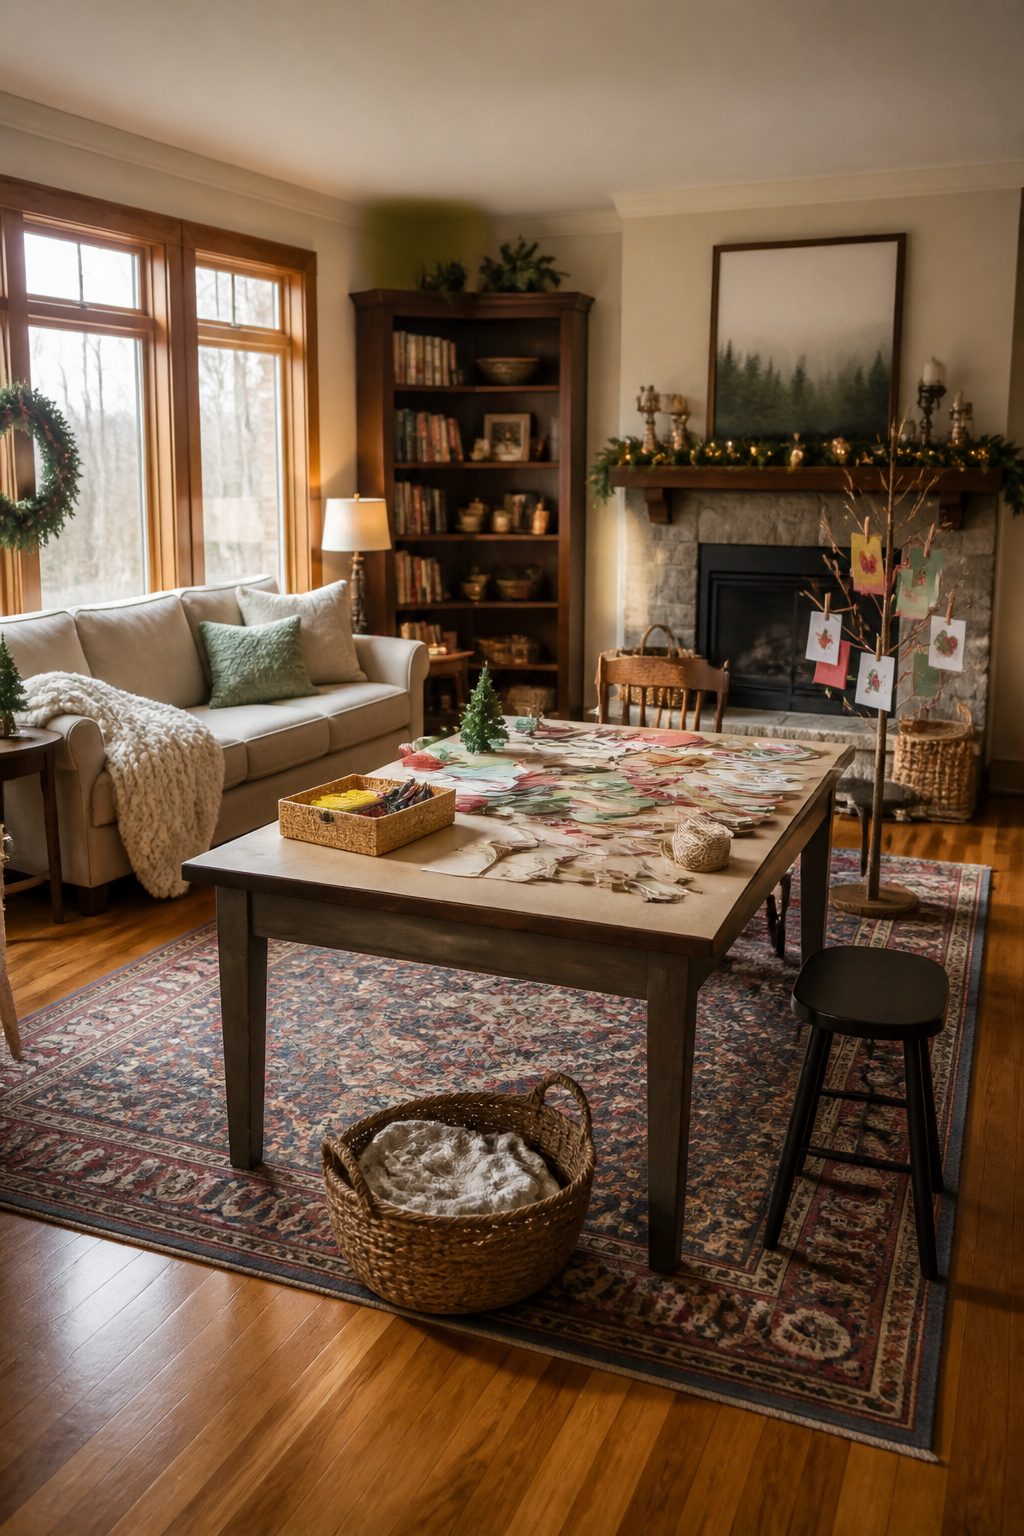
Clay forming belongs to the youngest kids, because the mistakes are fixable and the drying time builds patience they do not yet have.
A three-year-old can pinch a disk into a rough tree shape; the wobble becomes character once you punch a hole near the top for twine. Supervise the hole punch closely, or the disk cracks in half and you start over.
By six or seven, children can coil small branches from air-dry clay into actual holders that stand on a shelf, though the bases will be thicker than yours and the cards will lean. Let them.
Branch gathering goes better with grade-schoolers who have learned to look before they grab. They spot the right lichen-covered stick you walked past, and they break the brittle ones so you learn together which ones survive the car ride home.
Painting and stringing split by temperament, not age. Some children will layer gold acrylic until the branch looks dipped; others lose interest after two strokes and produce a streaky modernist piece that honestly works against white walls.
Stringing cards with clothespins requires more dexterity than it looks, so younger children hand you pins while older ones sequence the arrangement, which always takes three times as long as solo work because negotiation is the real project.
What children reliably ruin: wet clay left on the radiator, branches too green that warp as they dry, and the "perfect" card someone gave you that gets painted over because it was within reach.
What they improve: the arrangement, because they do not care about chronological order or height symmetry and the result looks lived-in rather than staged.
Plan the first attempt for a Saturday with Sunday as backup, and stop before anyone cries about glitter.
Frequently Asked Questions
How do I display Christmas cards?
Clip them to a wire tree, string them on twine across a ladder or wall, tuck them into a freestanding wooden frame, hang them from branches, or tape them inside a washi-tape tree outline on the wall.
Each method trades capacity against space and how often you want to rearrange them.
What materials do I need for a Christmas card display?
Wood, twine, clothespins, ribbon, and greenery cover most projects. Add painter’s tape for walls, binder clips for lights, and a fishing swivel if you build a mobile.
The article’s staples list runs under ten dollars and works across half the ideas.
How long should I keep Christmas cards displayed?
Most come down in the first week of January, though one source mentions leaving a banister garland up through January without issue. Fresh branches and greenery will look brittle by then anyway, so the timing lines up.