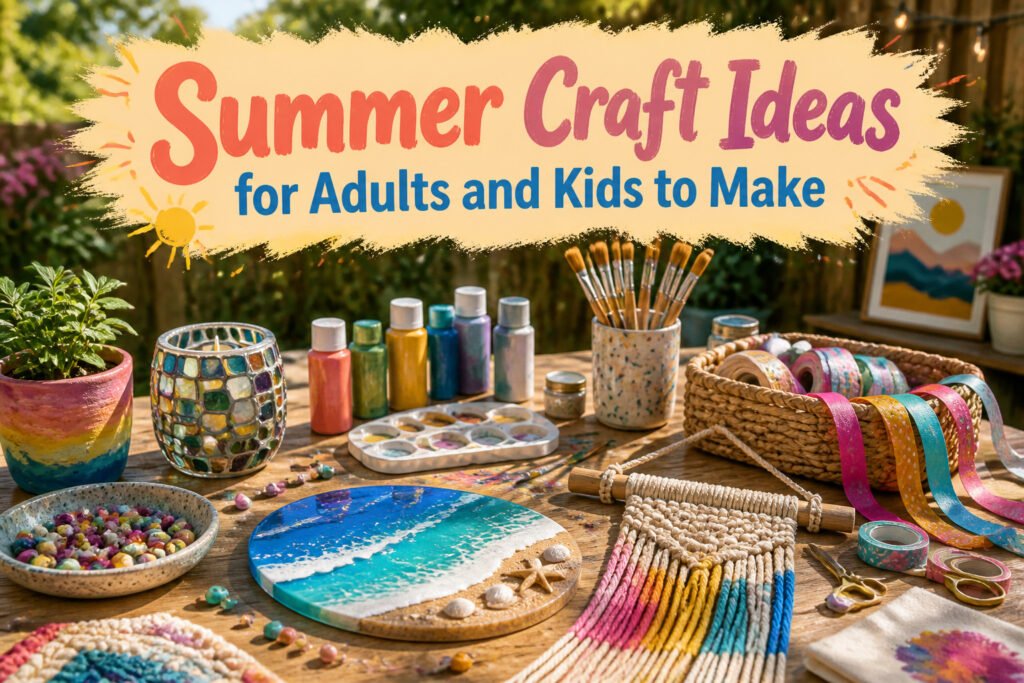
The best summer craft ideas cost under ten dollars in supplies and range from one afternoon to two weekends in effort.
The deciding factor is not skill but patience: whether you can wait for resin to cure or flowers to press flat under a book for two to three weeks.
A diamond-tipped drill bit kept cool in water, a 200°F oven for salt dough, and dish soap mixed into acrylic paint so it scratches off clean are the kinds of specifics that separate a finished piece from a Pinterest fail.
1. DIY Sea Glass Bottles
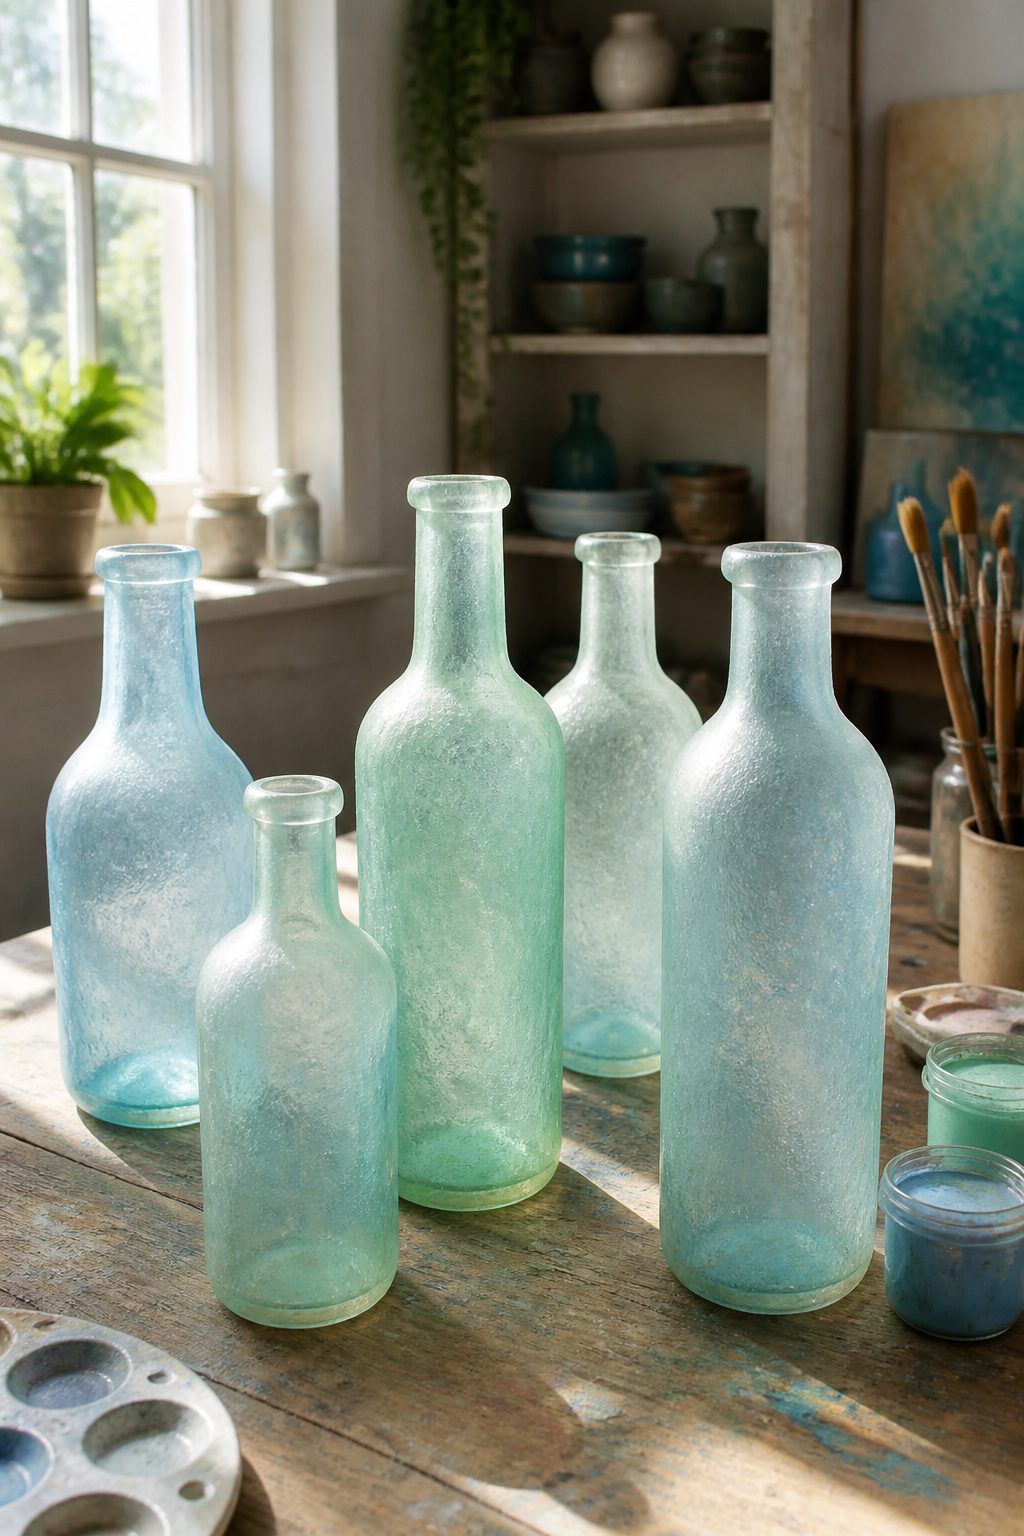
Sea glass bottles look best when the light passes through them, which means the paint job matters more than the bottle shape. Any glass bottle works for this, olive oil jugs included, though the squat ones need a steadier hand.
The weathered look comes from layering translucent paint rather than one solid coat.
I start with a base of pale blue or seafoam green thinned almost to water, let it streak, then add a second layer in a slightly different tone once the first is dry to the touch.
A third pass with barely-there white or gray at the rim and base suggests years of salt abrasion.
If you have actual sea glass fragments, glue them on with clear-drying adhesive after the paint cures, keeping the pieces small so they read as texture from across the room.
The mistake most people make is overworking it. Smooth, even coverage looks like a factory finish, not a tide-washed relic.
Let the brushstrokes show, and stop at three layers unless the glass underneath still reads clearly.
2. DIY Sea Glass Rope Lantern
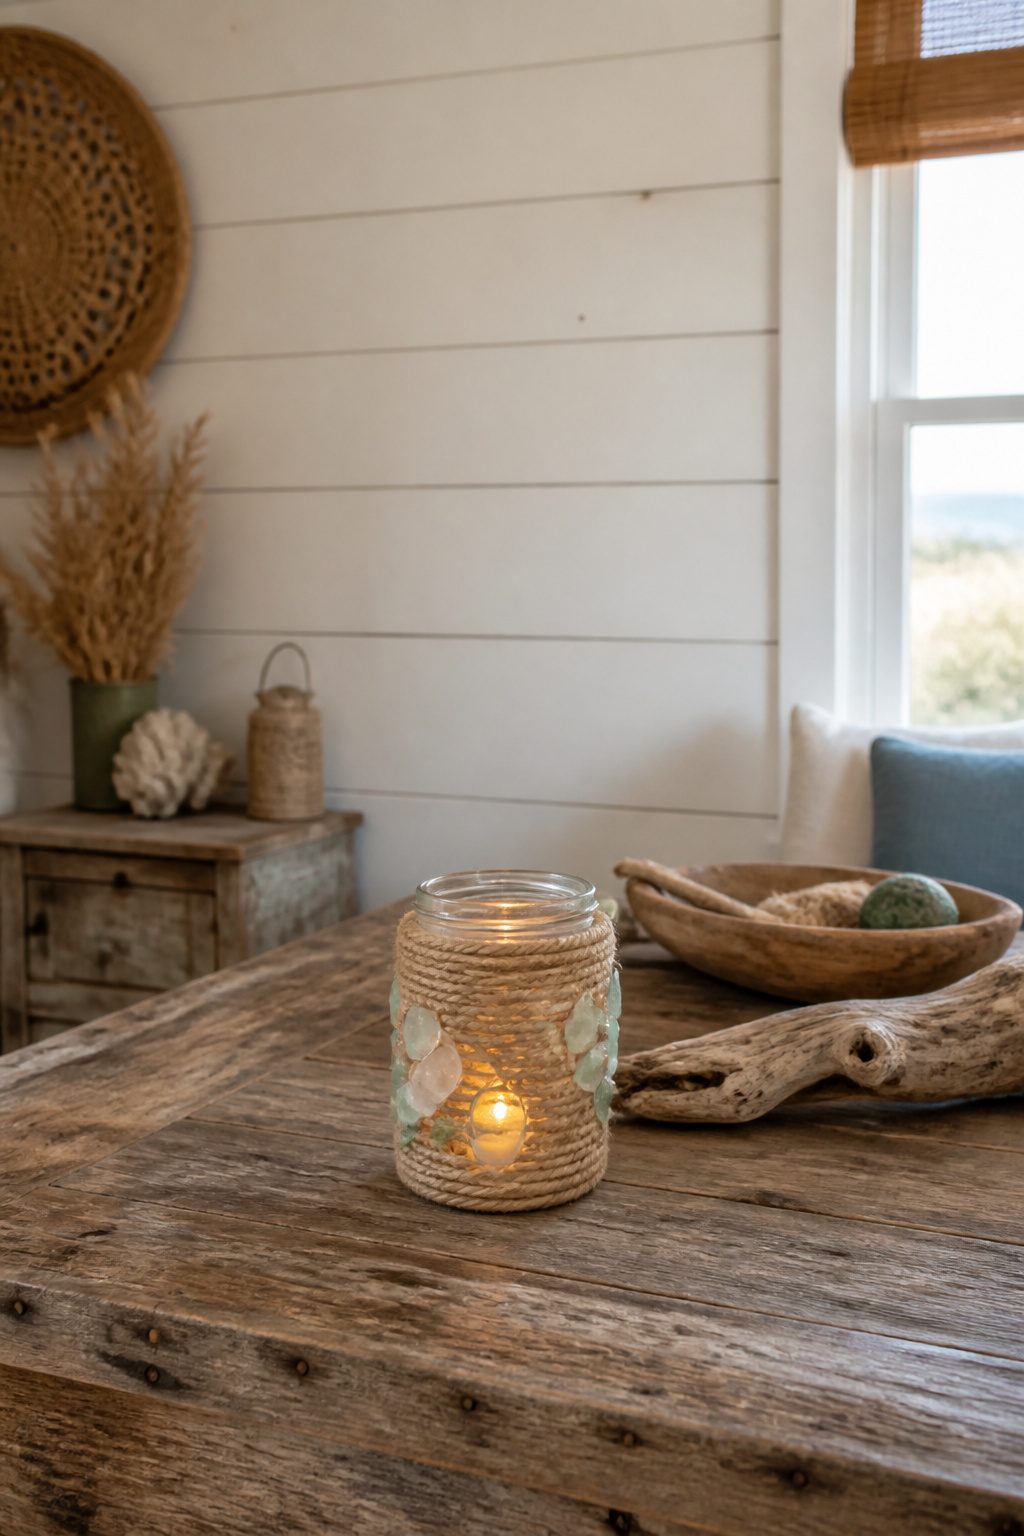
A wide-mouth mason jar or an old glass lantern with the hardware removed gives you the cleanest surface to work with. Hot glue sets fast with sisal rope, which matters because you are wrapping and pressing in one motion.
I start at the bottom rim, fix the rope end with a dot of glue, and spiral upward so each coil kisses the last; gaps look careless on a piece this simple.
Sea glass pieces need a day to dry. I glue them in clusters of three or five, never a solid band, because the rope texture is half the point and the glass should read as something washed up, not tiled.
A battery-operated tea light is the only safe choice here; real candles heat the glass, soften the glue, and turn a weekend project into a fire hazard.
The flicker still catches the frosted edges at dusk, which is the whole effect you are after.
3. Wall Hanging Seashell Craft
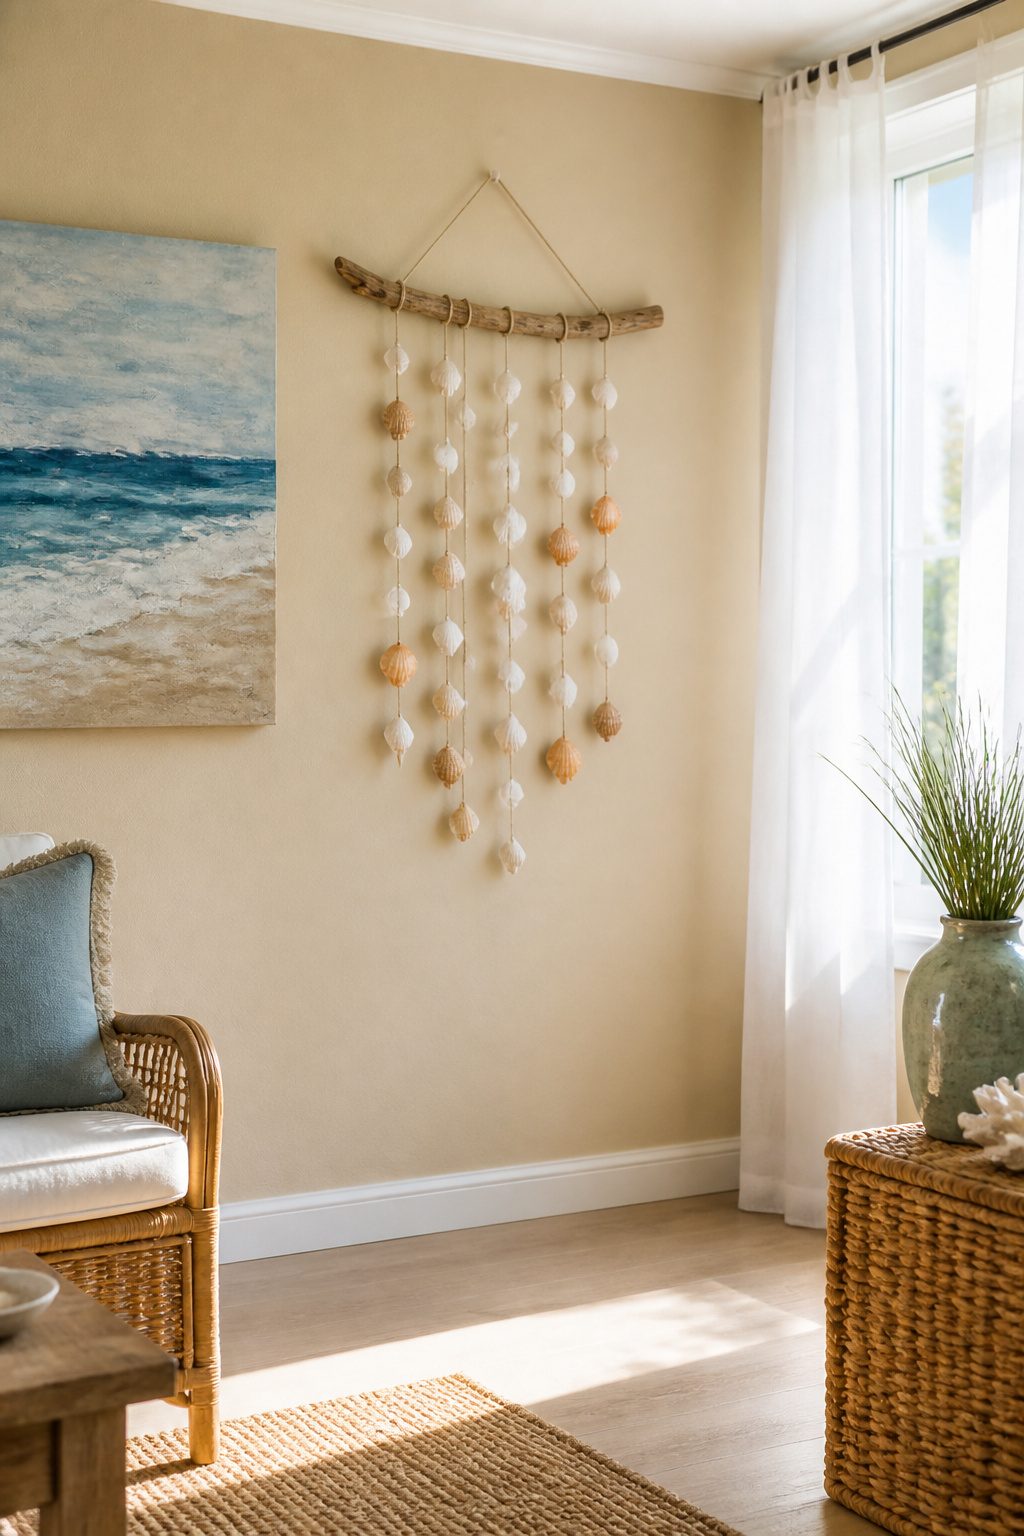
A wall hanging built from collected shells turns a beach trip into something that lasts past the weekend.
Driftwood with a natural fork or a simple wooden hoop gives the piece its shape; shells hang from short lengths of twine or fishing line at staggered heights so they catch light and move with air currents.
Cleaning the shells first matters more than the arrangement. Live-caught shells hold organic material that will smell within days as it decays.
Soaking them in a weak bleach solution for several hours, then rinsing and letting them dry completely, prevents that problem entirely. Sand and grit left inside will also wear through twine over time.
Drilling holes takes patience. A standard twist bit will crack thin shells; a small diamond-tipped burr used with light pressure and water to keep the spot cool works better.
Shells with natural holes from predation can skip this step, though they are rarely positioned where you need them. Thicker shells like whelks or conchs tolerate drilling more forgivingly than delicate scallops or sand dollars.
For the driftwood base, a single nail or screw eye on the back side is usually enough to hang the weight.
A wooden hoop needs three evenly spaced attachment points with twine gathered to a single ring, or it will tilt and spin.
4. Starfish Craft
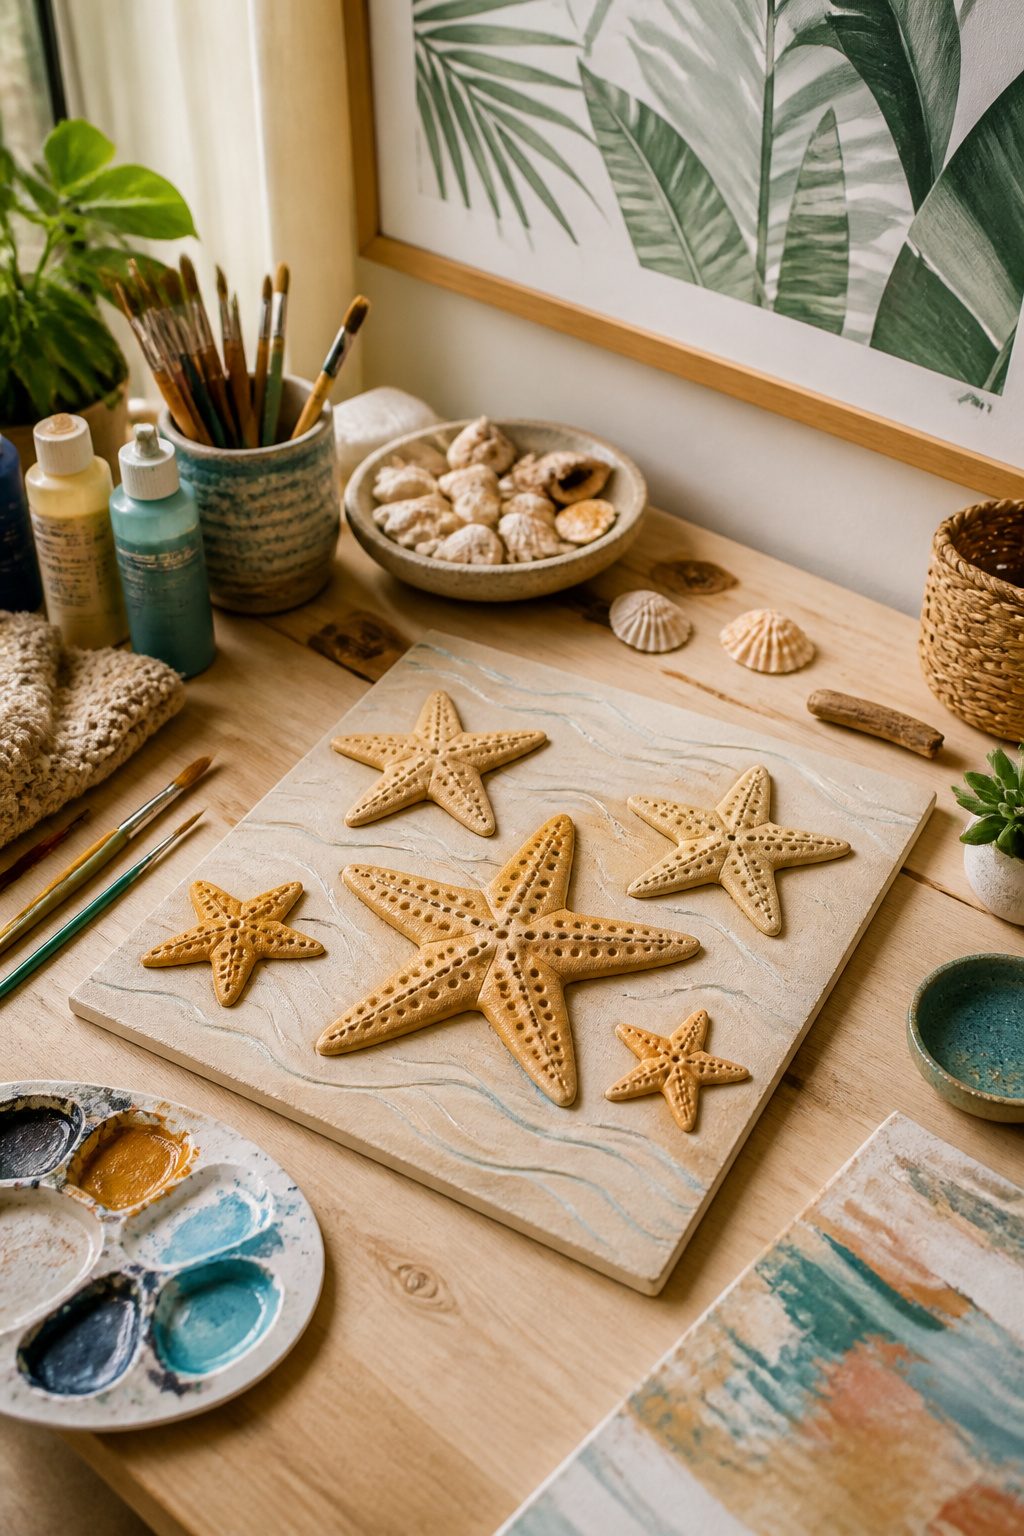
Salt dough starfish wall art has one advantage over clay: the oven does the waiting for you. I mix a basic batch, roll it to about a quarter inch, and cut the shape with a plastic knife.
The trick to realistic texture is working while the dough is still soft. A toothpick dragged from the arm tips toward the center creates those raised ridges, and tiny poked dots along each ridge catch light like real starfish pores.
Bake at 200°F for roughly two hours; the low heat dries it through without puffing or cracking. Thicker pieces need more time, not more heat.
Air-dry clay skips the oven entirely, though it takes a day or two to harden. The same toothpick technique works, but clay holds finer detail if you let it set up for ten minutes before poking.
For a faster project, heavy watercolor paper cut into shape and stippled with a pencil eraser gives a flat, graphic look that reads well in a gallery wall of mixed beach finds.
Paint choices depend on your wall: warm ochre and sand tones against white, or bleached bone color if your room already runs warm.
5. DIY Seashell Candle Tutorial
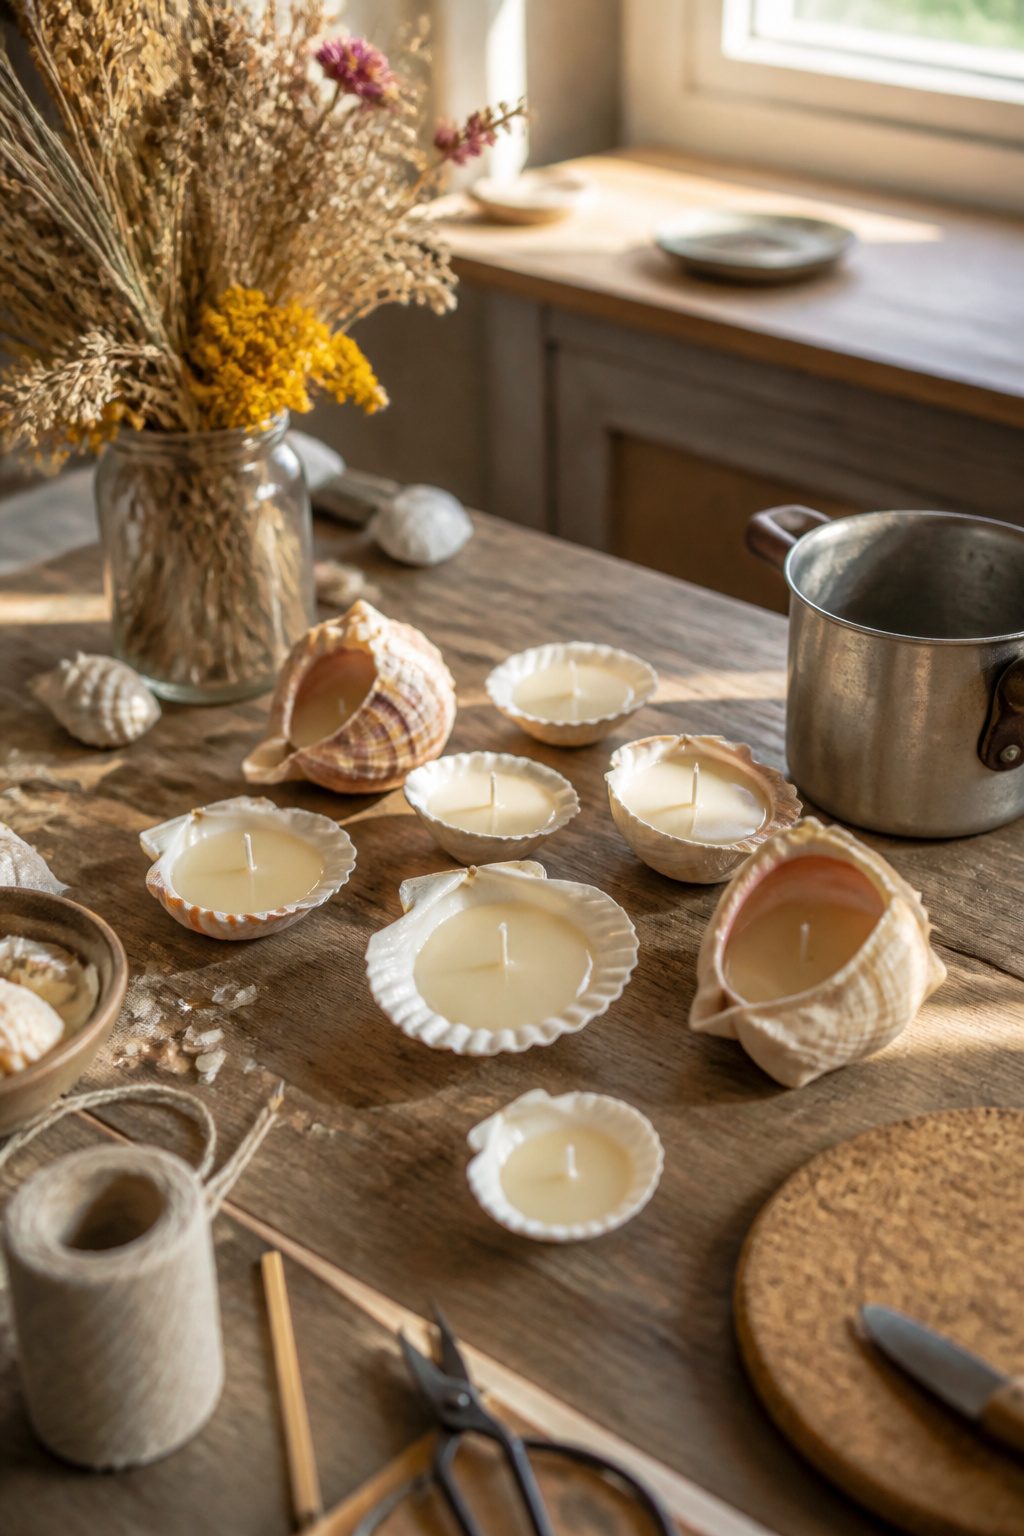
Shells picked up on vacation usually end up in a jar on a shelf. Melting wax and pressing in a wick turns them into something you actually use.
Smaller shells, the kind that fit in a palm, work best as tealight holders.
A single wick pressed into the center with a dab of melted wax to anchor it, then filled to the lip, gives you a burn time of a couple hours.
Larger shells need more wax and a sturdier wick, but they sit flat on a table and throw more light.
Cleaning matters more than you’d think. A quick rinse at the beach leaves salt and sand behind that weakens the wax bond and smells when heated.
Boil them for a few minutes, let them dry fully on a rack, and check for cracks that would leak.
Soy wax poured around 130°F stays liquid long enough to settle into an even surface. Paraffin shrinks as it cools and can pull away from the shell walls, so pour in two thin layers rather than one thick one.
The second pour fills the dip that forms in the center and gives you a level top.
A shell with a deep natural cup holds wax without any prep. Flatter shells need a rim built up with hot glue or a ring of clay to contain the pool.
Either way, set them on a saucer; even a stable-looking shell can tip when the wax burns low and the balance shifts.
6. DIY Decoupaged Seashells
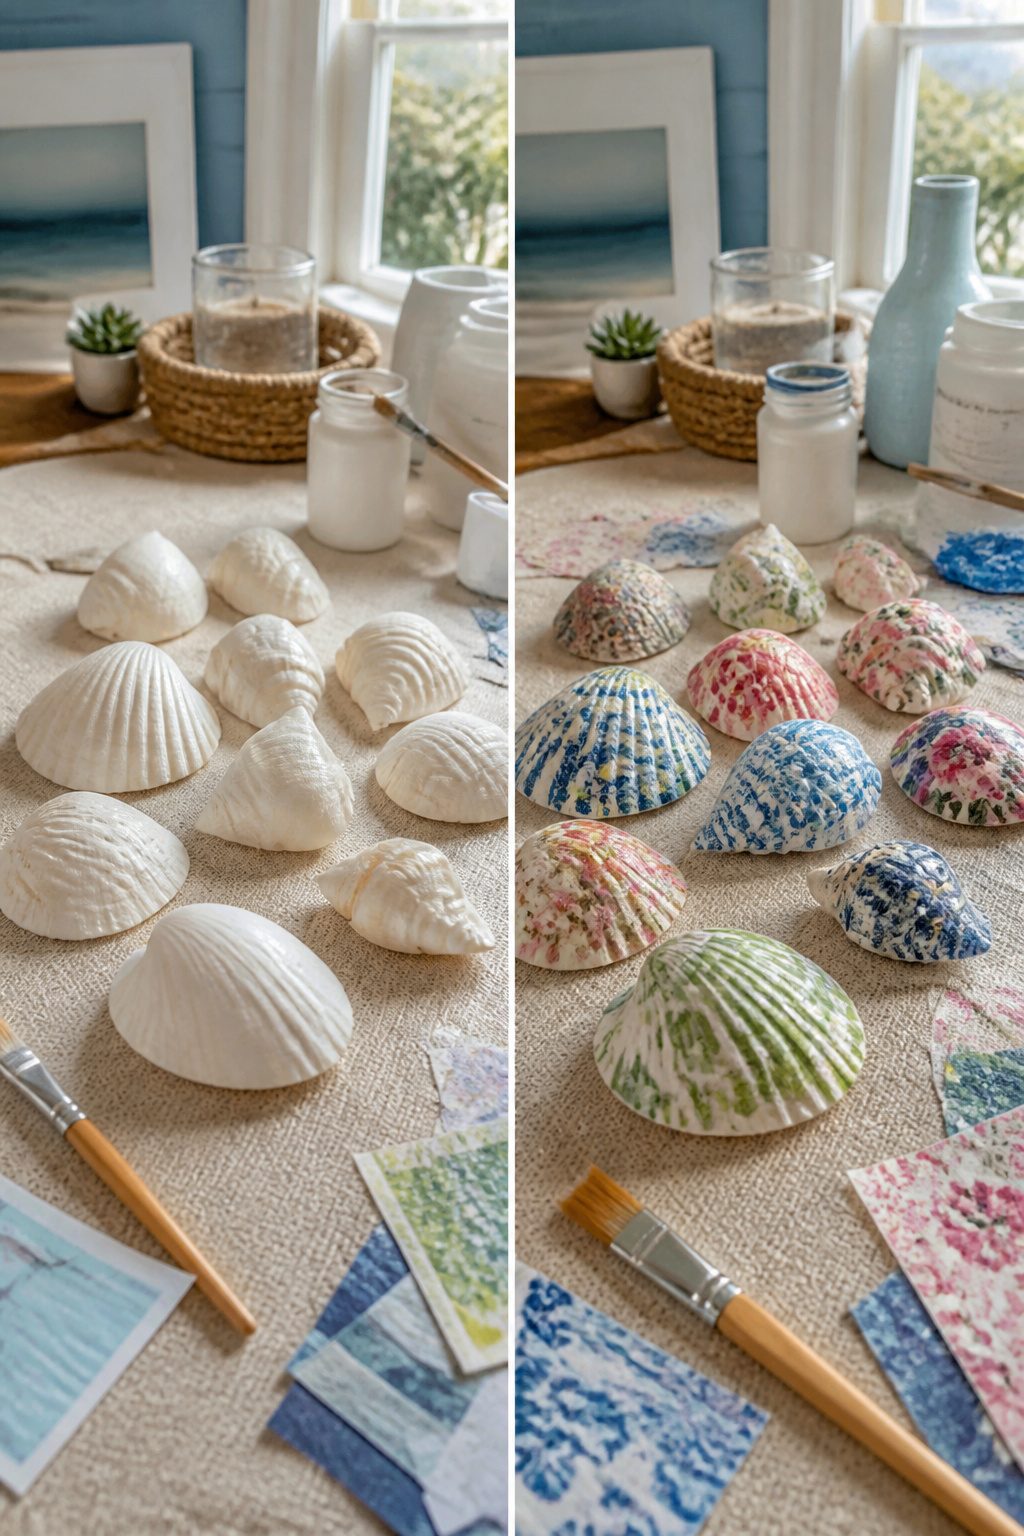
Thin paper or napkins pressed onto shells with Mod Podge turns the broken or plain ones into something worth keeping. The matte finish reads as found-on-the-beach natural; glossy catches light like a gift-shop magnet and fights the whole point.
I learned that after brushing on a first coat that looked wet even when dry. Now I thin the first layer slightly with water so the paper fibers relax into the shell’s ridges instead of floating on top.
A shell with a chipped edge or a hole at the hinge works better than a perfect one, because the flaw gives you a place to tear the paper and blend it in.
Work over wax paper, not newspaper; the Mod Podge dries fast enough that yesterday’s news will bond to the back of your shell if you aren’t careful.
Two coats of matte medium over the top, and the paper becomes part of the surface rather than a sticker sitting on it.
7. Painted Citrus Serving Tray
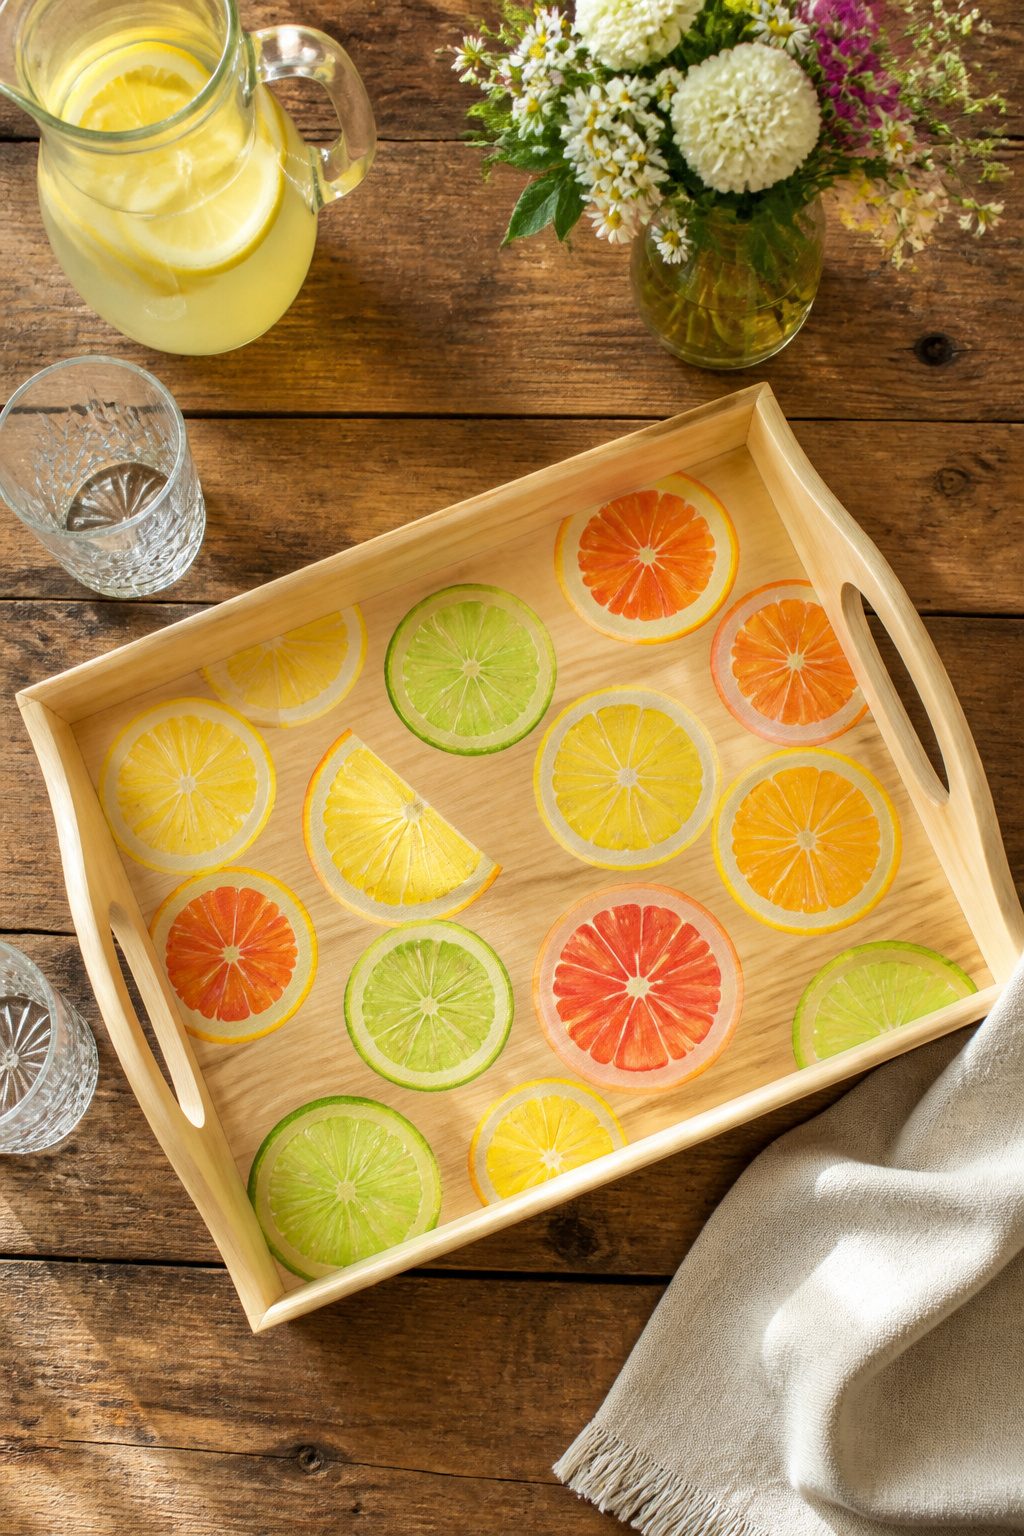
A wooden serving tray painted with citrus slices reads like summer without trying too hard. I started with a cheap pine tray from a craft store and sketched lemon, lime, and orange halves in pencil first.
The rind curves matter more than perfect circles; slightly lopsided slices look more like real fruit.
Acrylic paint covers wood in two thin coats and dries fast enough to finish sketching and painting in one afternoon.
I used a flat brush for the rind, a round one for the segment lines, and a dot of white at the center for the highlight.
Masking tape pressed hard along the tray edges kept paint off the rim, and peeling it back at a sharp angle gave me a clean line without touch-ups.
The part that almost ruined it was skipping sealer. Unsealed acrylic will lift under a damp glass in about a week.
Two coats of water-based polyurethane, sanded lightly between with 220 grit, made the surface washable and slightly satin rather than plastic-shiny. That finish has held through two summers of actual use on my porch.
8. DIY Scratch Off Travel Map
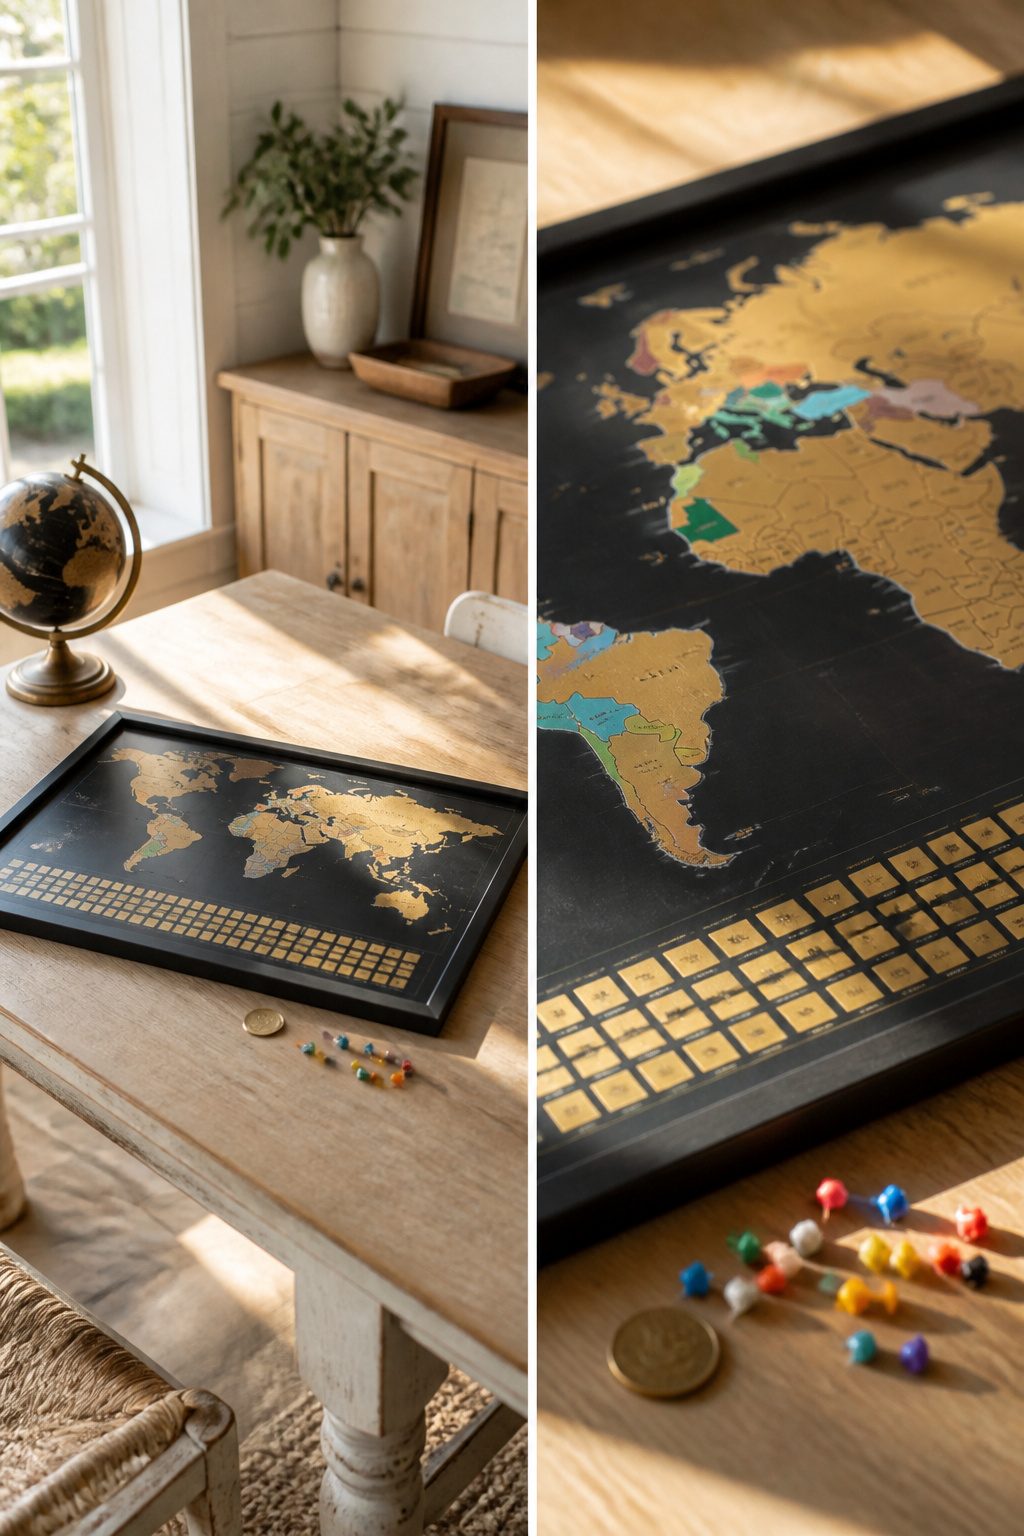
A printable world map from any free vector site becomes the base for a scratch-off travel map that tracks summer trips without the forty-dollar store version.
The trick is the barrier layer: two parts acrylic paint to one part dish soap, brushed over the regions you want to hide.
The soap keeps the paint from bonding permanently to the paper underneath, so a coin scrapes it away cleanly.
I printed mine on 110 lb cardstock after a test run on regular copy paper warped from the moisture. The paint goes on in thin coats, three or four, letting each dry to the touch before the next.
Too thick and it scratches in gummy chunks; too thin and the map shows through before you touch it.
The dish soap ratio matters more than the brand. I started with equal parts and the first scratch lifted the printed ink beneath it, not just the paint.
Cutting the soap back to half fixed that.
For a summer vacation tracker, color-code the countries or states by trip year, or let kids scratch off each destination the night you get home. The whole project fits an evening and costs less than a takeout pizza.
9. Lavender Flower Painted Mason Jars
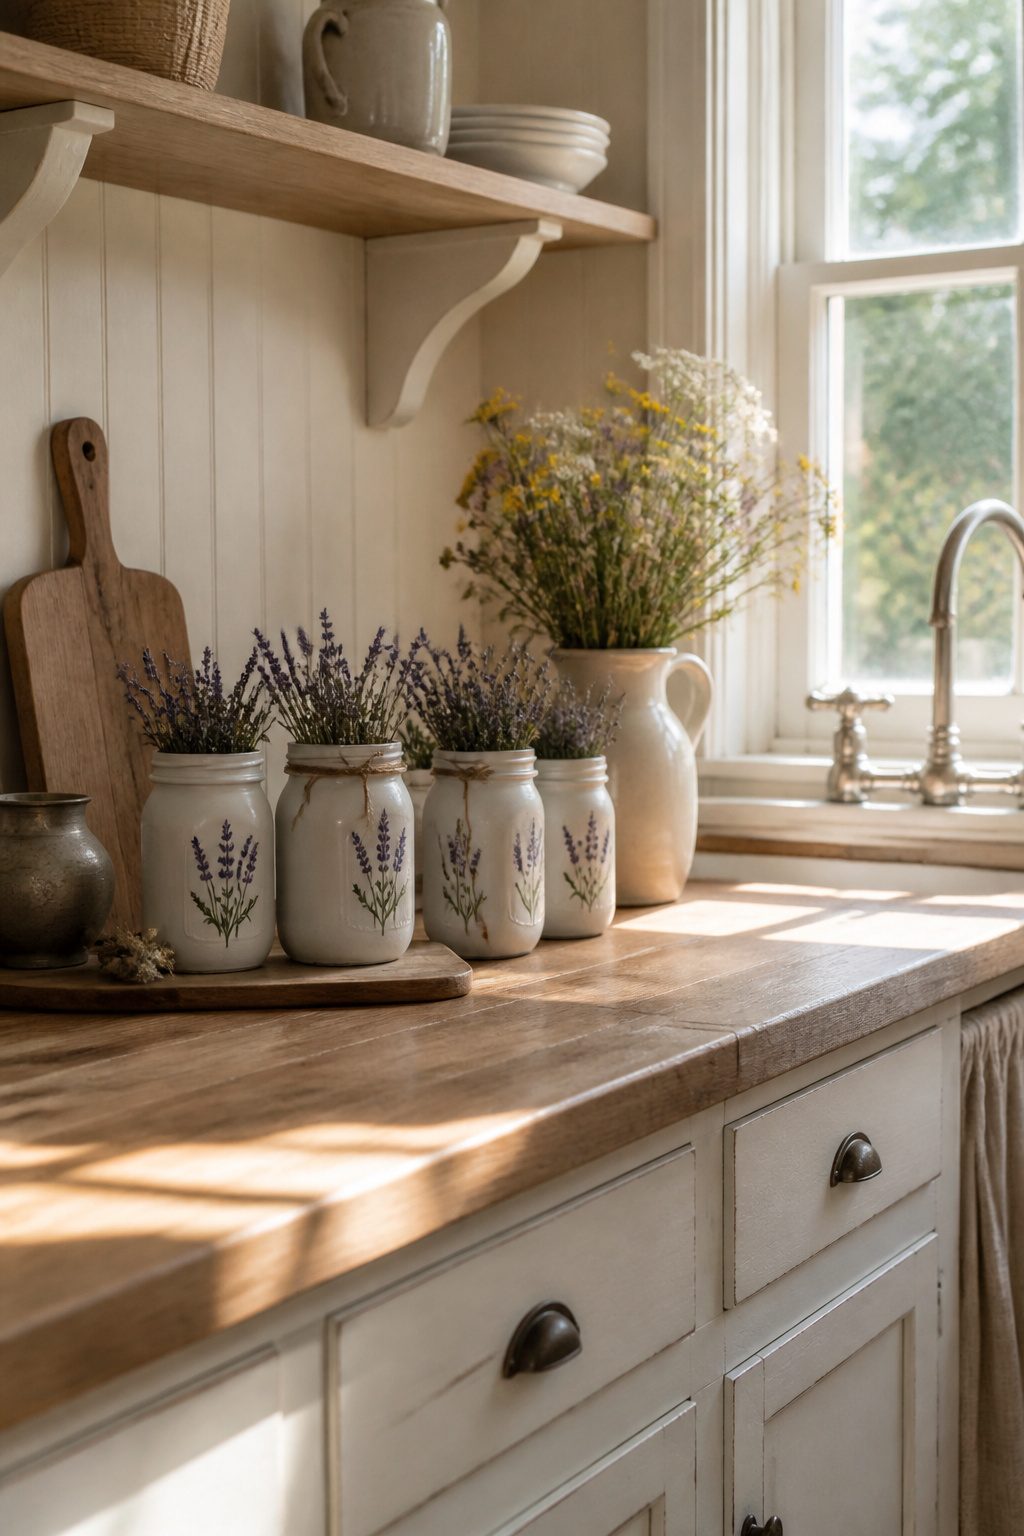
Chalk paint grips glass better than acrylic when you skip the primer, which matters on a curved jar where brush marks show every flaw.
I learned that after two coats of regular craft paint peeled off a set of drinking glasses in a single sheet.
For the lavender motif, trace a simple sprig silhouette onto contact paper, cut it out with a craft knife, and stick it to the jar as a mask.
Paint the whole surface in a soft gray-white or pale sage, let it cure overnight, then peel the stencil away before the paint fully hardens. The silhouette stays crisp that way.
Distressing with 220-grit sandpaper around the raised lettering and rim adds the worn French-country finish that makes these look found rather than made.
Focus the sanding where hands would naturally wear the surface over years: the lip, the base edge, any corner that catches light. A light rub with dark wax after sanding settles into the scratches and deepens the illusion of age.
The whole project takes one evening of hands-on time plus drying, and a set of four jars costs less than a single store-bought vase with the same look.
10. Pressed Flower Lanterns
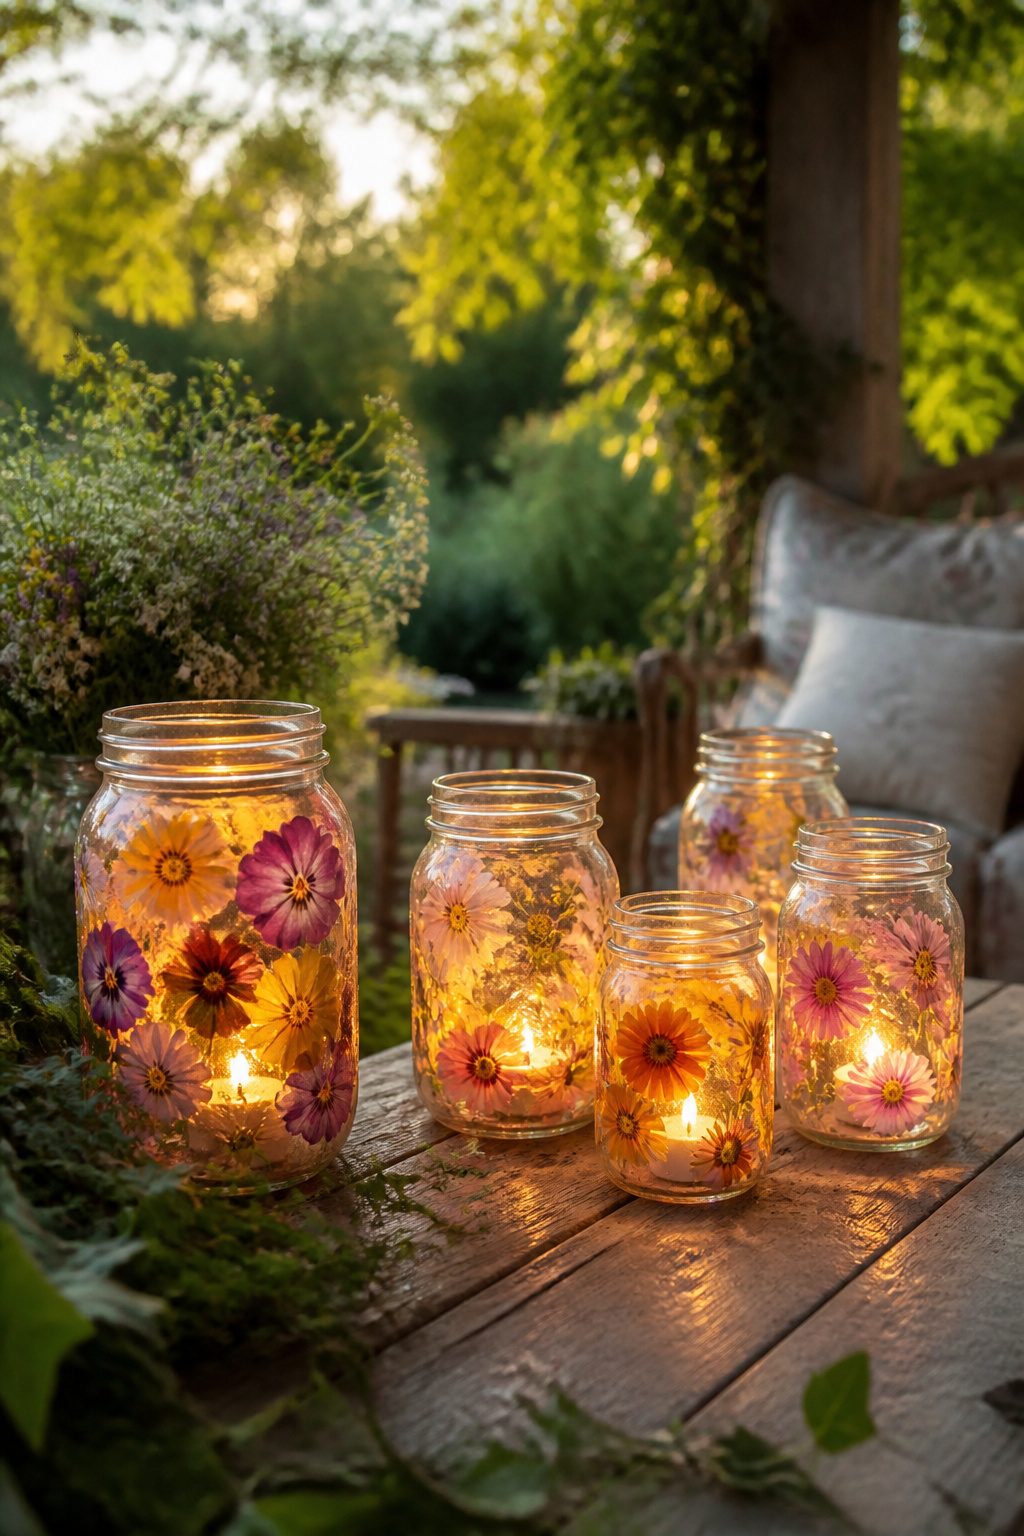
Pressed flowers look fragile on a windowsill, but sealed between wax paper or clear contact paper they hold up for months.
The trick is patience: flowers need two to three weeks pressed flat under a heavy book before you work with them. If you are starting this project on a Saturday, that timeline will not save you.
A microwave flower press speeds the drying to a minute or two per batch, and the color stays brighter than air-drying in my experience.
Once the flowers are flat and dry, arrange them between two sheets of wax paper or one folded sheet of contact paper.
Iron the wax paper on low heat to fuse the layers, or peel and stick contact paper over itself.
Wrap the sealed sheet around a clean glass jar or an existing lantern, trimming the overlap so the seam sits at the back.
A tea light behind the panel lights the petals like stained glass without the fire risk of exposed dried flowers.
Contact paper is easier to reposition if you misalign the first stem. Wax paper clouds faster in humidity but costs almost nothing.
Either way, the jar sits safely on a patio table through August evenings.
11. DIY Pressed Flower Coasters
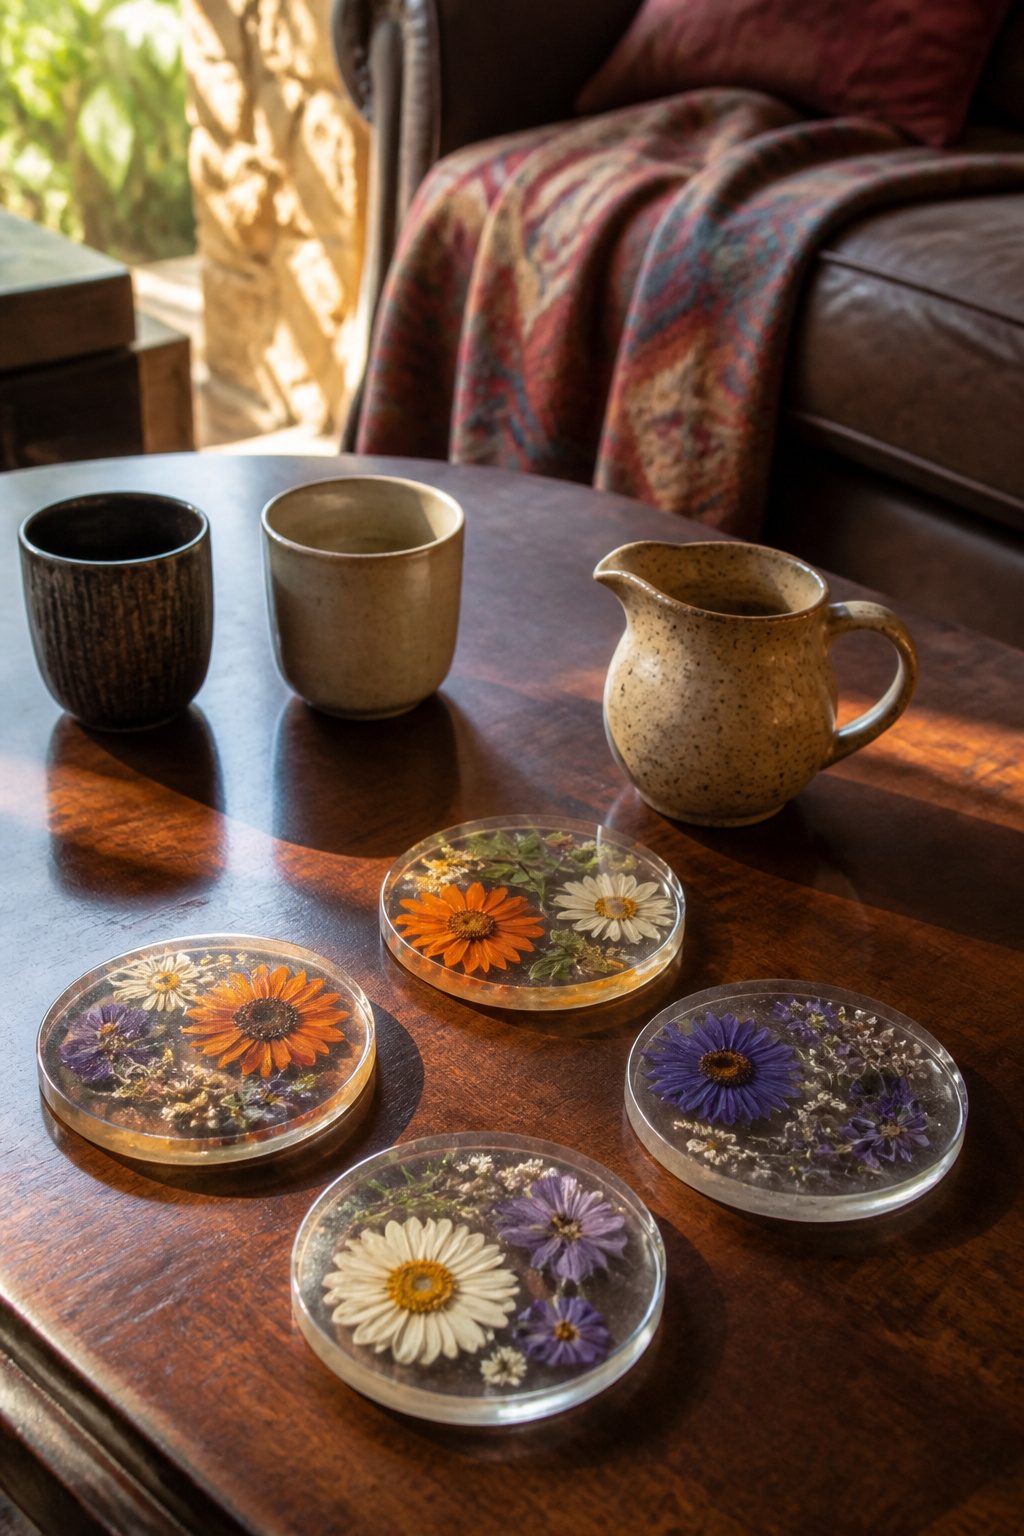
Pressed flowers look fragile in resin, but the real enemy is a bubble trapped against a petal edge that turns into a cloudy scar once the cure finishes.
A heat gun or a drinking straw waved an inch above the surface pulls those bubbles out before the resin sets, and checking at the five-minute mark catches the ones that rise late.
I pour in thin layers, letting each one gel before adding the next, so stems and leaves stay exactly where I placed them instead of drifting to the top.
Silicone molds meant for coasters peel clean without release spray, though I learned that the hard way on a first batch that stuck to a repurposed ice tray and tore at the edges.
White flowers go amber in some resins; yellows and purples keep their color better, so my picks from the yard lean toward clover and buttercups over daisies.
The whole pressing and pouring cycle spans two weekends, one for the flowers to flatten in a book and another for the resin to cure hard enough to use.
12. Pressed Flower Magnets from Air Dry Clay
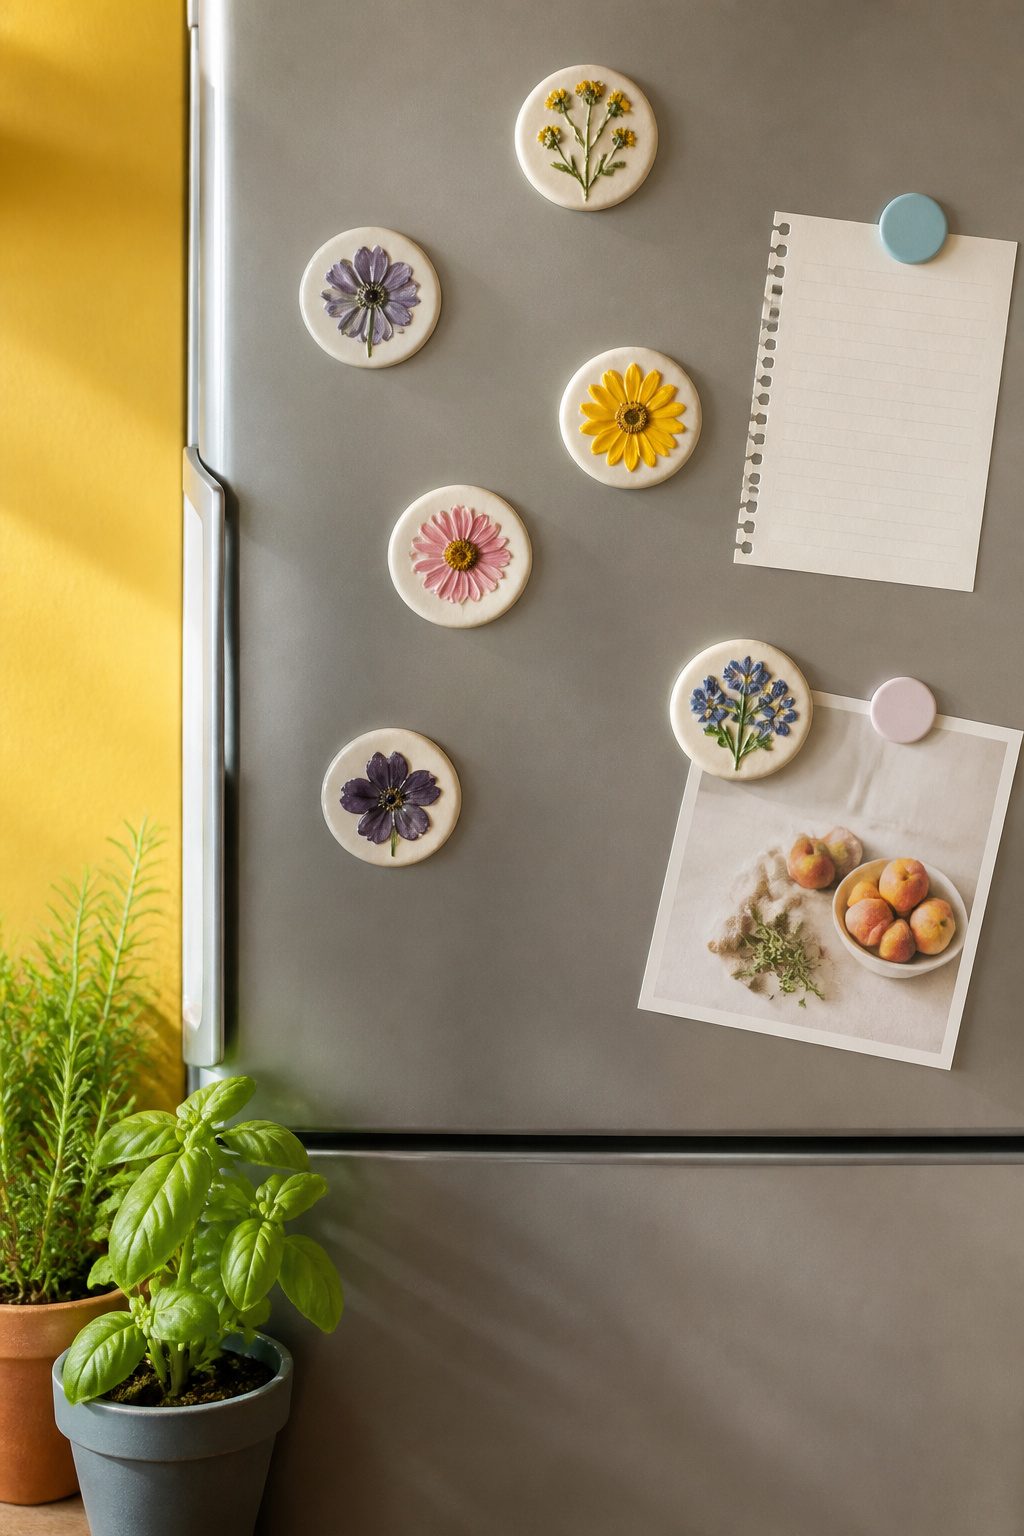
Air-dry clay circles about the diameter of a coffee mug make a good base for pressed flowers. Roll the clay to roughly pencil-thickness; thinner clay warps less while drying, which keeps the magnet back from peeling later.
Press the flowers in gently, then let the piece dry fully before brushing on Mod Podge.
That seal matters more than it looks like it will, because unsealed air-dry clay crumbles at the edges after a few weeks of fridge-door traffic. Once the seal is dry, glue a magnet back with a strong craft adhesive.
The whole project fits an afternoon, and the supplies run under ten dollars if you already own a rolling pin.
13. DIY Sand Dollar Resin Coasters
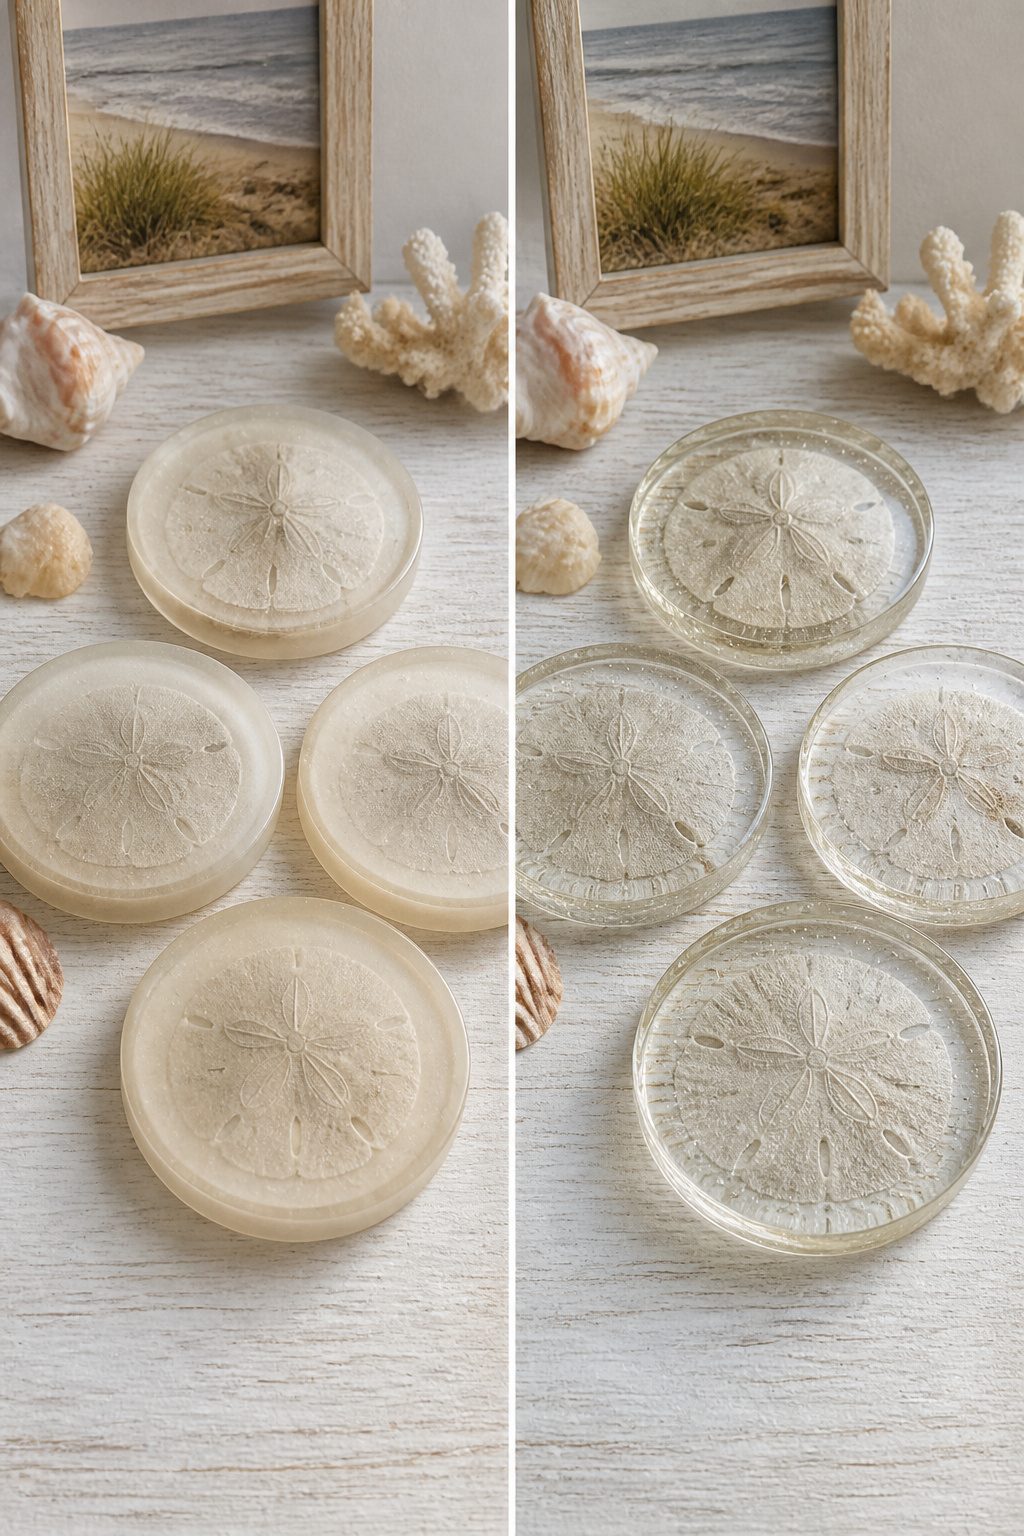
Clear epoxy lets you cast either real sand dollars or resin copies into coasters that look almost identical on a table. The difference matters once someone actually sets a drink down.
Real sand dollars are brittle; the thin, calcified body cracks under pressure or chips at the edge when it meets a wet glass dragged across it.
A resin sand dollar, poured from a silicone mold of an original, holds up to repeated use without the white dusting that real ones shed.
If you want the genuine article, seal it thoroughly with a thin brush coat of epoxy before embedding it in the mold. This slows but does not stop the eventual breakdown.
For a coaster that survives past Labor Day, the resin copy is the practical choice: same radial pattern, same slight ivory tone, none of the fragility.
Pour your clear epoxy in two layers, letting the first gel slightly before adding the second, so the sand dollar stays centered rather than floating to the top.
A standard round silicone coaster mold runs about ten dollars and yields four pieces. The whole project fits an afternoon plus overnight cure.
14. Ocean Resin Art
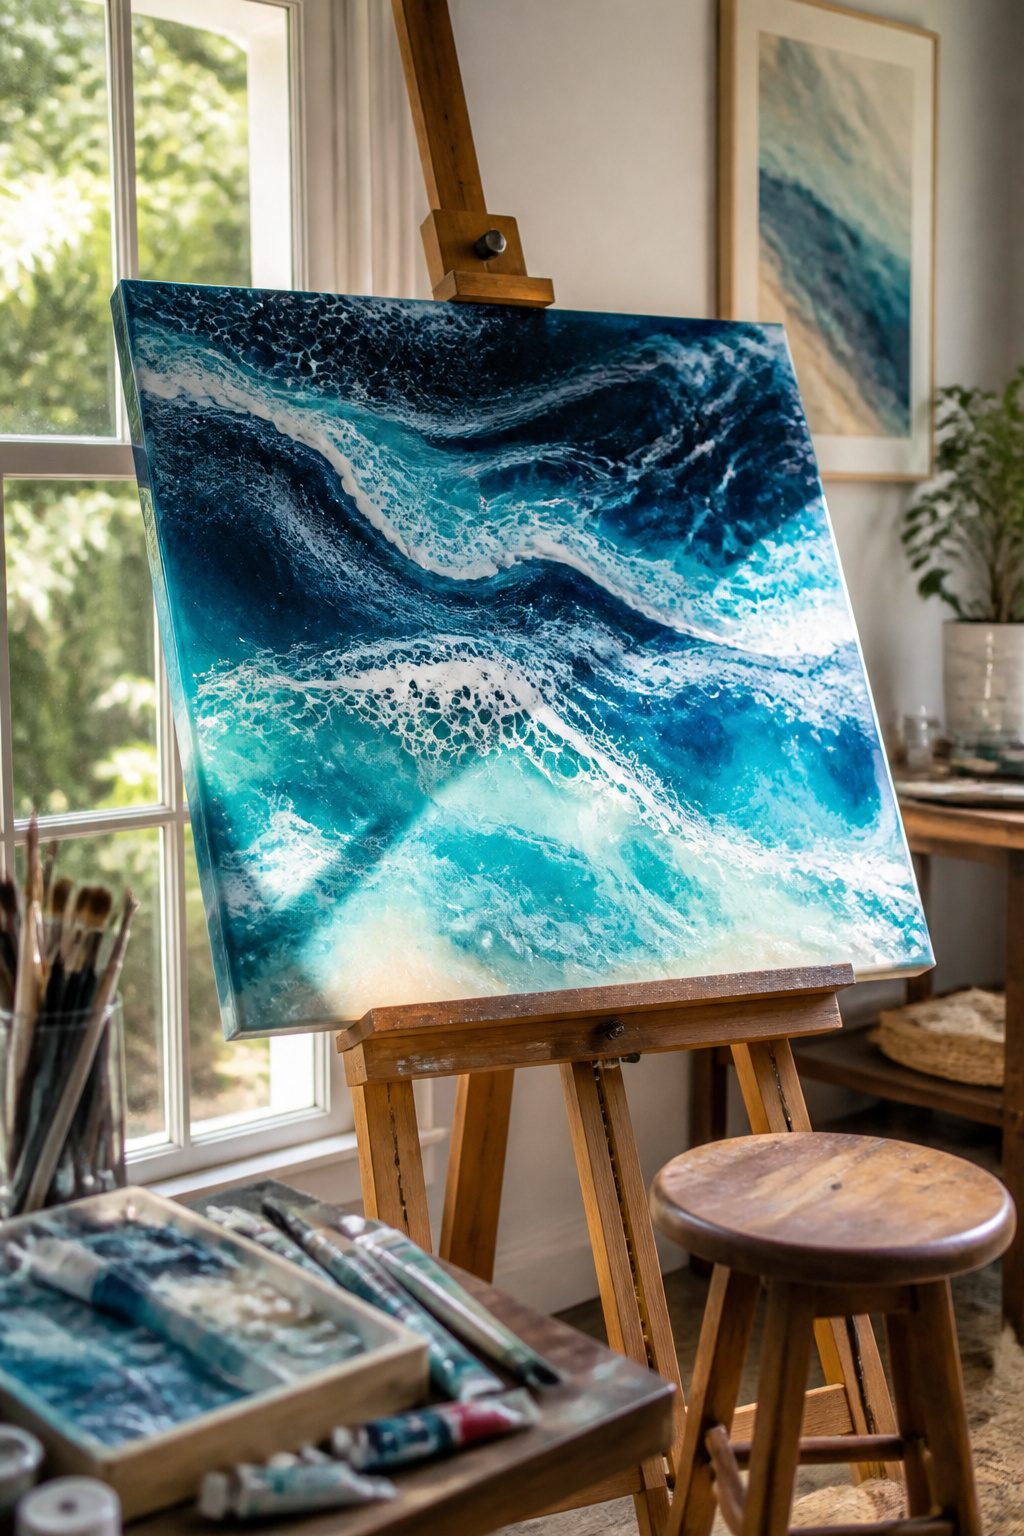
Layered resin with blue pigments and white alcohol ink gives the closest thing to real ocean movement I’ve found in a weekend craft.
You pour in stages, letting each blue layer cure partially before the next, which builds depth that a single pour never achieves.
The white ink stays on top until you hit it with a heat gun, then it pushes into tendrils that look exactly like breaking foam.
Timing matters: too early and the colors muddy, too late and the white sits on top like a cap.
Canvas works, but wood panels handle the weight better and won’t sag if your resin runs thick. I learned that after a 16×20 canvas bowed overnight and the pigment pooled in the center.
The fix was a braced wood panel, same size, which stayed flat and let me build six layers over two days. Total active time is maybe three hours; the rest is curing while you do other things.
15. Herb Garden Sign
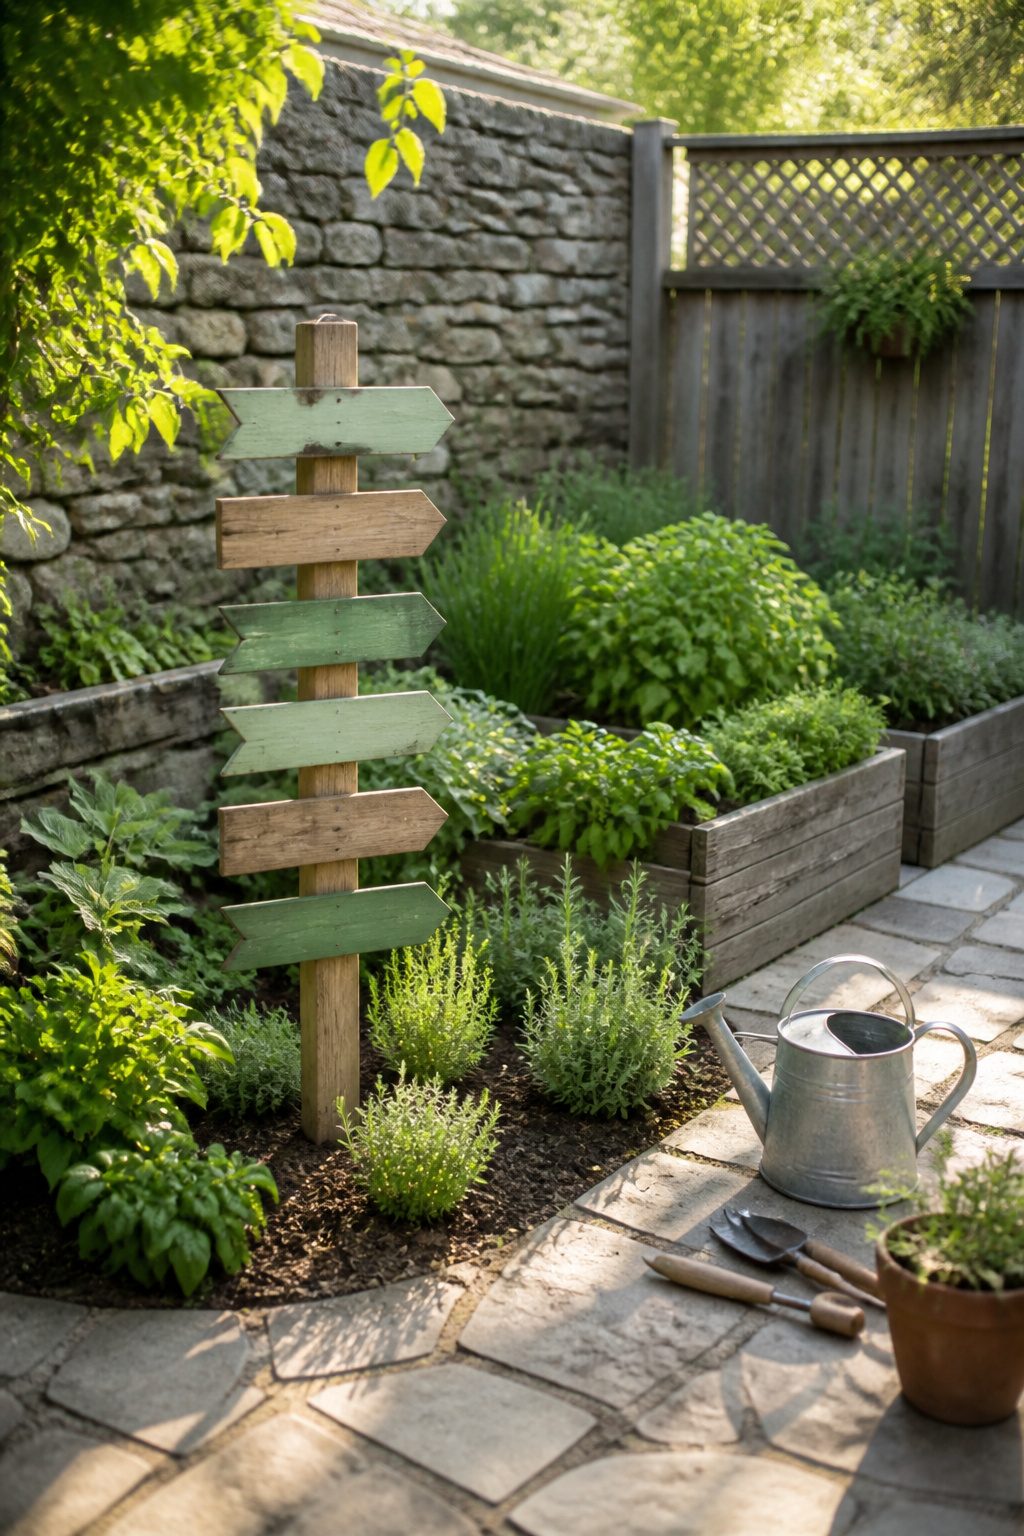
A wooden herb garden sign survives longer outside if you start with exterior paint and a clear sealer over the top.
I learned that the hard way after a regular acrylic piece I made for my mother warped and faded before August ended.
Stencils keep the lettering readable from a distance, which matters more than you might think when you are trying to tell thyme from tarragon from across the yard.
"Toads Welcome" is the phrase I keep coming back to, though custom herb names in a clean sans-serif font look sharp above a row of pots.
For the stencils, adhesive ones stay put while you work and peel away without tearing the grain. A coat of sealer on the back edges helps too; water likes to creep in where you do not expect it.
16. Easy DIY Garden Stepping Stones
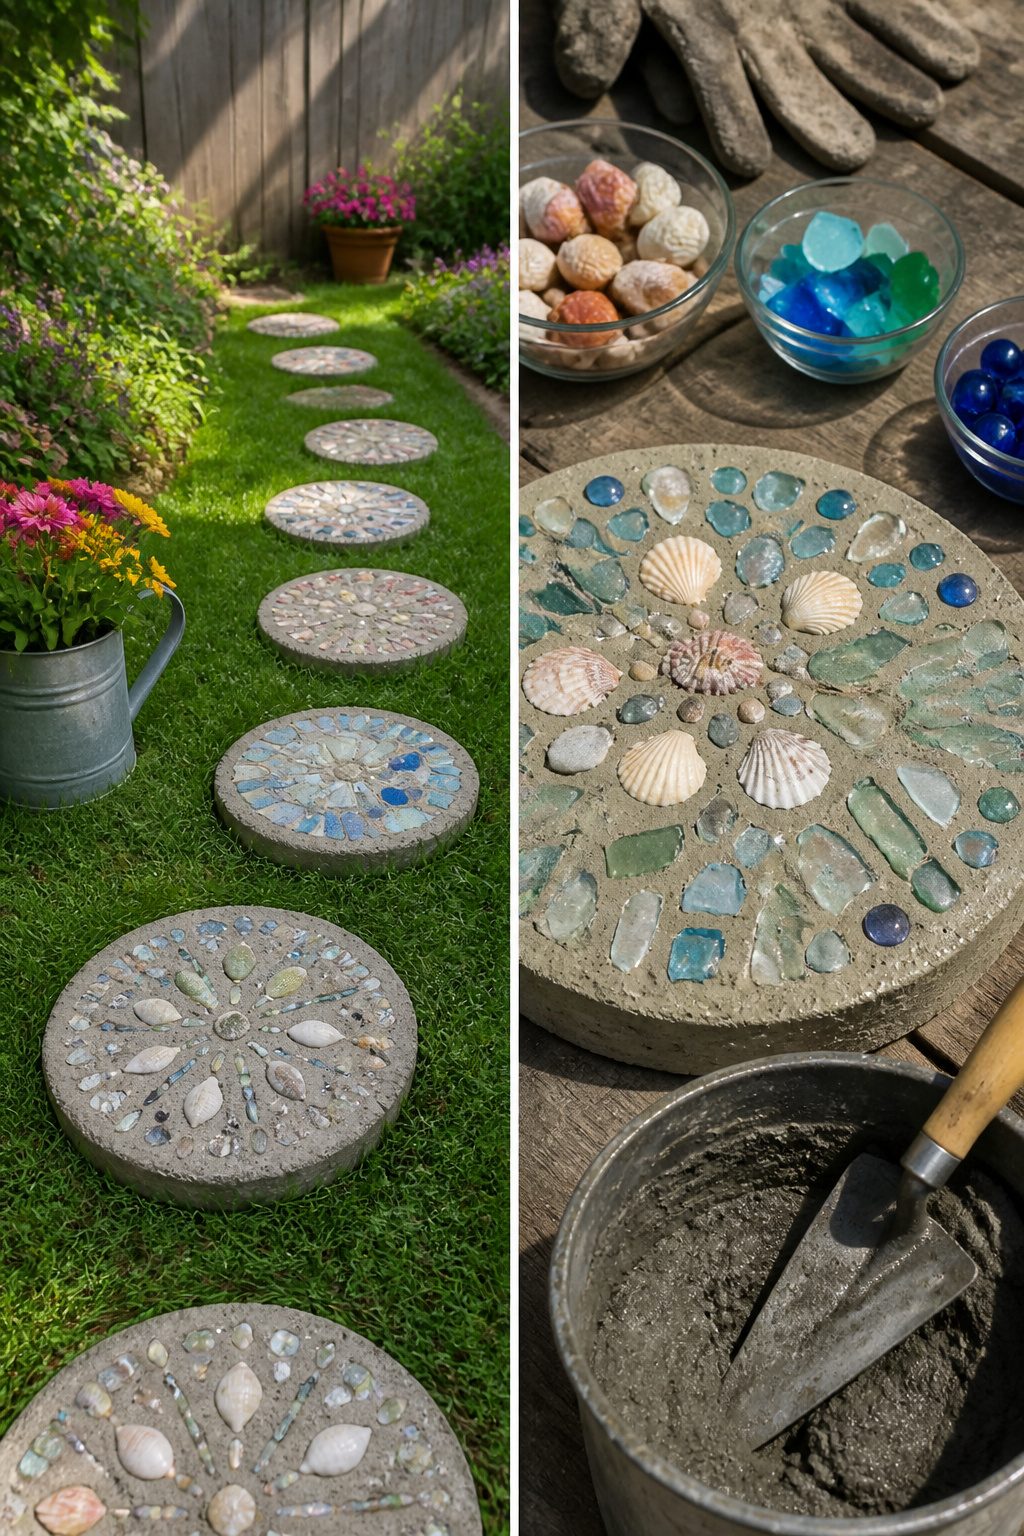
A bag of quick-set concrete and a plastic planter saucer from the garden center are the only specialty supplies you need.
I mix the concrete a little wetter than package directions suggest; it flows into the mold’s corners without trapping air pockets that weaken the stone later.
Press glass shards, shells, or a child’s hand into the surface while the mix still holds a thumbprint.
Quick-set concrete cures enough to unmold in 24 hours; standard mix needs a full 48, so check the bag before you promise the kids a finished path by Sunday night.
Shells with iridescent interiors should face up, but smooth beach glass looks better pressed on edge so light catches the thickness.
I learned that after laying my first stone flat-side-up and watching it read as gray smudge from three feet away.
Seal the cured stone with a concrete sealer if you want the colors to stay vivid past one season; unsealed, the surface weathers to a soft chalky look that some people prefer for cottage gardens.
17. Applique Clay Flower Pots
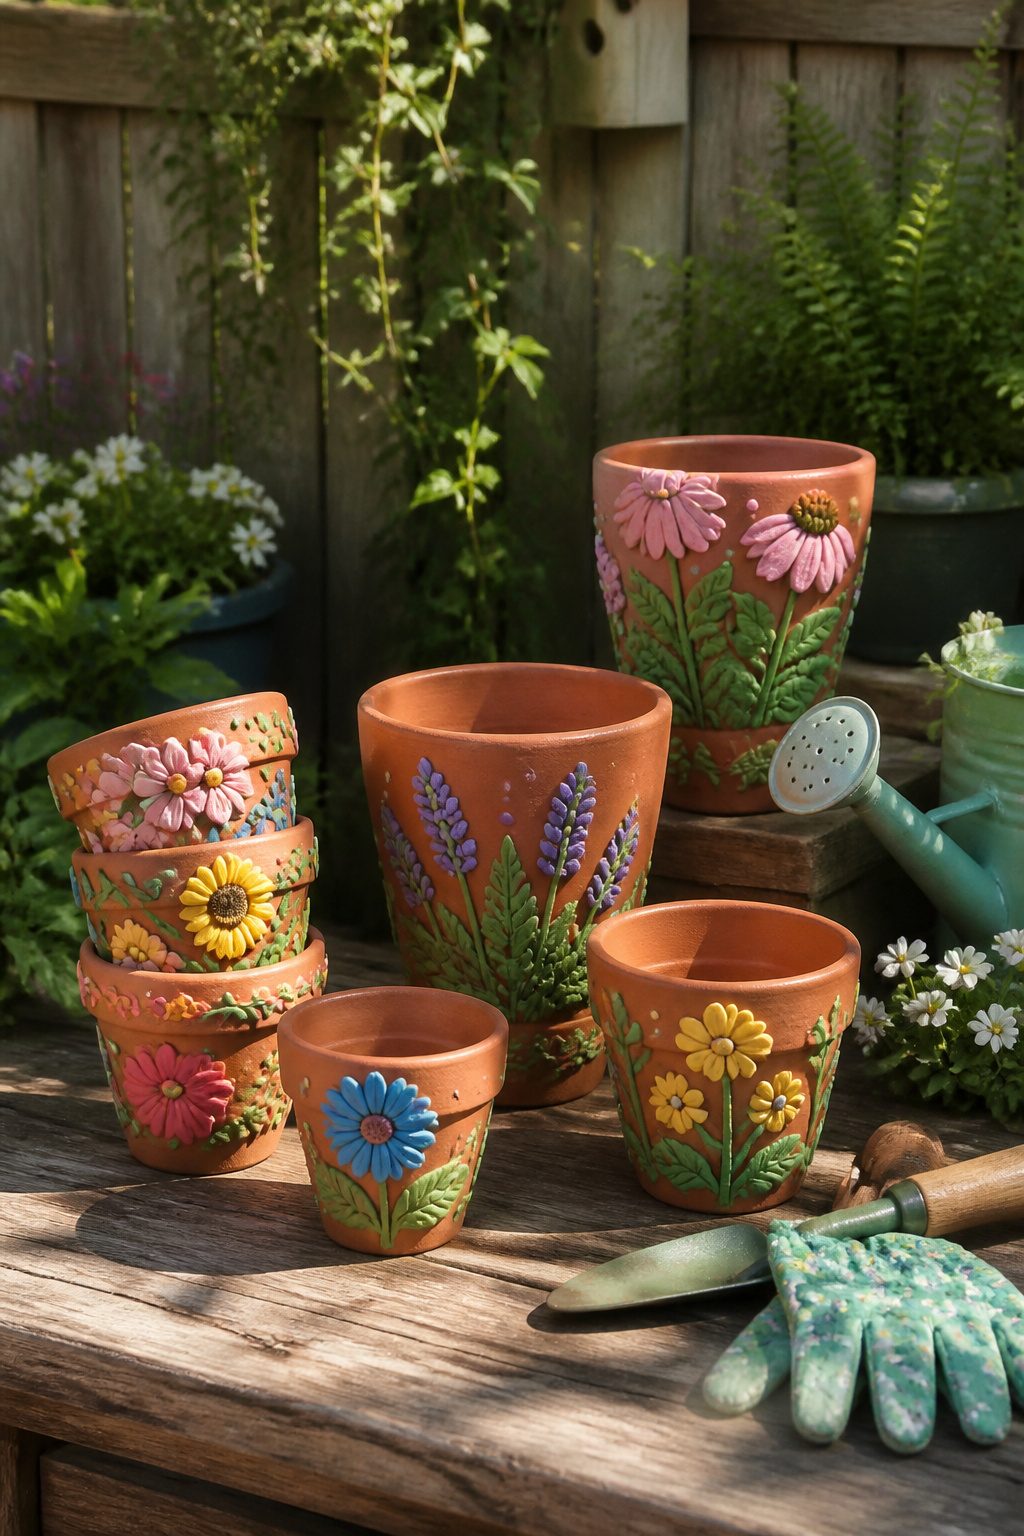
Terracotta pots take polymer clay well, but the clay and the pot handle heat very differently. The pot stays out of the oven entirely.
Polymer clay bakes at 275°F for 15 to 30 minutes depending on thickness, and a terracotta pot that size would crack long before the timer went off.
I shape the clay on a silicone mat, press the pieces onto the pot while the clay is still soft, then lift the whole design off and transfer it to a parchment-lined baking sheet.
After baking and cooling, a strong craft adhesive bonds the cured shapes back to the pot. The seam is nearly invisible if the clay was formed against the pot’s curve in the first place.
Thin petals and leaves bake closer to 15 minutes; thicker coils or beads need the full half hour. An oven thermometer helps, since home ovens run hot or cold by enough to scorch light colors or leave thick pieces brittle inside.
I learned that after a batch of coral-colored disks turned brown at the edges; now I check the thermometer before any load goes in.
18. Decoupage Garden Pots
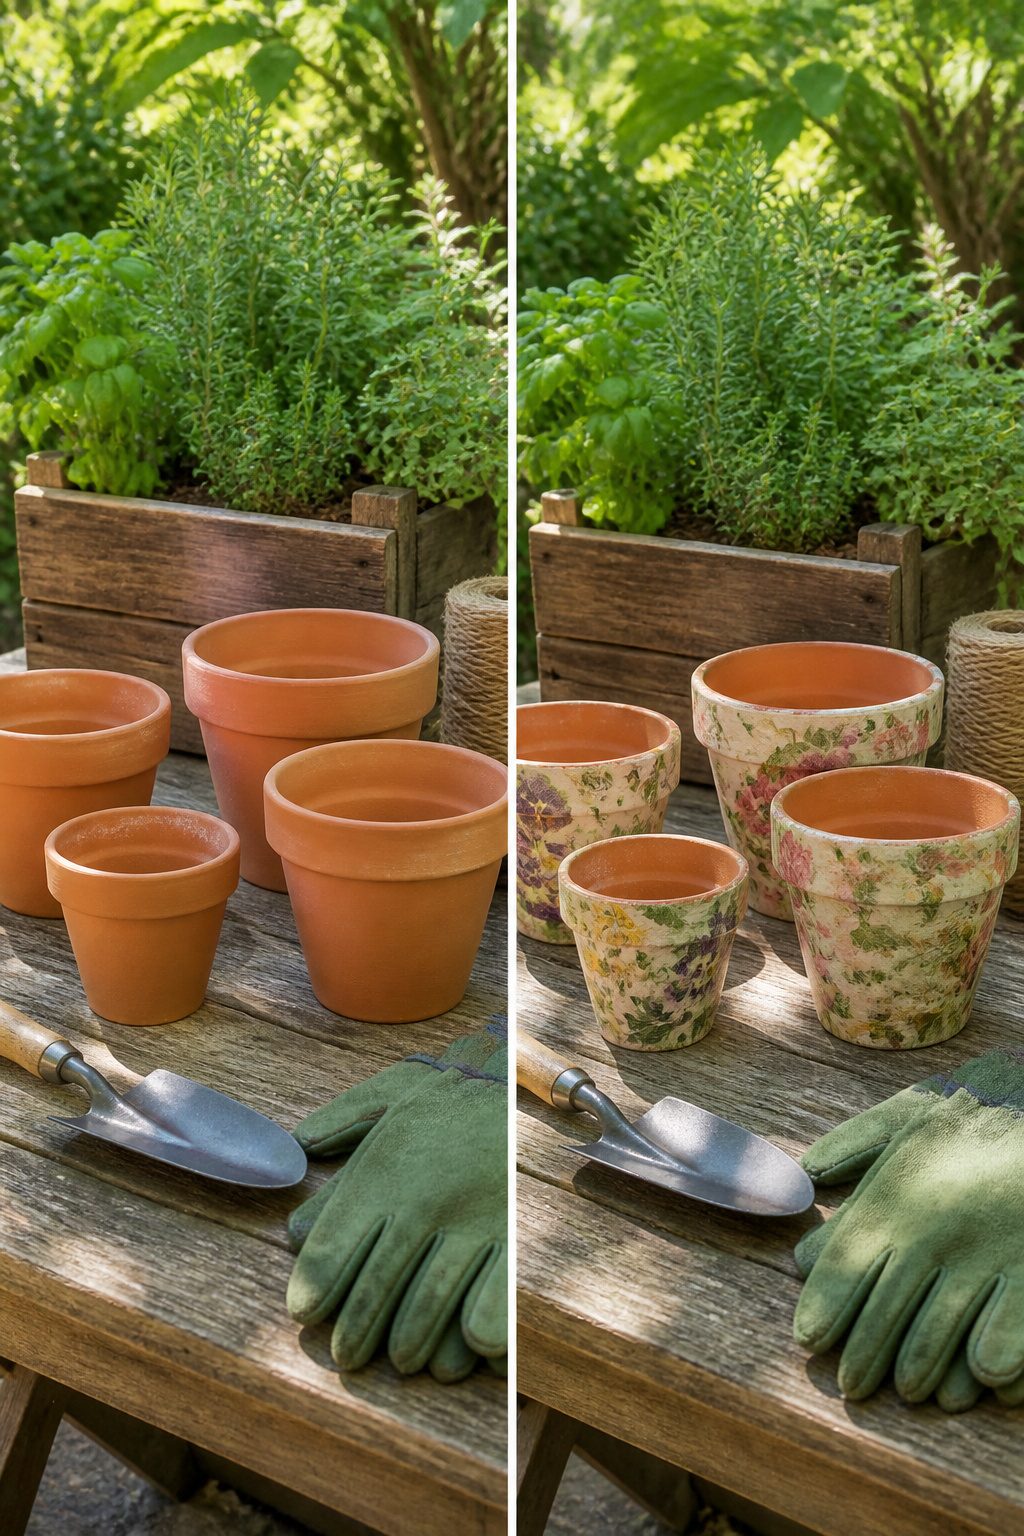
Torn edges disappear into the surface far better than clean cuts, which is why I always rip the napkin or tissue paper by hand rather than reaching for scissors.
The fibers feather out and melt into the pot under multiple thin coats of decoupage glue, each one allowed to dry before the next goes on.
Thick layers seem faster but they wrinkle the paper and leave cloudy spots that only show up once everything cures.
I learned that the hard way on a set of herb pots last spring, watching a single heavy coat buckle the hydrangea print I’d spent an hour tearing into shape.
Plain terracotta works fine, though any porous surface takes the glue well; just wipe the dust off first so the paper actually grips.
The finished pots hold up outdoors if you seal them with a water-based varnish after the decoupage dries completely, usually a full day later.
19. DIY Sea Glass Wind Chime with Seashells
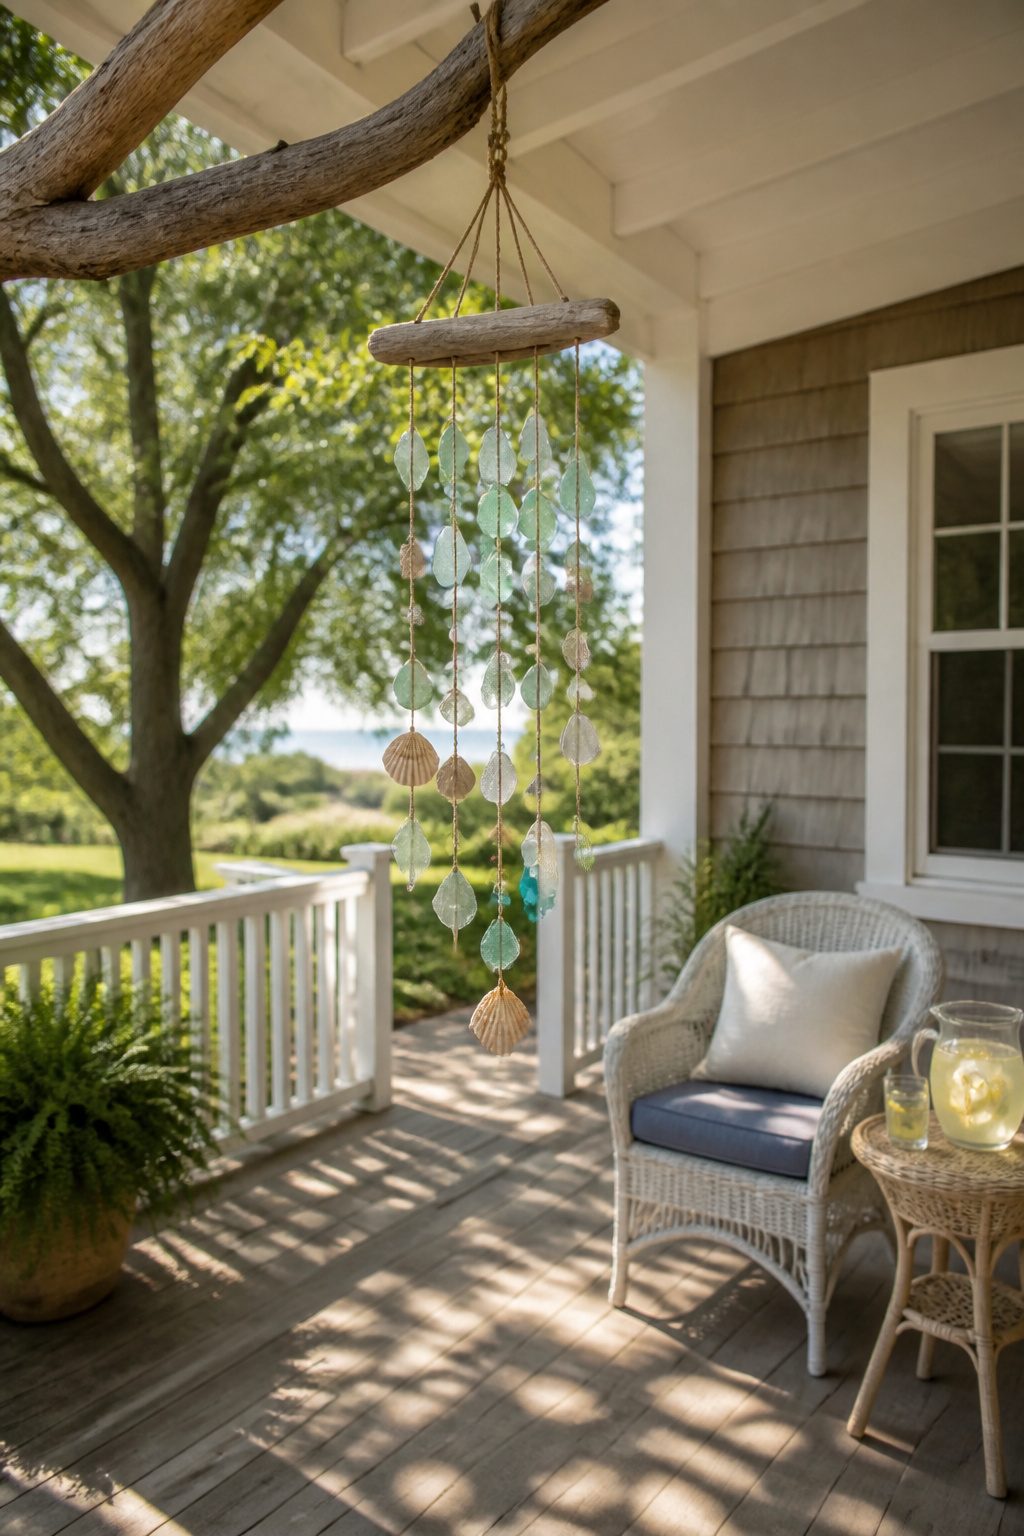
Drilling sea glass takes a diamond-tipped bit and a dish of water underneath to keep the dust down and the glass cool. The shells are softer, but they still crack if you lean in too hard or drill dry.
A small masonry bit works for most shells; hold them in a folded towel so they do not spin.
For the top, driftwood gives the whole thing a found-on-the-beach look, though a metal ring from the hardware store is easier to hang level. Fishing line is nearly invisible against the sky, but wire holds up better in coastal wind.
Leave six inches or more between pieces if you want a real chime instead of a clatter. Too close, and the shells slap together in one dull note.
Wider spacing lets each piece ring against the next in sequence, and the glass makes a lighter sound than the shells, so mixing the two gives you something like a melody rather than a drumbeat.
Tie the knots with a dab of clear glue; salt air works knots loose faster than you would expect.
20. Driftwood Jewelry Hanger
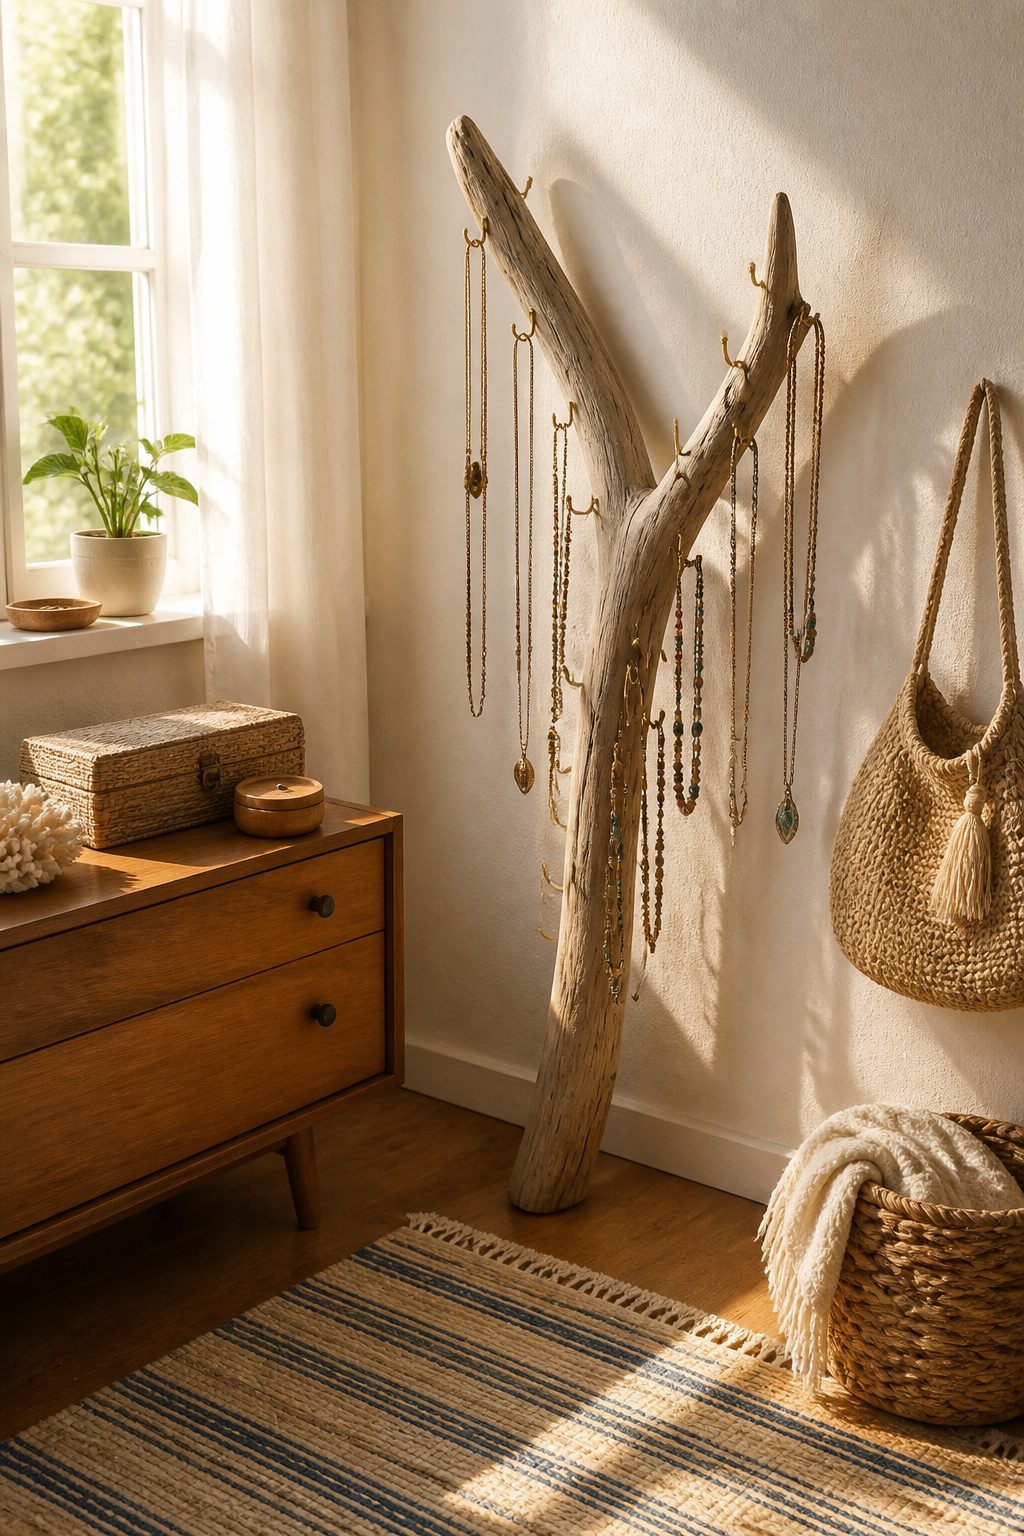
A piece of driftwood with a natural fork makes the best jewelry hanger, because the split cradles necklaces without letting them slide into a tangle.
Sand every surface that hands might touch, especially the underside of that fork where you will hook and unhook chains. Splinters from driftwood run deeper than from milled lumber, and they carry salt and grit that irritate longer.
I use 80-grit paper first, then finish with 150; the ten minutes of sanding saves days of picking at a palm.
For hardware, small screw hooks beat nails. Brass ones tarnish to a soft brown that suits the beach-washed gray of the wood, and the threads grip the dense, weather-hardened grain without splitting it.
Pre-drill holes slightly narrower than the hook shank, or the torque of your fingers will snap the head off before it seats flush.
Space them an inch or two below the fork on either side, plus one centered above for the wall mount.
A single picture hanger on the back, set into a pilot hole with wood glue, holds plenty of weight. Driftwood is already dry and light; a twelve-inch piece strains nothing.
The whole project takes one evening and costs less than a store-bought hook rack, and the result looks like something you found and kept, not something you assembled.
21. Painted Rocks
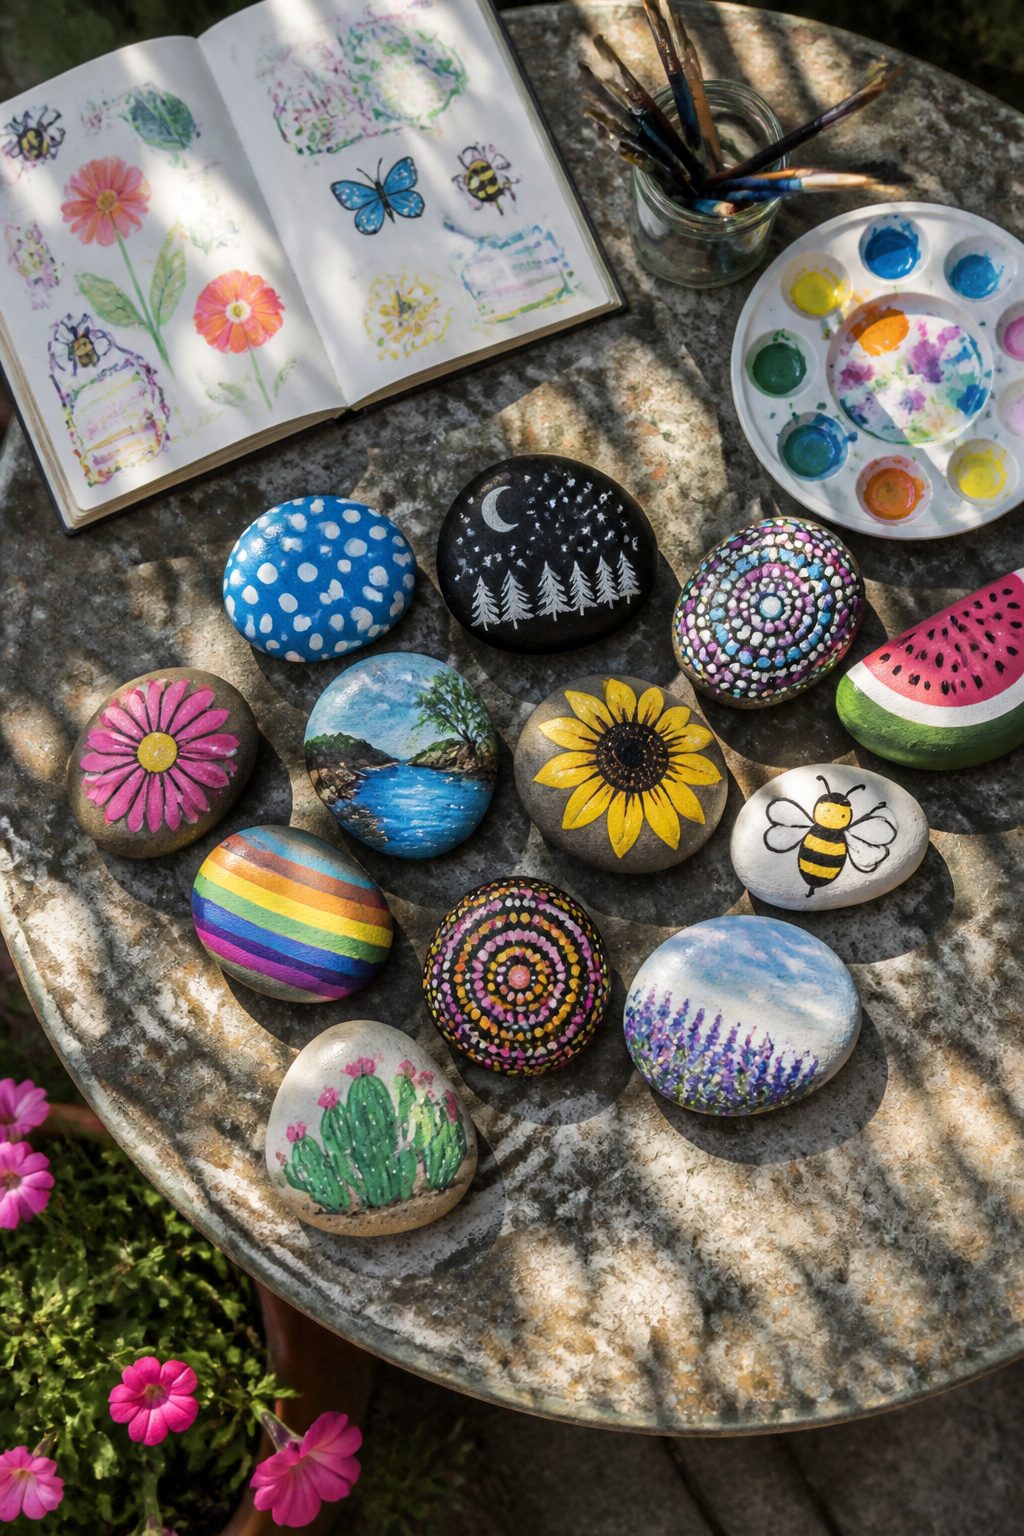
Smooth river rocks with a flat face are the ones to grab for this project; the porous, crumbly stones from a backyard bed will drink paint and shed flakes no matter how careful you are.
I scrub mine with dish soap and an old toothbrush, then let them dry completely on a sunny porch before any paint touches them.
A thin coat of white acrylic primer, brushed on and left overnight, keeps the colors from going muddy and saves paint later.
For the actual design, acrylic paint markers beat brushes every time on a surface this small.
The fine tip lets you draw a dragonfly wing or a ladybug spot without the blobbing that happens when a brush hits a pebble’s curve.
I learned that after ruining a dozen rocks with a size-two flat brush that held too much paint.
Seal the finished piece with a spray acrylic sealer, two light coats, or the first rain will turn your afternoon’s work back into plain stone.
22. Hand-Painted Water Bottles
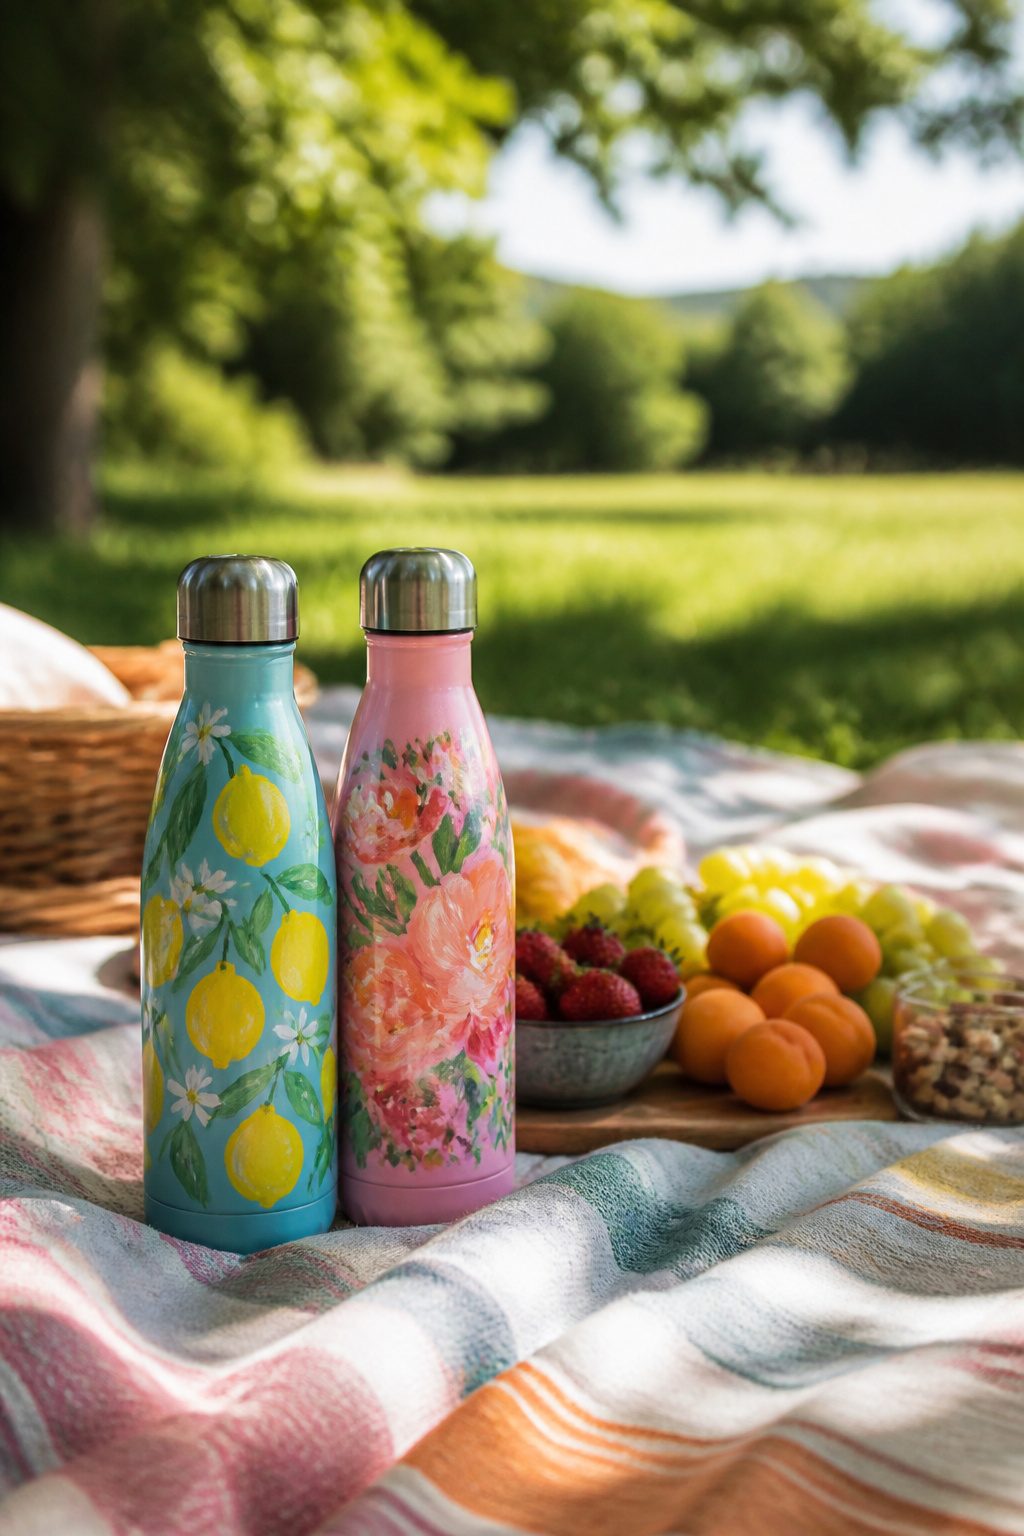
A stainless steel water bottle takes acrylic paint better than plastic, but either works if you rough the surface first with fine-grit sandpaper. I learned that the hard way when paint flaked off a smooth bottle after two hand-washings.
Paint pens give you cleaner lines for lettering or small patterns, while brushed acrylic covers larger areas faster.
Either way, a dishwasher-safe sealant like Mod Podge Dishwasher Safe formula is necessary for longevity; regular Mod Podge melts into sticky streaks the first time someone forgets and runs it through the cycle.
Two thin coats of sealant, letting each cure fully, beats one thick coat that pools at the base. Hand-washing still extends the life, but the sealant buys you forgiveness for the inevitable machine wash.
Kids can handle the painting if you do the sanding and sealant yourself; the bottleneck shape naturally limits where small hands reach, which keeps designs simple without planning.
23. Colorful Magnetic Clothespins
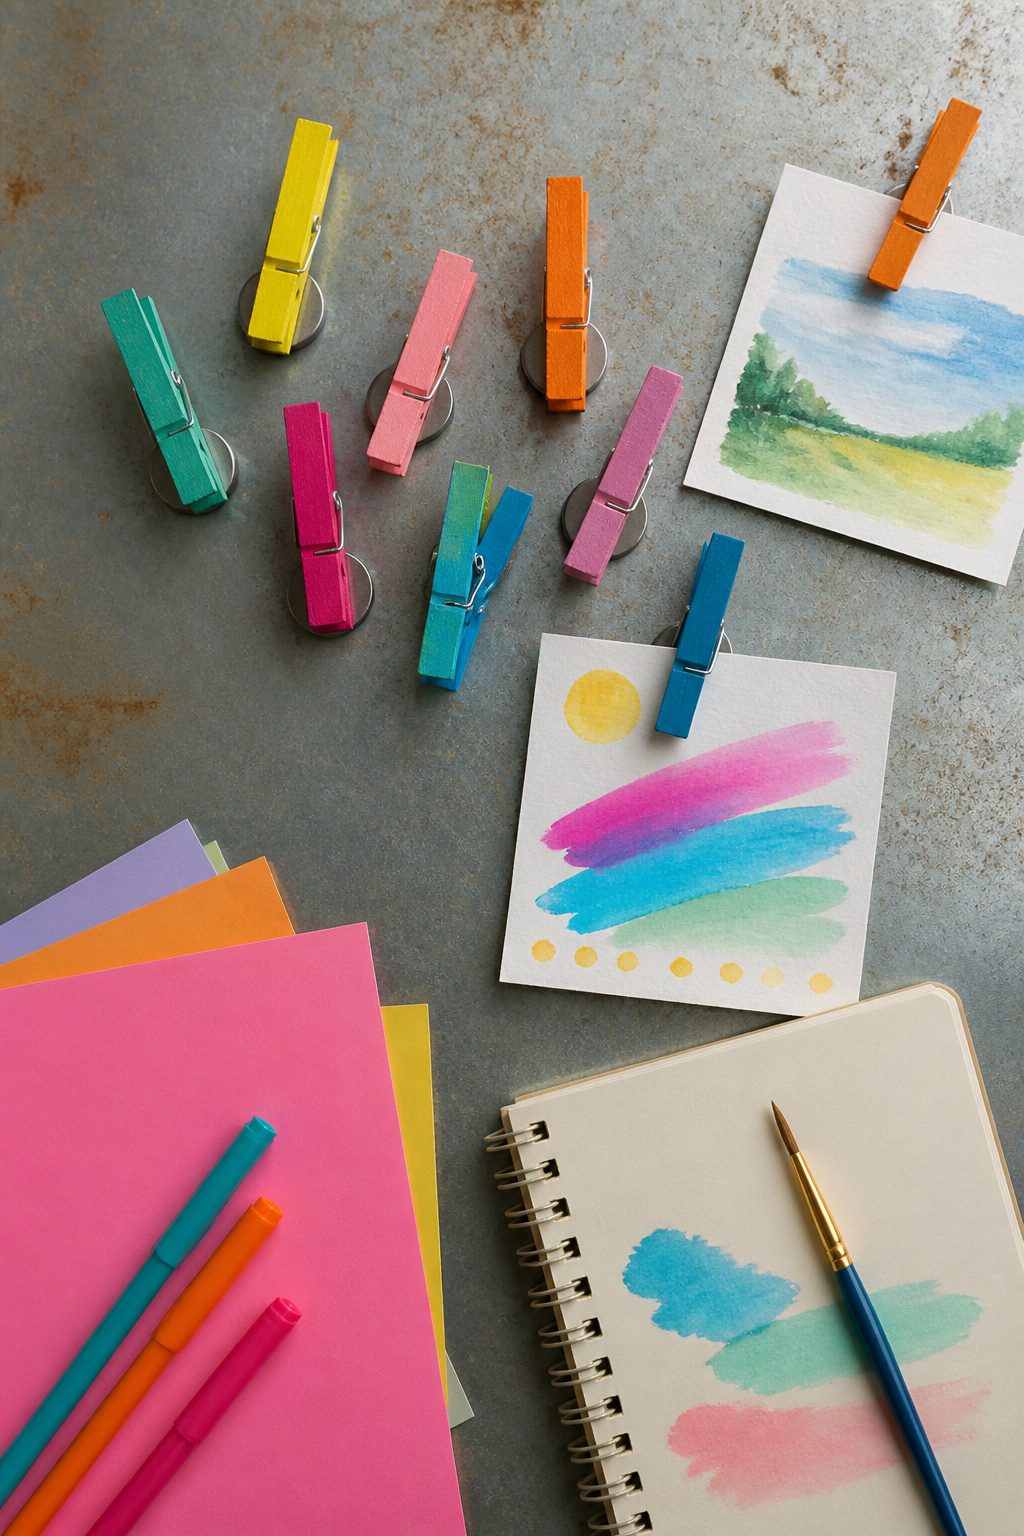
A dozen painted clothespins and a roll of adhesive magnet strip will fill an afternoon and a fridge door. I paint mine in batches, clipping them to a cardboard box so both sides dry without sticking.
Acrylic craft paint takes about twenty minutes per coat; two coats covers the wood grain clean.
Once dry, neodymium magnets glued to the back hold far better than the flexible strip magnets sold for this craft, especially once a kid starts swapping photos every day.
Hot glue works in a pinch, but E6000 or another strong craft adhesive lasts longer on the slick magnet surface. The finished clips hang grocery lists, summer camp art, or postcards without the bulk of frames.
Strip magnets alone slide down under anything heavier than a single photo; learning that cost me a morning of re-gluing.
For a few dollars more, the small rare-earth discs turn a simple kids’ craft into something that actually gets used for months.
24. Fruit Stamped Tea Towels
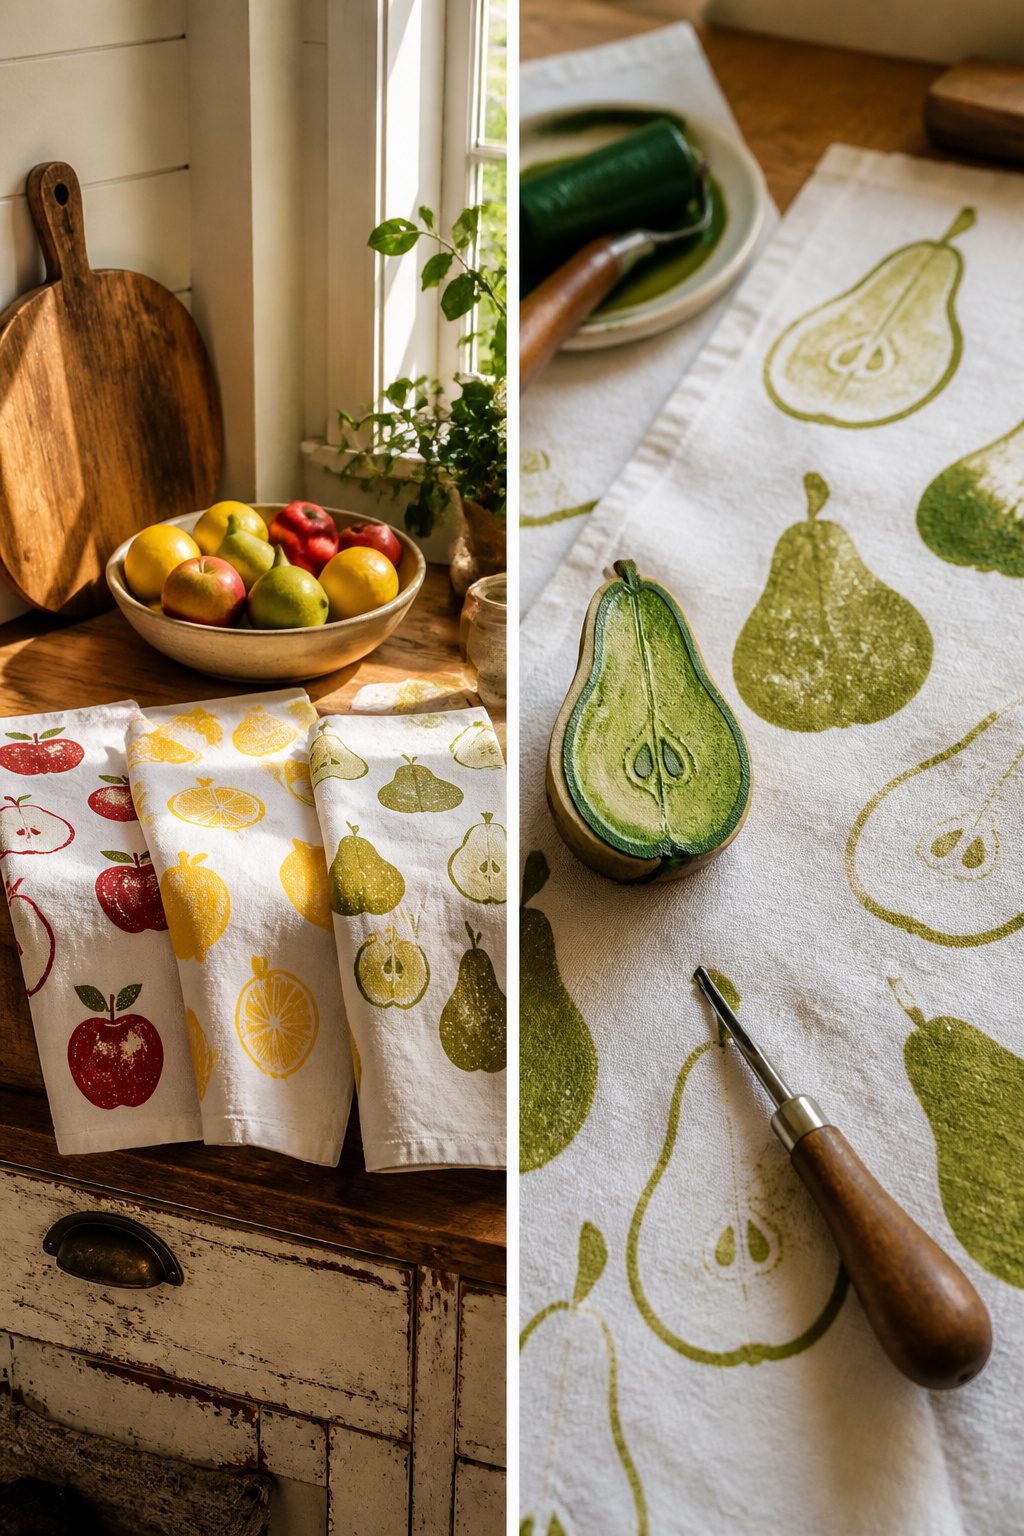
Half an apple, a lemon, or a pear becomes a surprisingly crisp stamp once the cut surface dries out a bit.
Blot it with a paper towel, let it sit cut-side up for ten or fifteen minutes, and the flesh firms enough to hold a clean edge when you press it into fabric paint.
Cotton tea towels work best; the weave grabs the pigment without bleeding the shape into a blur.
A quick swipe of lemon juice across the cut face, then left in the sun, keeps the fruit from browning through a whole afternoon of printing.
Kids can handle the stamping once an adult preps the halves, and the paint heat-sets with an iron in about two minutes per towel.
I tried pears once and found the core cavity makes a neat natural dot in the center of each print, almost like a built-in design element.
25. DIY Washer Necklace
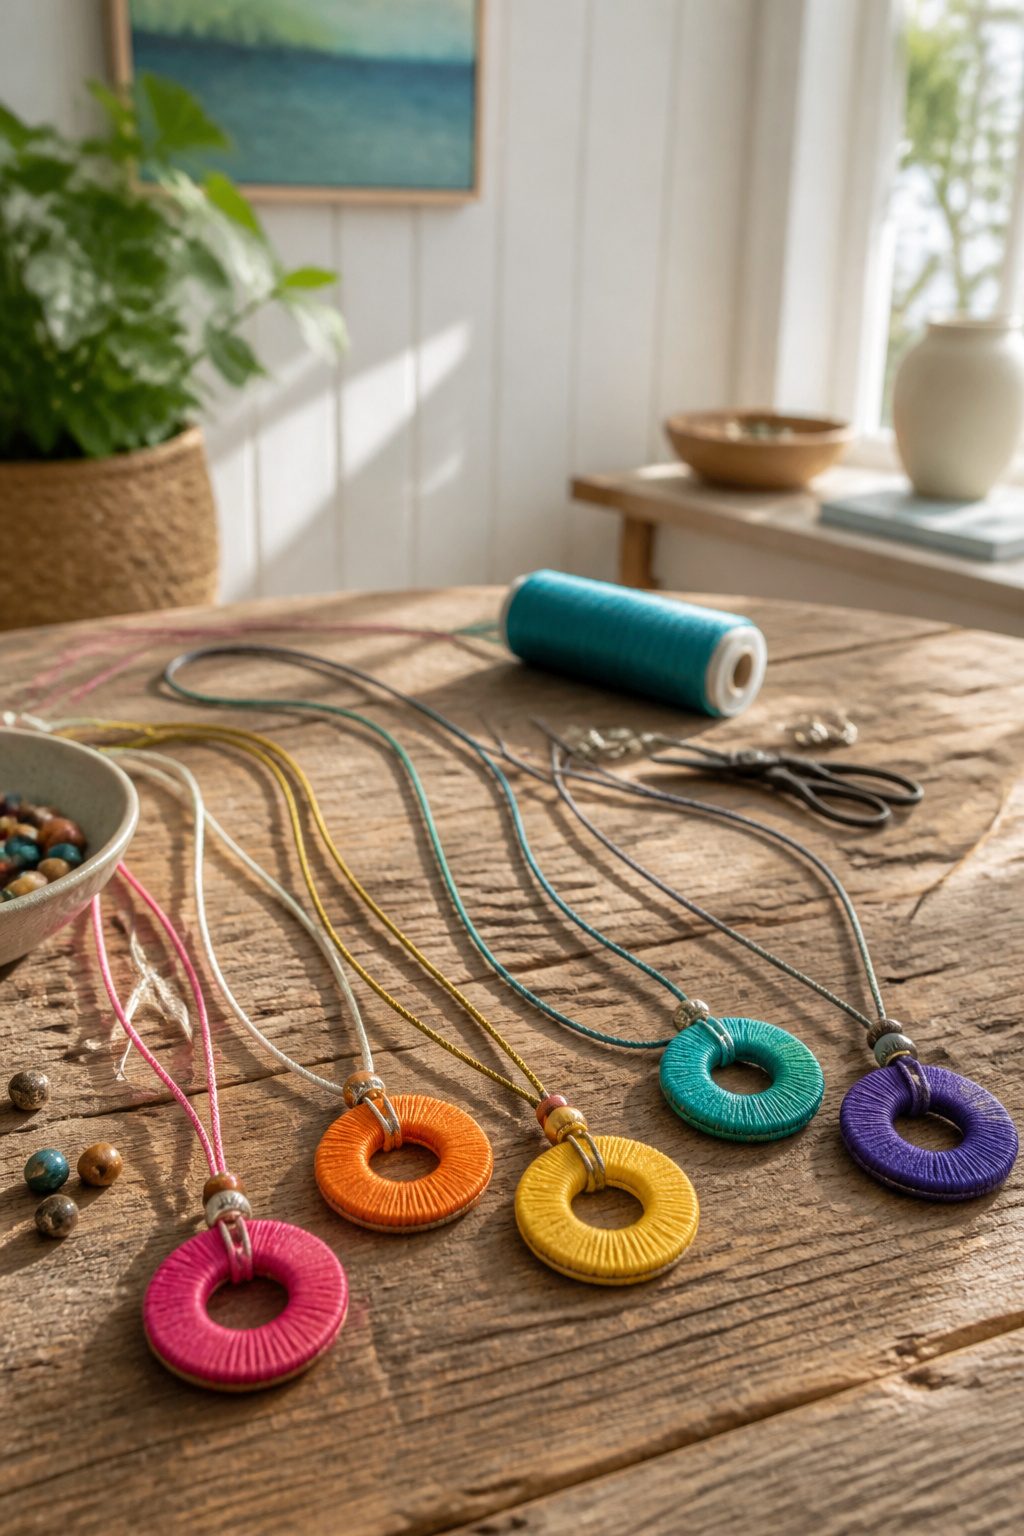
Metal washers from the hardware store turn into something a kid actually wants to wear, which is not a sentence I expected to write.
A one-inch washer costs under twenty cents, so a classroom’s worth of necklaces runs you less than a coffee.
Paint works, but wrapping the washer with embroidery floss covers the raw steel and gives the thing some weight on the cord.
Thread the finished washer onto whatever string you have, knot it firmly, and the necklace holds up through at least one summer camp. A bead above the knot keeps the washer from sliding off if the cord frays.
Glitter and extra paint are optional. The base project needs so little time and cleanup that pulling it out on a short afternoon actually makes sense.
26. DIY Citrus Rope Coasters
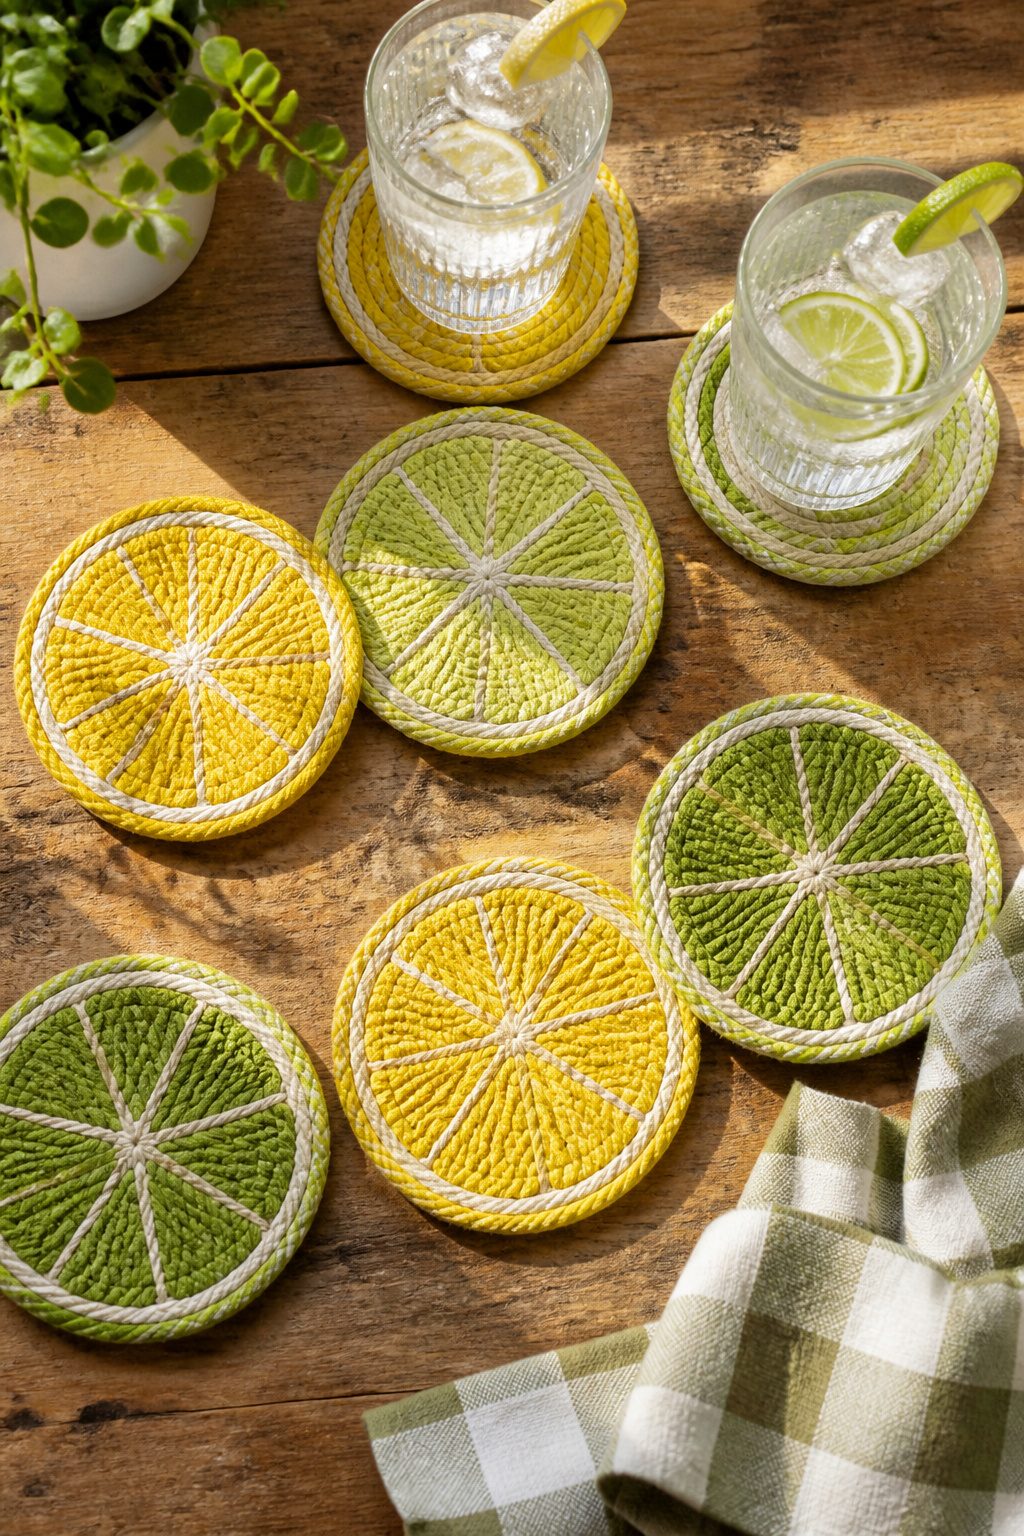
Cotton rope coiled into a flat spiral makes a coaster base that actually absorbs condensation instead of letting it pool on the table. I start with a coil about four inches across, tacking each round down as I go.
Hot glue sets in seconds, which matters when you’re making a set of four and patience is thin.
Craft glue works fine too, and it’s the safer call if kids are joining in; just clamp the coils under a book for an hour so they don’t spring loose while drying.
Once the base is flat and firm, acrylic paint turns the top into a citrus slice.
A pale yellow or green wash for the rind, brighter color for the flesh, and a quick dot of white near the center for the pith.
A toothpick dragged through the wet paint creates those membrane lines without needing any real brush skill.
The rope texture hides wobbly strokes, which is why this project survives a Saturday afternoon with a glass of lemonade nearby rather than a studio setup.
27. Tropical Tote Bags
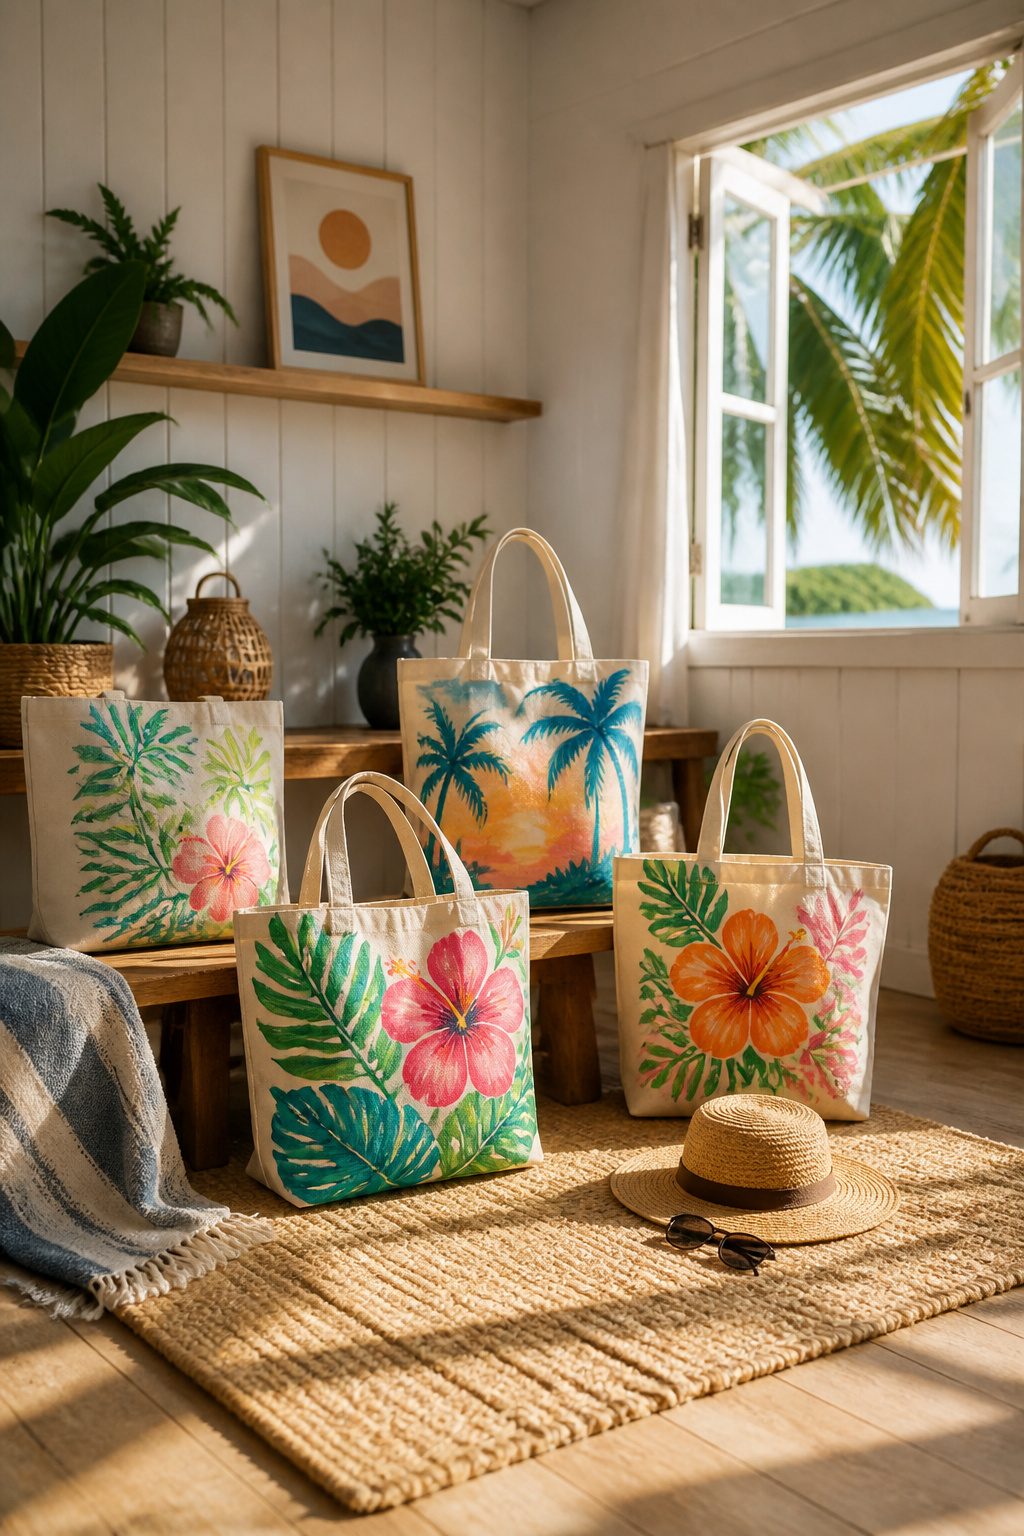
A canvas tote bag is the right surface for summer painting because it already looks like it belongs at a pool or a market. The trick is keeping the paint from cracking when the bag gets folded and shoved somewhere.
Fabric medium mixed with acrylic paint does that job; without it, the paint sits on top like a skin and splits the first time you cram the bag under a car seat.
I work with stencils for palm leaves and monstera because the shapes are forgiving. A little bleed under the edge just reads as tropical looseness.
Hibiscus I paint freehand; the petals are five rough strokes and a dot in the center, so a wobble looks intentional.
Country Living’s method for fabric paint applies here too: thin your paint, load the brush lightly, and build color in two passes rather than one heavy coat that pools and cracks.
Iron the finished bag to set the paint, following whatever timing the manufacturer printed.
28. DIY Giant Paper Flowers
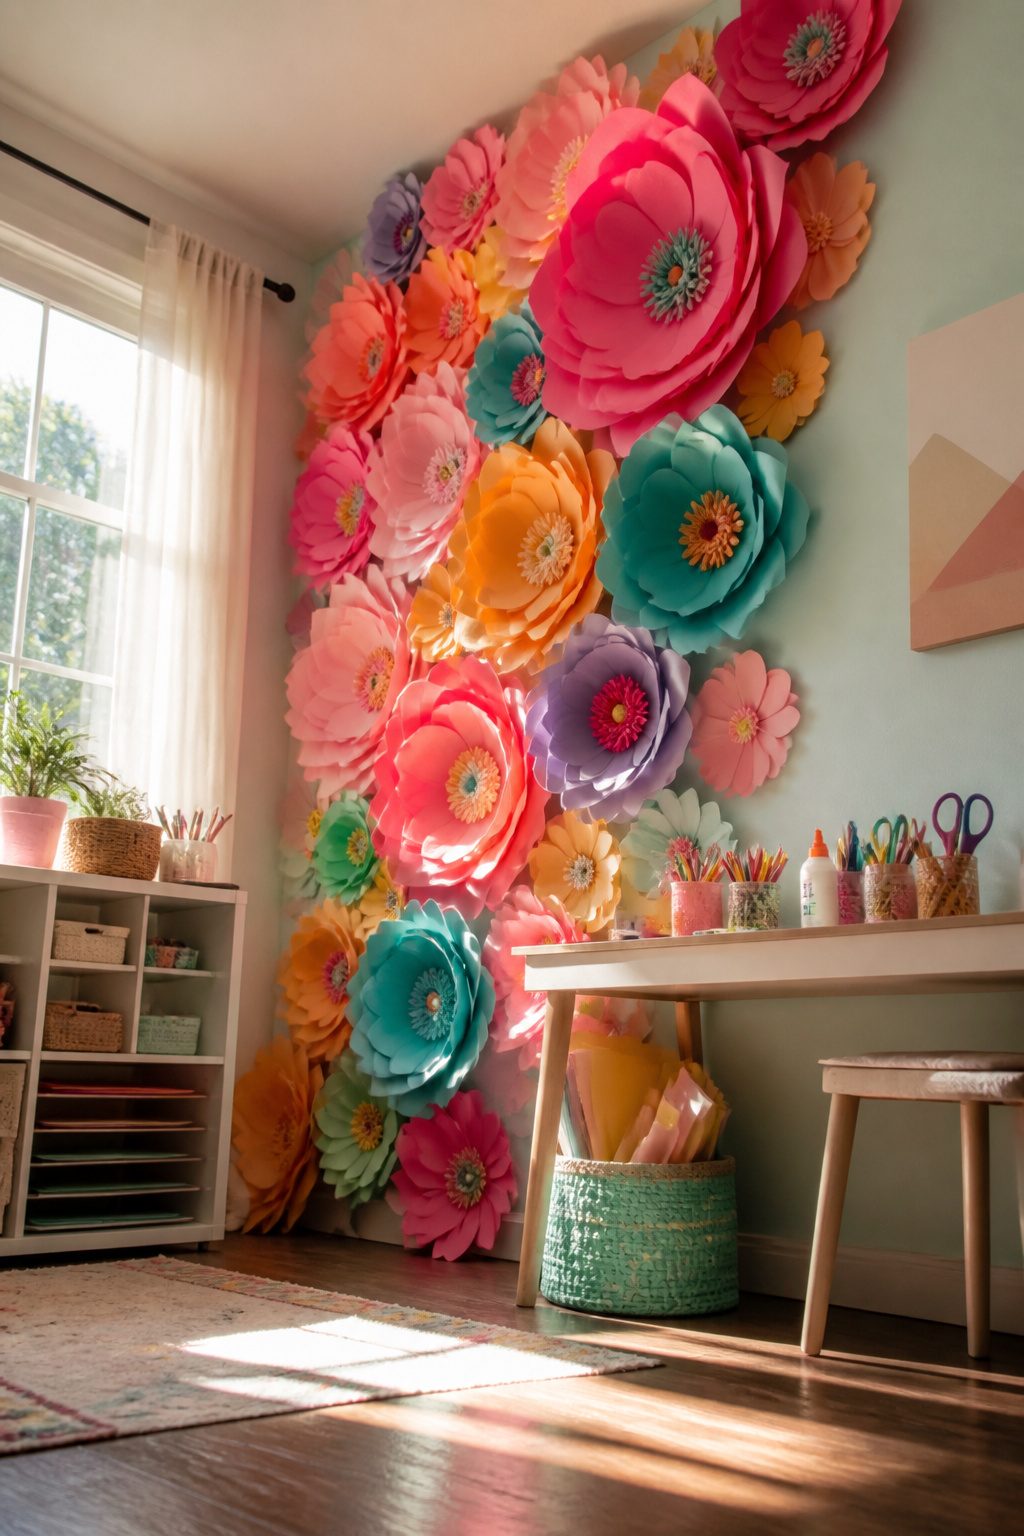
Cardstock petals hold their shape through humidity that wilts lesser paper, which is why I keep a pack of 65-lb sheets on hand for these.
The cutting is forgiving: trace a teardrop about six inches tall, freehand if your hand is steady, and stack four or five layers to cut several at once.
A wooden dowel, the kind sold for closet rods or cake testing, curls the outer edge when you drag it across the petal’s belly like curling ribbon.
Three or four petals overlap at the base with a dot of hot glue, and you build rings outward from a punched-circle center.
Crepe paper stretches thin for petals that look almost grown, and the texture catches light like nothing else, but a summer’s worth of window sun will fade and fray it.
Cardstock outlasts the season if you want the bouquet to survive past August.
The center hides a disk of scrap paper with fringed edges or a pom from leftover yarn; either way, the glue gun does the real work while you hold the shape until it sets.
29. Ice Cream Cone Garland
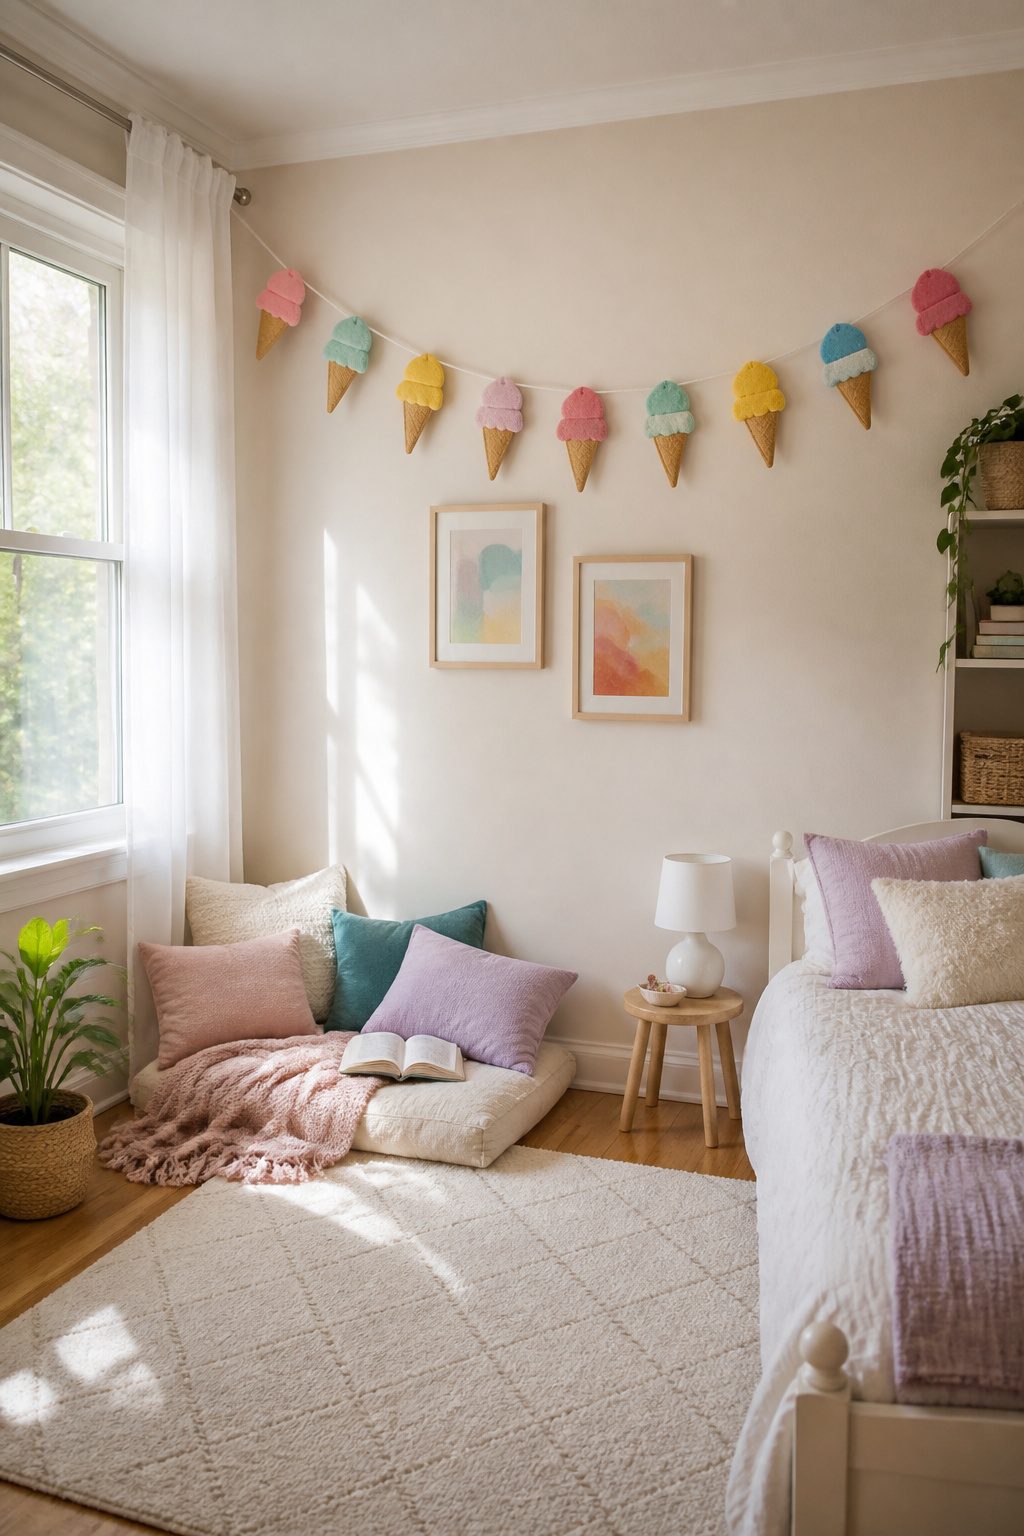
Felt holds a crease better than paper once you start stacking scoops, so that is the material I would reach for first.
Cut a simple cone shape from tan or waffle-patterned felt, then punch out circles for the ice cream in whatever flavors match your room or party colors.
Stuffing the scoops with a pinch of polyester batting before you glue them shut gives the garland actual depth instead of that flat bulletin-board look.
A dab of hot glue at the center keeps the batting from shifting when you string everything on twine with a needle. Space the scoops unevenly; a rigid rhythm looks store-bought.
The finished strand works across a kid’s headboard for summer or draped over a patio door for a birthday, and the whole project stays light enough that masking tape will hold it.
30. DIY Bubble Wands and Homemade Bubble Solution
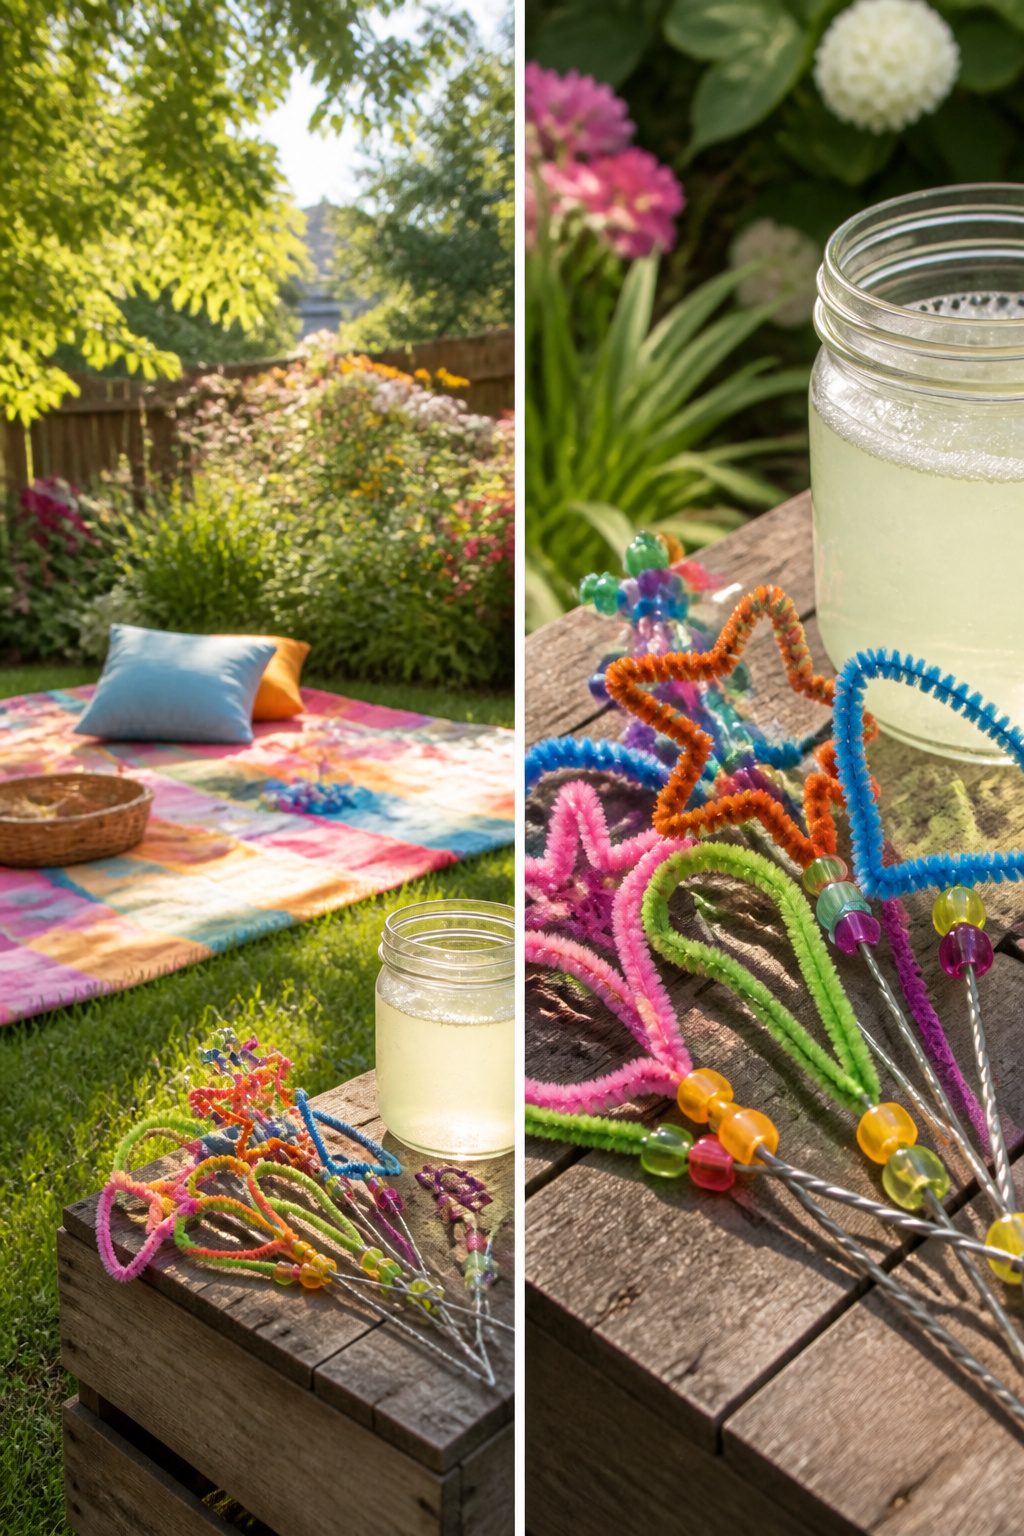
Wire hangers or pipe cleaners bend easily into hearts, stars, or simple loops with a handle, and a batch takes about ten minutes once you find the rhythm. The bubble solution matters more than the wand shape.
Six cups water, one cup dish soap, and a quarter cup glycerin is the ratio that holds up; the glycerin slows evaporation so the film stays intact long enough to float.
Corn syrup works in a pinch, but glycerin gives noticeably stronger bubbles that don’t pop at the first breeze. I mix it the night before if I remember, which lets everything settle and seems to improve the stretch.
A funnel and a recycled bottle with a tight cap keep the kitchen from becoming a sticky floor hazard, and the whole setup costs under five dollars if you already own dish soap.
31. Colorful Jellyfish Craft for Kids
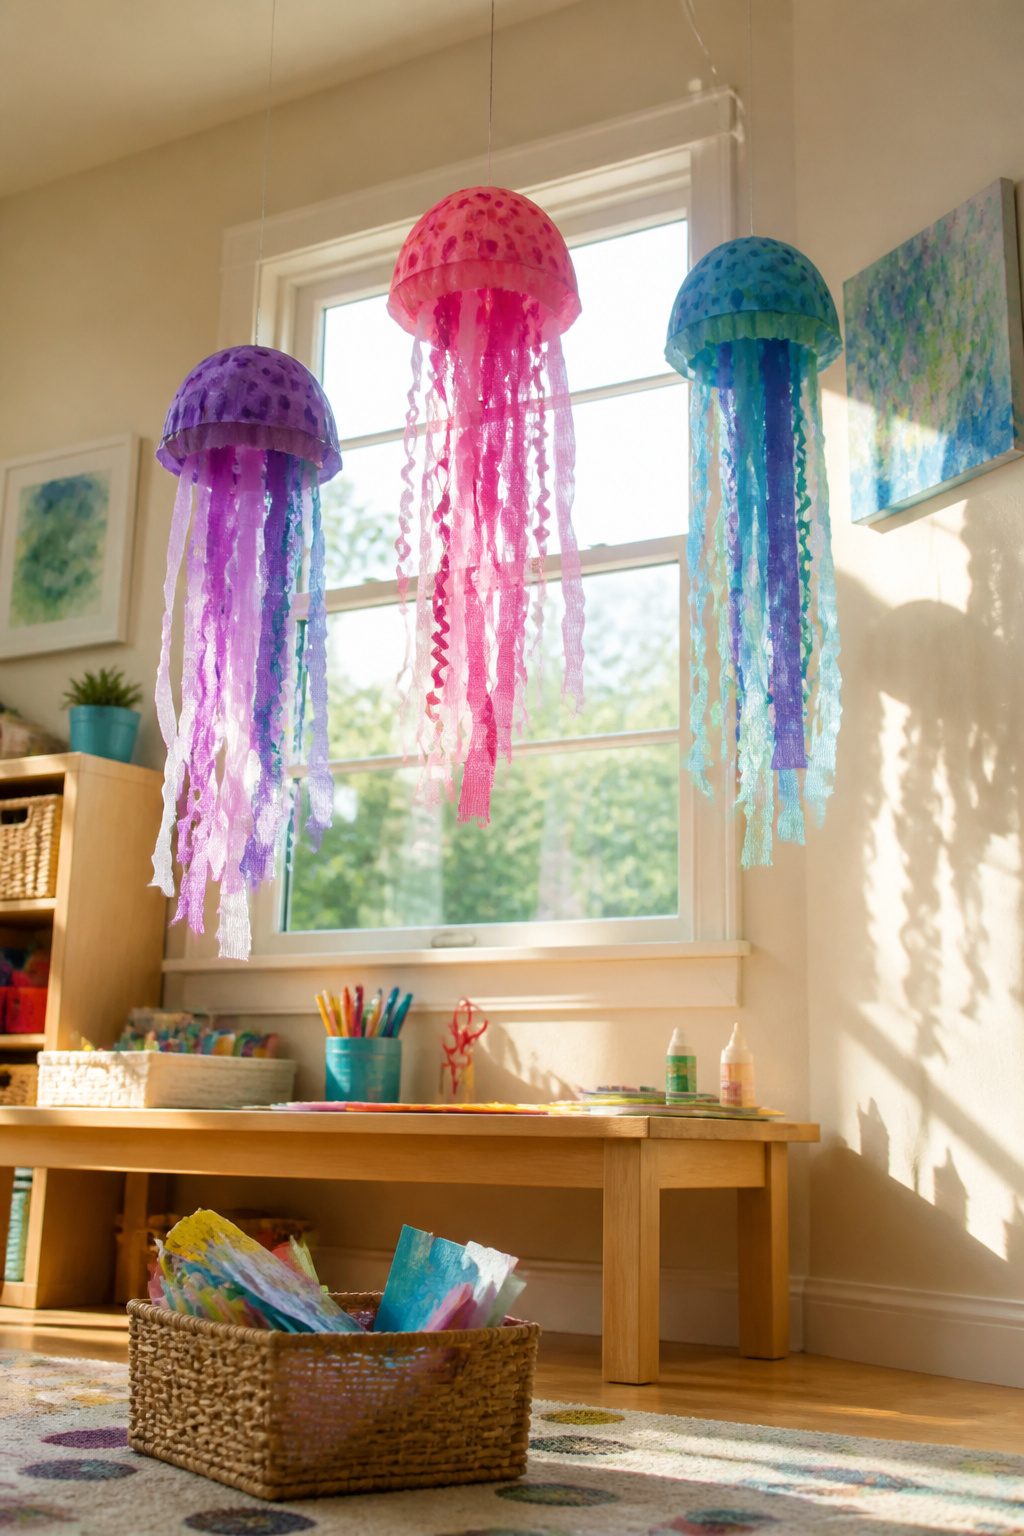
Paper bowls take acrylic paint surprisingly well, and the curved shape already suggests a jellyfish dome once you flip it over.
I paint the outside in two or three bright colors, letting them streak and overlap rather than aiming for solid coverage; the unevenness looks like water movement once it hangs.
Crepe paper strips about an inch wide and twice the length of the bowl drape best; ribbon works too, but it catches air and spins instead of drifting.
I attach eight to twelve tentacles inside the rim with a glue gun, spacing them unevenly so the thing tilts slightly when it moves.
String tied through a hole punched at the center of the bowl bottom gives you the hanging point, and a second piece knotted off-center makes it sway.
Googly eyes glued to the painted surface read clearly from below, though a marker-drawn sleeping face changes the whole mood.
Three or four of these at different heights turn a porch corner into something that actually moves in a breeze, not just sits there.
32. Paper Plate Ice Cream Craft
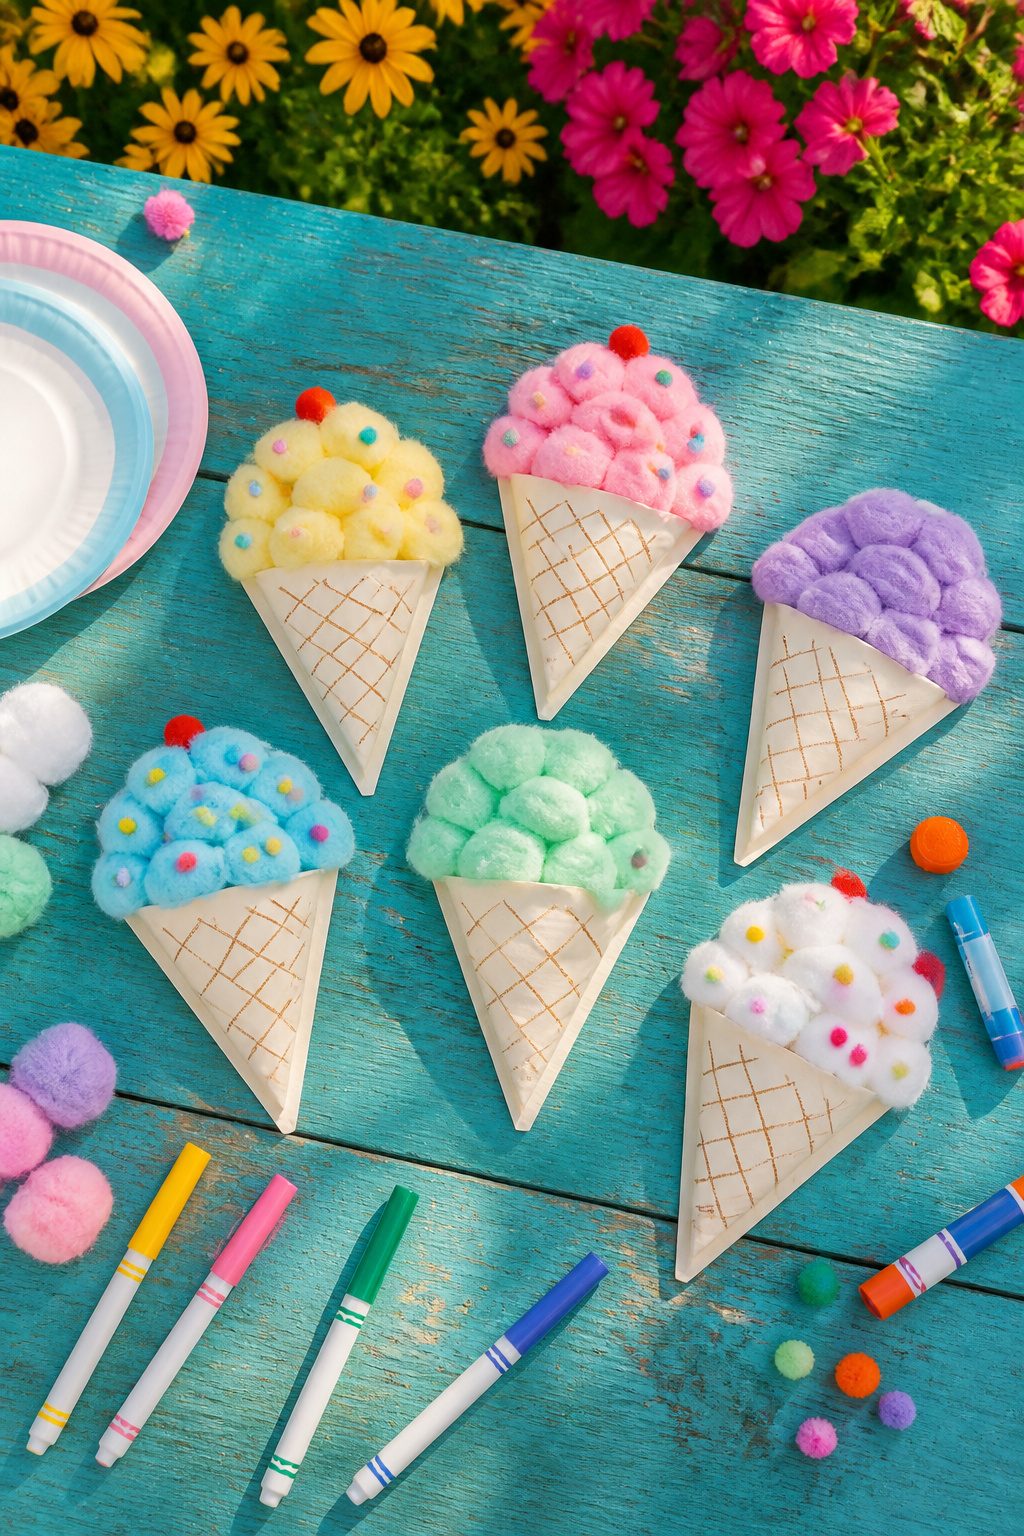
A paper plate folds into a cone faster than it has any right to. Cut from the rim to the center, overlap the edges until the point looks right, and tape or staple it underneath so the seam sits flat.
The scoops are cotton balls or pom-poms, glued in a stack with tacky glue or a low-temp gun.
Painting the plate first with stripes or waffle patterns makes the cone read as something other than folded paper, and a preschooler can manage the whole thing with a brush wider than their grip.
The pom-poms hold paint too if you want colored "flavors," though the fuzz drinks it up and needs longer to dry than you’d guess. My own batch stayed damp overnight and smeared when I checked too early.
Set the finished cones on a windowsill for a day; the summer light does more for them than any craft-room lamp.
33. Painted Rock Fish Craft for Kids
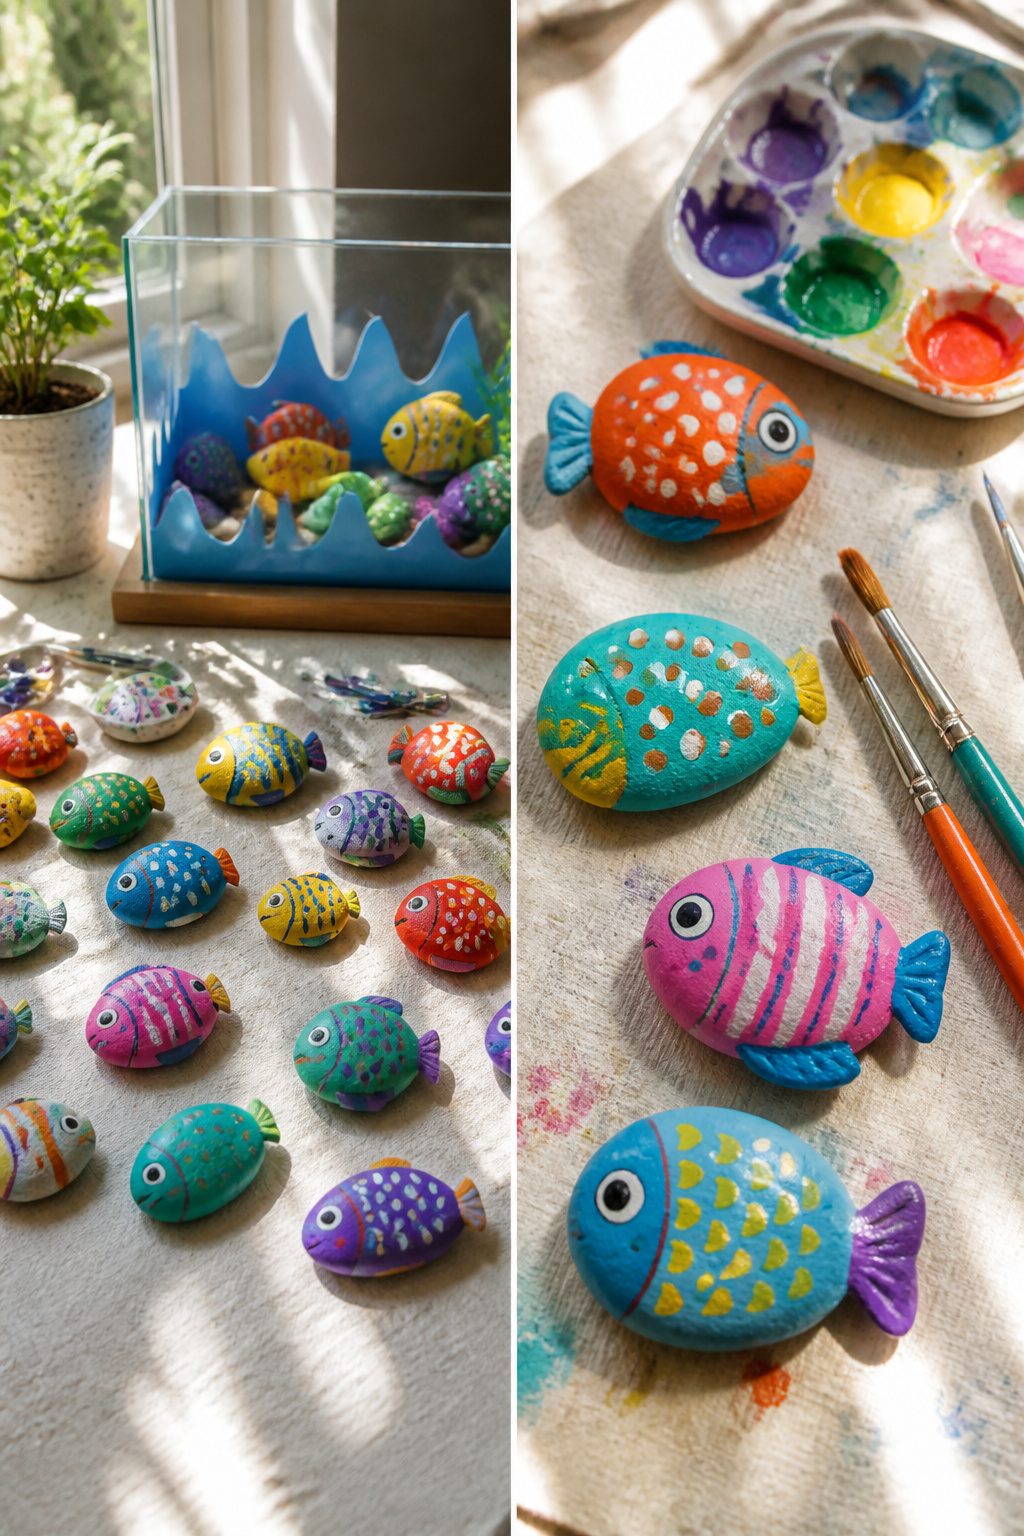
Flat rocks from a riverbed or a garden-supply bag make the best fish bodies, because a smooth face takes acrylic paint evenly and the weight sits still on a shelf.
Acrylic paint covers dark stones in two coats, which matters when your kid picks up a near-black piece and still wants it orange.
I paint the base color, let it dry while we cut fins from cardstock or felt, then glue the fins to the back with tacky glue so they stick out like a tail and dorsal fin.
A shoebox lined with blue construction paper becomes the aquarium, and the rocks sit inside with a little wadded tissue paper for seaweed.
The whole thing takes one afternoon, costs maybe the price of a dollar-store paint set, and survives the walk from the kitchen table to a bedroom shelf without breaking.
34. DIY Paper Spinner
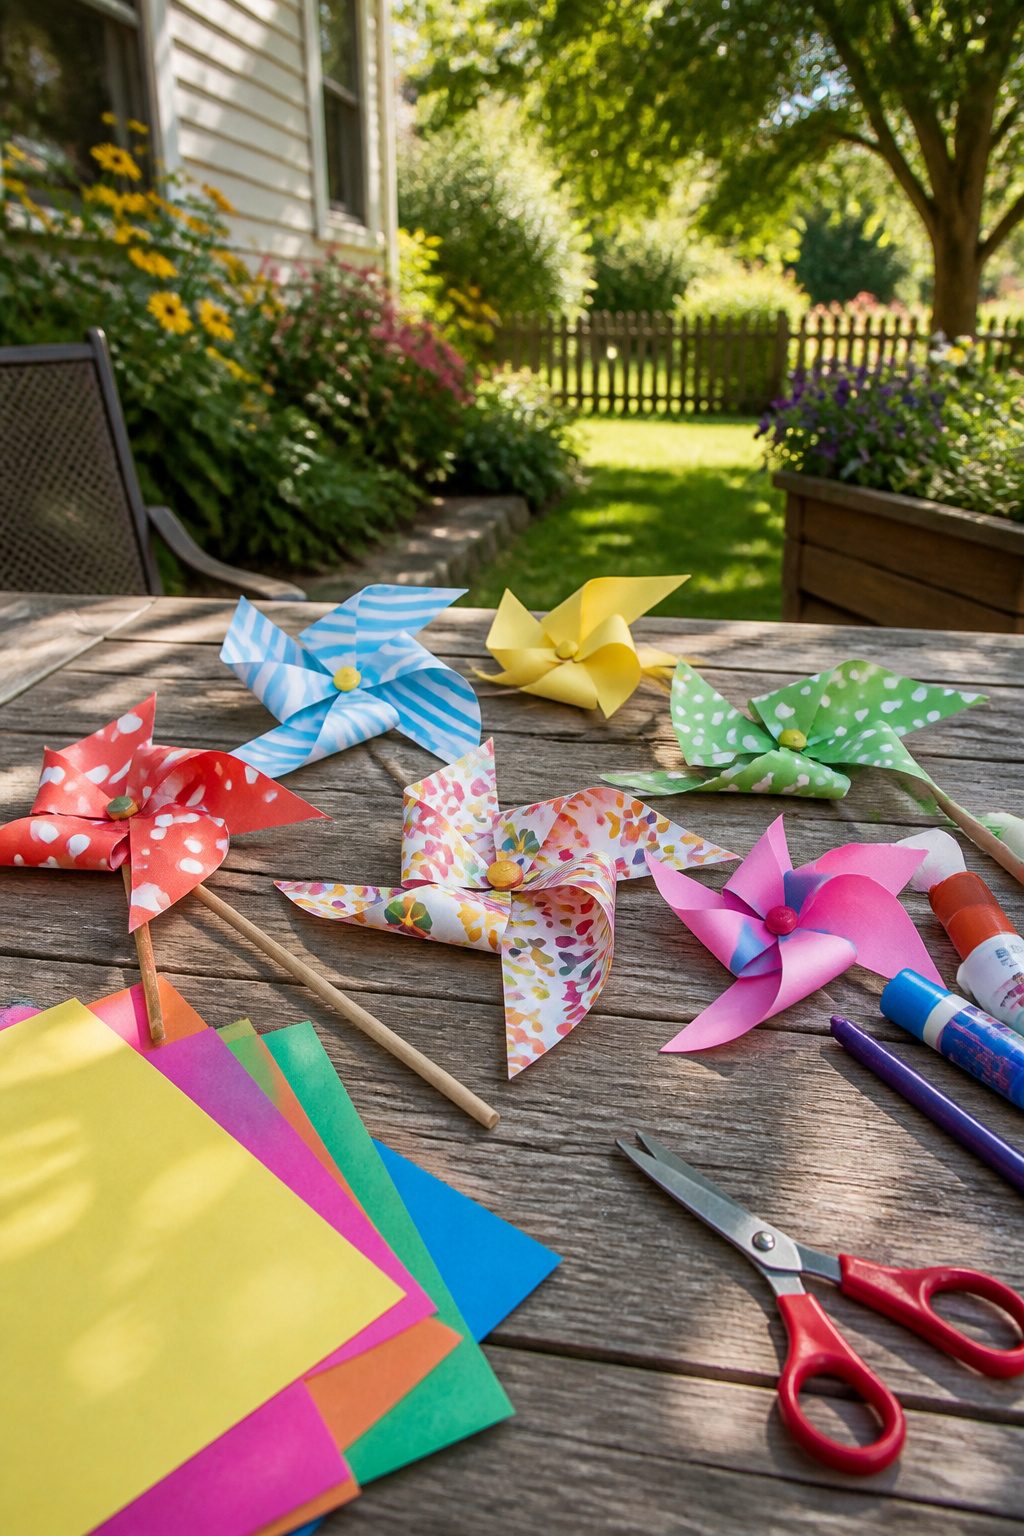
A paper spinner is one of those summer craft ideas that looks too simple to work until you drop one and watch it helicopter to the ground.
The whole toy comes from a single sheet folded into an accordion, then sliced partway down the center so the two halves twist against each other as they fall.
The accordion fold matters more than the shape you cut at the ends. Each pleat needs to be the same width, about a finger’s width, pressed sharp so the paper holds its spring.
Once folded, you cut from the open edge toward the center fold, stopping well short of the middle so the two strips stay joined at the spine.
Open it, give the two halves a slight twist in opposite directions, and drop it from shoulder height.
Lightweight paper spins longer than cardstock, which seems backwards until you think about what actually happens. The spinner needs air to push against the pleats and keep it rotating; heavier paper drops fast and barely turns.
Printer paper or even newsprint works better than anything from the scrapbook aisle. The first one I tried with cardstock fell like a stone.
The second, made from a flyer that came in the mail, spun slowly enough that my nephew could catch it on the way down.
35. Floating Popsicle Stick Boat Craft for Kids
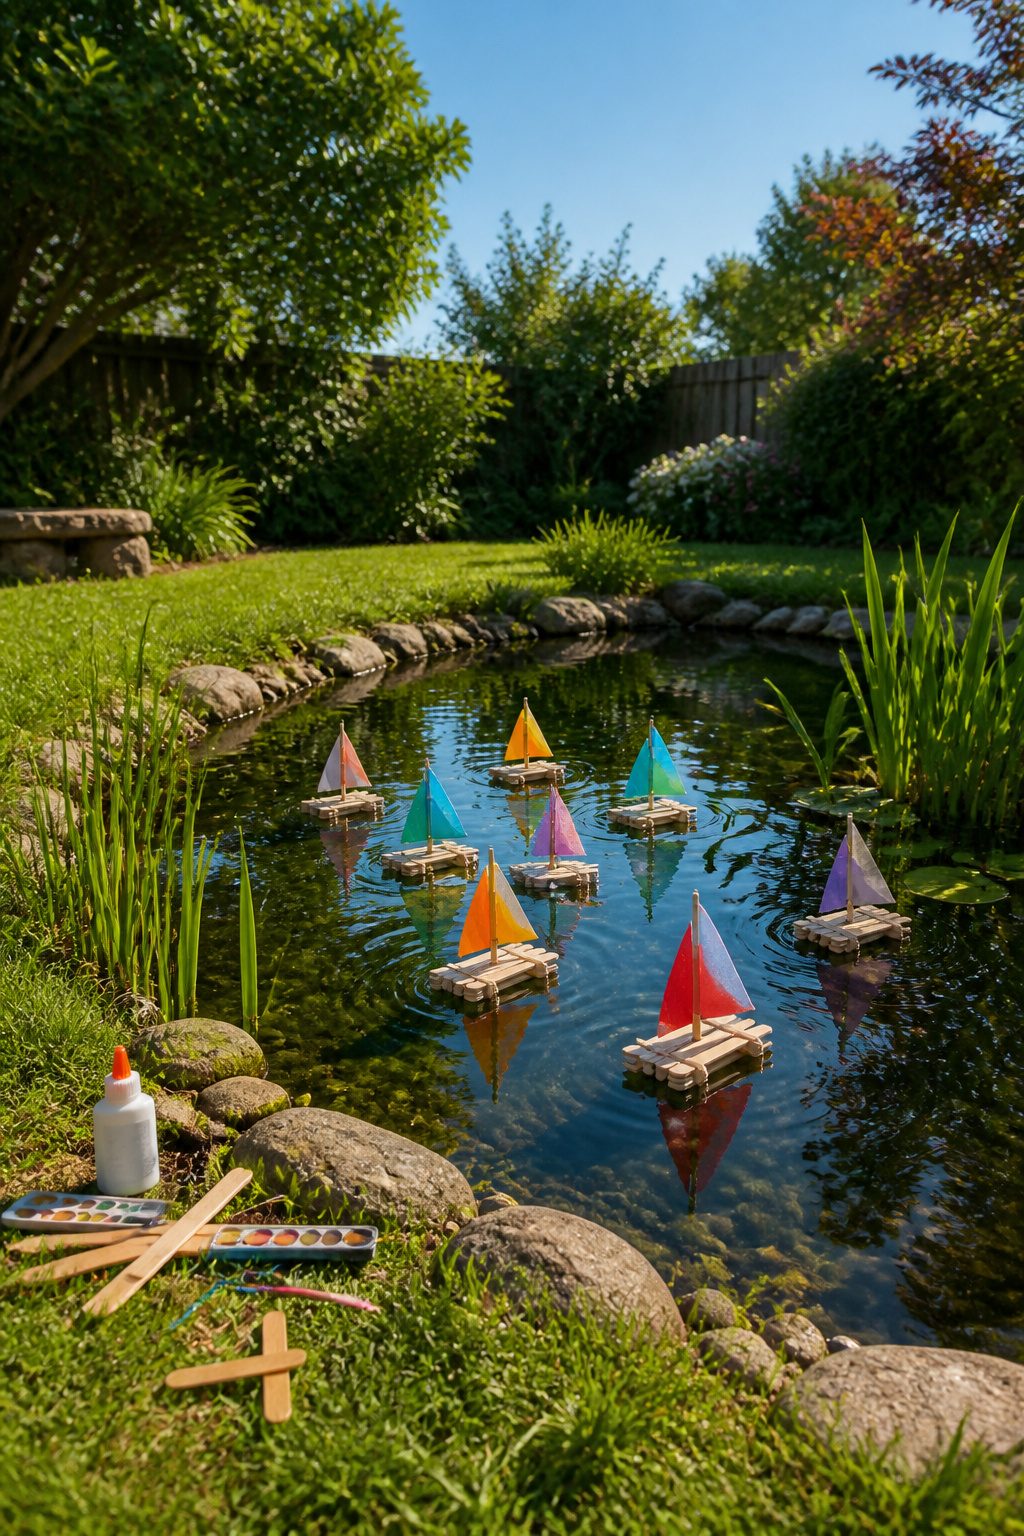
A flat boat shape comes together faster than you’d expect. Lay popsicle sticks side by side until you have a deck about four inches long, then glue two more sticks across the ends to hold them together.
The crosspieces go on top, not underneath, or the boat sits too low in the water and takes on a wave from the bathtub drain.
The mast is just a toothpick, and the sail is a triangle of paper punched through at two points so it stays put.
A thin coat of glue or Mod Podge over the whole hull buys you more than one afternoon of sailing. Without it, the sticks soften after the first bath and the boat comes apart mid-voyage.
My nephew learned this the hard way with his first build; the second one, sealed properly, survived a full week of sink-and-rescue missions before the sail finally wilted.
Mod Podge dries clear and leaves a slight sheen that looks like real boat varnish. Regular white glue works too, though it clouds a little and needs a second coat.
Either way, let it cure overnight before launching, or the seal turns gummy in warm bathwater.
36. Coffee Filter Butterflies
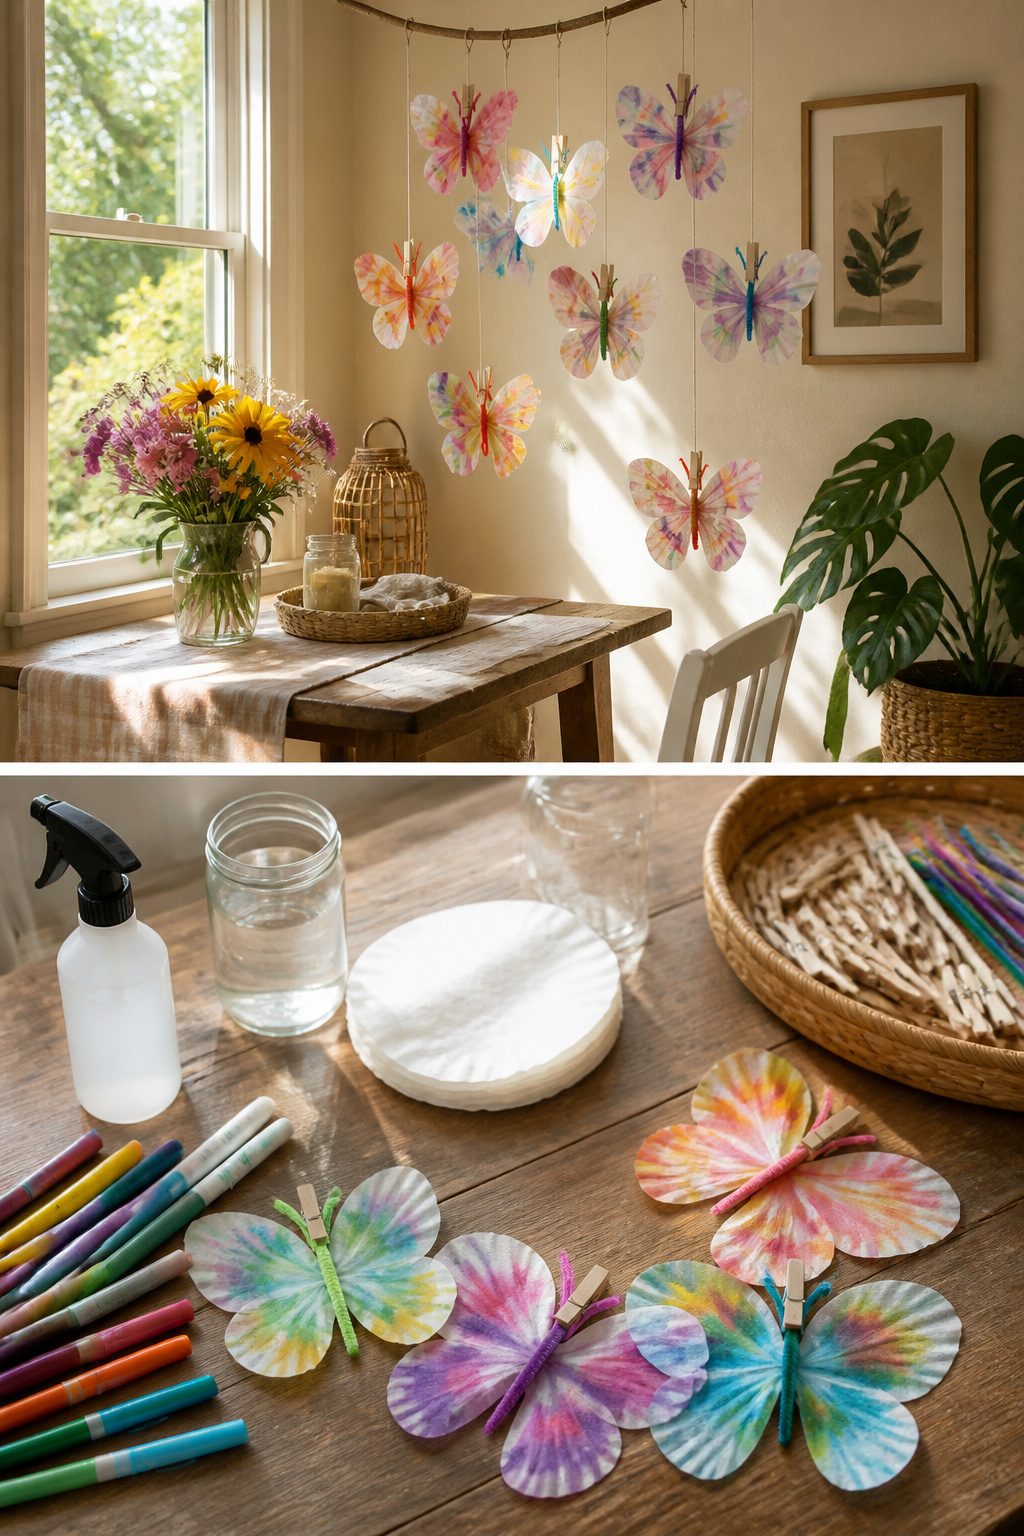
Coffee filters take marker ink in a way that feels almost too easy for the result you get.
Lay a few flat, let the kids scribble patches of color, then mist the whole thing with a spray bottle until the ink starts to bleed.
The water does the blending for you, so the finished sheet looks like watercolor without the setup or the mess.
Once the filter dries, which takes maybe twenty minutes in sun, pinch it through the middle and clip a wooden clothespin around the fold. That pinch becomes the butterfly body, and the two wings fan out on either side.
A half-twist of pipe cleaner threaded through the clothespin spring makes antennae that hold their shape and give the thing its personality.
The whole project runs on supplies most households already have, and a single filter makes two wings so nothing gets wasted.
My only note from trying this with a group: the markers need to be the washable kind, not permanent, or the water step does nothing and the kids end up frustrated.
37. Plastic Spoon Bug Craft
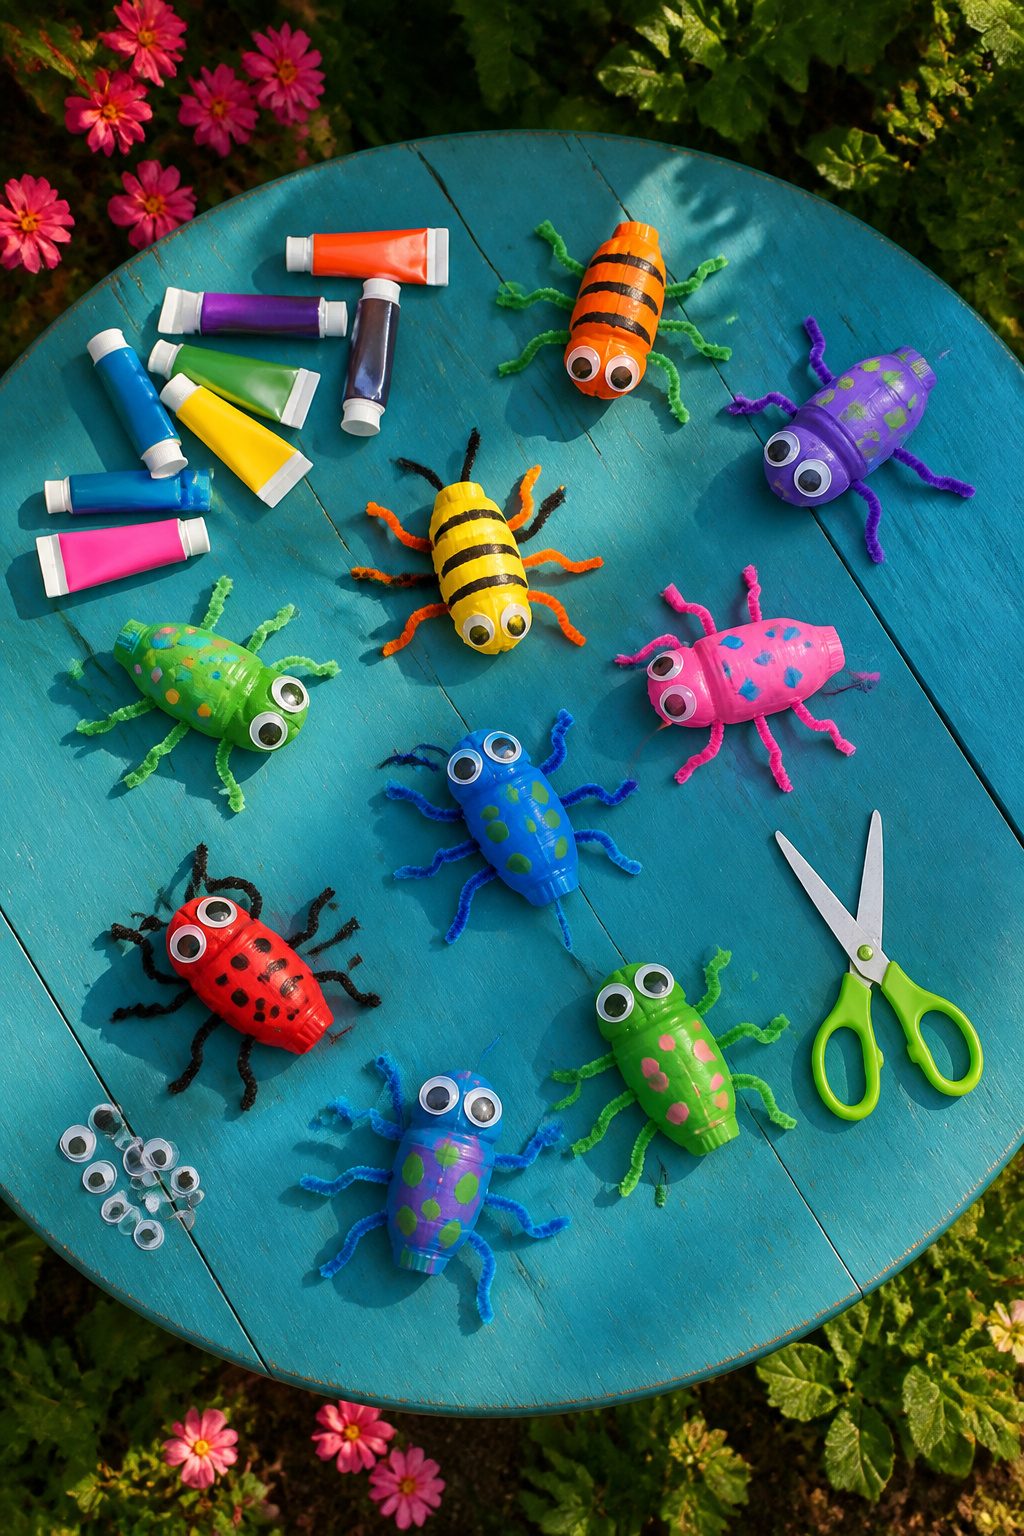
A plastic spoon from the dollar store becomes the whole body of a bug, and that economy is what makes this project worth doing with a group.
The bowl of the spoon is painted in stripes or solid color for the thorax, then the handle gets bent or left straight to become antennae or a stinger, depending on whether your kid is making a butterfly or a wasp.
Pipe cleaners thread through holes punched near the head for legs, and googly eyes glued to the bowl complete the face.
I have learned to punch the leg holes before painting; the drill or awl cracks the plastic less when the spoon is still stiff, and the paint covers the rough edges.
Two pipe cleaners cut in half give you four legs, which is enough for most insects and keeps the underside from turning into a tangle.
Tacky glue holds the eyes better than school glue if the spoons will live outside, though even tacky glue softens in real heat.
The whole build takes under twenty minutes per bug once the paint is dry, and a batch of two dozen spoons costs about three dollars.
38. Beaded Pipe Cleaner Dragonflies
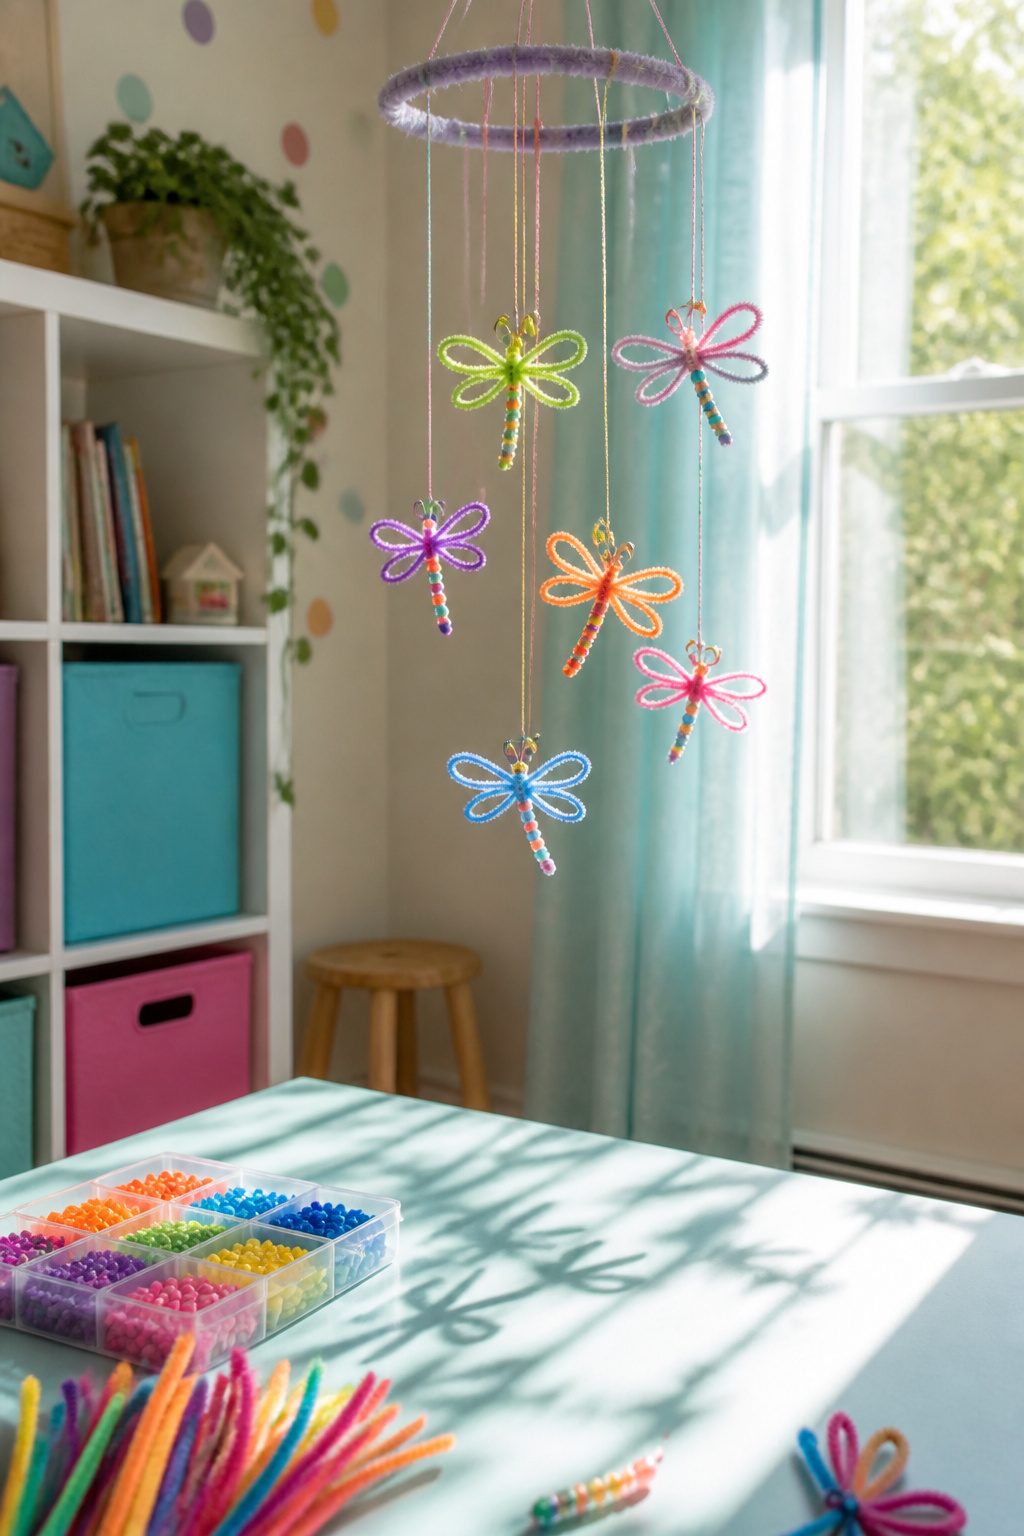
A single pipe cleaner folded in half makes the dragonfly body, with beads threaded onto both legs of the fold so they stack and leave a small loop at the top for hanging.
Pony beads in translucent greens, blues, and ambers catch light the way real dragonfly abdomens do; opaque beads read more like toy insects.
The wings take a second pipe cleaner bent into two equal loops, then twisted once around the body just below the bead line to lock them in place.
Small hands manage the threading fine, though the wing twist needs a tighter grip than most kids give it on the first try.
The whole thing sits in a ten-minute window once the bead colors are picked out, and a bag of mixed pony beads covers dozens of dragonflies for under four dollars.
39. Yarn Wrapped Octopus Craft
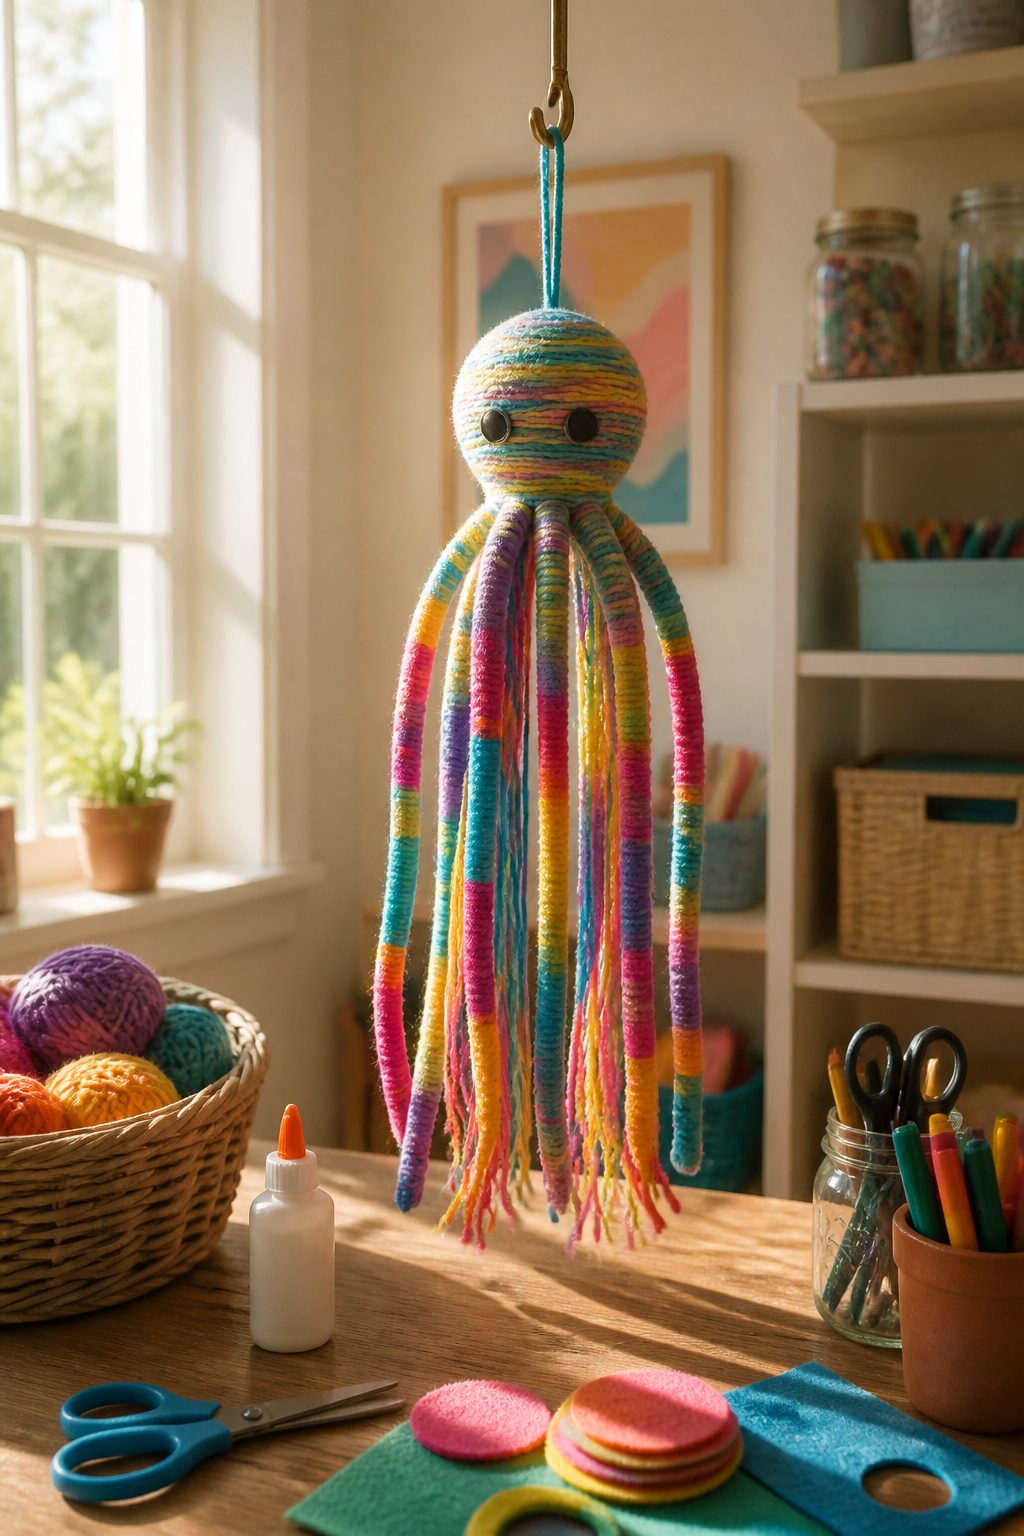
A cardboard tube from a paper towel roll makes the octopus body, or a small balloon if you want a rounder head.
Eight legs is the traditional count, but kids rarely check, so a six-legged version still looks right and saves twenty minutes of wrapping time.
Yarn gets wound around the form until the cardboard disappears, then tied off and trimmed to whatever length hangs well for your space.
The legs are just long yarn strands knotted through the body and left to dangle.
Felt circles cut with ordinary scissors and glued in rows turn plain yarn into suckers, which is the detail that makes kids carry the finished piece around instead of leaving it on the table.
Hot glue sets fast but a glue gun needs supervision; tacky glue works if you have the afternoon to let it dry.
I have seen these hung from ceiling hooks with fishing line so the legs spin in a window fan’s breeze, which turns a static craft into something that actually moves.
40. DIY Glass Mason Jar Aquarium
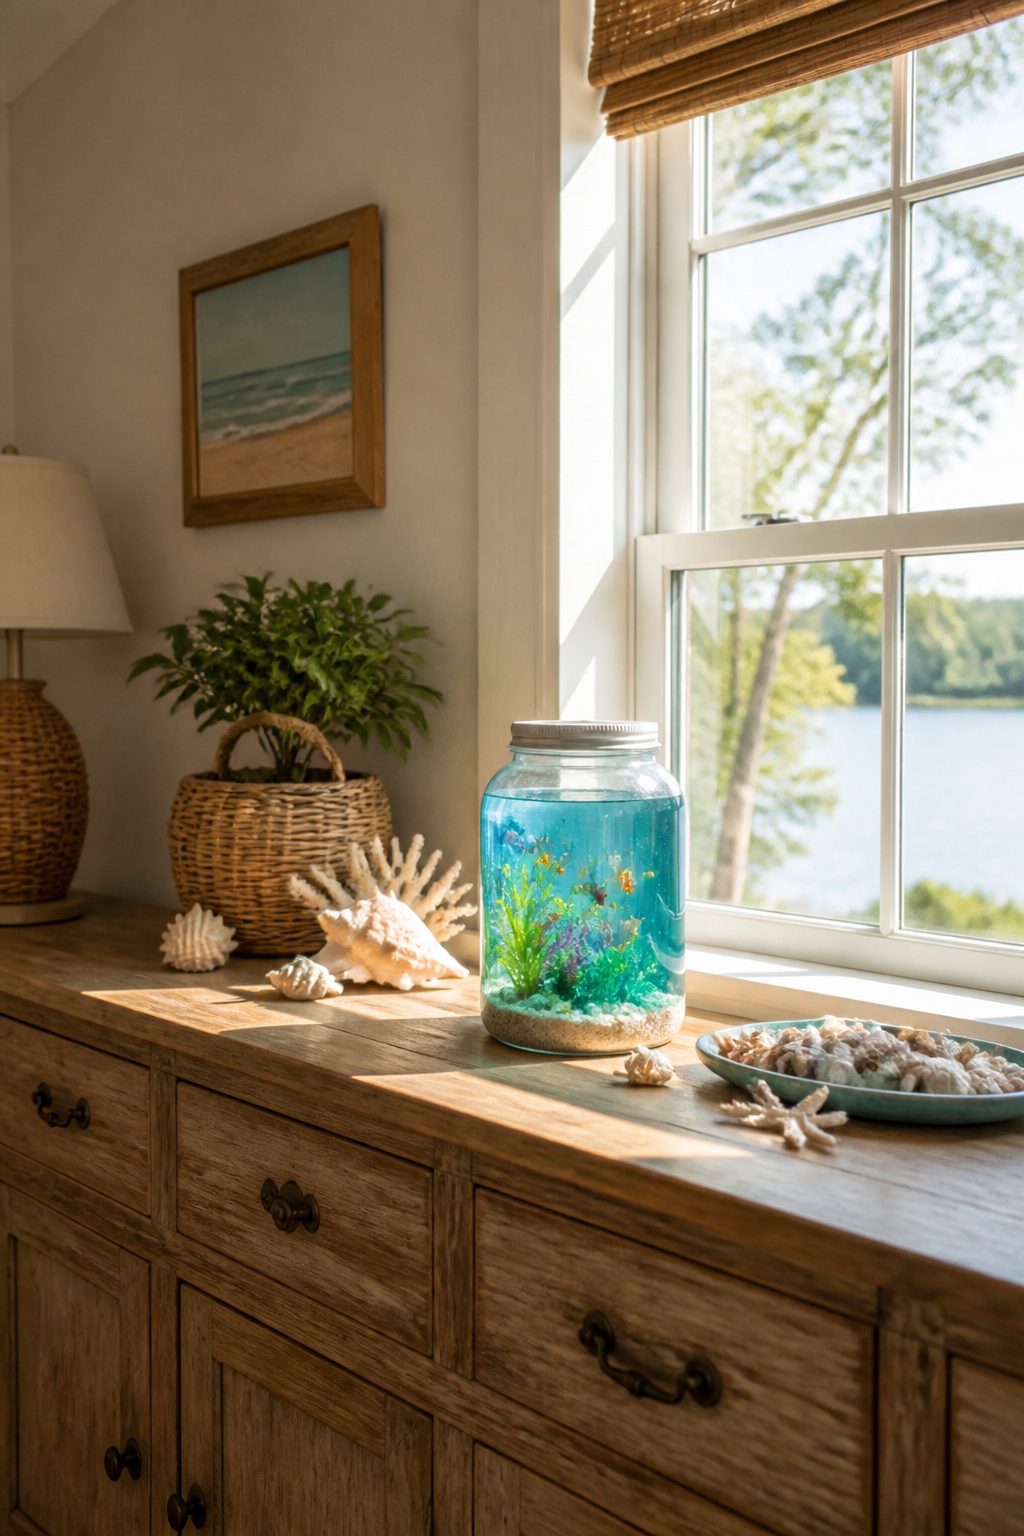
A mason jar aquarium works best with about an inch of rinsed play sand pressed flat at the bottom. That layer keeps shells from sliding around and gives the whole thing a beach-floor look.
I add shells next, tilting some against the glass so they stay visible from the outside, then tuck in plastic plants with weighted bases between them so they do not float loose once the water goes in.
Tap water with one drop of blue food coloring turns the right pale aqua; two drops and you are in swimming-pool territory, which is not the look. Plastic fish or small aquarium figurines finish the scene.
They are cheap, they never need feeding, and a six-year-old can rearrange them without breaking anything.
The lid matters more than you might think. It stops evaporation, which means the water line stays put and you are not adding a splash every three days to keep the jar from looking half empty.
Screw it tight, set the jar where it gets light but not direct sun, and the thing lasts the whole summer without turning green.
Frequently Asked Questions
What are some easy summer crafts for kids?
Sea glass bottles, salt dough starfish, and pressed flower magnets made from air-dry clay all work well for children with adult supervision.
The starfish craft uses basic dough that bakes at a low 200°F for about two hours, and the clay magnets fit an afternoon with supplies under ten dollars.
For outdoor projects, quick-set concrete stepping stones let kids press in shells or glass shards and unmold within 24 hours.
What materials do I need for summer crafts?
The projects in this article rely on glass bottles, mason jars, seashells, driftwood, air-dry clay, polymer clay, concrete mix, resin, wax paper or contact paper, Mod Podge, acrylic and chalk paints, sisal rope, and various adhesives.
Many items come from yard collections or hardware stores; a silicone coaster mold for resin work runs about ten dollars and yields four pieces.
How can I keep kids entertained during summer?
Hands-on projects that produce something usable or decorative tend to hold attention longer than open-ended activities. Scratch-off travel maps let kids track trips by scratching destinations with a coin, and decoupaged seashells or painted citrus trays give quick visual payoff.
Spreading resin or concrete work across two days with curing time in between builds anticipation without demanding constant focus.