Pumpkin craft ideas span from a forty-five-minute paper plate project to a three-day concrete cure, and the right choice depends on whether you need something to survive a single afternoon or come back out of the bin next October.
The trick most tutorials skip is the condition that changes everything: embroidery hoops need mid-weight cotton duck, not quilting cotton, or the dome collapses within days.
1. Embroidery Hoop Pumpkins
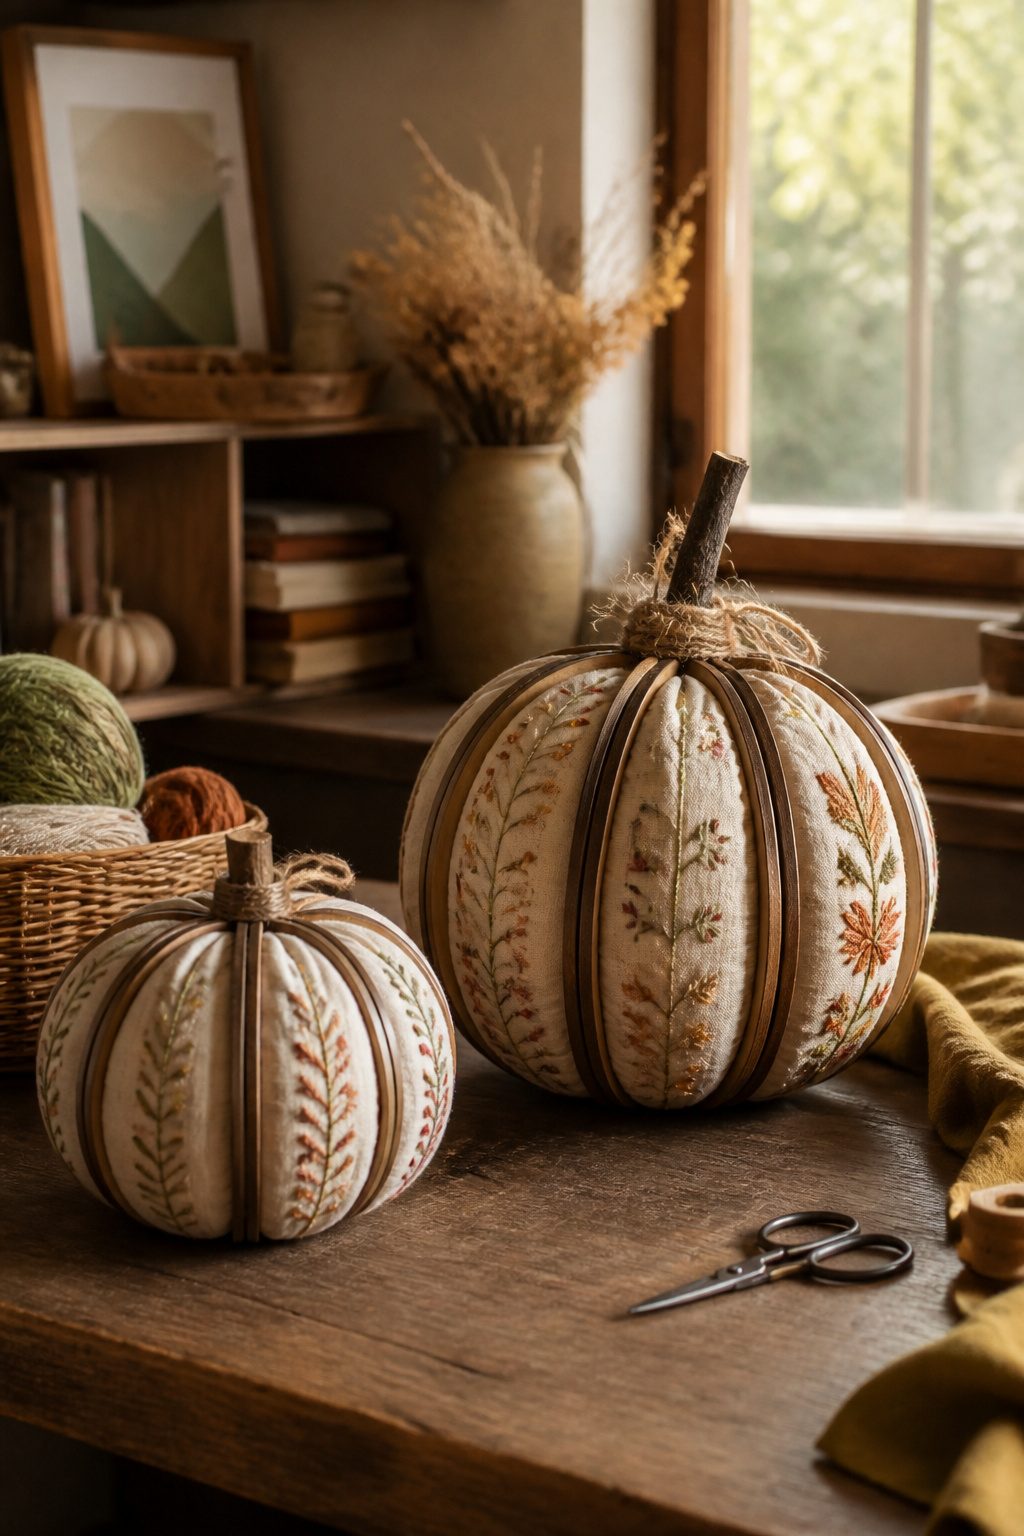
Embroidery hoops turn into pumpkins faster than you expect, and the finished piece weighs almost nothing. A single pumpkin needs two hoops, one inside the other, lashed together to make the ribbed sphere.
Fabric gets stretched across the back and gathered at the front, where a stick or a cork becomes the stem.
The fabric matters more than the hoops. A mid-weight cotton duck or a heavy linen holds the dome shape without sagging.
I tried a thin quilting cotton once, the kind printed with tiny leaves, and the whole front collapsed inward after two days. The weave was too loose to push back against the tension.
Quilting cotton needs a layer of felt or interfacing behind it if that is what you have on hand.
Staining the hoops with coffee or walnut ink before assembly saves a step later; raw birch reads as craft-fair, which is fine if that is your look, but a darker tone blends better with real fall decor.
The whole project takes under an hour once the stain dries, and the materials run about eight to twelve dollars per pumpkin if you buy hoops in a set.
2. DIY Pumpkin Vase
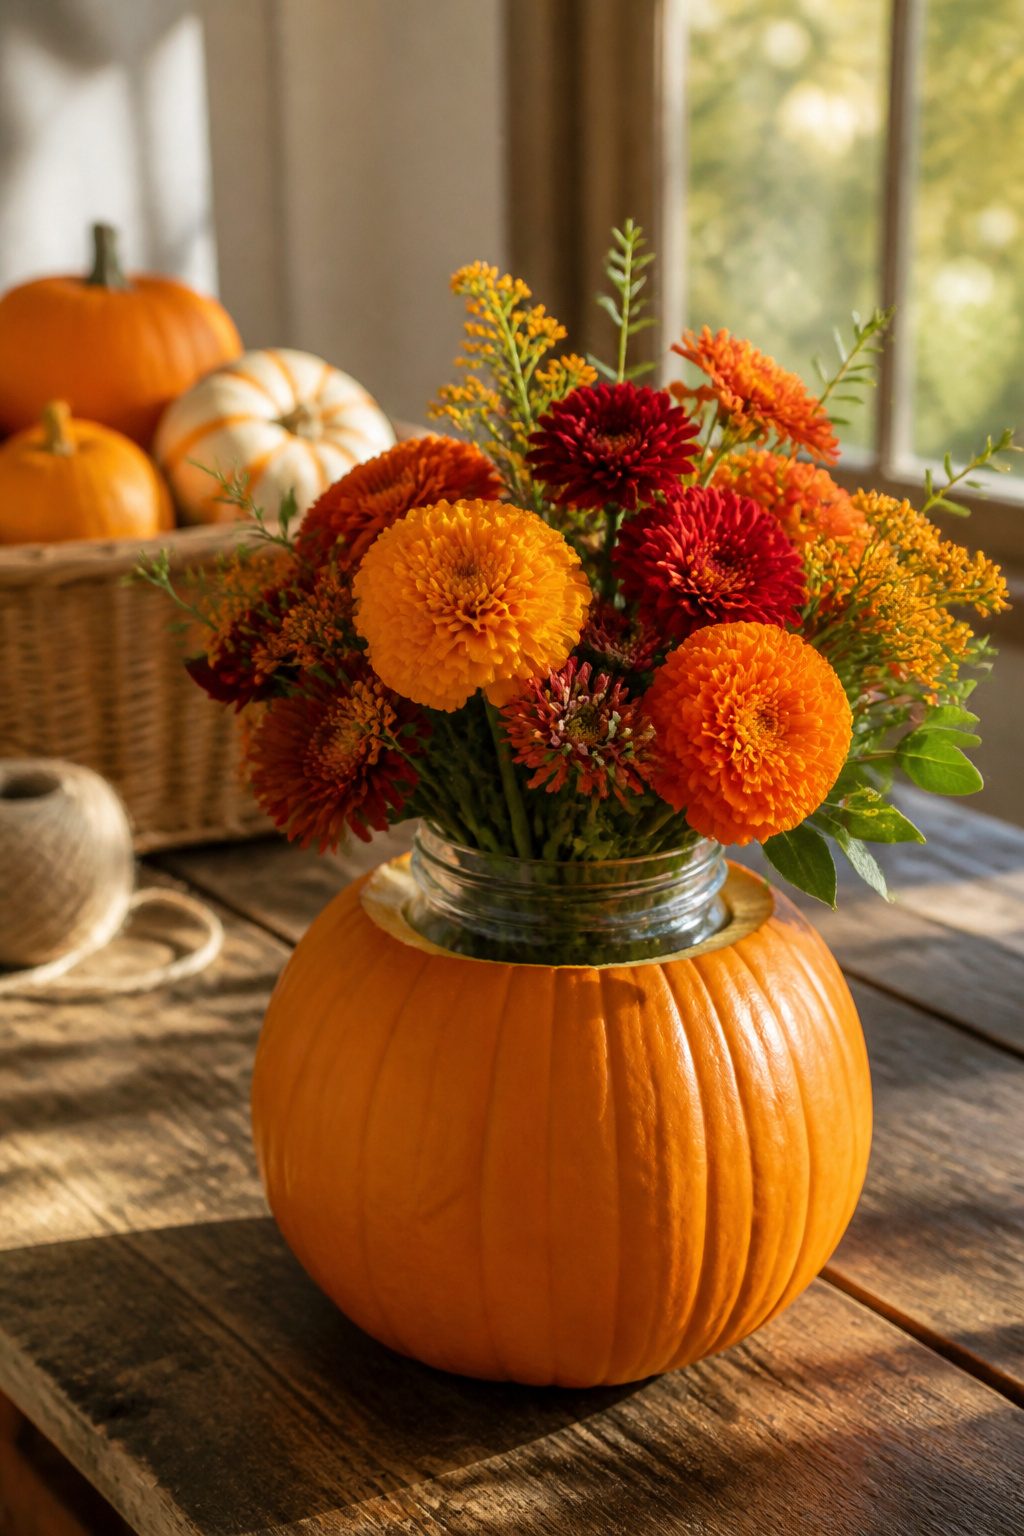
A pumpkin vase only works if water stays where it belongs.
The first time I hollowed a real pumpkin and dropped a mason jar straight in, the rim sat too high and the whole thing looked like a glass sticking out of a soup bowl.
Now I measure the jar against the pumpkin shell before cutting, and I shave the inside floor flat so the glass sits low enough that only flowers show above the lip.
A medium pie pumpkin, roughly six to eight inches across, holds a standard grocery-store bouquet without looking crowded. Anything smaller forces stems to angle outward and snap; anything larger swallows the arrangement and looks empty.
Real flowers need that water barrier, no question. I have tried floral foam instead, and the results split hard: mums and dried grasses lasted fine, but roses and dahlias wilted in three days without a water source.
Artificial stems skip the jar entirely, which is the easier play if you want the look for more than a long weekend.
3. Vintage Farmhouse Pumpkin
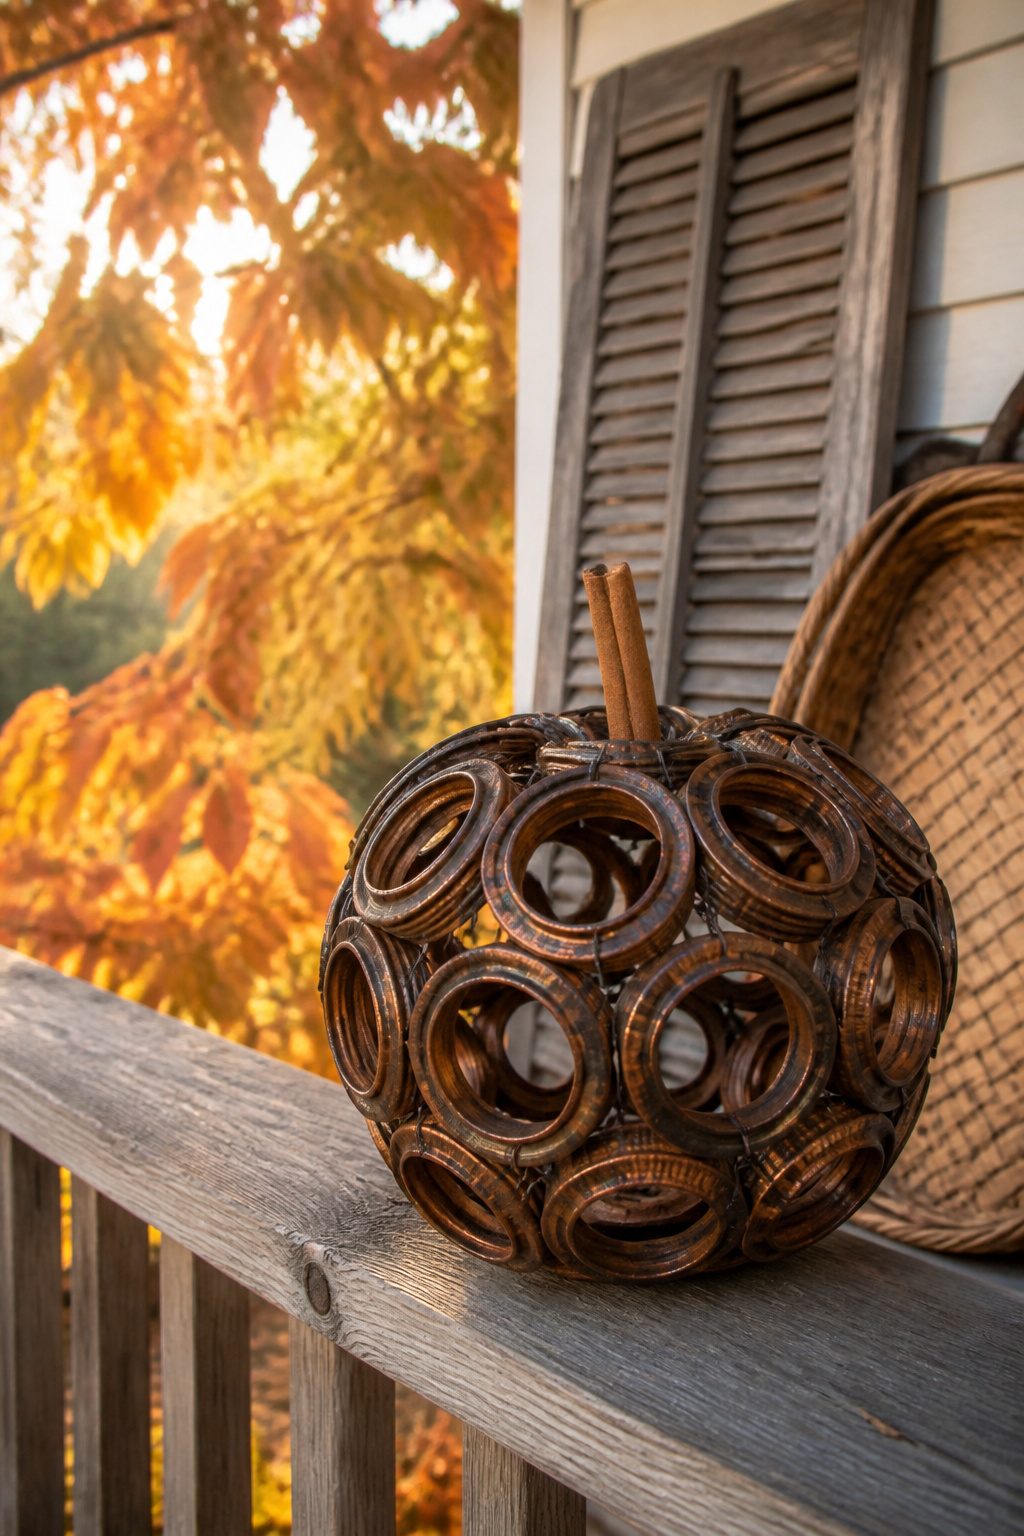
Mason jar lid rings wired into a sphere make the frame for this one, and the ring count matters more than you’d guess.
For a 6-inch pumpkin, plan on about thirty-five rings; fewer than that and the sphere gaps, more and the weight starts to fight you.
I learned the wire gauge lesson the hard way: 20-gauge floral wire sagged within a week, while 16-gauge held its shape through a whole season on the porch.
Spray paint the rings before you start, not after, or you’ll fight drips in every joint.
The finish that read as real rust rather than cartoon orange was a flat spray base in burnt sienna, then a mist of matte black from arm’s length so the color settled uneven.
A cinnamon stick stem, wired through the top ring, finishes the farmhouse look without any extra fuss.
4. Fabric Pumpkins
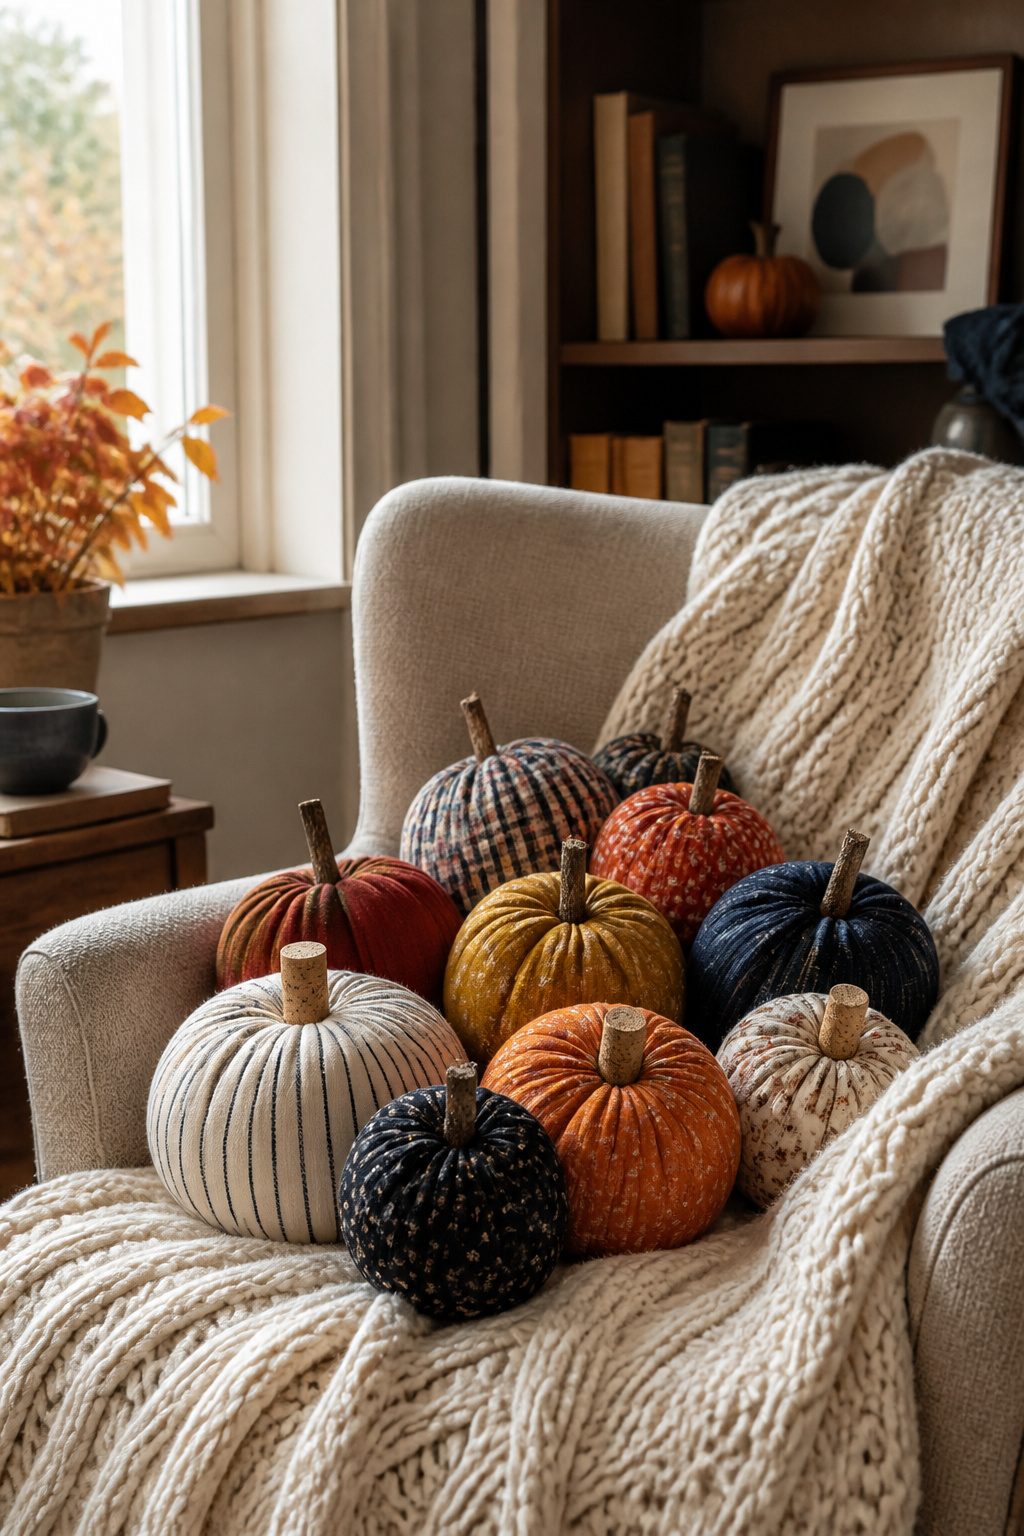
Stuffed fabric pumpkins come in two builds, and the difference matters for how long they keep their shape. Sewn versions, like the velvet pumpkins that use real pumpkin stems, hold up because the seams take the stress.
Gathered no-sew versions, often made with yarn or soft sweater scraps, rely on a running stitch pulled tight at the center; they look charming the first October but tend to slump by the second if the stuffing shifts.
Poly-fil packed tight is the stuffing that survives more than one season. Loose fill settles, and once a pumpkin goes flat on one side, it never recovers.
For fabric weight, quilting cotton and light upholstery ticking stripe work. Heavy velvet drapes well but needs a sharp needle to close neatly.
Stretch knits, including those thrifted sweaters, pucker at the seams unless you stabilize them with a lining layer, which most weekend projects skip.
Drop cloth weight, the same canvas used for ticking stripe pumpkins, hits the middle ground: stiff enough to stand, soft enough to gather without puckering.
Twigs or wine corks finish the look better than fabric stems, and both are free after a walk or a dinner party. The corks pair especially well with sweater pumpkins, where the soft body needs the hard contrast.
5. No-Sew Flannel Pumpkins
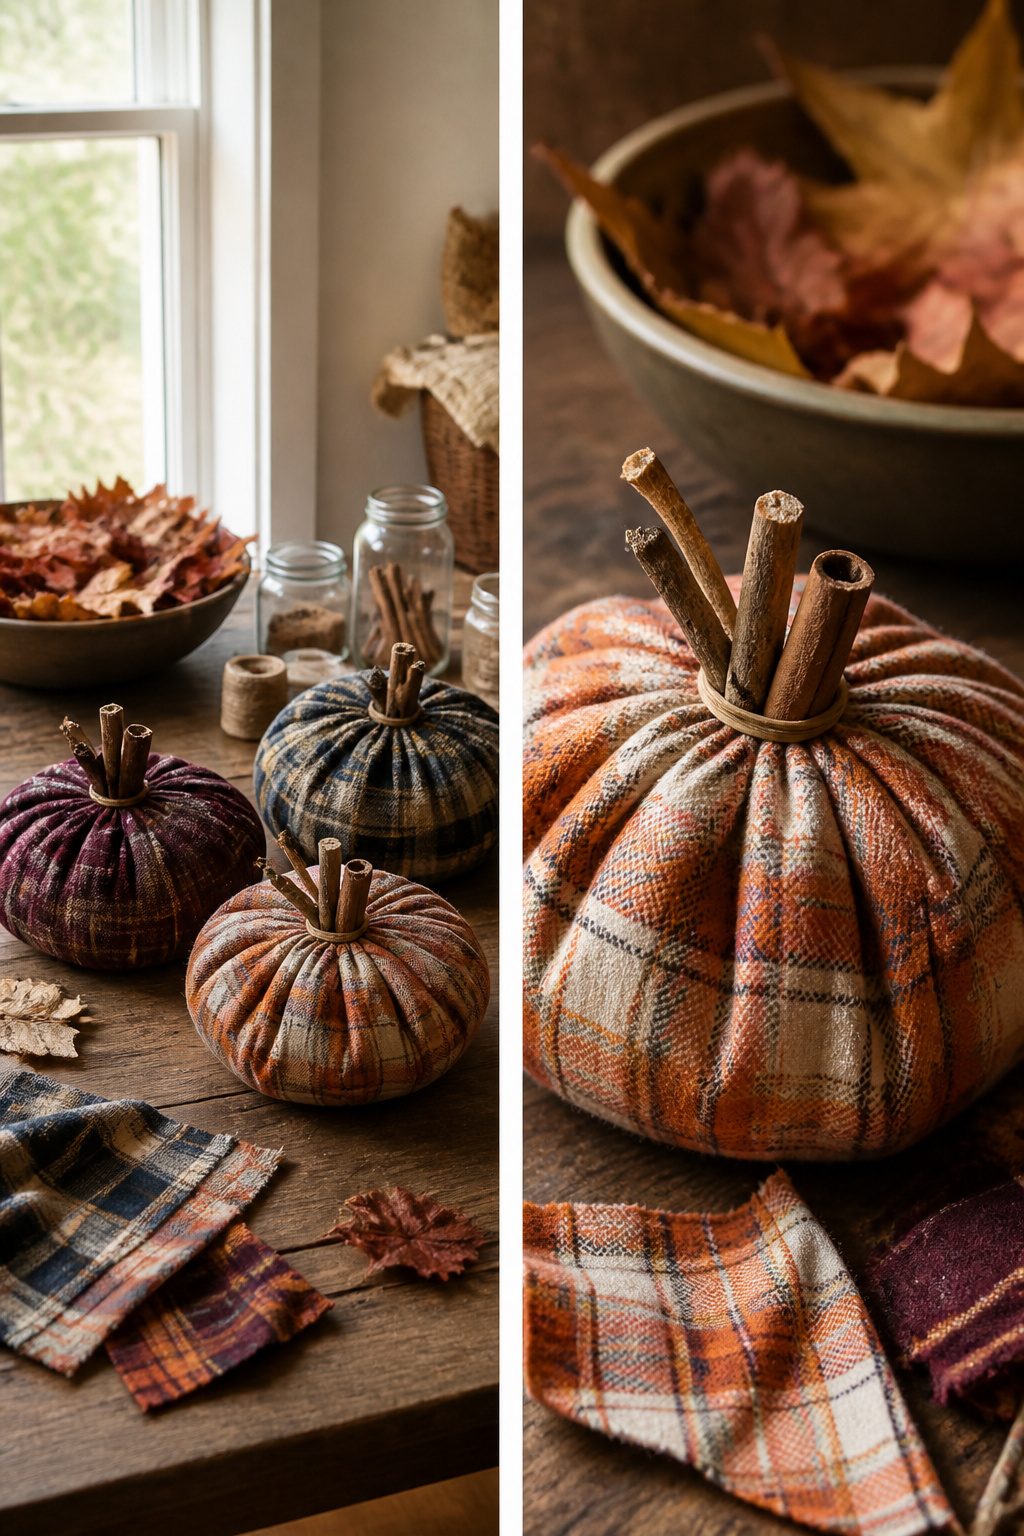
Flannel pumpkins built with rubber bands instead of a needle have become my go-to when someone texts asking for a craft that finishes before Sunday night.
The method is simple: cut a rectangle of flannel, pile polyester stuffing in the center, and gather the fabric at the top with a thick rubber band.
For a softball-sized finished shape, roughly half a yard of flannel leaves enough tail to tuck under or leave rustic.
The rubber band does the structural work, so the stem is just a stick or a cinnamon piece hot-glued over the knot. Hot glue is where this project bites back.
The flannel weave leaves gaps, and glue squeezes through to fingers in ways it never does on smooth surfaces.
I keep a bowl of ice water nearby now, which sounds dramatic until you’ve peeled dried orange fuzz off a fingertip.
These pumpkins flatten slightly where they sit, which I actually prefer to the perfect spheres from sewn versions. The dimple reads handmade, and the flannel nap catches window light in a way felt never manages.
6. Pumpkin Handprint Craft
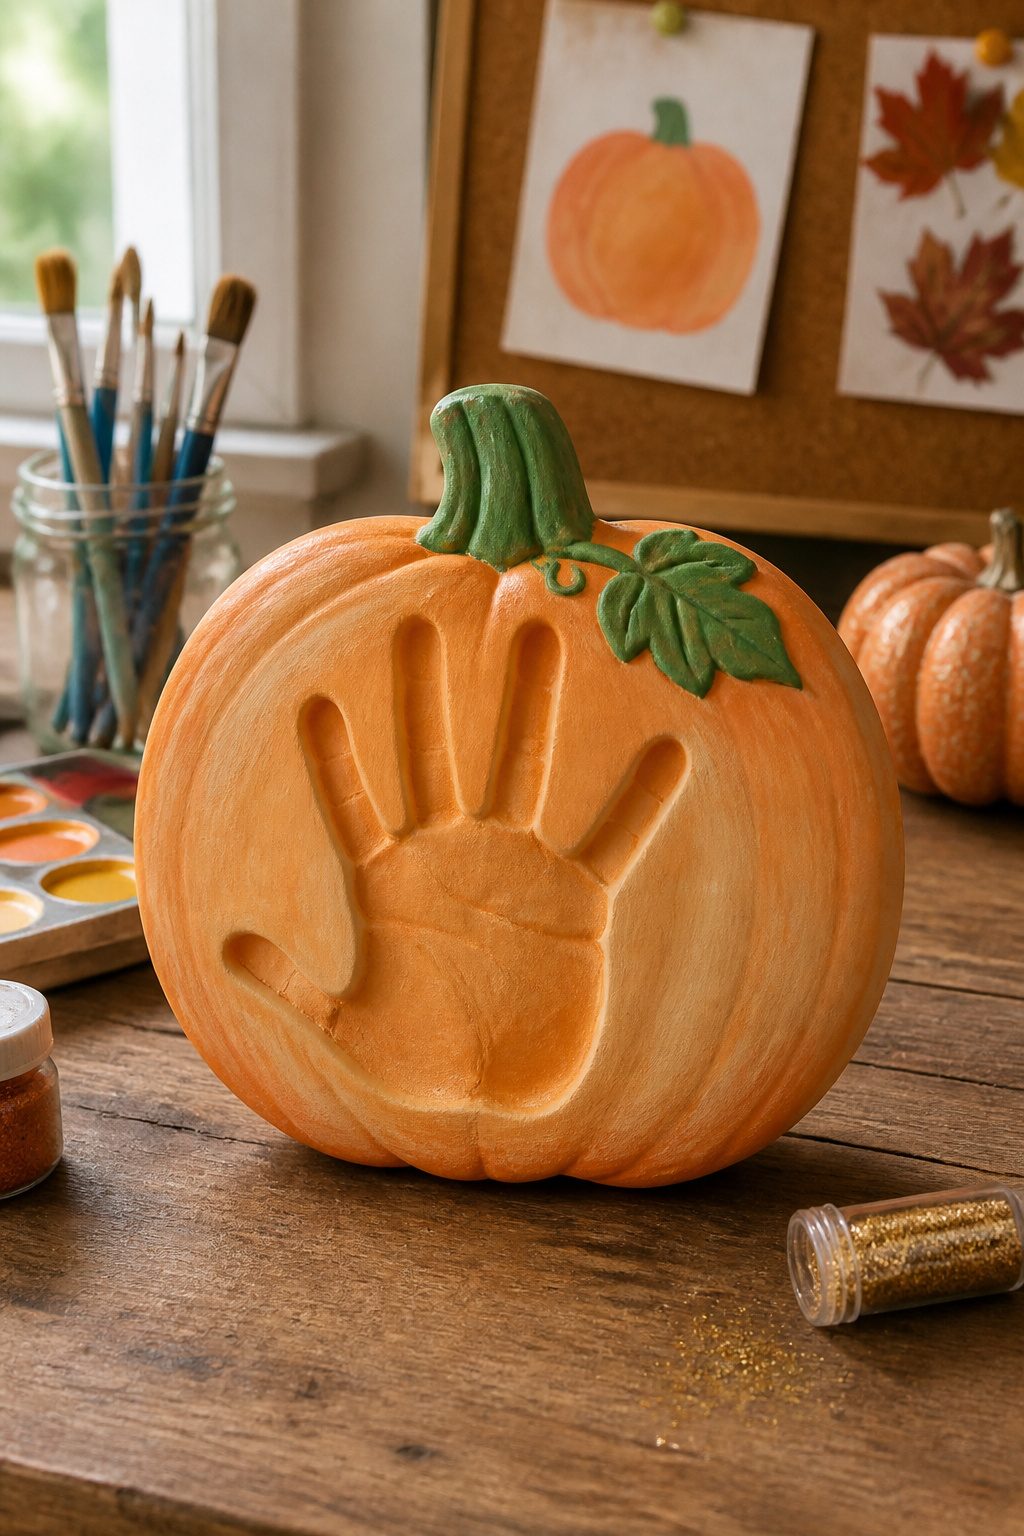
Handprint crafts always sound easier than they are.
The first time I tried this with my niece, the orange paint we used for the pumpkin body washed right out of her corduroy dress, but the green on her palm, meant to be a stem, left a ghost of itself through three cycles.
Tempera for the orange, acrylic for the stem and leaf; that is the split I settled on after that afternoon.
Paper matters too. Construction paper buckled once the paint went on thicker than a wash, and the curl never flattened, not under books, not under a warm iron through cloth.
Card stock held its shape but cost more per sheet than the whole rest of the project. I buy the cheap stuff now and keep the wet work thin.
The one we made in 2021 still hangs in my sister’s hallway. The orange has gone a little peach, and the handprint looks smaller than I remember, which is the whole point of a keepsake.
The acrylic stem stayed true green. The tempera body faded gently, like a real pumpkin left on the porch through November.
7. Toilet Paper Roll Pumpkins
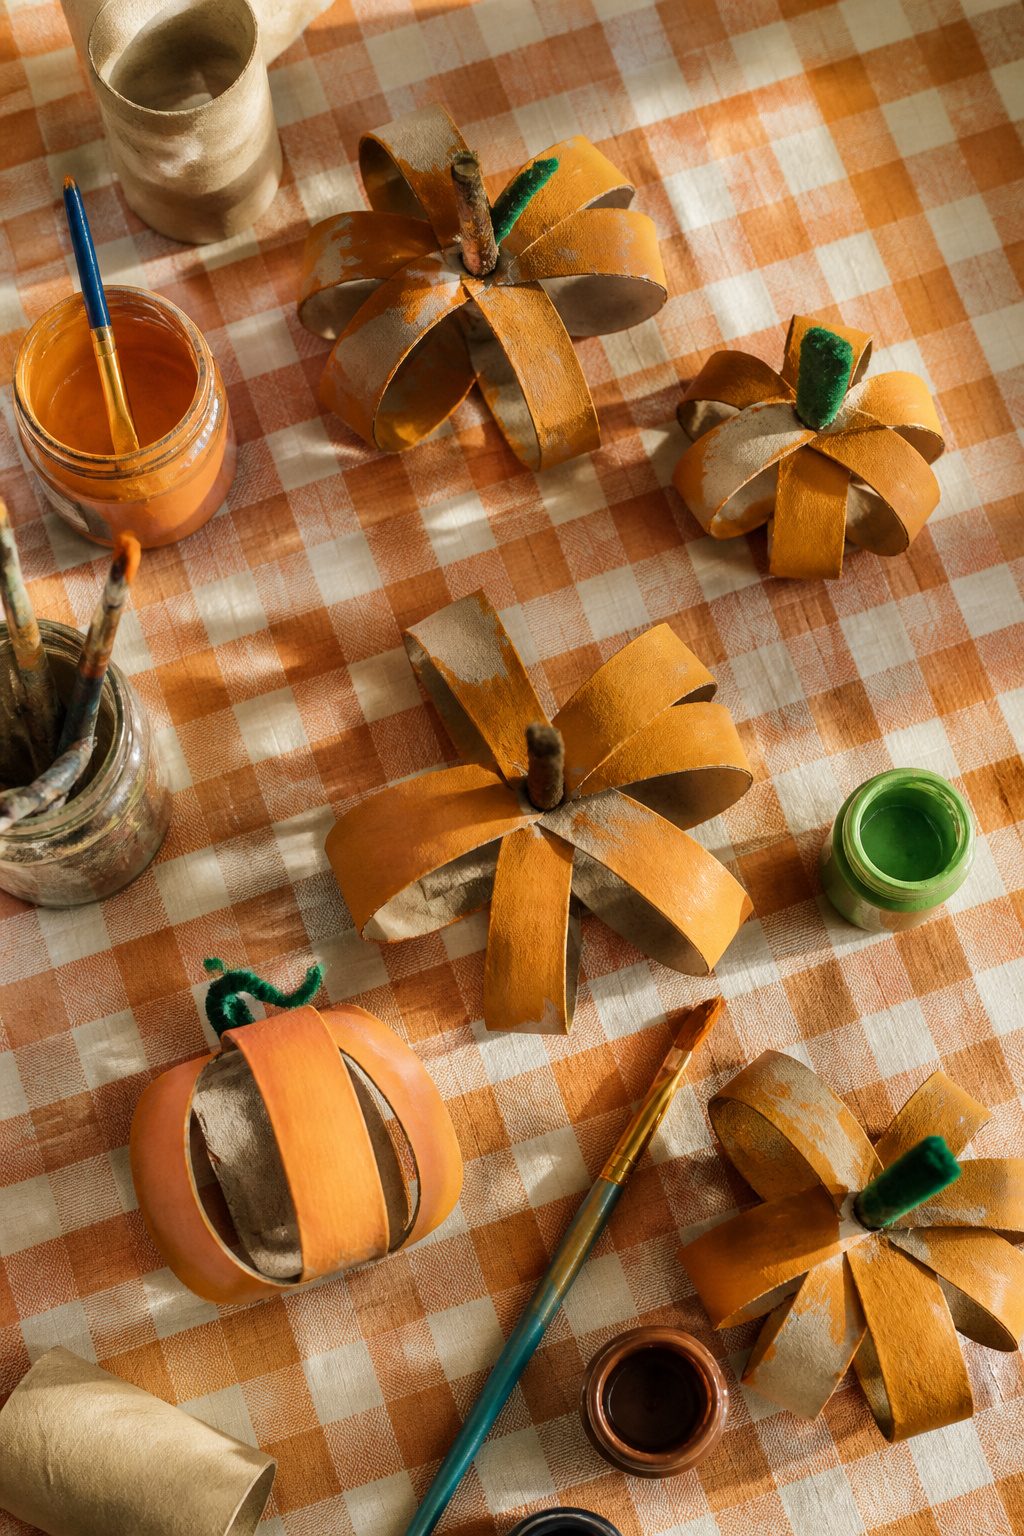
Cardboard tubes flatten and curl in ways that read as pumpkin segments without much persuasion.
I cut four toilet paper rolls lengthwise for each small pumpkin, then curled them inward so the cut edges met and the outer faces formed ridges.
A single roll yields enough strips for one petite pumpkin if you are willing to work smaller; two rolls give you a rounder, more substantial shape with overlapping layers.
Raw cardboard drinks paint. Acrylic covers in two coats if you want solid orange, but one thin coat lets the paper texture show through, which looks more like a heirloom pumpkin than a mistake.
I learned that the hard way after over-painting my first batch into plastic-looking spheres.
My four-year-old managed the painting and the pinching together of precut strips with a glue stick.
The step that needed me was the hot-gluing of the final segment, where holding three curved pieces in place while the glue set requires more hands than a small child owns.
Plan on doing the hot glue yourself unless your kid is older or unusually patient with clothespins and drying time.
8. Egg Carton Pumpkins
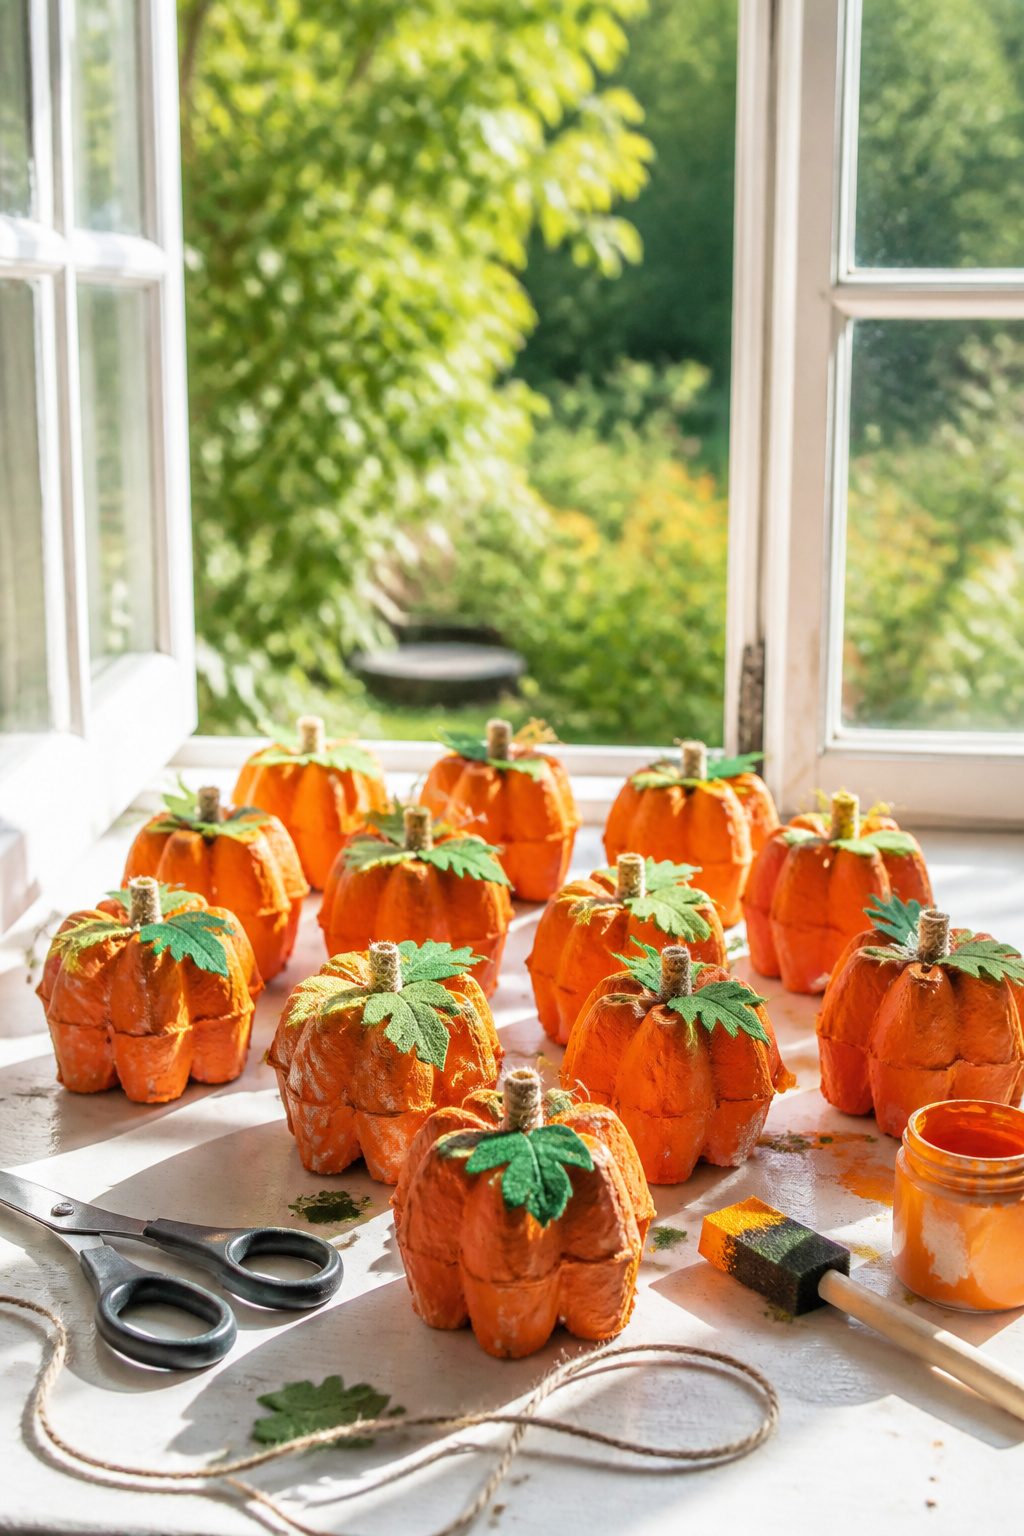
Egg carton pumpkins work best with a standard dozen carton, which gives you twelve cups to shape into a small patch. The first mistake most people make is painting the cups whole.
Water-based craft paint soaks into raw cardboard and warps the edges while it dries, so the pumpkins end up lopsided. A thin layer of white glue brushed over the outside and rim first seals the surface without adding much time.
Once that dries, two coats of orange acrylic go on evenly and hold their shape.
The stem took three tries before I found something that looked right.
A real cinnamon stick was too thick and brown; a rolled paper twist looked like a straw; a short piece of twine coiled and glued into a stubby spiral gave the right scale and texture.
Glue it to the inside of the cup before you paint, and the color blends together naturally.
A full carton yields enough for a windowsill grouping or scattered table accents, and the whole project stays under the cost of a carton of eggs you already finished.
9. Paper Plate Pumpkins
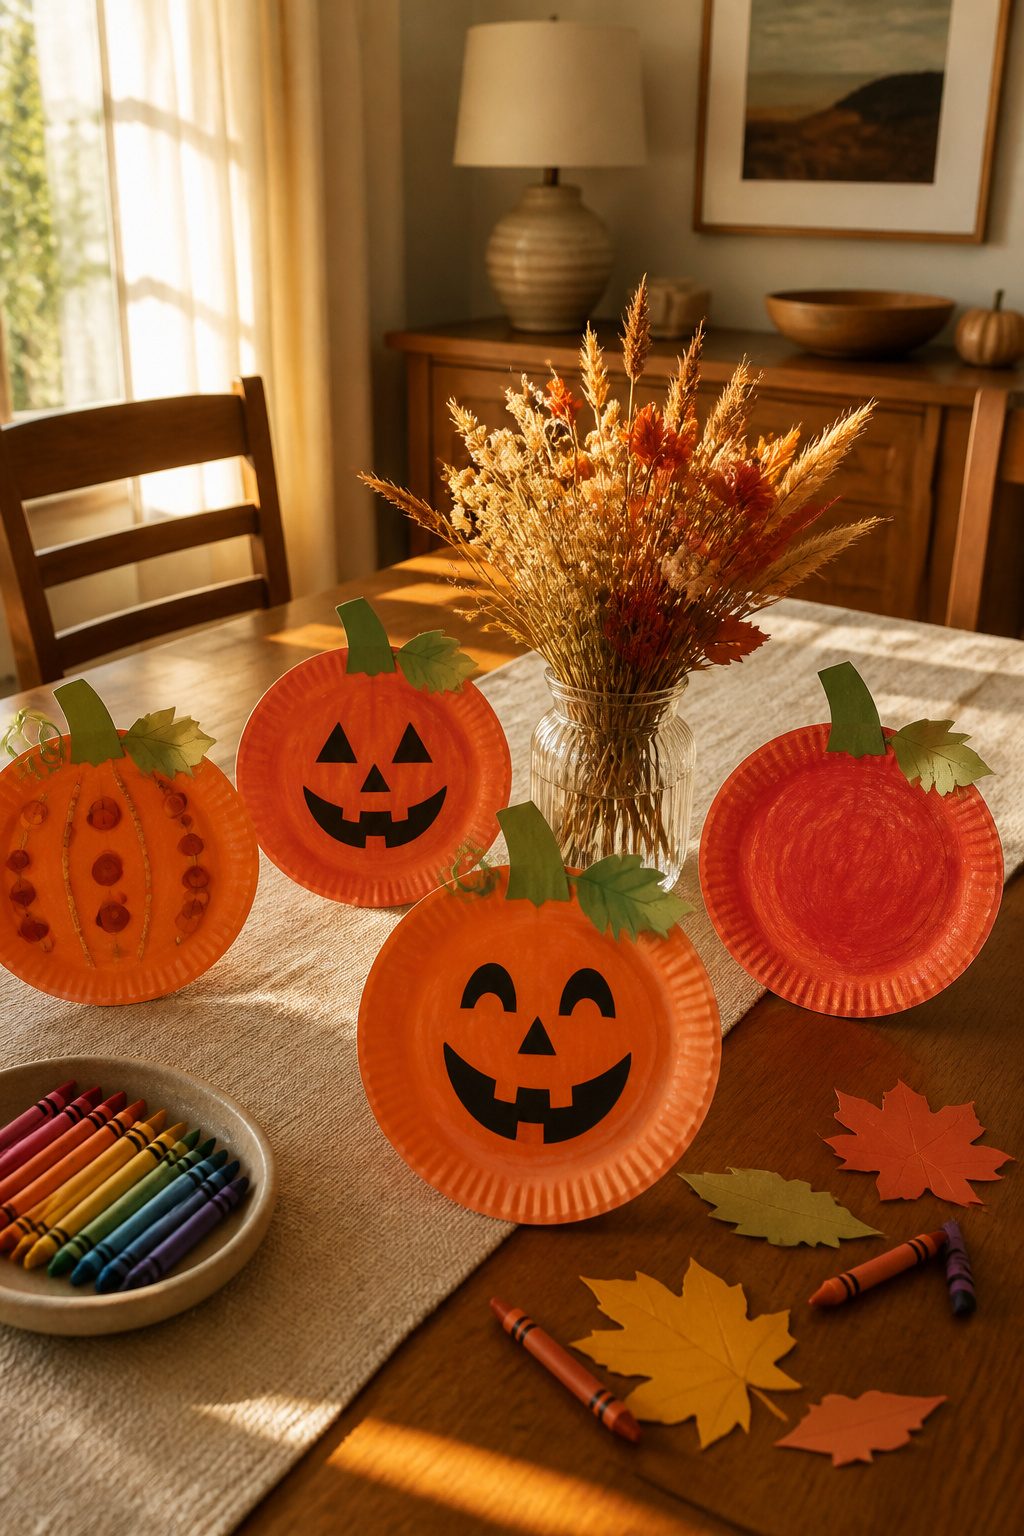
Paper plate pumpkins fall into two camps: the quick one-plate version and the fuller two-plate build. A single plate folded in half gives you a flat, semicircle face that tapes neatly to a window or fridge.
Two plates stapled rim-to-rim buy you depth, almost a little lantern shape, though the gap between them needs stuffing with crumpled grocery bags or it collapses on itself.
Paint color is where I burned an afternoon. The first orange I grabbed dried exactly like construction paper, that flat, school-project look that reads "craft" from ten feet away.
What worked better was a warmer, redder orange with a second, lighter coat dry-brushed on top. The ridges of the plate catch that second layer and start to look like actual pumpkin texture instead of poster board.
From start to tape on the window, budget about 45 minutes plus drying time. The paint layer is thin and dries fast in a sunny spot, but trying to draw a face before that happens smears the features every time.
I learned that the hard way on a plate that went straight to the recycling bin.
10. Pumpkin Mummies
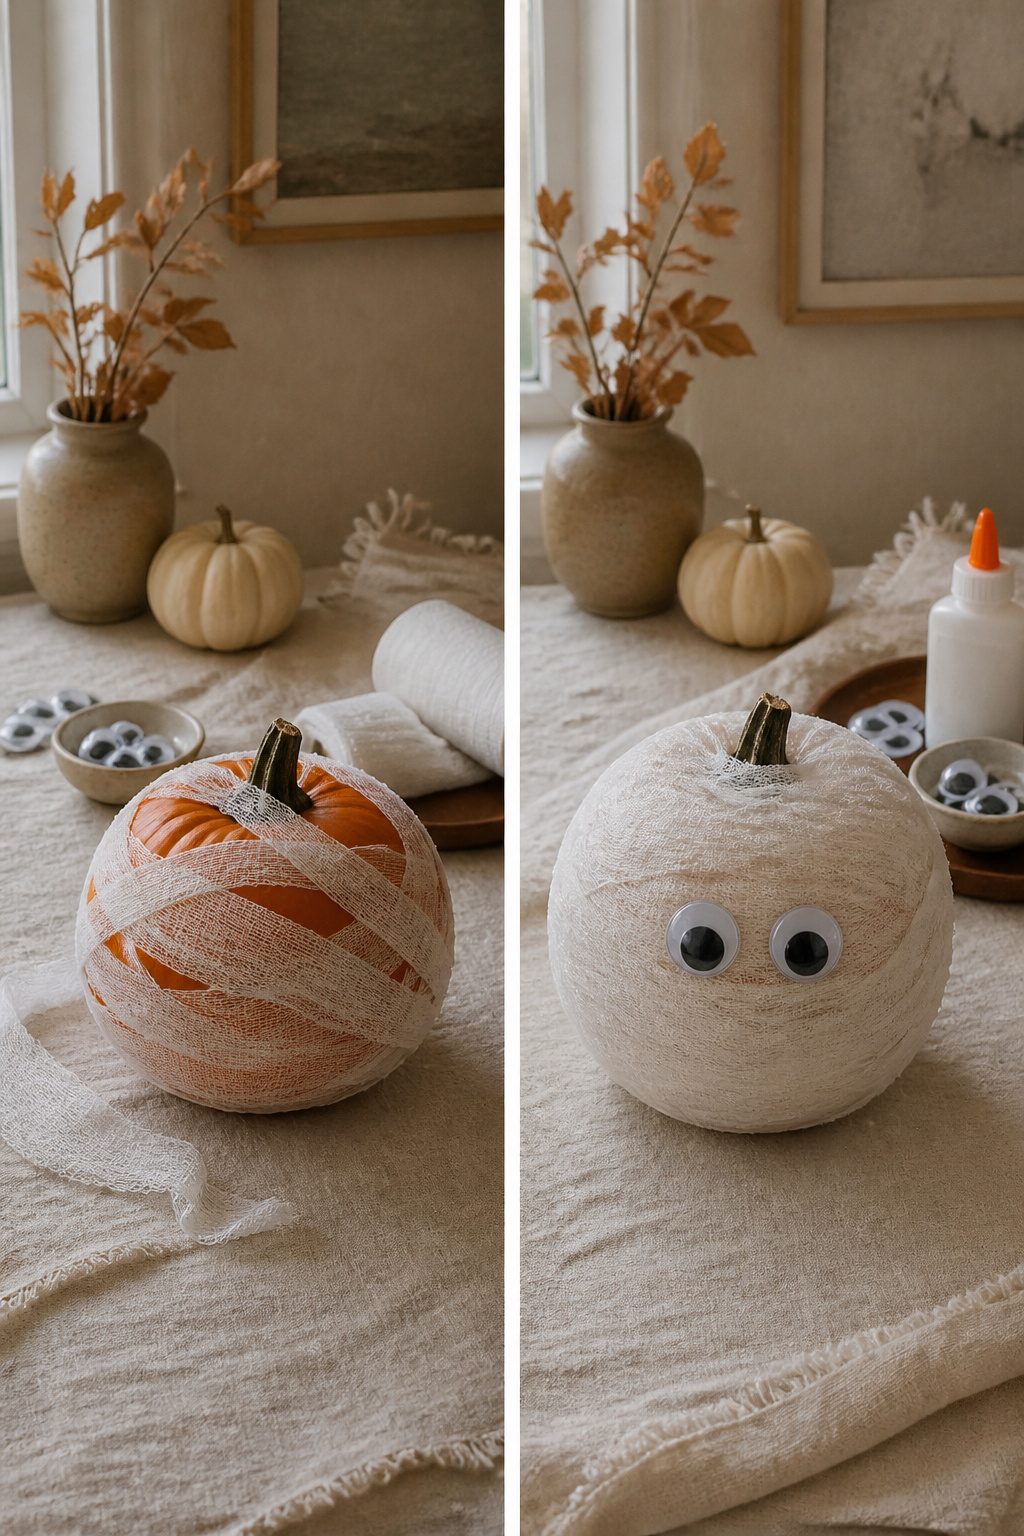
Gauze was the obvious choice for wrapping, but the weave frays the moment you cut it, leaving strings that catch on pumpkin stems and porch railings alike.
Medical gauze holds better if you tear it against the grain instead of slicing; the edges feather and grip each other when layered. I learned the adhesive part the hard way after a rain night in late October.
Regular white glue turned to paste on the porch. A hot-glue base with tacky glue over the top survived the damp, though the gauze darkened slightly where water pooled in the pumpkin’s hollows.
The eyes make or break the expression. Googly eyes at half-inch diameter read as cute on a pie pumpkin, but the same size on a five-pound jack looks alarmed, almost insectile.
For larger pumpkins, three-quarter inch sits right in the sweet spot between whimsical and vacant. Space them close together, barely a finger-width apart, and they read as child-mummy.
Wider than two inches apart and the face goes hollow, more haunted house than front-porch friendly. I keep a bag of mixed sizes now and test two pair before committing glue.
11. Pumpkin Wreath
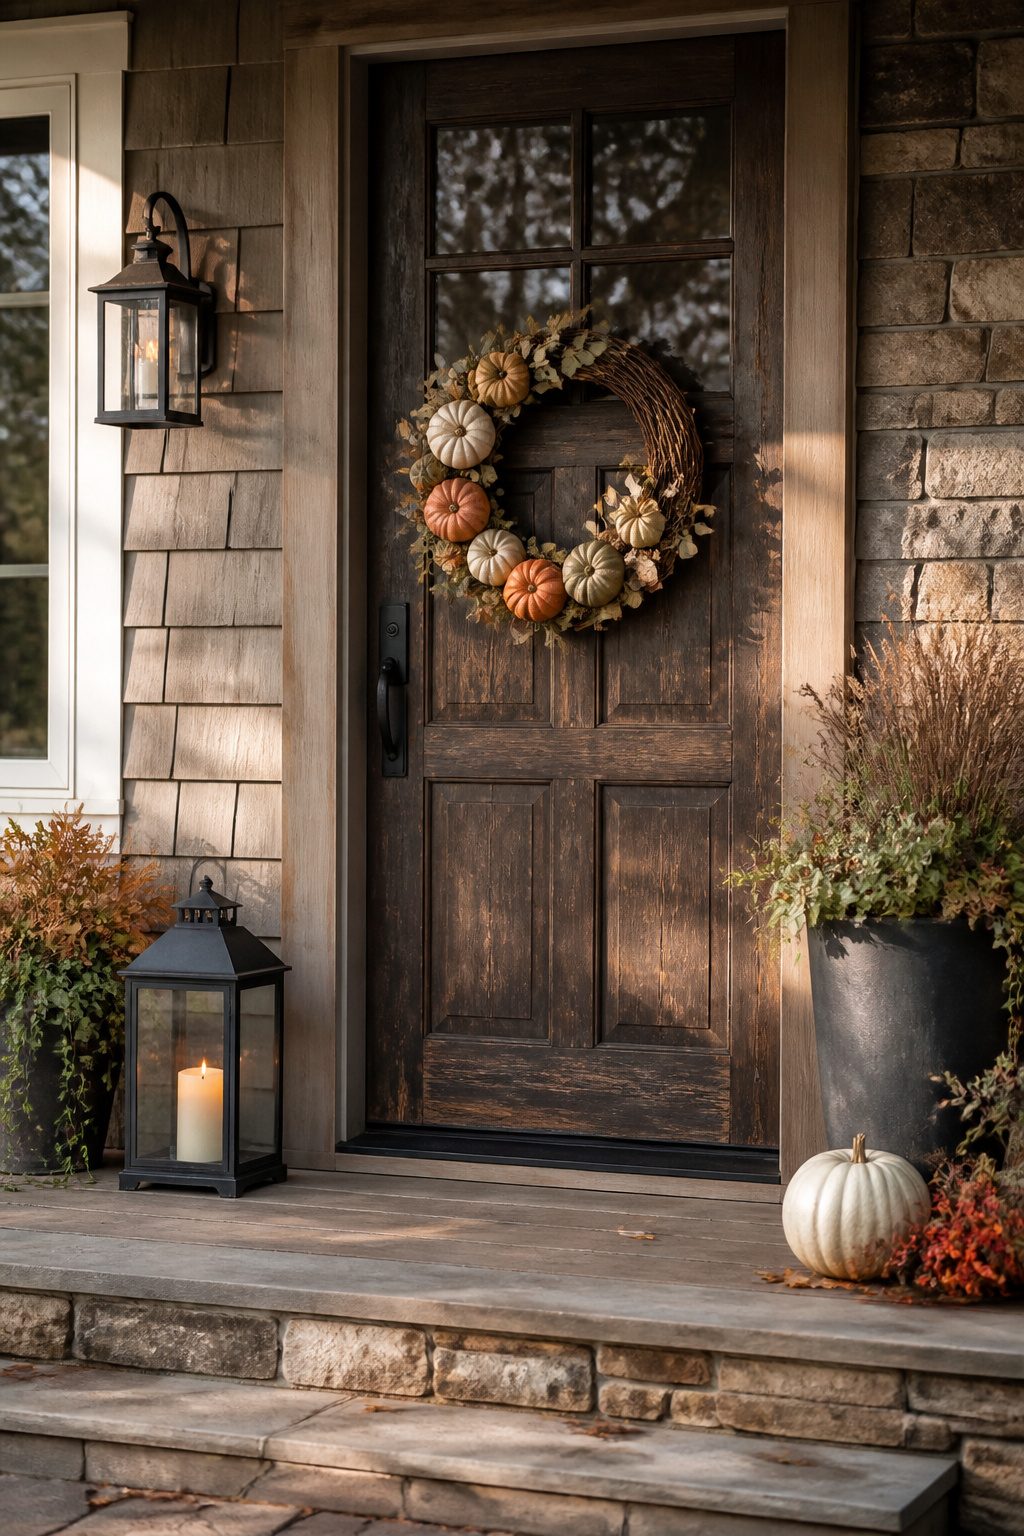
Grapevine wreaths hold their shape without fighting you, which is why I reach for one over a wire frame whenever I am attaching anything with heft.
The wire frame I tried first left every pumpkin shape loose and spinning; the grapevine let me nestle the minis into the gaps and secure them with plain floral wire twisted tight at the back.
That lasted the full season, including a week of rain that softened the paper-mache pumpkins but never loosened them.
What I did not measure was the door clearance. The pumpkins sat proud of the wreath by a good two inches, and the storm door would not close over them.
A grapevine base plus any three-dimensional attachment needs at least three inches of clearance between your main door and the storm door, or you are hanging it on an interior wall instead.
Mine moved to the living room by mid-October, which turned out to be the better view anyway.
12. Pumpkin Slime
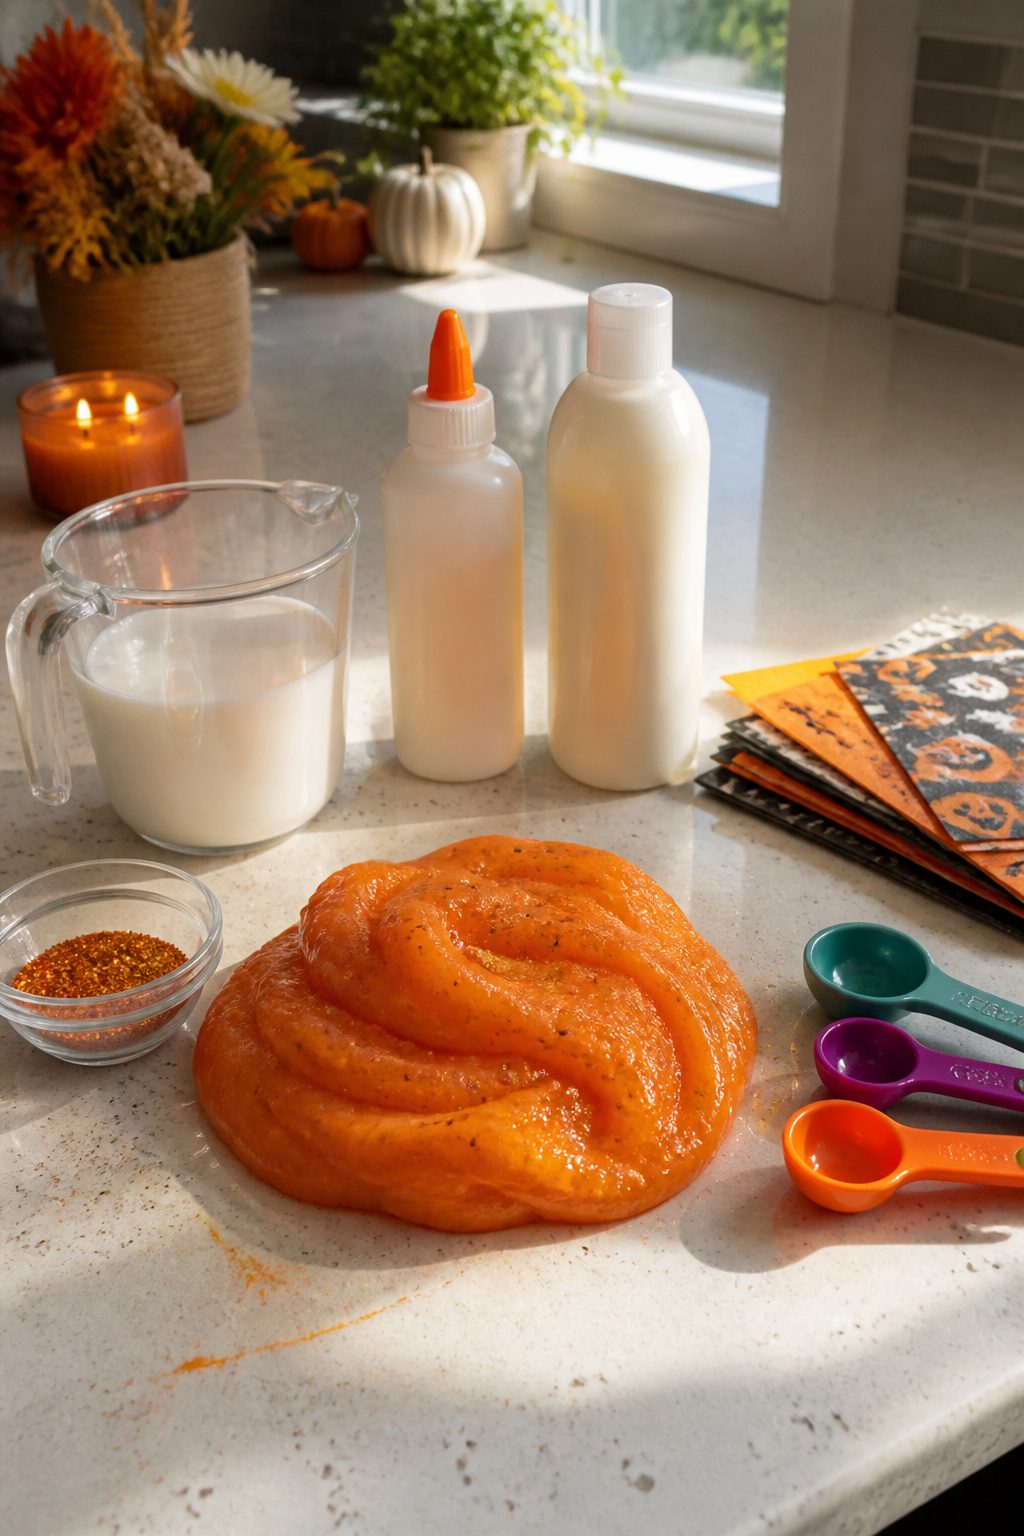
The first batch of pumpkin slime I mixed turned into a bouncy ball within two hours, which tells you how unforgiving the recipe ratio can be.
Two parts white school glue to one part liquid starch, measured by volume, is the mix that actually stayed stretchy through the afternoon. Anything closer to even and the cross-linking happens too fast.
Food coloring was where I stopped trusting the internet. Liquid orange dye looked perfect in the bowl and left a faint stain on the laminate counter that took three days of scrubbing to fade.
Gel color, kneaded in after the slime comes together, gives the same pumpkin tone without the bleed. I learned that the hard way on a rental kitchen surface I did not own.
The slime held its stretch for about four hours before the rubbery phase set in. Storage in an airtight container bought another day, but this is still a one-afternoon project, not a decoration you set out for the week.
For the $8 in glue, starch, and dye, that lifespan feels fair.
13. 3D Paper Pumpkins
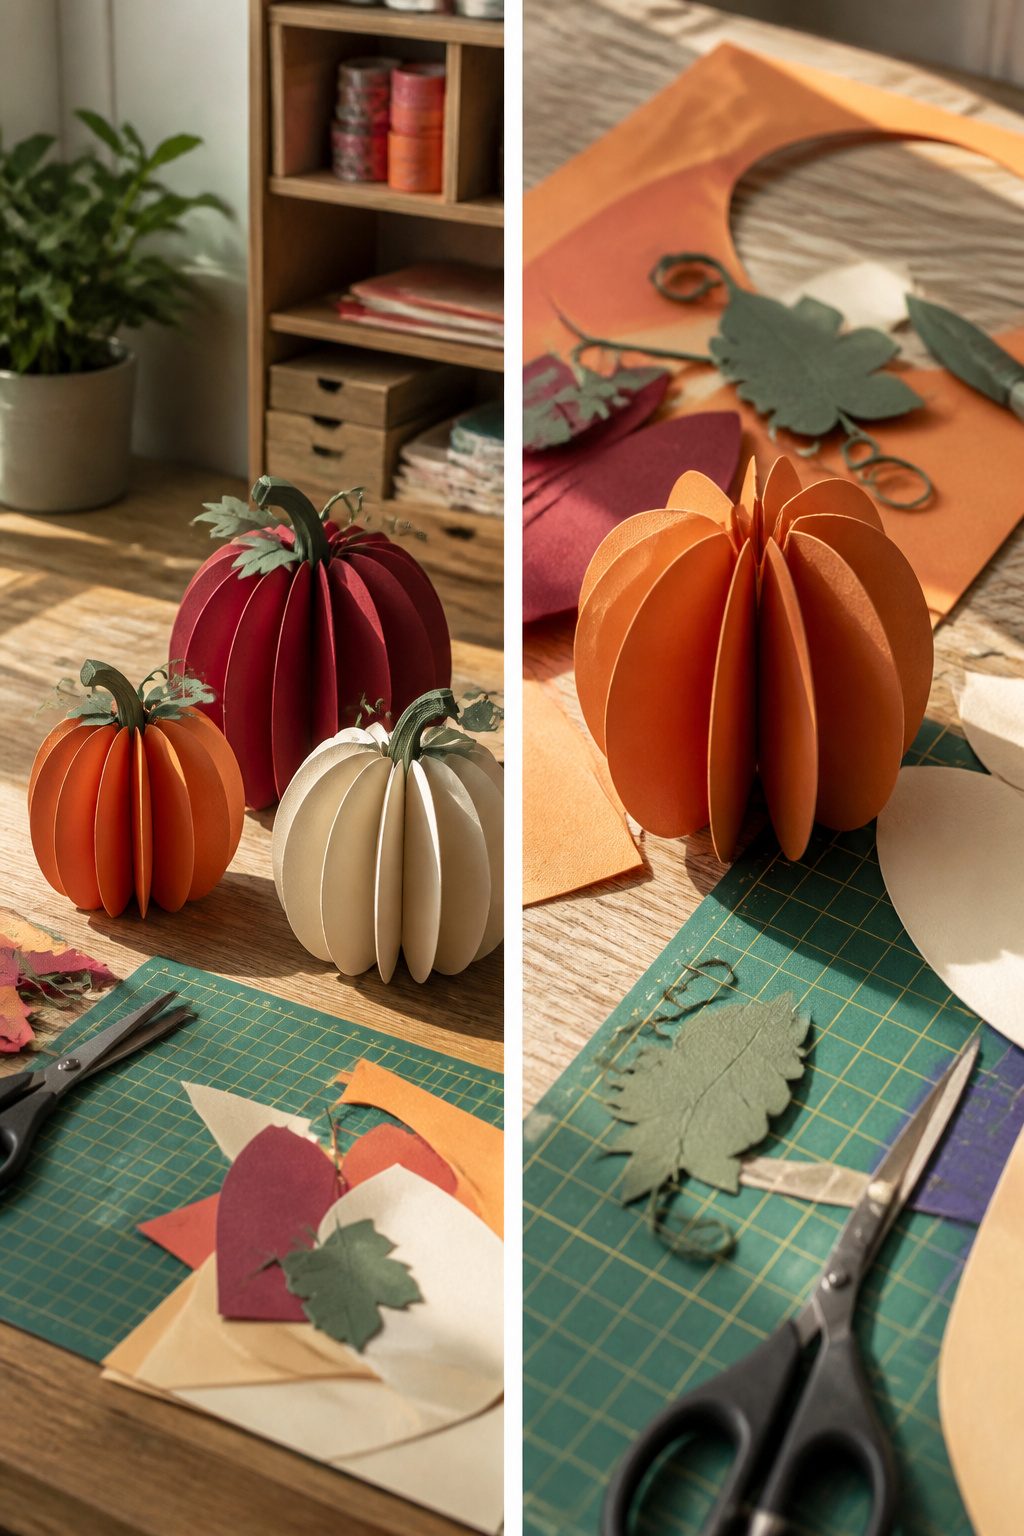
A 3D paper pumpkin looks complicated until you see the template. I found a free printable from a craft blog that scores the fold lines for you, which matters more than the cutting itself.
65 lb cardstock held the creases clean; 20 lb copy paper collapsed after two folds and the whole thing turned into a sad accordion.
The heavier sheet took about twenty minutes to cut, fold, and glue into a sphere, and my six-year-old managed the assembly in forty with help on the first tab.
A glue stick works if you press each seam for a full count of ten; hot glue is faster but the ridges soften and the pumpkin loses its geometry.
I made six for a mantel cluster and hung the smallest from fishing line over the kitchen table, where it spins in the heat vent draft like a proper mobile.
14. Yarn Pumpkins
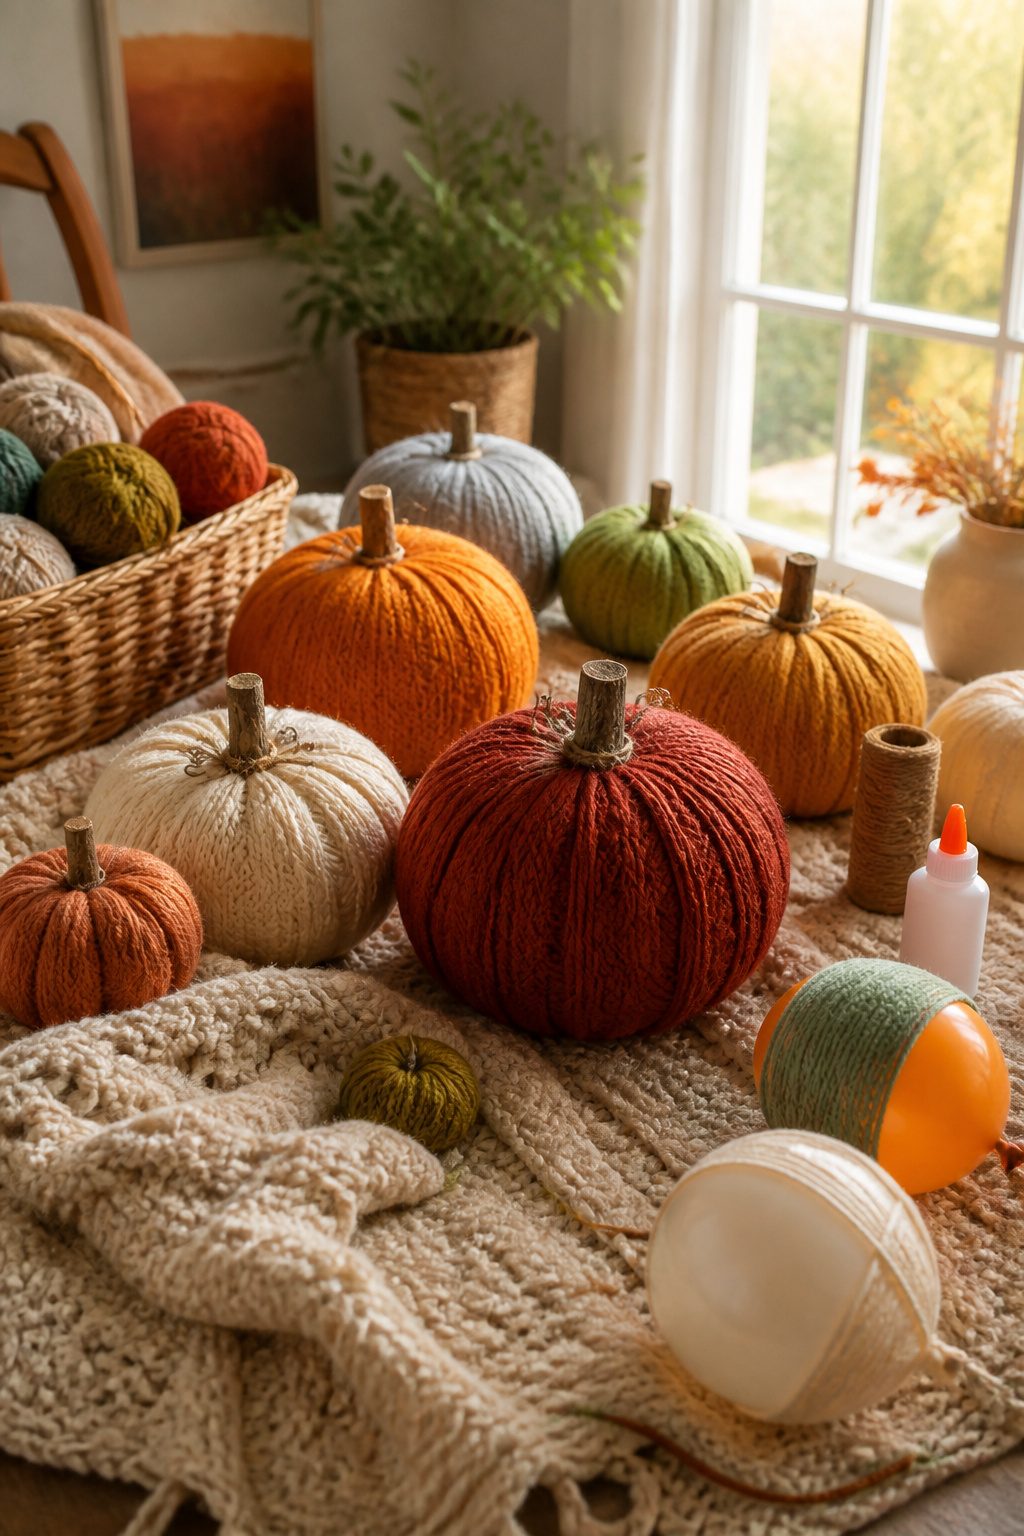
Yarn pumpkins look homespun and cost almost nothing, which is why I keep coming back to them.
The balloon method is the one most tutorials start with: blow up a round balloon, wrap it in yarn soaked with glue, and wait. That waiting is where I trip.
The first batch I made sat on wax paper for two full days before the yarn shell felt hard enough to risk popping the balloon inside, and even then a couple sagged where the glue had pooled thick.
Budget a full 48 hours of drying time before you need them on the table.
Wire frames skip the balloon mess entirely. Floral wire bent into a pumpkin shape gives the yarn something to grip while the piece dries open to air, so the same glue mix can set overnight instead of over a weekend.
The catch is coverage. With a sport-weight yarn I had to wrap the frame three times to hide the wire gaps, and the ridges looked busy.
A single pass took bulky yarn, the kind sold for quick-knit scarves, which also meant fewer total wraps and less glue to apply.
The stiffened sphere route, no frame at all, works if you build the yarn into a solid ball while wet. I have not managed to keep these round without a form inside; they flatten where they sit.
For renters who store decorations in bins eleven months a year, the wire-frame version holds its shape through being shoved between boxes.
15. Concrete Pumpkins
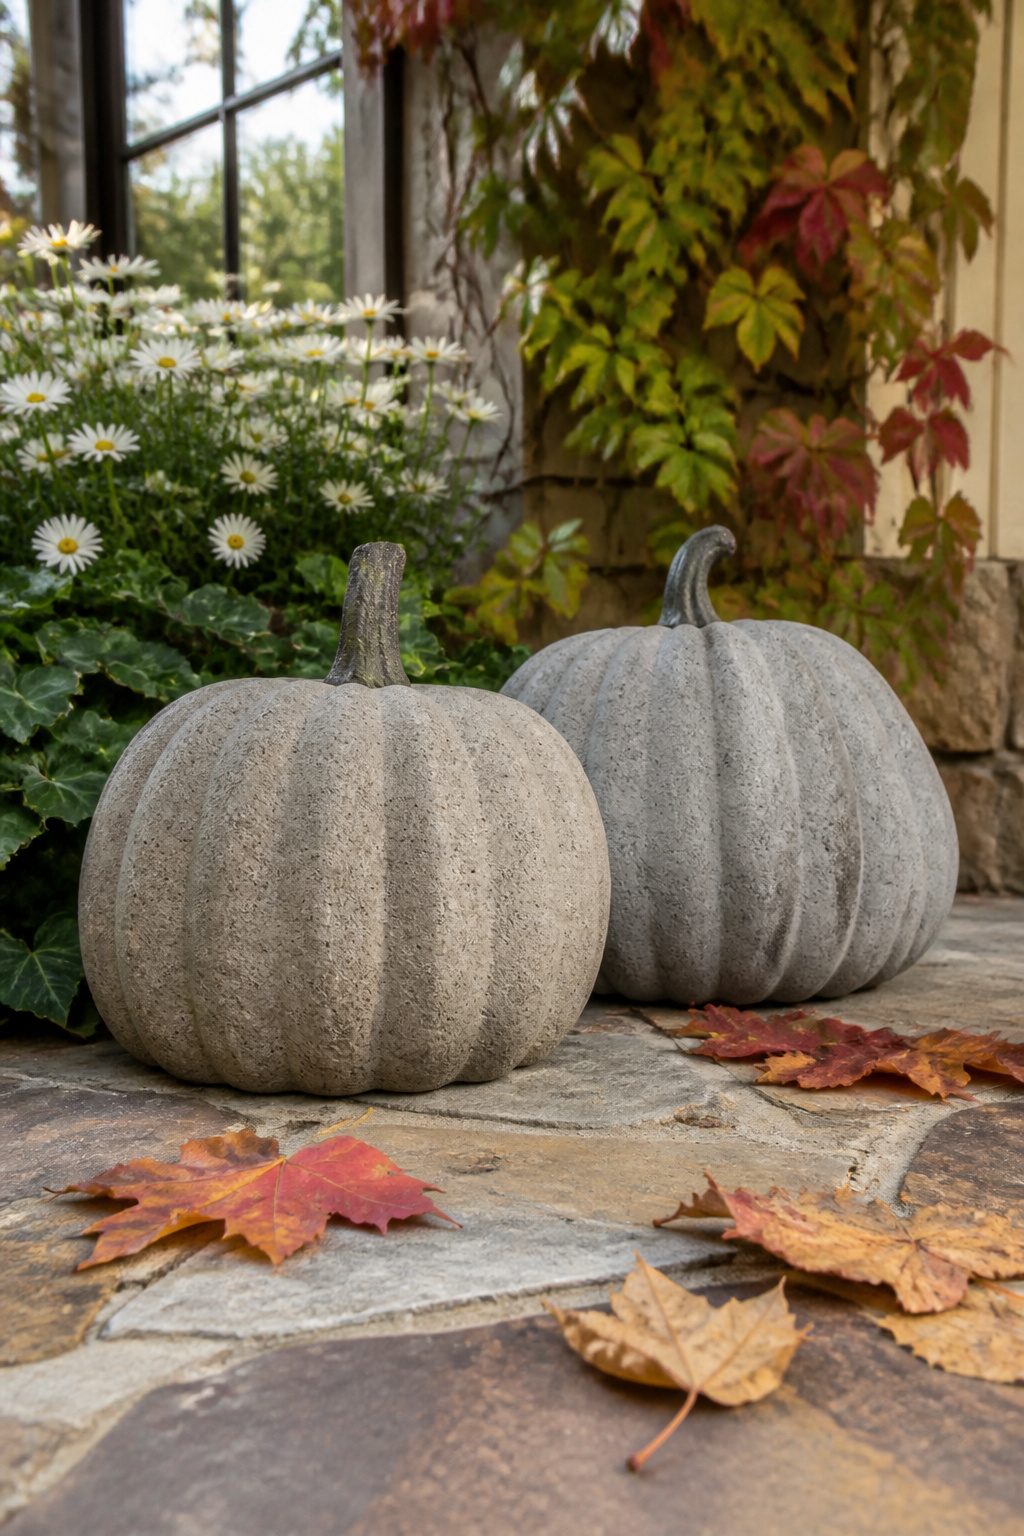
Concrete pumpkins sit in the garden long after the real ones have collapsed into themselves.
I started with a pair of plastic craft pumpkins from a dollar store, the kind with the snap-on lids and the faint seam lines running down five sides.
The mold has to be something you can cut away, because a rigid shell will not release a cured lump of stone.
The mix ratio that worked was one part Portland cement to two and a half parts fine aggregate, just enough water to make it cling without slump.
I packed it by hand, tapping the sides with a rubber mallet until bubbles stopped rising.
Curing took three full days before I felt safe slicing the plastic away with a utility knife, and even then the surface was damp enough to darken my gloves.
What surprised me was the weight: each finished pumpkin came in at nearly eight pounds, which meant placing them on the stoop in October and leaving them until frost without worry of wind, squirrels, or prank relocation.
The heft is the point. These are not seasonal decor you store; they are yard furniture that happens to be shaped like October.
16. Pumpkin Fairy House
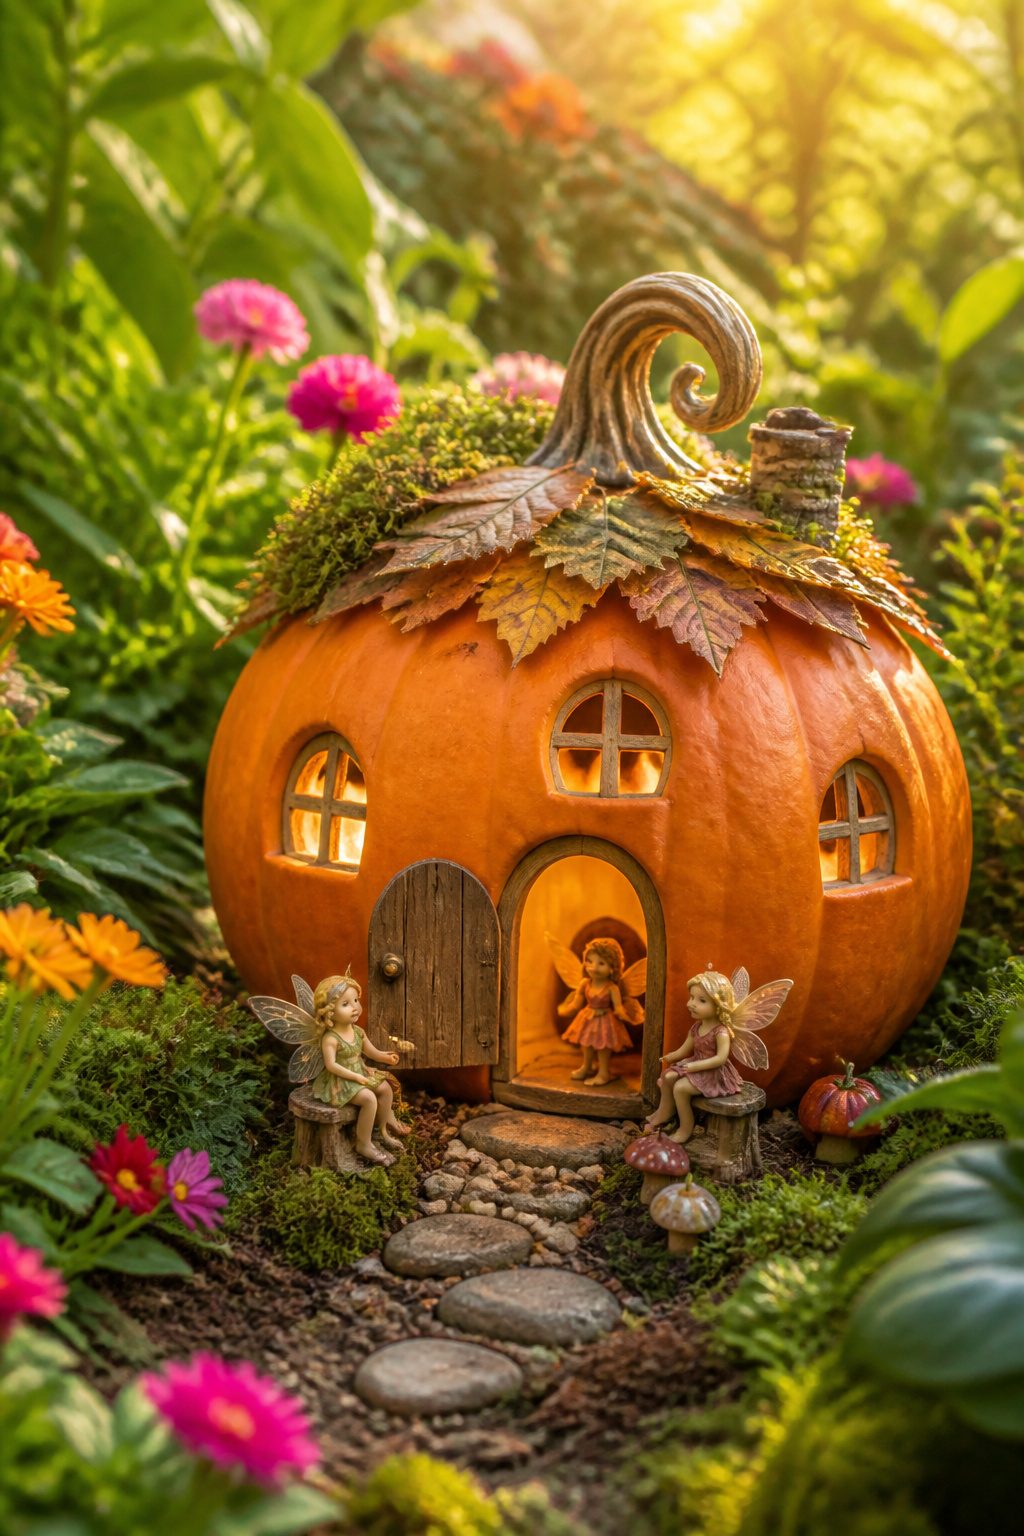
A pumpkin fairy house works best with a wide, short pie pumpkin rather than a tall carving type.
The walls need to stay thick enough to hold their shape, and a pie pumpkin’s dense flesh keeps the roof from sagging after a day or two on the counter.
I learned the door and window cuts the hard way. A paring knife felt too sharp and twitchy in my hands around the small openings, and the blade caught once on the curved surface.
A serrated grapefruit knife, the kind with a rounded tip, gave the control I needed for roughing out the shapes and cleaning the edges without the same slip risk.
The base at the bottom runs about an inch and a half thick on a medium pie pumpkin, which leaves solid material to hollow from above and still carve a working doorway.
I hollow through the top stem hole, not the face, so the front stays intact for the cutouts.
Fairy figurines around two inches tall fit the scale best. Anything larger crowds the porch; anything smaller gets lost against the orange walls.
A battery tea light on the inside, set back from the door, turns the windows orange after dark without heating the flesh enough to soften it.
17. Pumpkin Seed Craft
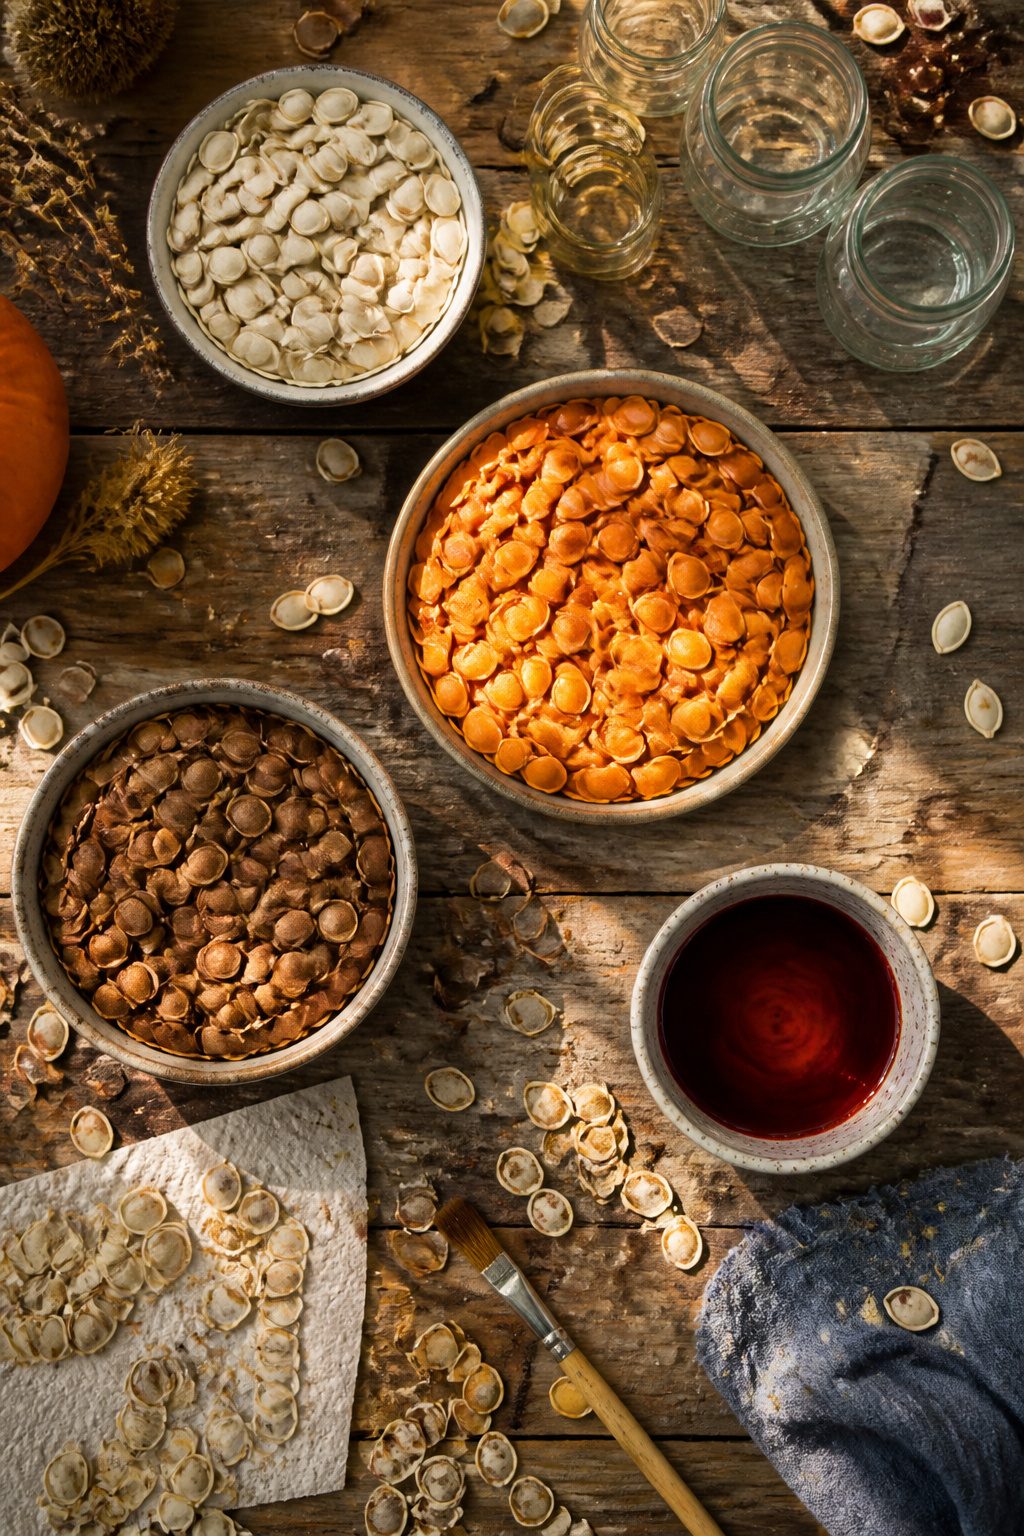
Pumpkin seeds straight from the gut of a jack-o’-lantern need a full day or two of drying before they take glue without rotting.
Spread them on a baking sheet in a single layer, not piled; the ones that touch each other in a clump stay damp and mold later.
A low oven speeds this up, but the kitchen will smell like toasted squash for hours, so I usually just leave the tray on top of the fridge where the air moves.
Rit dye, the liquid kind from the grocery aisle, takes to dried seeds better than acrylic paint, which flakes off when the seeds knock together in a bowl.
Soak them in a shallow dish of dye for twenty minutes, drain, and let them dry again.
The color stays vivid enough for a mosaic or a glued outline on cardboard, and the slight gloss looks like fall instead of kindergarten.
Tacky glue holds. School glue does not; the seeds pop off in a week.
For a project that reads as autumn decor rather than bird feeder, keep the palette tight: deep orange, brown, and cream, with the natural seed color doing most of the work.
I once let my niece add neon green and purple to her own bowl, and the result sat in the garage until January.
The adult version, all ochre and rust on a thrifted wooden frame, hung by the door through Thanksgiving.
18. Wine Cork Pumpkins
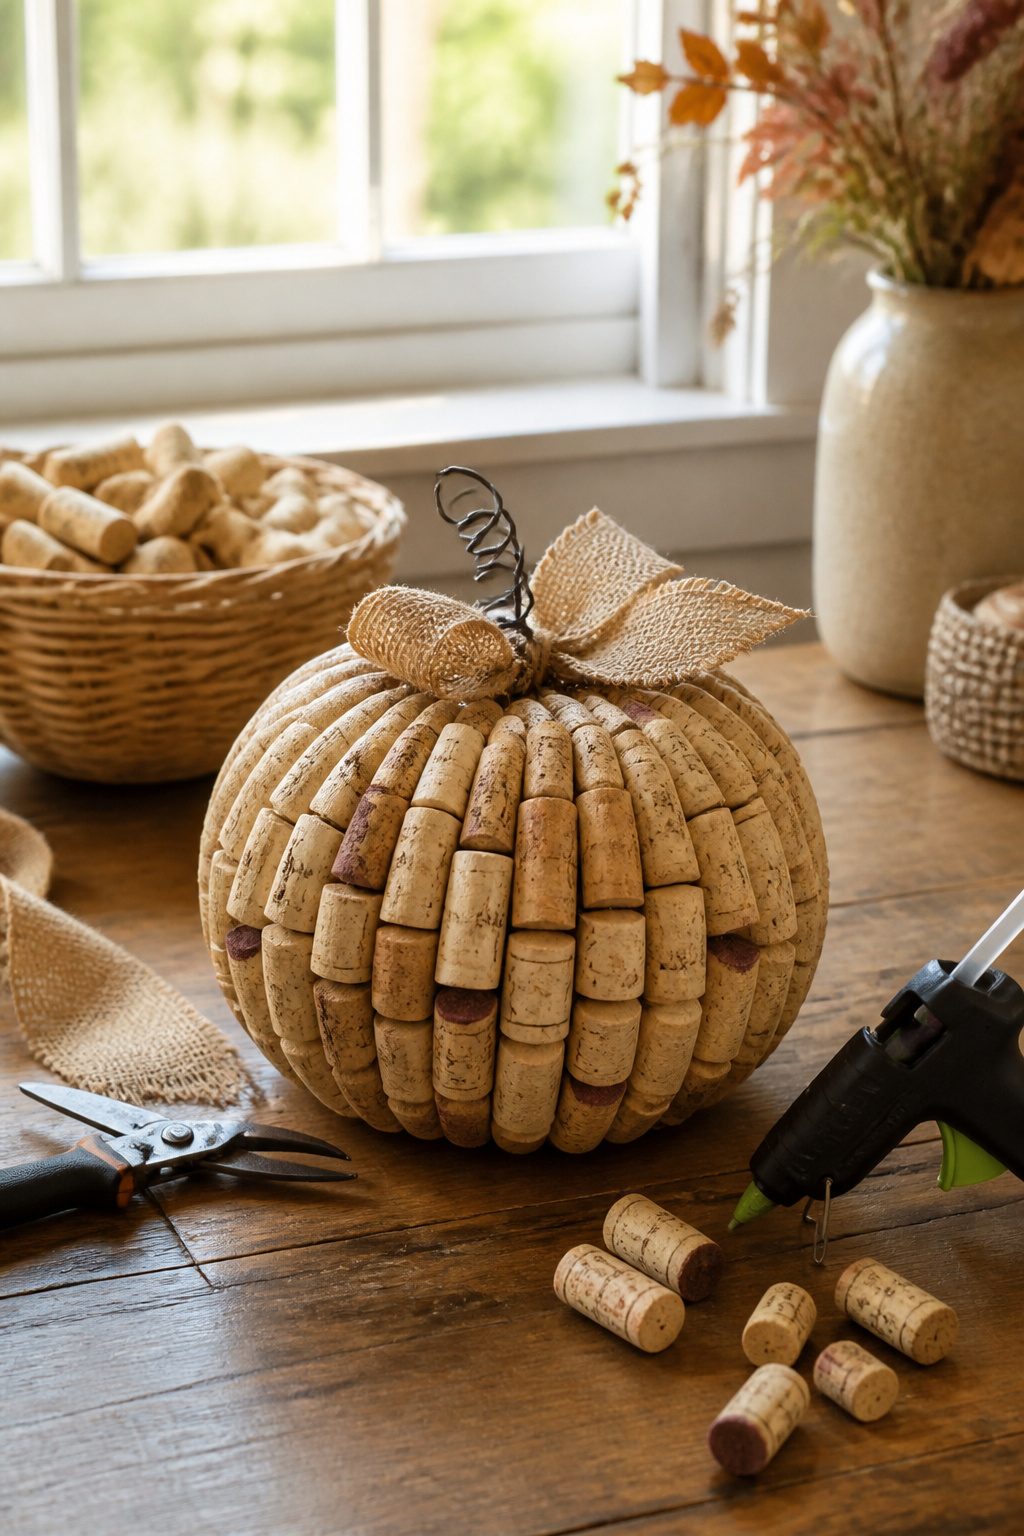
A 4-inch wine cork pumpkin eats through about thirty-five corks, which sounds like a lot until you realize how fast they pile up if you actually save them.
I ran short by twelve on my first attempt and had to buy a bag of used corks online for about eight dollars; the rest came from a jar I’d filled over two years.
Hot glue is the real budget killer here. I used nearly a full 10-inch glue stick just getting the base layer stable, then another half stick on the ribbon stem and any wobbly seams.
A wired burlap ribbon, not plain twine, is what keeps that stem upright past Thanksgiving.
The whole project landed under fifteen dollars because I’d hoarded corks, but if you’re starting from zero, budget closer to twenty-five and a full afternoon.
19. Pumpkin Spice Salt Dough
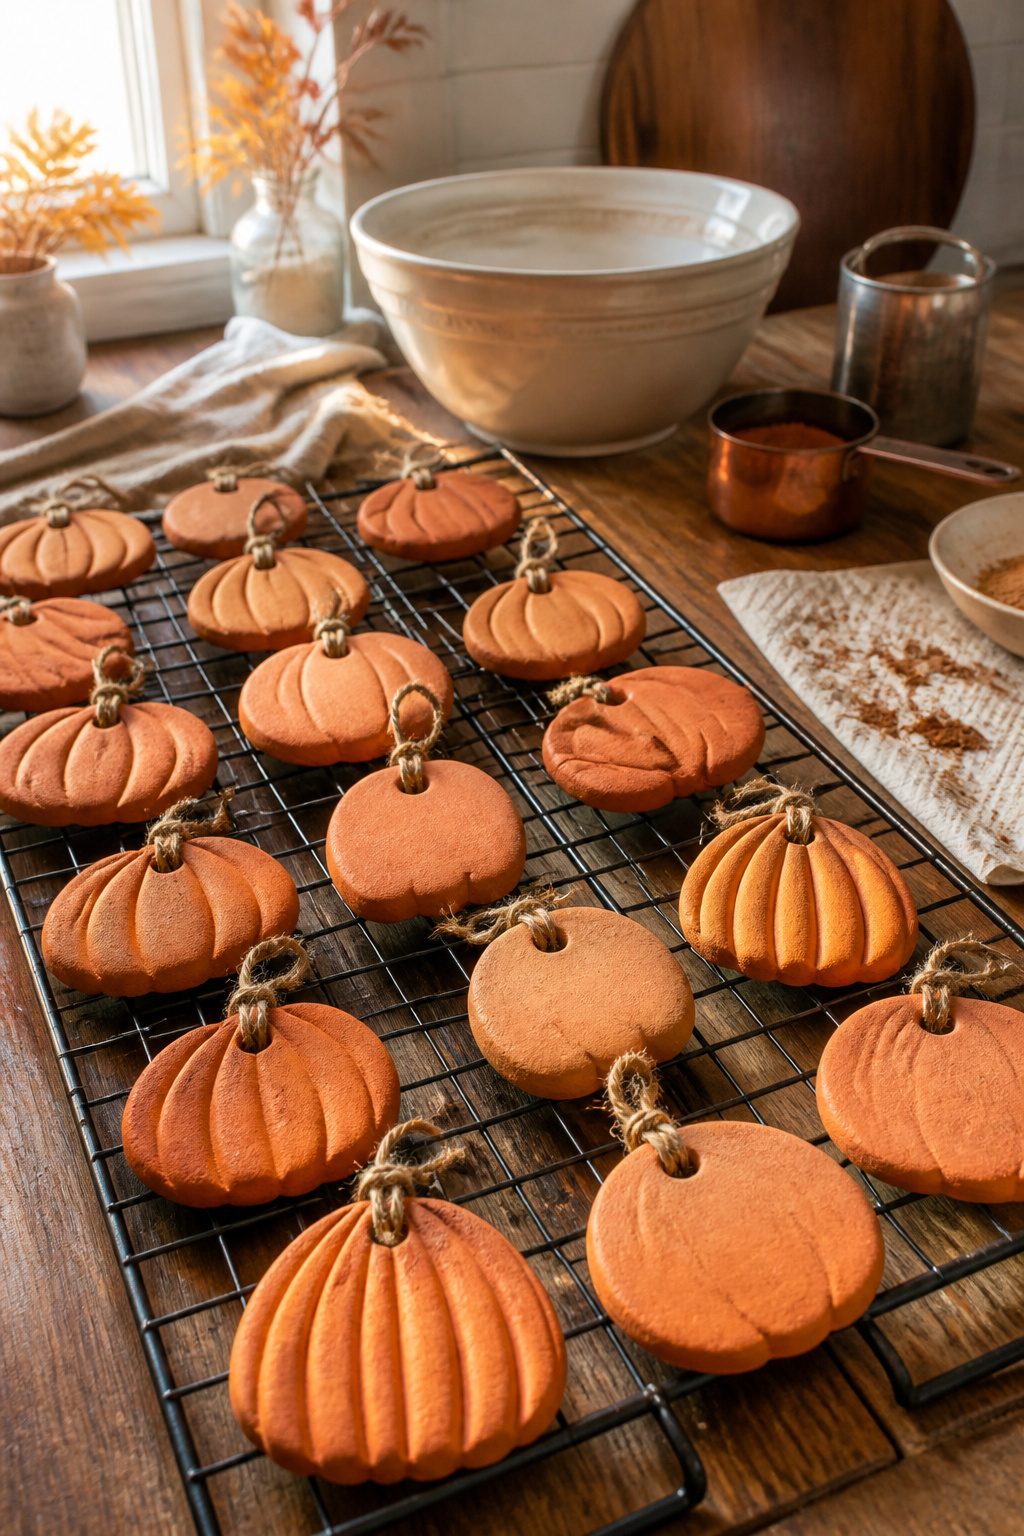
Salt dough takes paint well and costs almost nothing, which makes it tempting to skip the spice and just shape plain pumpkins. The scent is worth the extra step, though.
I use one tablespoon of pumpkin pie spice mixed into two cups of flour, one cup of salt, and three-quarters cup of warm water.
The dough bakes at 250°F for two to two-and-a-half hours, flipping the shapes halfway through so they do not bow.
The baked dough carries a warm brown tint that looks more like gingerbread than pumpkin.
Acrylic craft paint in orange covers it in two thin coats; I keep a small brush dry and drag it through the wet paint for the ridged look.
A coat of matte varnish keeps the surface from turning chalky by December.
My first batch of ornaments cracked because I pulled them from the oven while the centers still held moisture. The outside felt firm, but two days later the trapped humidity found its way out through fissures.
Now I let them cool on the rack overnight, then set them on a windowsill for another full day before painting. The ones that dry slowly have lasted four years on the tree without a crack.
20. Pumpkin Topiary
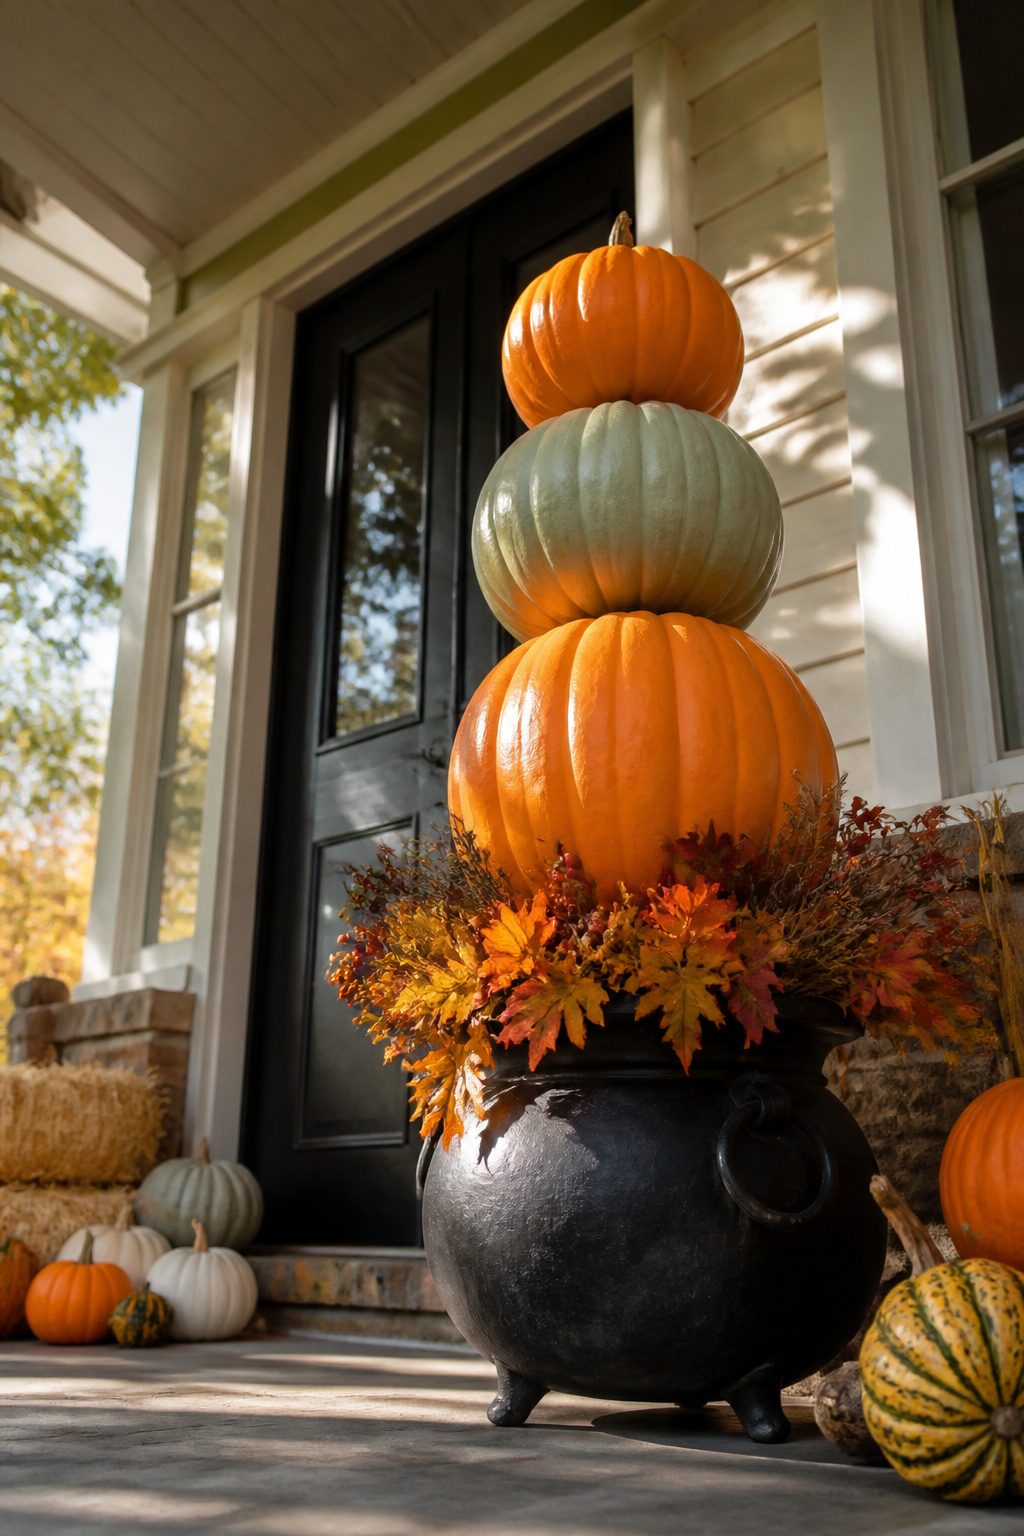
Stacked pumpkins look simple until the middle one starts to sag and the whole tower leans like a drunk.
The rod running through the center is the skeleton, but it shows, so wrap it in twine, raffia, or a strip of burlap before you start stacking.
Glue the wrap in a spiral so it grips the metal and doesn’t slide when you thread the pumpkins on.
Size progression matters more than I expected. A heavy base, a medium middle, and a small top gives the eye a place to land; two pumpkins the same width create a dumbbell shape that reads awkward from the street.
I tried real ones first, carving and stacking them on a porch in Houston heat. The bottom pumpkin went soft in under twenty-four hours, and the weight of the stack above it pressed the flesh into an orange puddle.
Craft pumpkins, the hollow foam kind sold at most craft stores, solve that. They take paint, they take hot glue, and they do not collapse under their own weight.
For the base, a mini cauldron or any weighted pot works. Cut cardboard to fit the opening, wedge floral foam underneath, and sink your rod into that foam before the pumpkins go on.
Hot glue where each pumpkin meets the next keeps the stack from spinning in a breeze. Paintable craft pumpkins mean the color scheme lasts past the season you bought them for.
21. Pumpkin Carving
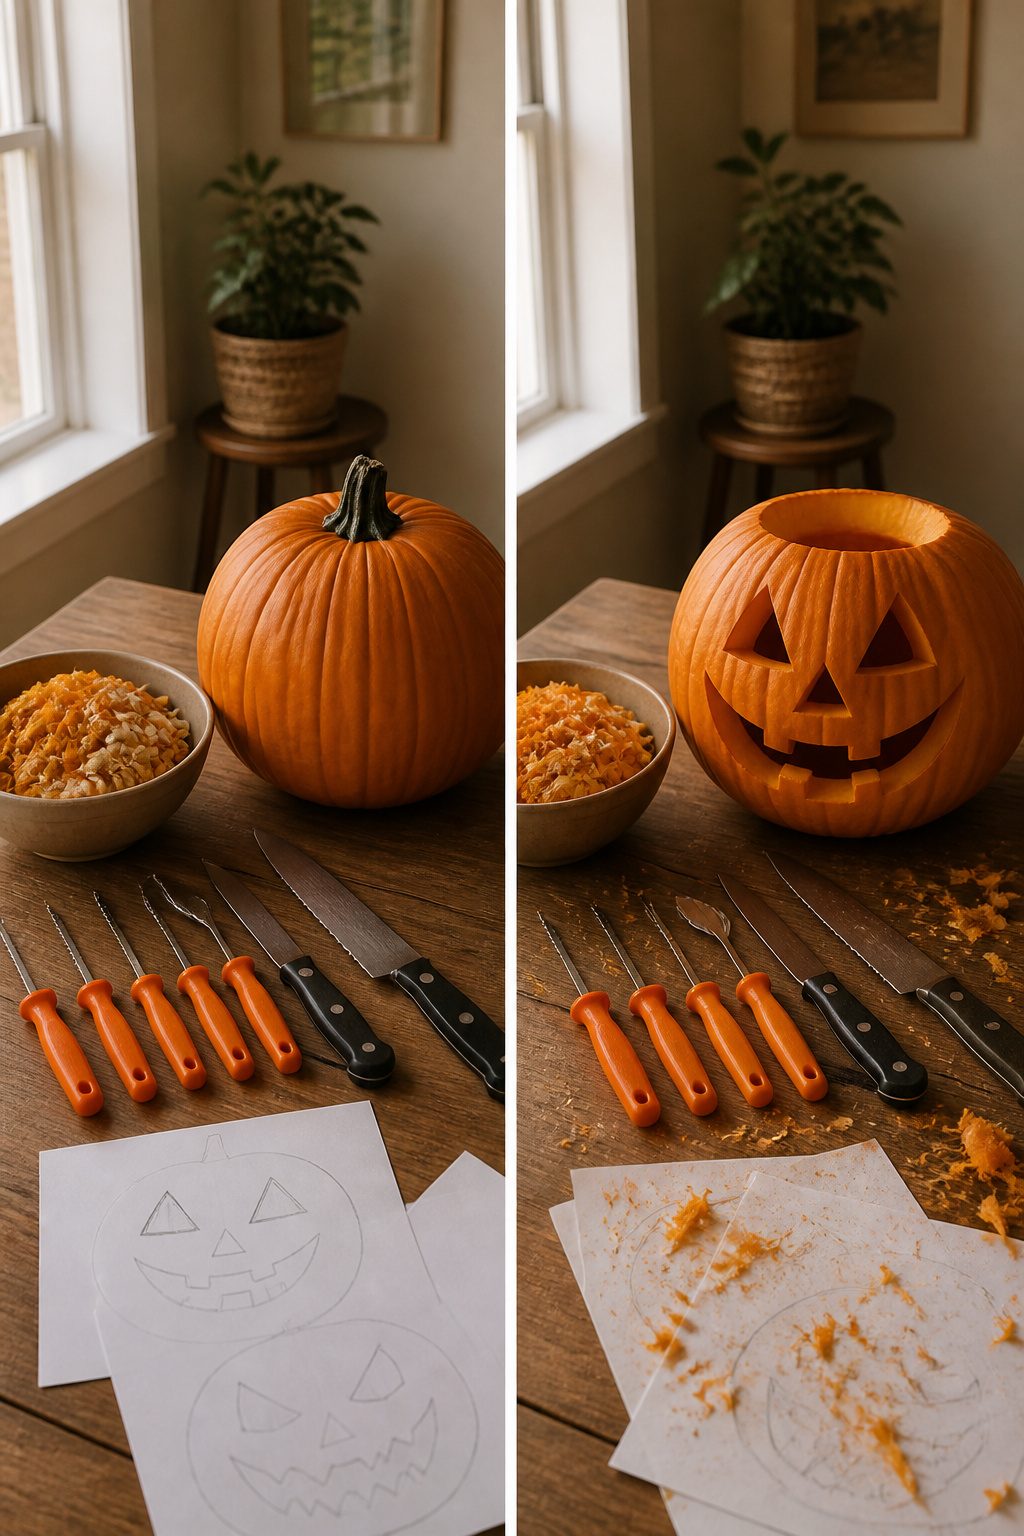
A basic serrated kitchen knife is the fastest way to ruin a pumpkin and a thumb.
The twelve dollars I spent on a small carving kit with a thin saw blade and a poker tool paid for itself in one evening.
The saw cuts curves without snagging, and the poker is what makes pattern transfer actually work. Tape your printed pattern to the pumpkin, poke through the paper along every line, then remove it and saw between the dots.
For faces, skip the triangle eyes. A simple crescent moon cut from the side, or a silhouette of a tree with branches, reads better from the sidewalk and takes half the time.
The preservation spray I tried, the one that promises three extra weeks, did nothing the plain bleach-water dip didn’t do for free. Both held up about five days before the collapse started.
If you want longevity, buy a fake pumpkin and carve that instead; the foam ones take the same saw blade and sit on the shelf for next year.
22. Decorated Faux Pumpkins
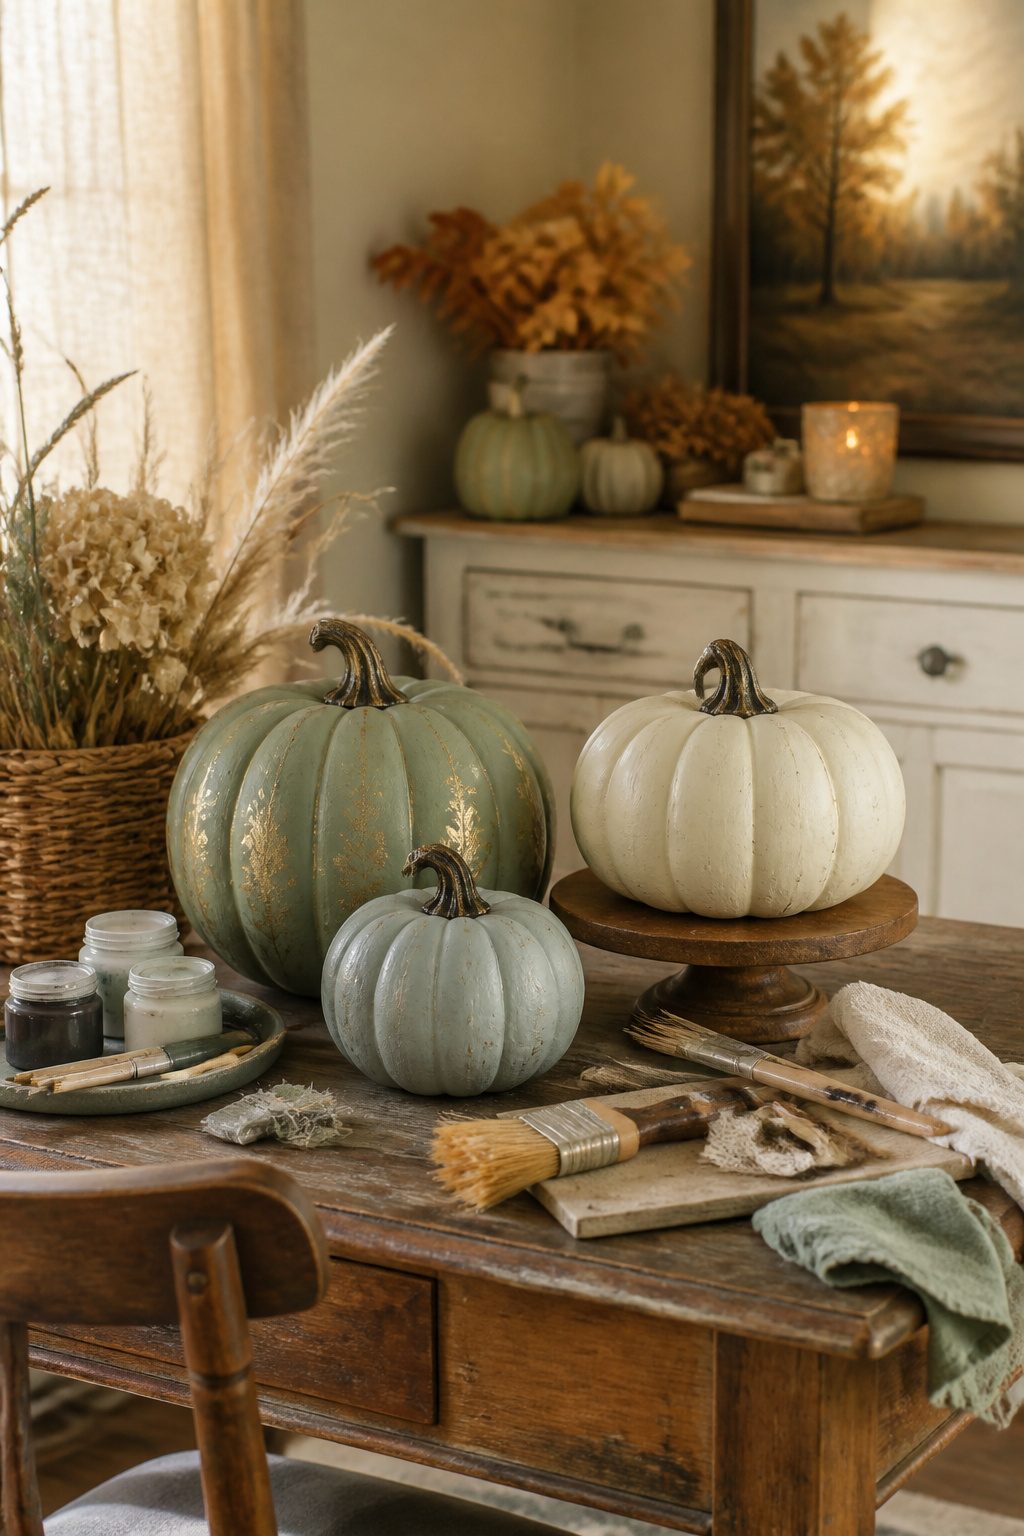
Not every craft pumpkin takes paint the same way. The white foam ones I picked up at Michaels for 50% off looked promising until the first coat of anything solvent-based started eating the surface.
Foam pumpkins melt with spray paint or certain solvents, so water-based products are the safer bet. Chalk paint adheres to almost any surface without priming, and two coats of Annie Sloan in Old White covered that plasticky sheen completely.
A dab of dark wax worked into the grooves afterward gave the ridges some depth.
Milk paint behaves differently. Miss Mustard Seed’s formula needs a bonding agent mixed in or it flakes off synthetic surfaces, and the white wax finish softens the color into something that reads store-bought rather than handmade.
I would skip decoupage on curved foam; the paper wrinkled across every ridge when I tried it, and the matte medium never dried flat.
For the cleanest result, chalk paint with dark wax wins on foam. The milk-paint route needs more patience but rewards it with a muted, almost ceramic look.
Both stay under the cost of a single real heirloom pumpkin, and neither rots on the porch by November.
23. Pumpkin Patch Sign
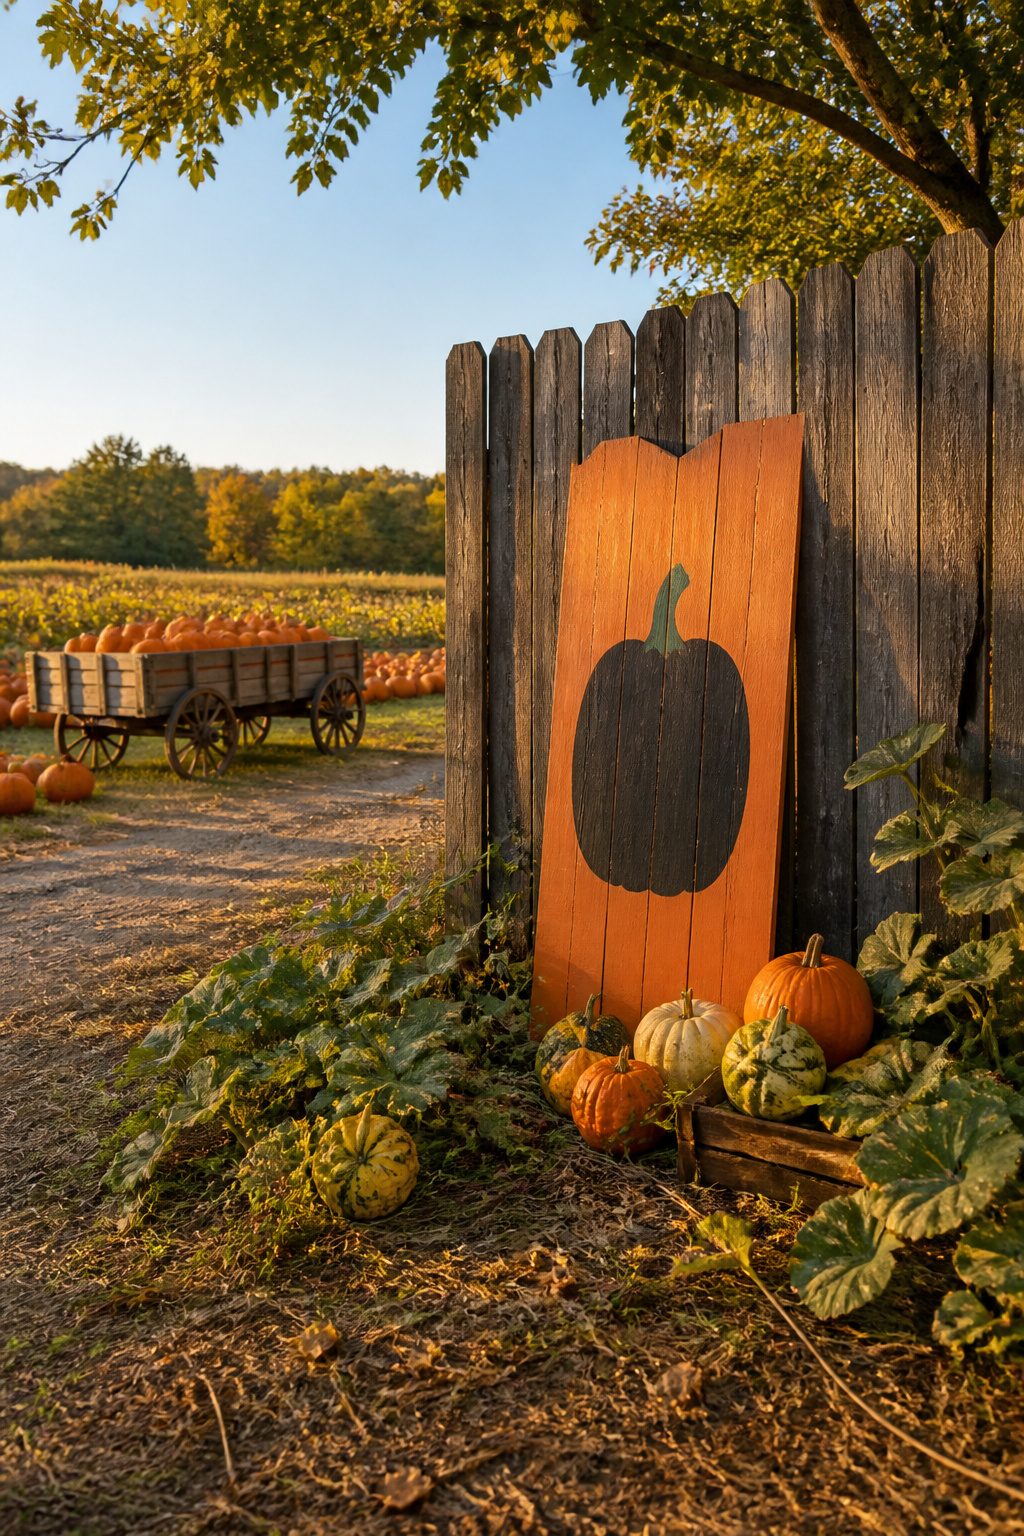
A 24-inch board is the smallest that reads from the road, though 36 inches gives drivers enough time to actually slow down and notice it.
The first sign I painted used a traced serif font, the kind sold in vinyl packs at craft stores, and it looked crisp for about two weeks before the edges started catching dirt.
Freehanding the lettering with a flat brush took longer, but the slightly uneven weight reads more like an actual farm stand and less like a kitchen decal.
Sealant choice matters more than paint quality. I brushed on a water-based outdoor polyurethane that promised crystal clarity, and by the next October the whole sign had shifted to the color of old newspaper.
An acrylic spray labeled non-yellowing has held for three seasons now, though it needs reapplication every spring after the winter salt spray.
24. Pumpkin Doormat
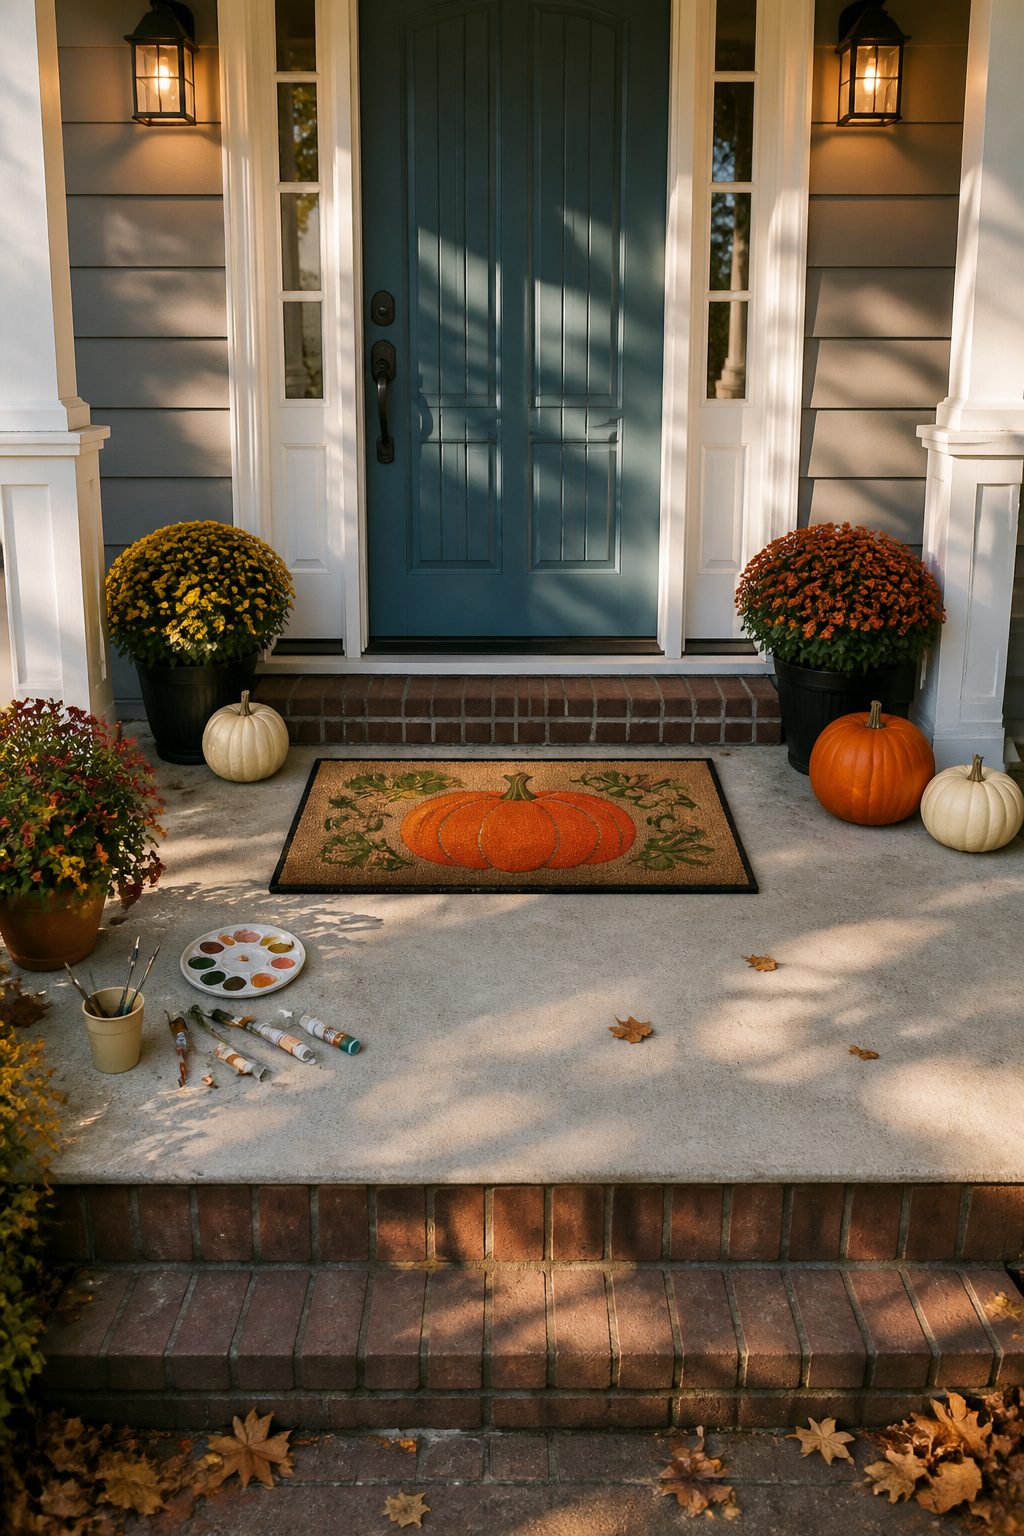
A plain coir mat takes acrylic craft paint better than the rubber-backed ones, though the fibers still drink it in and dry lighter than the bottle promises.
I cut a simple pumpkin stencil from freezer paper, ironed it wax-side down so the edges sealed flat, and still got bleed-through at every curve where the brush pressure pushed paint under the paper.
Second try I pounced the paint on with a dry stencil brush instead of stroking, and the edges stayed clean enough for a doorstep.
Two coats of exterior polyurethane were supposed to protect it from October rain. The sealant held through fall, but by February the painted pumpkin had faded to a peach blur and the coir underneath was shedding flakes.
For one season it works. For a mat you want back next year, the design belongs on a separate board you set on top, not on the mat itself.
25. Pumpkin Pillow
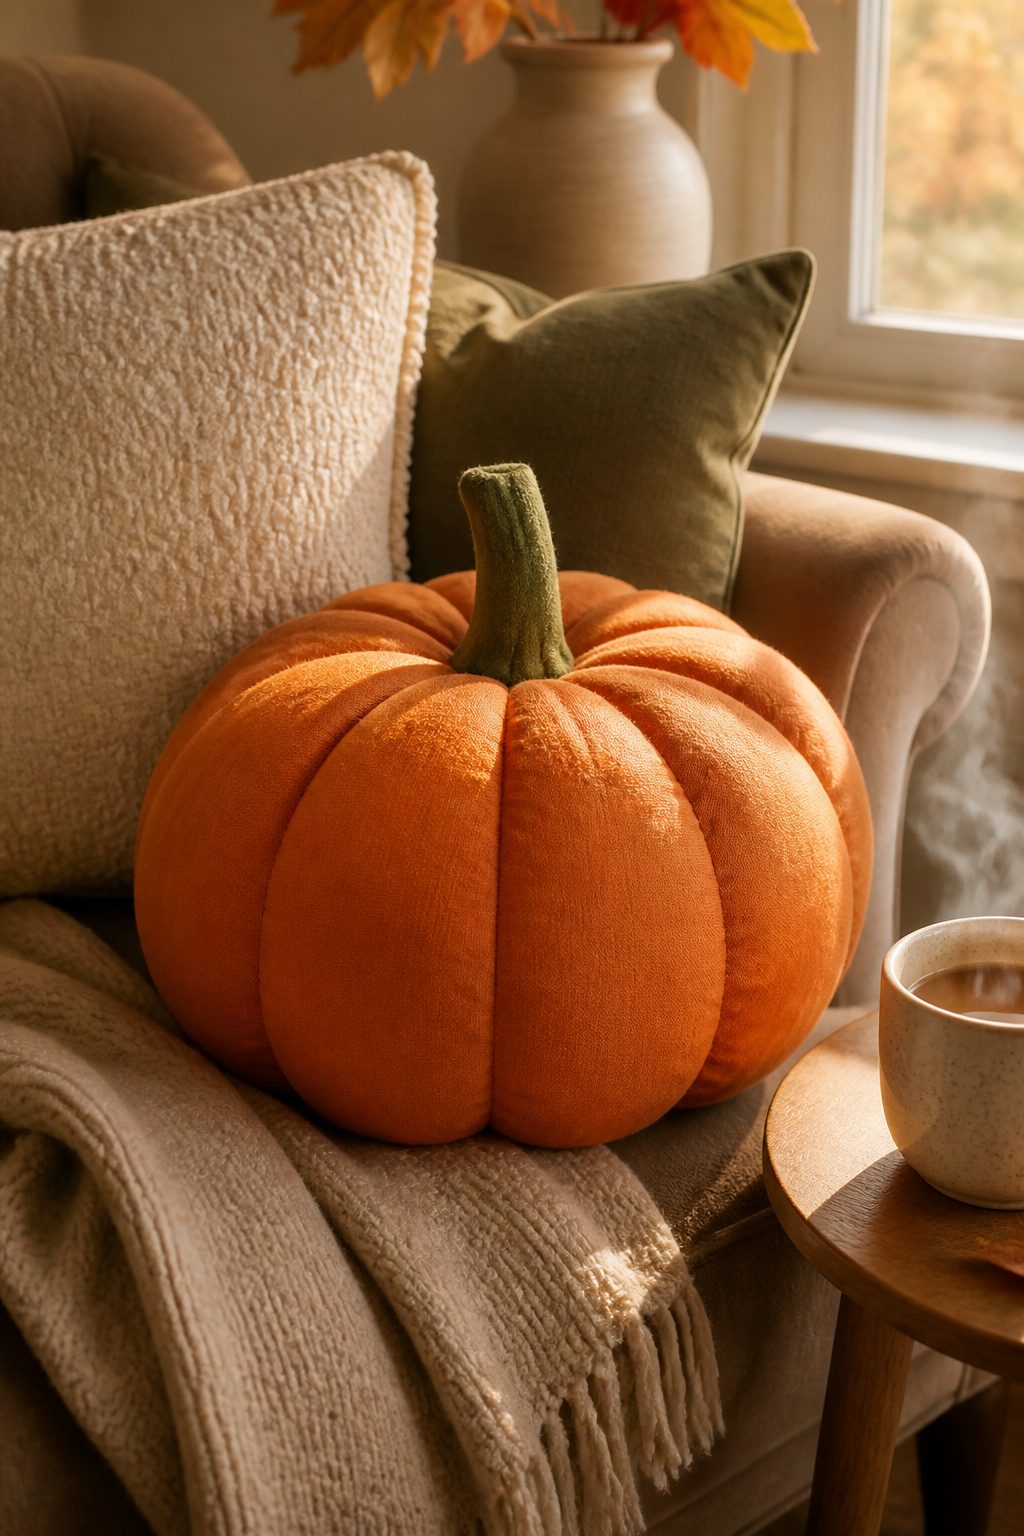
A pumpkin-shaped pillow sounds simple until you try to get the ribs to stay plump after a few sits.
The pattern that solved it for me came from a free download on a quilting blog; the designer added darts along each seam that create the segments without any hand-stitching.
I used a standard polyester fiberfill, but the trick was stuffing each rib section separately through a small side opening before closing the whole thing. That keeps the shape from flattening into a generic round blob.
For a 14-inch finished pillow, you need about half a yard of orange broadcloth plus scraps for the stem and leaf. Curved seams on a domestic machine can bunch if you rush them.
I dropped the stitch length to 2.0 mm and used a walking foot, which fed the two layers evenly around each crescent-shaped panel. The slower setting added maybe ten minutes total and saved me from ripping a single pucker.
Materials I Keep On Hand
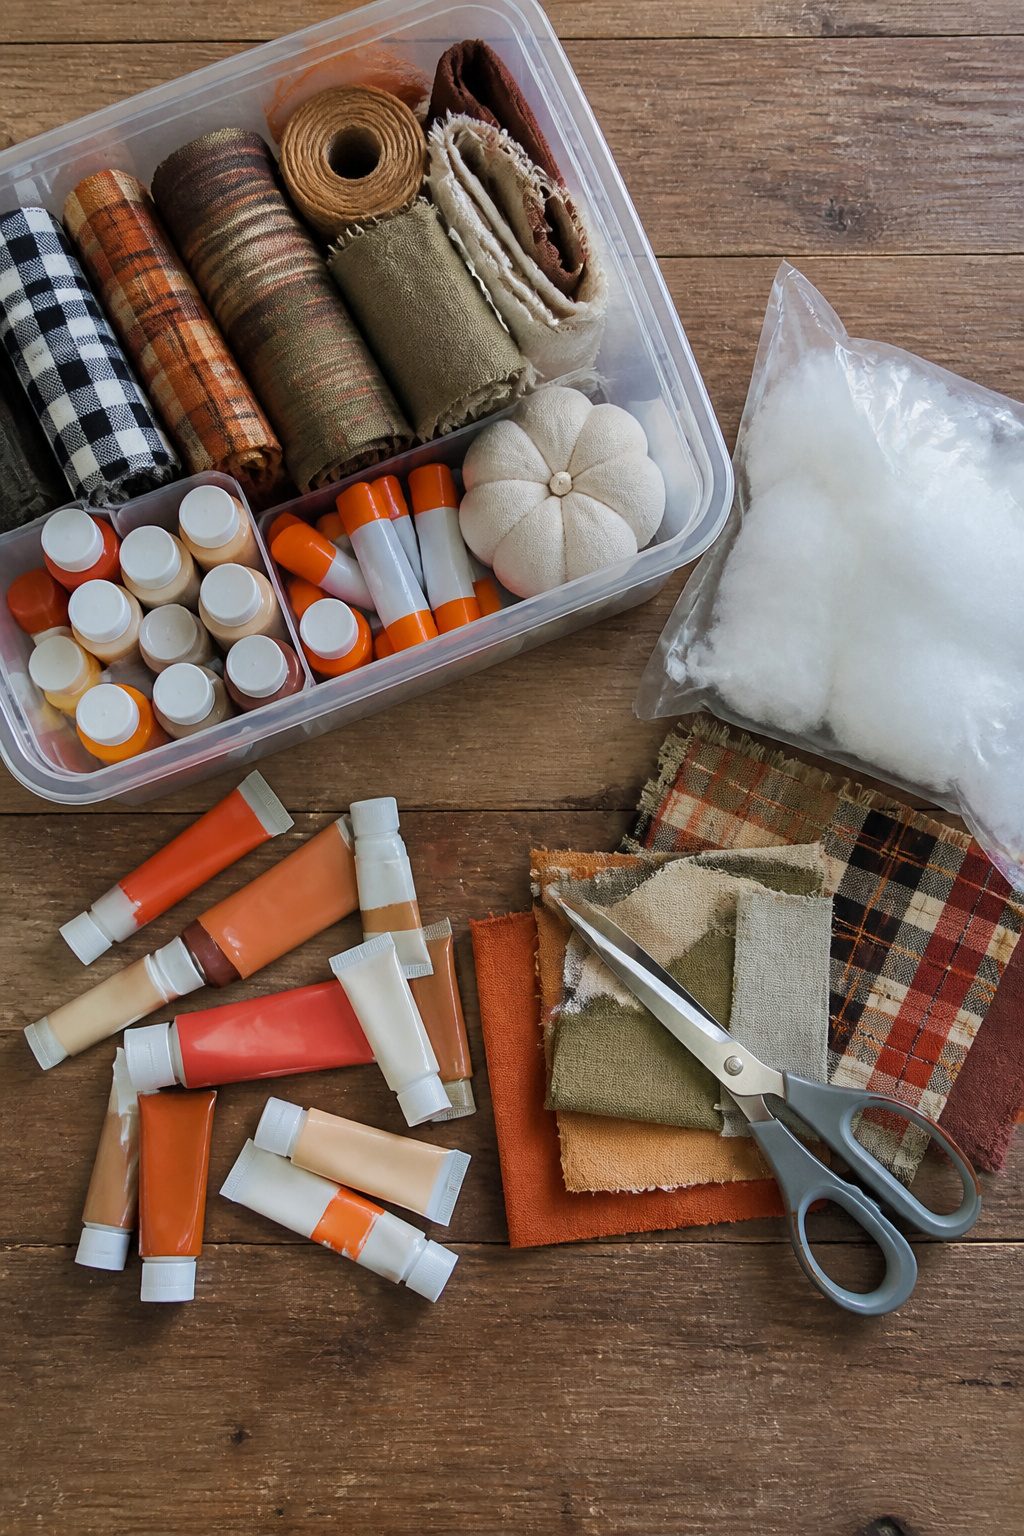
Most of these pumpkin craft ideas pull from the same small stash of supplies, so it helps to know what lives in the bin year-round and what gets bought per project. Hot glue and glue sticks are the constant.
Acrylic paint in orange and cream covers the base for nearly every painted pumpkin, whether the surface is glass, plastic, or the faux pumpkins you find at craft stores.
Wire in two gauges handles structure and detail work alike; the heavier wire shapes canning-ring pumpkins or forms a hanger, while the finer gauge wraps stems or ties off fabric gathers.
The fabric remnants bin is where most of my pumpkin material actually comes from. Scraps from drop-cloth curtains, old flannel shirts, or leftover yardage in fall plaids get cut into panels for stuffed fabric pumpkins.
A bag of poly-fil stuffing sits next to it, enough to last through several seasons of small projects. I replace the stuffing and the hot glue sticks annually; they flatten or dry out in storage.
Paint gets refreshed when the tubes run low, which happens every two or three years since a little cream and orange go a long way. Wire, scissors, and the remnant bin itself stay put.
The only per-project purchase is usually the base object: a faux pumpkin, a set of canning rings, or a cinnamon stick and burlap square for finishing a specific piece.
Keeping the core supplies in one bin means a new pumpkin project can start the same afternoon the idea shows up on Pinterest, no trip to the store required.
Kid-Friendly Choices by Age
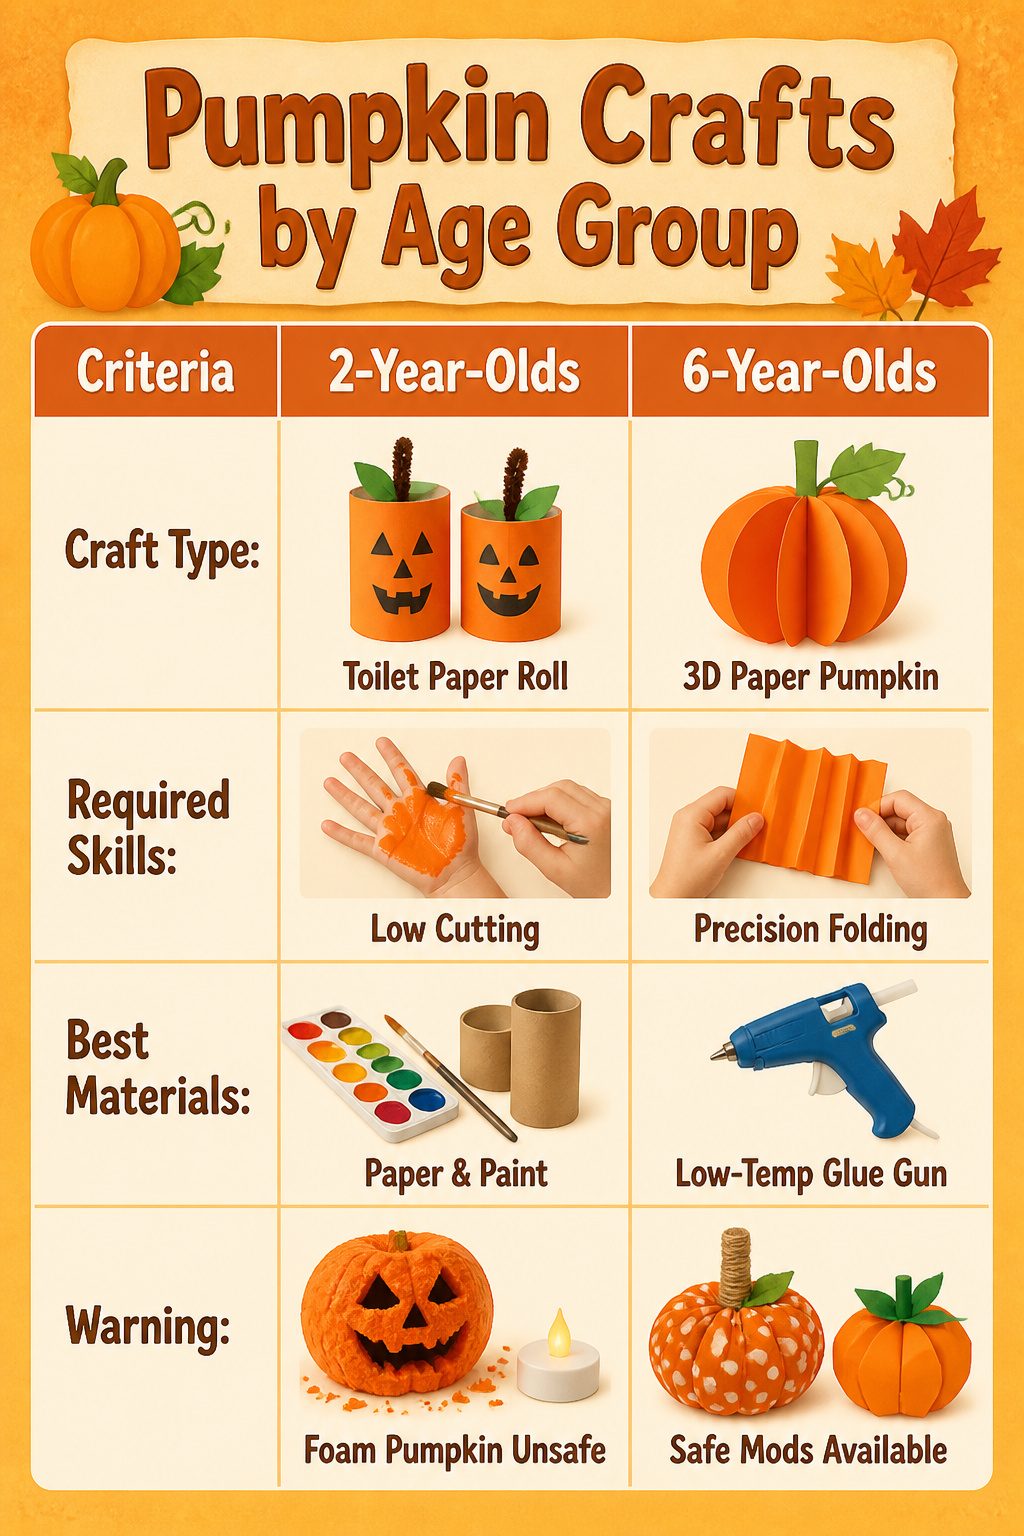
Toilet paper roll pumpkins and handprint paint projects are about right for a two-year-old. The rolls need almost no cutting, and the paint washes off most surfaces if you spread newspaper first.
By six, a child can manage 3D paper pumpkins and egg carton projects that need folding and more precise gluing.
The ten-year-old in my house got her own low-temp glue gun last fall for fabric pumpkins, and the seams she pressed herself held up through Thanksgiving.
The one project I thought was safe and was not: a carved foam pumpkin with a tea light.
The foam shed tiny bits a toddler put straight in her mouth, and the "flameless" candle got hot enough to scar the surface in under ten minutes.
Stick to paper, fabric, or the real thing until every kid in the room is past the put-everything-in-mouth stage.
What I Save and What I Toss
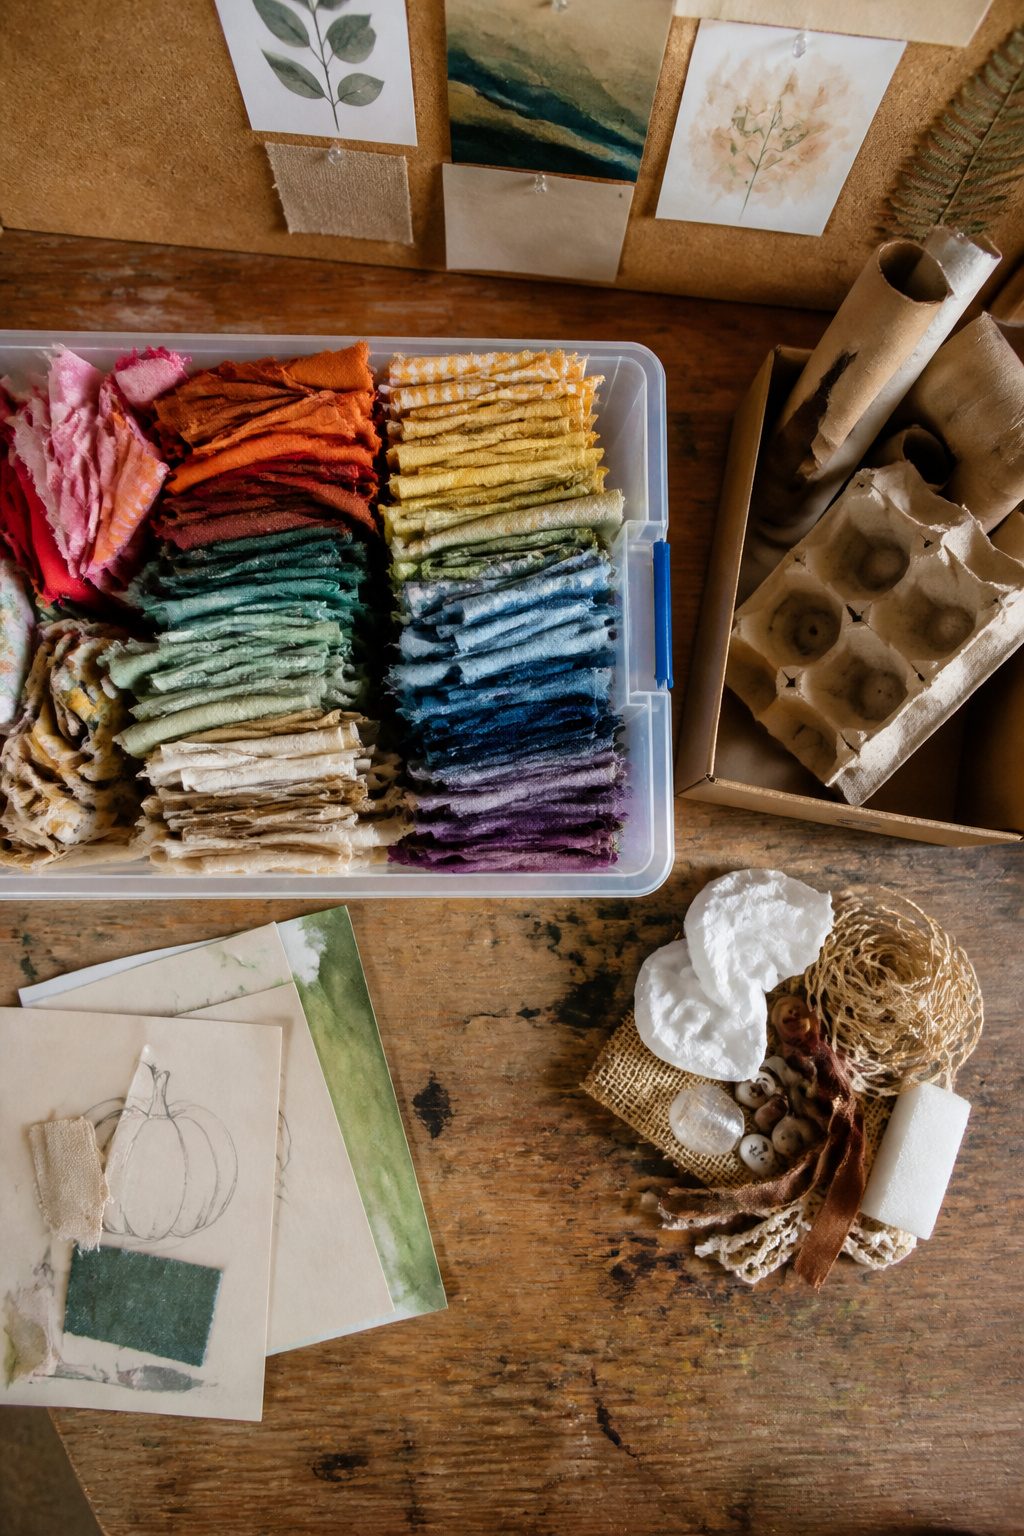
Egg cartons and toilet paper rolls multiply in my craft bin faster than I can turn them into anything.
I finally started a one-in, one-out rule: if a new cardboard tube arrives, the softest, most dented old one leaves that week. Wine corks were the opposite problem.
Three years of saving produced just enough for one small pumpkin project, and now I wish I had spent that drawer space on something else.
Fabric scraps follow a stricter test. Anything smaller than a credit card goes straight to stuffing or trash; anything palm-sized or larger gets folded into a clear shoebox by color.
Clear containers save projects, because what I cannot see does not get used. The exceptions are seasonal prints, which earn their own slim bin so I am not hunting through July watermelon scraps when October arrives.
Fall Themes That Hold Past Halloween
The line between autumn and Halloween decor is thinner than most of us pretend.
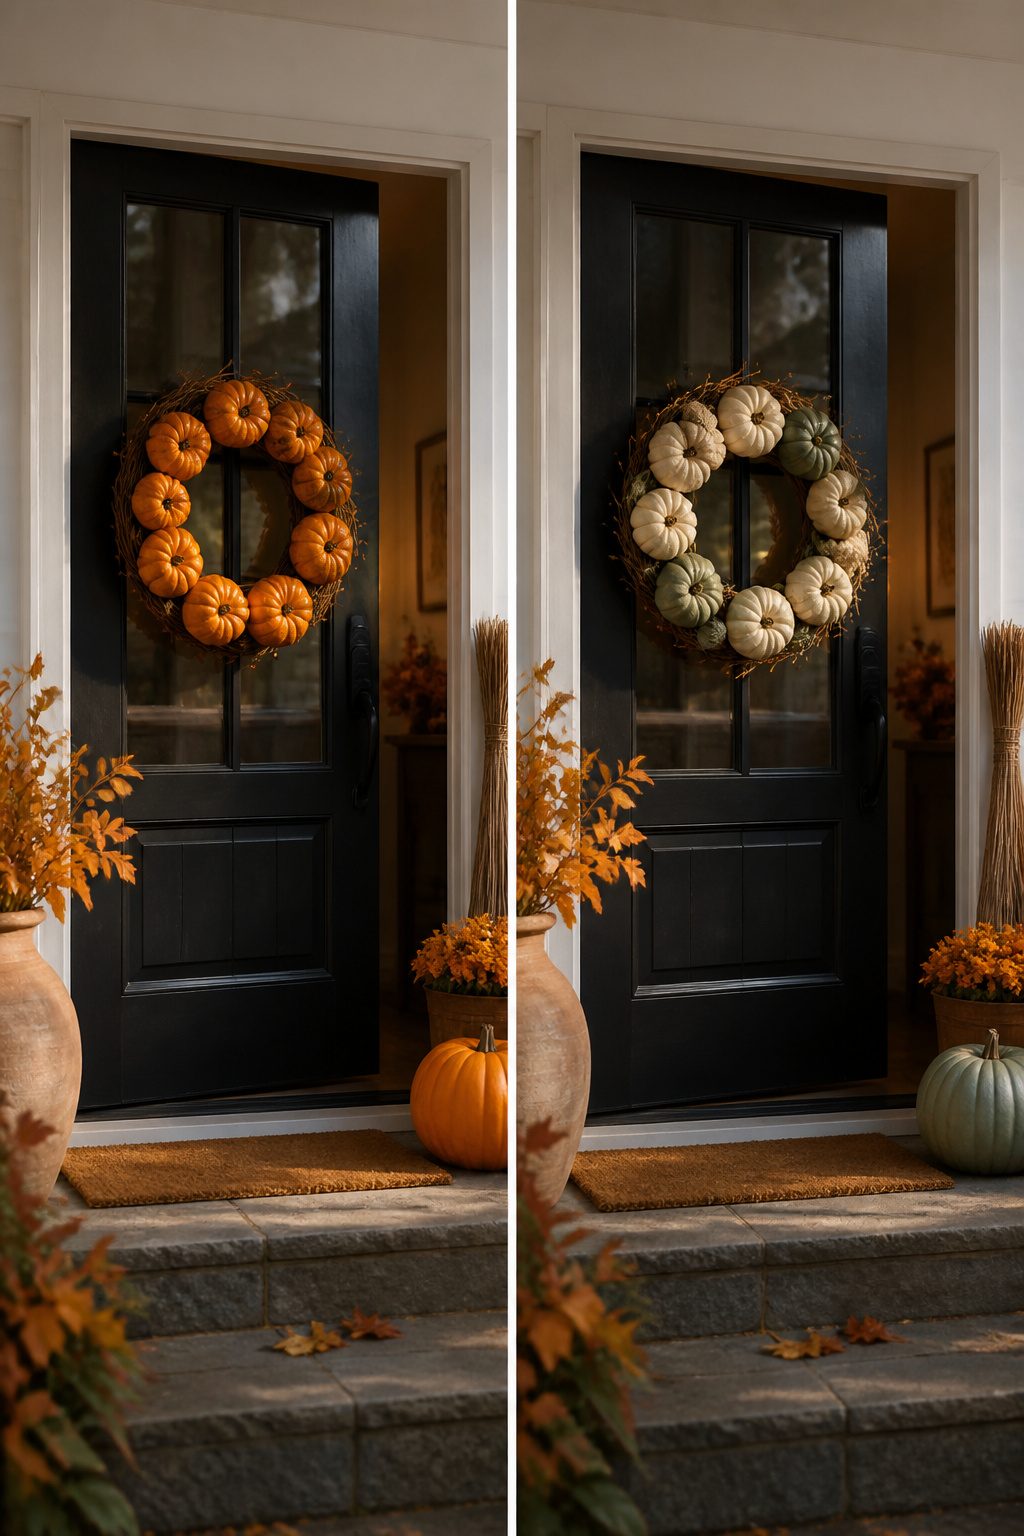
Cream and sage replace orange the moment you want a piece to survive past October 31, and anything with eyes or fangs needs to go back in the bin that night.
I learned this the hard way one November when the mummy-wrapped foam pumpkins stayed on the mantel through the first week of November. The gauze strips looked sad under ordinary daylight, and every guest asked why Halloween was still up.
They came down that afternoon.
The pumpkin wreath on my door is the counterexample. I built it from craft pumpkins in off-white and pale green, wired to a grapevine base with no jack-o’-lantern faces, no black accents.
It read harvest rather than haunted house, and it stayed up through Thanksgiving dinner without a single comment. The trick was the color shift: orange reads holiday-specific, but those muted tones read seasonal.
Faux pumpkins make this easier because they do not rot or attract pests, so the wreath could hang for two months without maintenance.
Versatility matters more than I used to think. A pumpkin project that works for both Halloween and Thanksgiving saves time and storage space, but only if you commit to the restraint during the making.
Frequently Asked Questions
What are some easy pumpkin crafts for kids?
Paper plate pumpkins, egg carton pumpkins, and handprint pumpkins all work well for children. Toilet paper roll pumpkins let four-year-olds manage the painting and pinching together of precut strips, though an adult should handle the hot-gluing step.
For the fastest finish, no-sew flannel pumpkins built with rubber bands instead of a needle can wrap up before Sunday night.
How can I decorate a pumpkin without carving it?
Paint, fabric, and embellishments all work without touching a knife. Embroidery hoops lashed into a sphere and stretched with fabric make a ribbed pumpkin that weighs almost nothing.
Mason jar lid rings wired into a sphere and spray painted in burnt sienna with a matte black mist read as vintage farmhouse rust rather than cartoon orange.
What materials do I need for pumpkin crafts?
Common materials include fabric, paint, glue, and recycled items like toilet paper rolls and egg cartons. Mid-weight cotton duck or heavy linen holds the dome shape for embroidery hoop pumpkins without sagging.
For concrete pumpkins, you need Portland cement, fine aggregate, and plastic craft pumpkins as molds you can cut away after curing.