
A wooden Christmas tree is a frame, shelf, or stack of cut boards shaped into a taper and left bare, painted, or lit in place of a live fir.
The catch is storage: a four-foot collapsible shelf unit folds flat against a closet wall, but only if you build the hinge system right with a pivot bolt at the apex.
Ana White’s plans keep the cost to a weekend project using cedar fence pickets and 1-1/4" screws.
Collapsible Standing Wood Christmas Tree Shelf
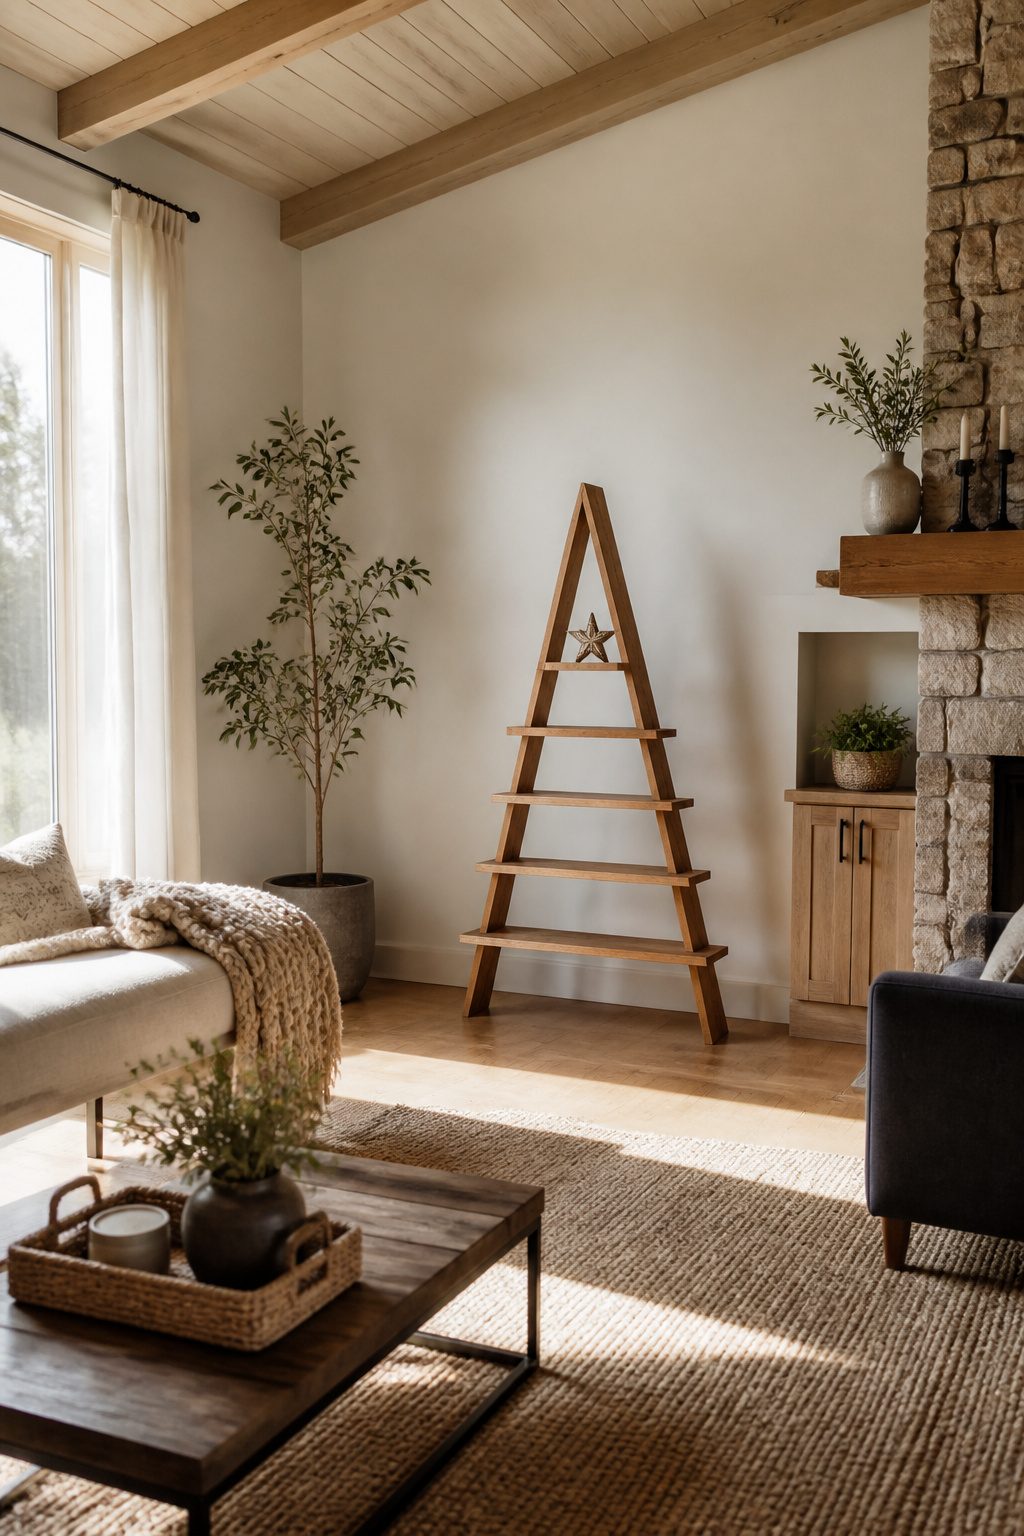
A collapsible standing shelf tree is the most furniture-like of the wooden tree options, and that comes with tradeoffs. The frame stands four to five feet tall and needs real floor space, not just a corner you clear for December.
The hinge system is the part that makes or breaks the project: two matching A-frame sides connect with a pivot bolt near the apex so the whole unit folds flat against a closet wall or slides under a bed.
The shelves run between the legs in graduated lengths, shortest at the top, each sized for a small ornament, a votive, or a sprig of greenery rather than a full-size decoration.
Ana White’s plans use cedar fence pickets or 1×6 whitewood, brad nails, wood glue, and 1-1/4" screws, which keeps the cost in the weekend-project range.
The 2×4 variation strips the design down even further, trading the shelf depth for a minimalist profile that reads more tree-substitute than storage piece.
Either way, this is the build to choose if you rent a small space and want one piece that stores flat and earns its keep as actual furniture the three weeks it stands upright.
Nesting Wood Christmas Tree Decor
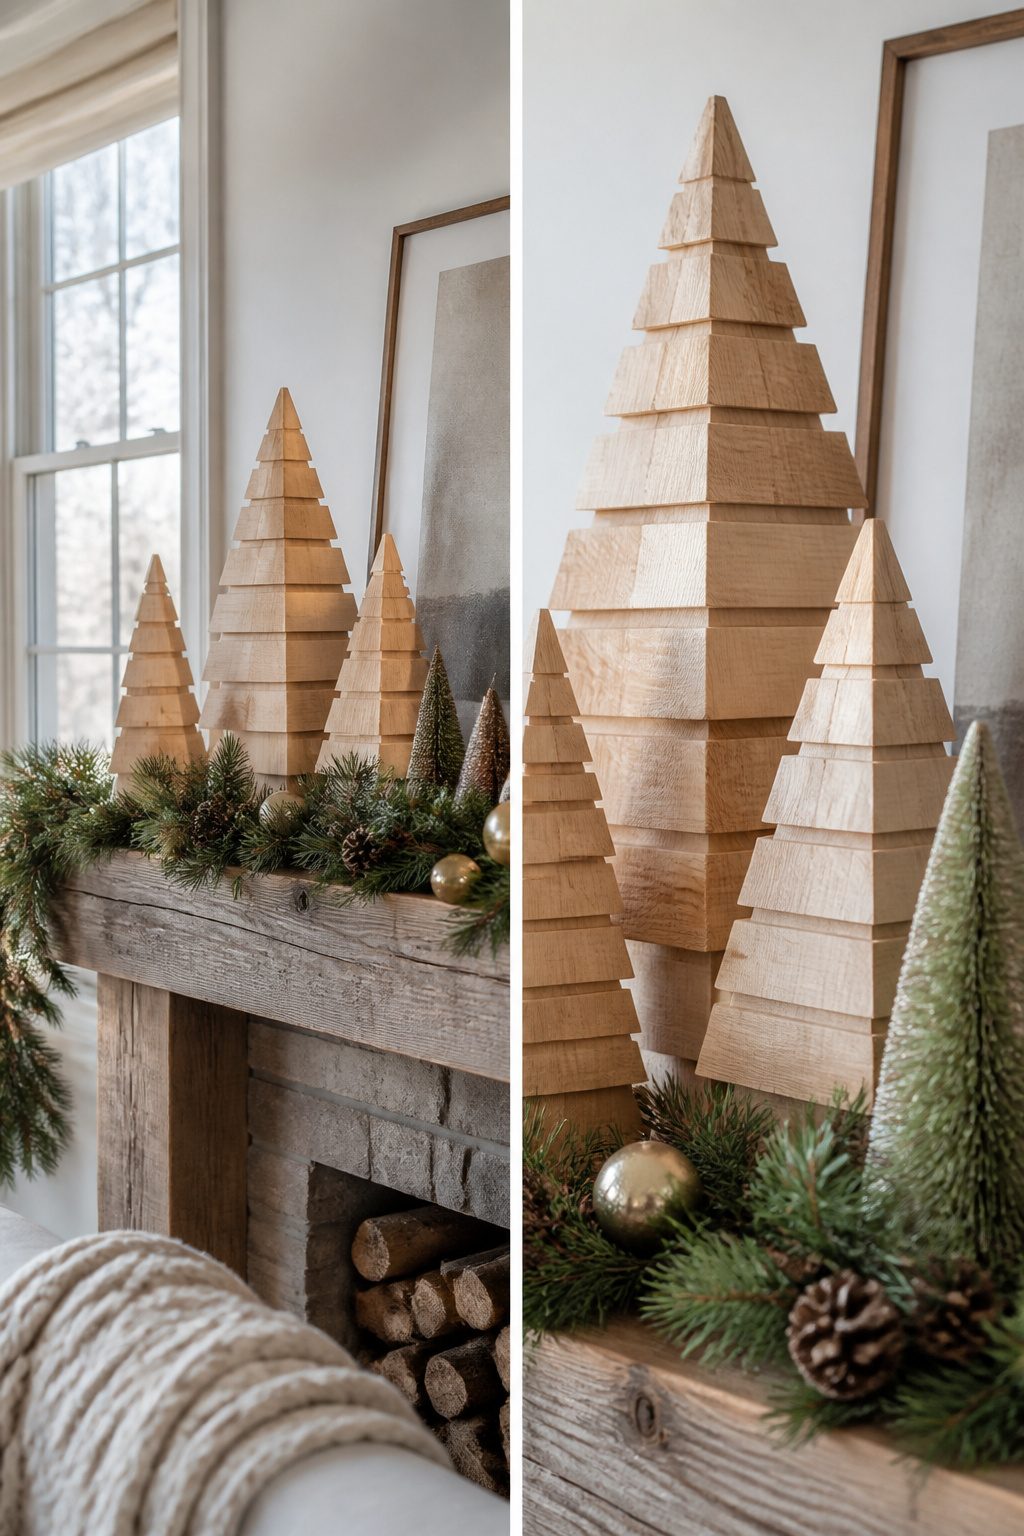
A 1x board and a miter saw will get you a whole family of trees that slip inside one another come January.
The stepped profile is the trick: each tier is a shorter square than the one below it, so the silhouette reads as a tree from the front and a hollow box from the top.
I like that the same cut repeats; once the fence is set, you are just slicing different lengths.
Sizes from about 6 inches to 18 inches tall fit the standard spots, a windowsill to a mantel, and the whole stack stores flat in a shoebox or slides under a bed. That matters more than it should.
My holiday bin lives in a closet that also holds the vacuum and two coats I never wear, so anything that nests instead of stacking wins the space battle.
Brad nails and wood glue hold the corners; the pieces are light enough that you do not need screws.
Paint them to match whatever your room is doing that year, or leave the grain bare if you are going for the quiet Scandinavian look.
At roughly $1 to $2 per tree, this is the project you batch out on a Saturday morning and hand out to friends by afternoon.
Wood Slice Christmas Tree
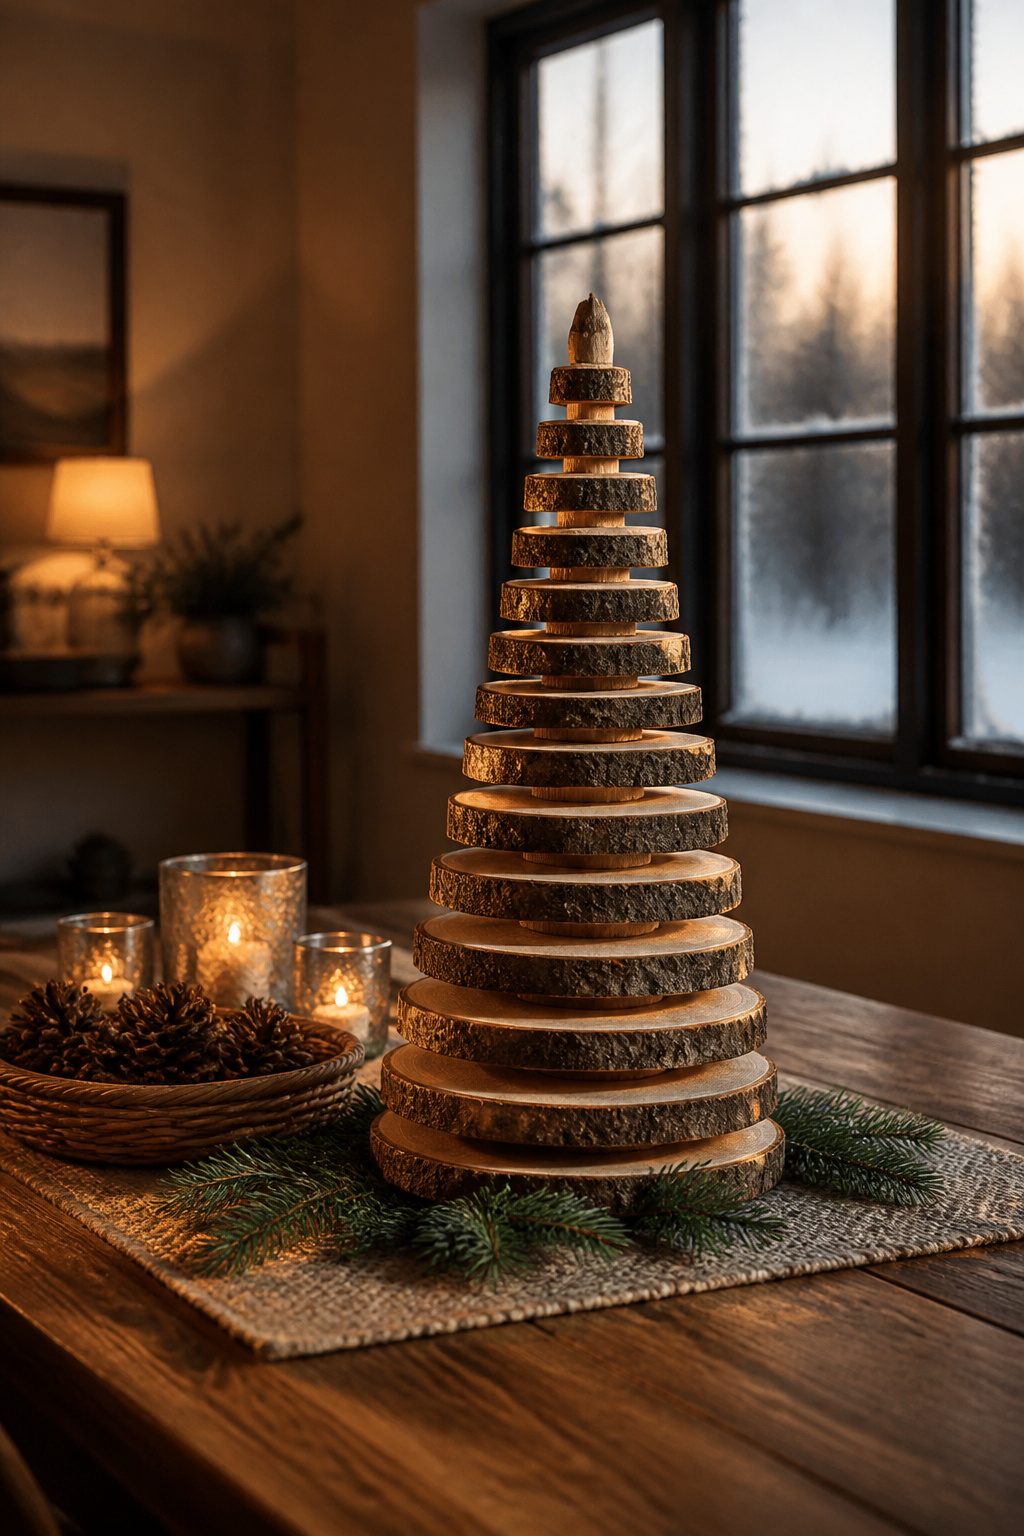
Cross-cut slices from a fallen branch give you a tree that still looks like a tree.
The rings read as ornament, the bark edge catches light against a wall, and no two pieces match because grain and ring pattern shift with every cut.
Most builds land between 12 and 24 inches tall, small enough for a mantel or a table center.
You can saw your own slices with a miter saw if you have a branch thick enough, or buy bagged craft slices ready to sand.
Either way, the bark edge is what sells the rustic look, so leave it on unless it is actively flaking.
Arrange your graduated sizes from a wide base to a narrow top, drill a center hole through each, and thread them onto a dowel or a length of rebar.
A dab of hot glue between slices keeps the stack from shifting if someone bumps the table.
The whole thing takes an afternoon and costs whatever the slices cost, which makes it one of the easier entries into wooden holiday builds.
Pallet Wood Christmas Tree
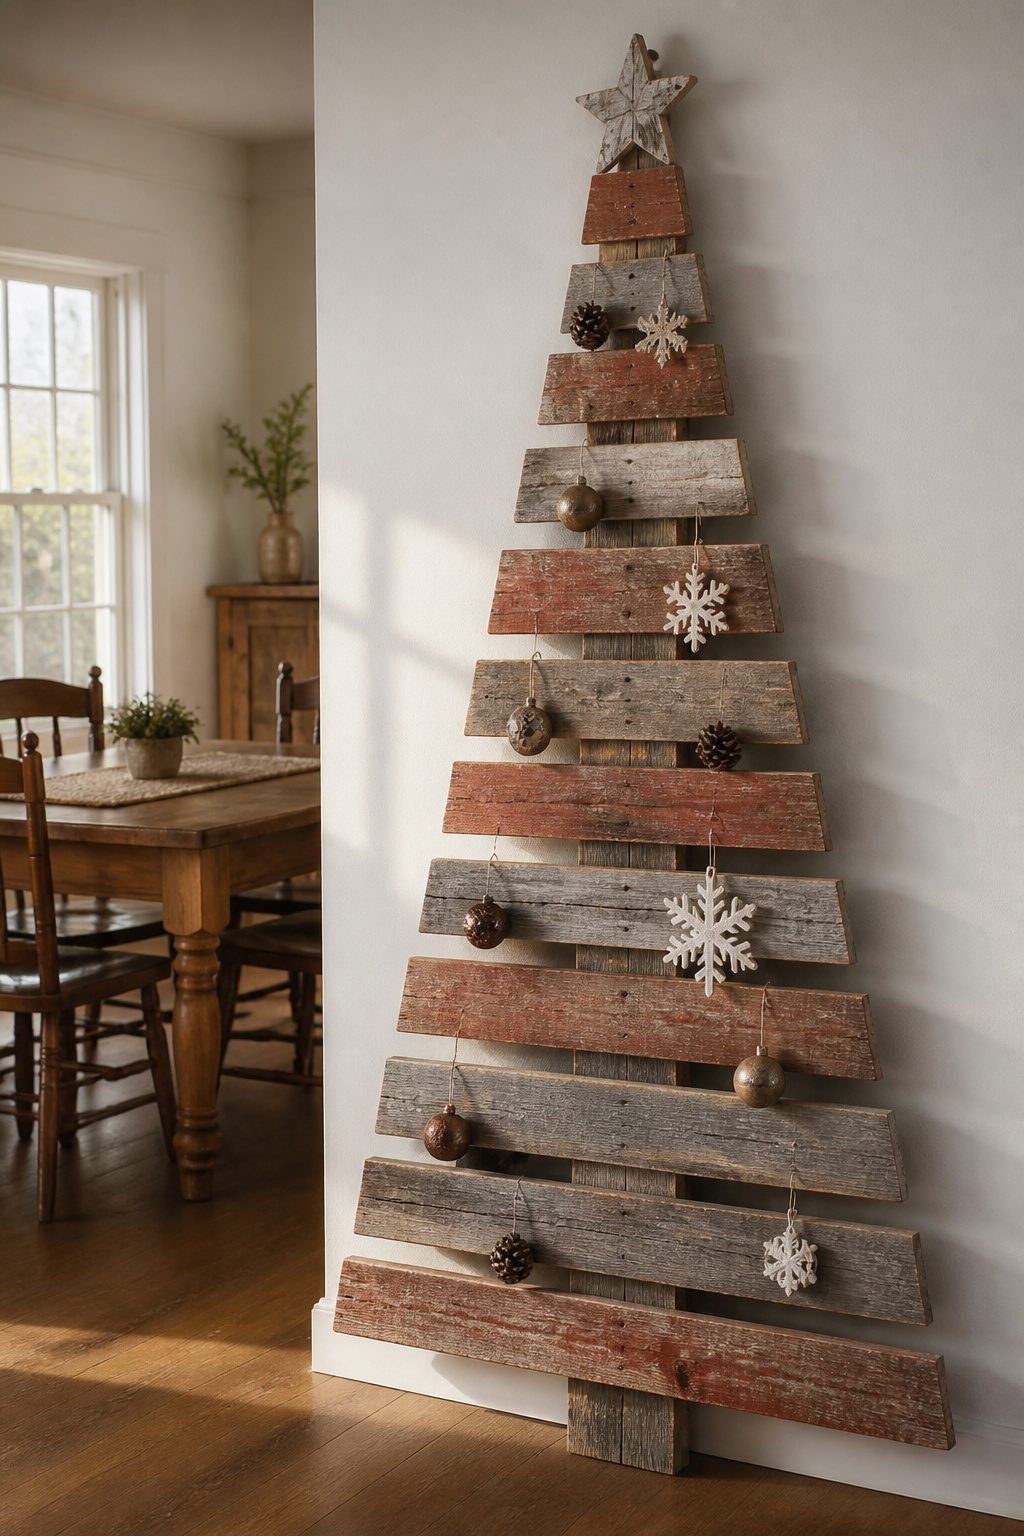
Pallet wood brings its own finish, which is half the point. The grayed or red-brown surface has already spent months or years outside, so the color is baked in and no stain is necessary.
What you do need to check is the stamp on the pallet itself: HT means heat-treated and safe to bring indoors; MB means chemical-treated with methyl bromide, and that one stays in the garage or goes back to the curb.
Breaking a pallet apart without splitting the slats takes patience. A pry bar and hammer work, but the trick is working from both ends of each slat and easing the nails out rather than ripping straight up.
A cat’s paw nail puller saves pieces that would otherwise crack at the fastener.
Most builders end up with a pile of slats between two and four feet long, which happens to be a comfortable span for a wall-mounted triangle tree.
The usual build is flat, not freestanding. Two vertical back slats form the trunk, horizontal pieces run across as branches, and the lengths step down toward the top.
A single screw per joint is enough for something that hangs on a wall and never carries weight. The gaps between horizontal slats let the wall color show through, so the tree reads as silhouette rather than solid mass.
A few nail holes or a faded paint ghost from the pallet’s first life only add to the look.
2×4 Christmas Tree
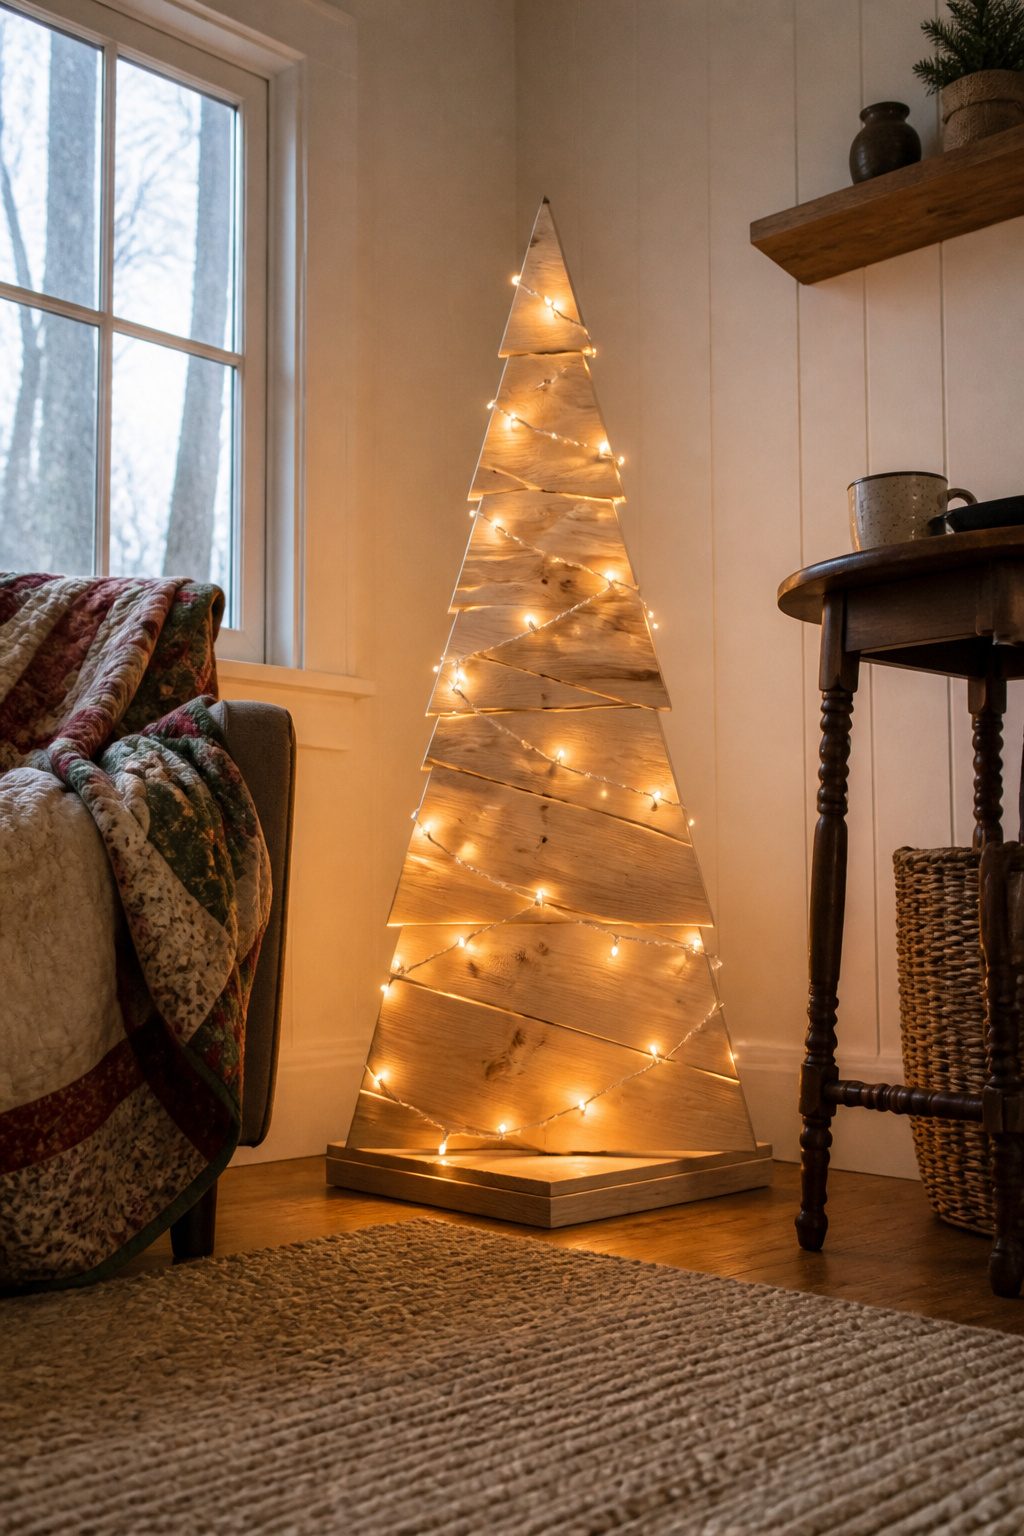
A 2×4 Christmas tree is where most people start, and for good reason. The whole build runs on 30-degree miter cuts that let five to seven tiers of branches stack neat and symmetrical to a point.
Perpendicular cuts keep the long points on the same side of the board; flip one piece and you get the mirror branch. Parallel cuts, with long points on opposite sides, handle the few straight connectors.
Either way, one setting on your saw gets you through the stack.
The finished tree lands around three feet tall, porch-friendly, easy to wrap with lights. Material cost sits at roughly $10 to $15 if you buy new 2x4s, less if you have scrap on hand.
Sand before you assemble, not after. I learned that watching builds where the builder skipped sanding first and fought splinters at every joint.
220 grit on all faces saves the trouble.
Scrap Wood Christmas Tree
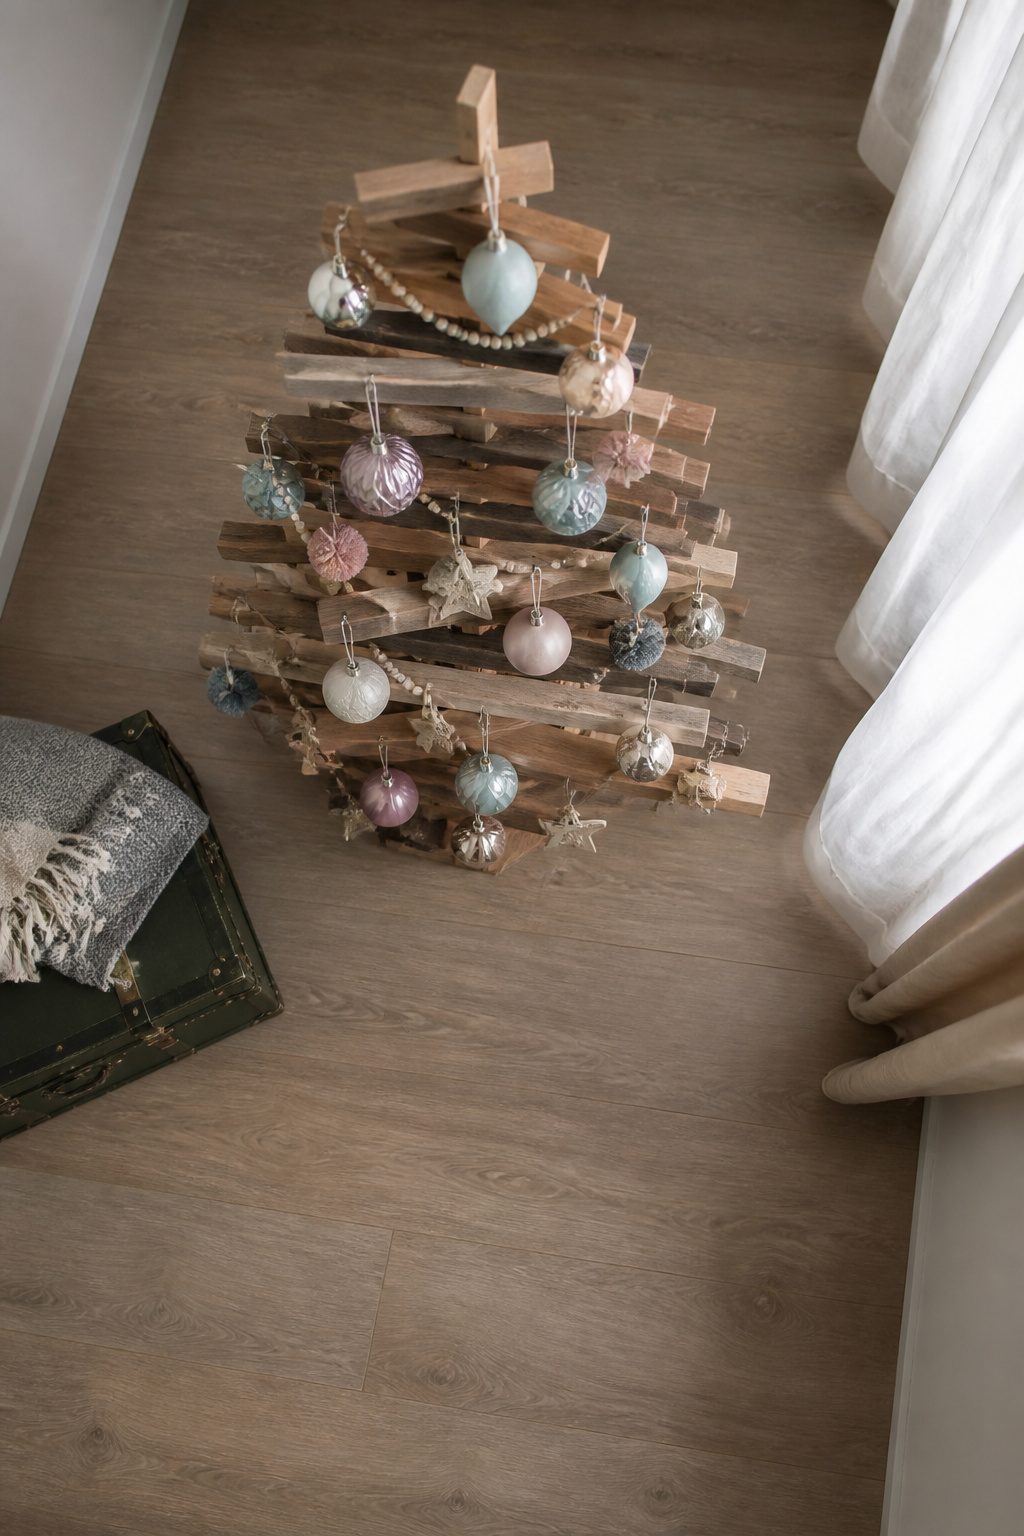
The scrap wood Christmas tree starts with whatever is already in the garage, and the irregular widths become the point rather than something to hide.
A 1×2 strip from a previous project gives you a small tabletop version; a 2×6 board scales up to something free-standing for the porch. The puzzle is fitting the pieces together so the taper reads as intentional, not accidental.
I have seen these work at anywhere from two feet to six feet depending on what the cutoff pile actually holds, and the zero-cost entry is the real draw when the only spend is a few brad nails and an hour of fitting.
A 45-degree angle cut is the only technical requirement, so a miter box and hand saw handle it if the circular saw is already buried under other projects.
Paint or stain covers the mismatched species, though leaving some boards raw and others washed white gives a village effect that reads as rustic charm rather than unfinished business.
The common mistake is forcing symmetry: the sources that rank treat the unevenness as the style, not a flaw to plane away.
If the longest board you have is thirty inches, that sets your height and you build the rest shorter from there, working down in whatever increments the pile allows.
Hanging Twig Christmas Tree
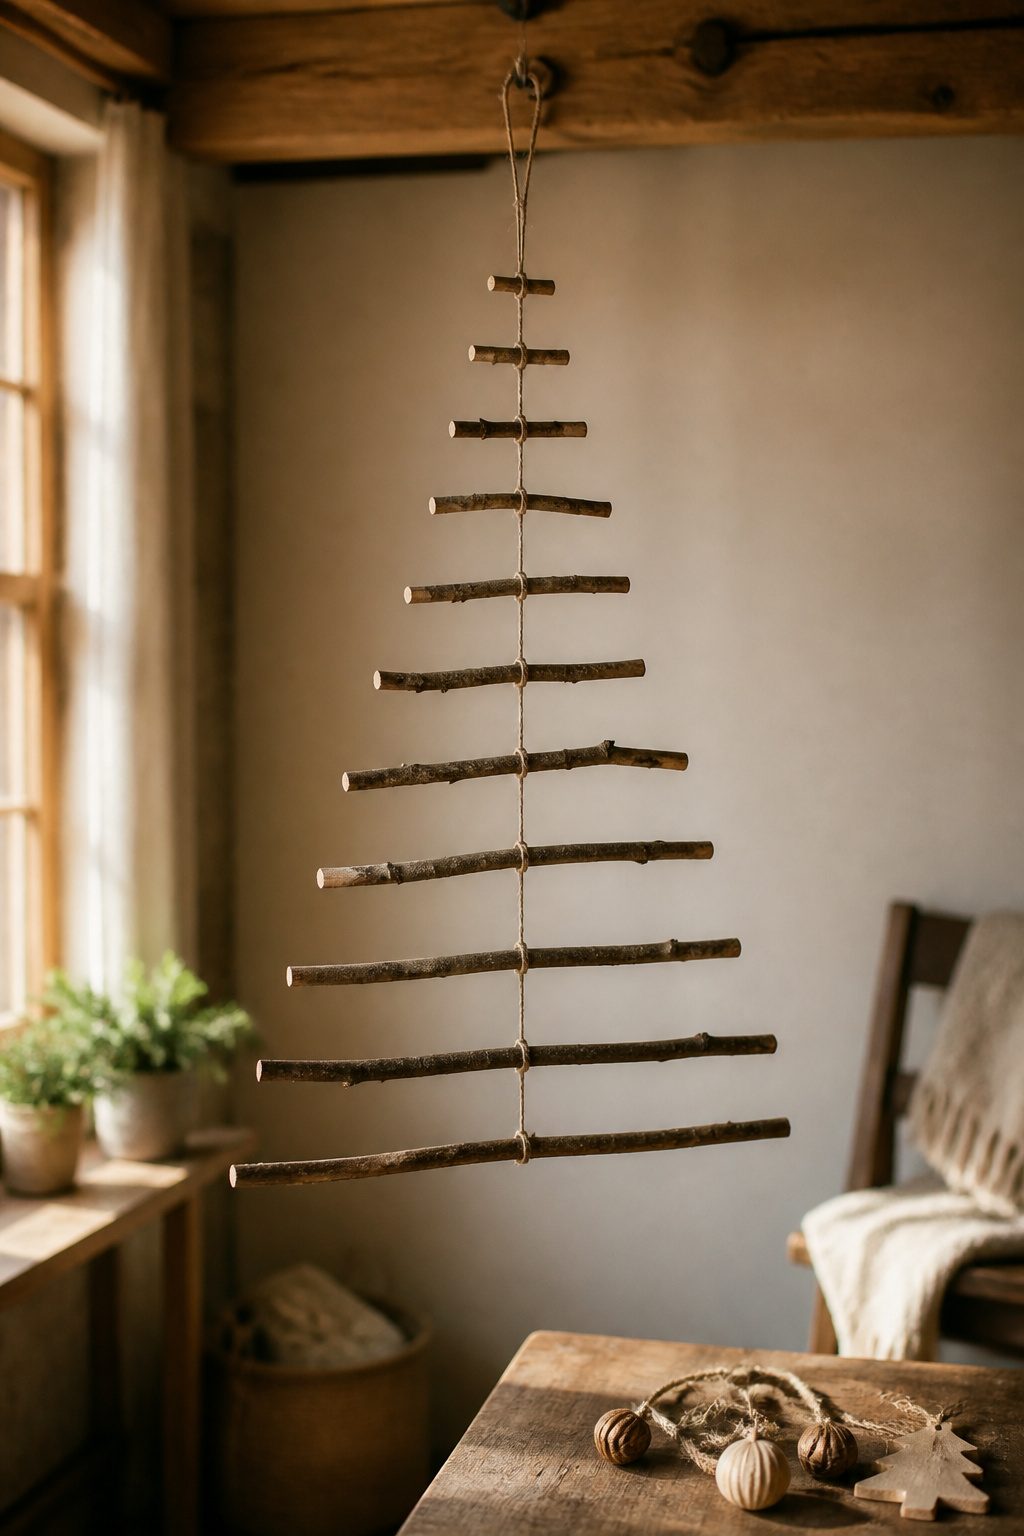
A hanging twig Christmas tree solves the floor-space problem by moving the whole thing to the wall.
Thin branches, roughly the same diameter as a pencil, get laid out in tiers from longest at the bottom to shortest at the top.
Twine lashed around a central spine, or wire if you want it to last past one season, holds the shape without glue or fasteners.
The gaps between twigs leave room for a few lightweight ornaments, though anything heavy pulls the whole frame crooked.
The real appeal is the collecting. Branches dropped after wind or pruning work better than green cuttings, since dry wood holds its shape and weighs almost nothing.
A walk through any neighborhood with mature trees usually turns up enough material for two or three trees in under an hour.
Apartment renters in studios or converted bedrooms get the full silhouette without surrendering the two square feet a standing tree demands, and packing it flat in January takes thirty seconds.
Wooden Christmas Tree Card Holder
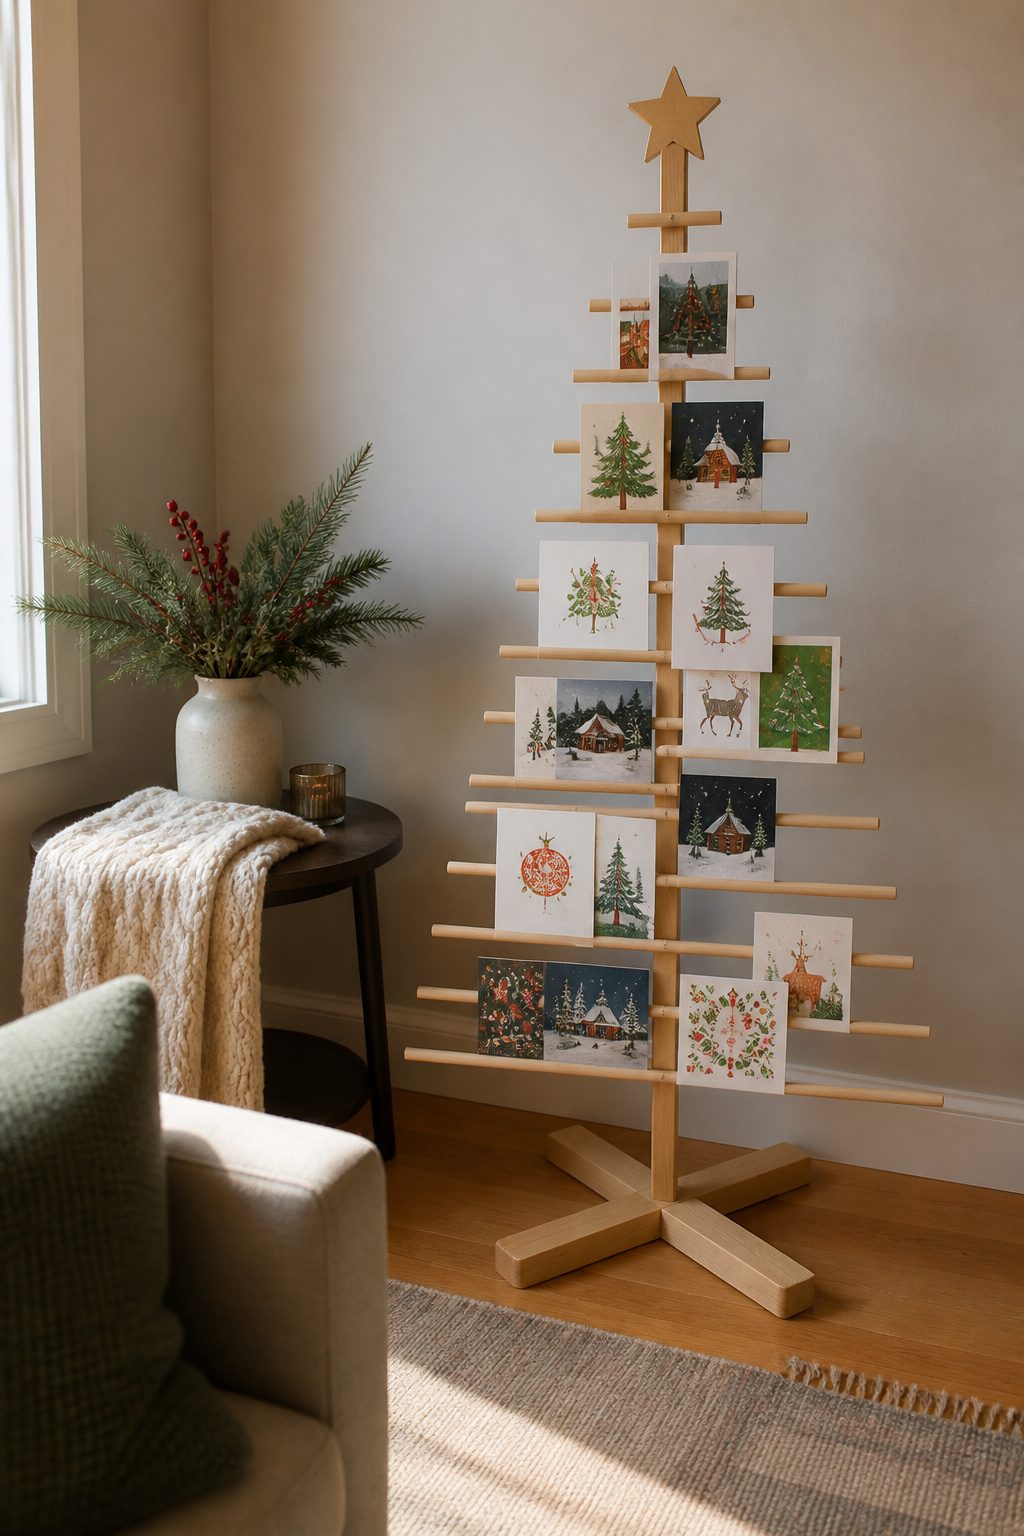
A freestanding wooden tree with horizontal slots or small clothespins solves the annual problem of where to put cards without cluttering every flat surface.
Most designs hold 12 to 20 cards, enough for the stack that still arrives even as mailed cards slow down.
The clothespin version, often built from pallet wood, lets you swap photos and cards daily; the slotted version from 1x material drops cards into saw kerfs that keep them upright without clips.
Skill level is genuinely beginner. A tape measure, saw, nailer, sander, and safety glasses get it done, and the finished piece stands on its own so you skip the tree-stand hunt entirely.
For small apartments, this can double as your only Christmas tree, which is how I ended up building mine the year a real fir would not fit through the door frame.
The cards face outward, the tree stays narrow against a wall, and the flat surfaces stay clear for actual living.
Rustic Wooden Christmas Tree
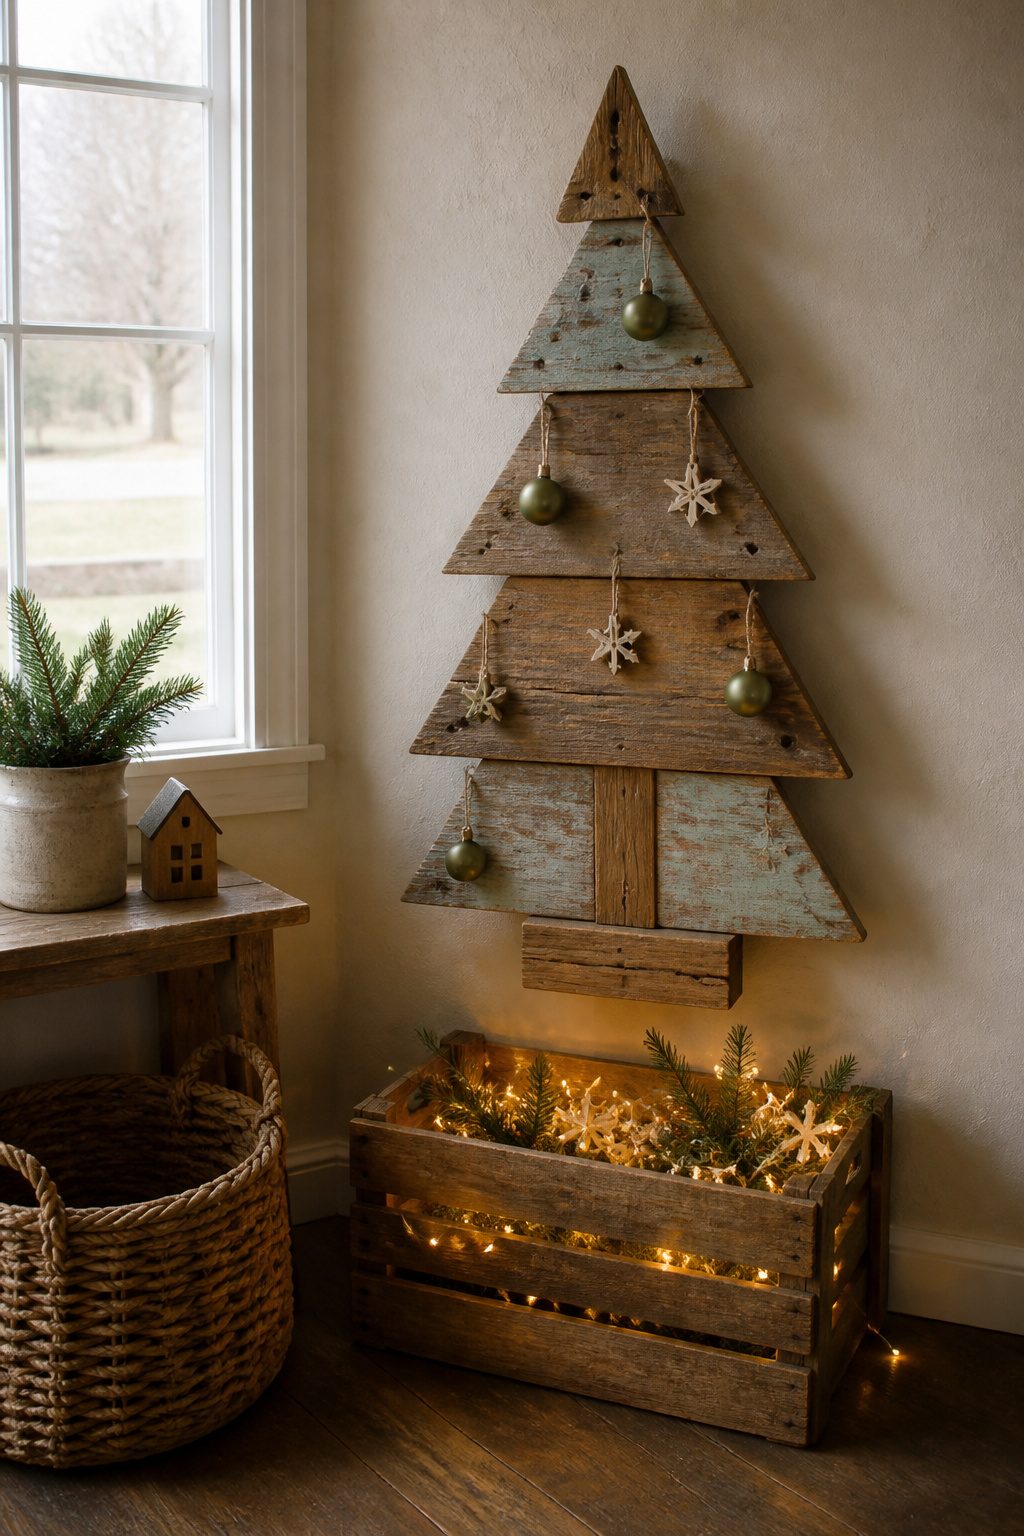
Reclaimed fence pickets or barn wood carry their own history in every nail hole and grayed streak, and that surface is exactly what sells the look.
The first time I built one of these, I sanded the boards smooth out of habit, then stood there looking at something that could have come from any big-box shelf.
The distressed grain is the whole point; stop sanding while the edges still catch on a sleeve. A light pass with 80-grit, just enough to banish splinters, leaves the weathering intact.
Painted or polished trees fight for attention. This one hangs back.
The muted tones read as found object rather than craft project, which matters in a small apartment where every piece competes for visual space.
Most versions run 3–4 feet tall and mount flat to the wall, so they eat zero floor space and survive a move without disassembly.
Ana White’s fence-picket version lands around $3 in materials, which leaves room in the budget for a string of warm-white lights or a small star cut from the same scrap pile.
The wall bracket is two 1x3s in a shallow V; the boards nail across at descending widths. No miter cuts, no hardware store runs.
The chippy paint and water stains you started with become the decoration, not a problem to cover.
Colorful Wooden Christmas Trees
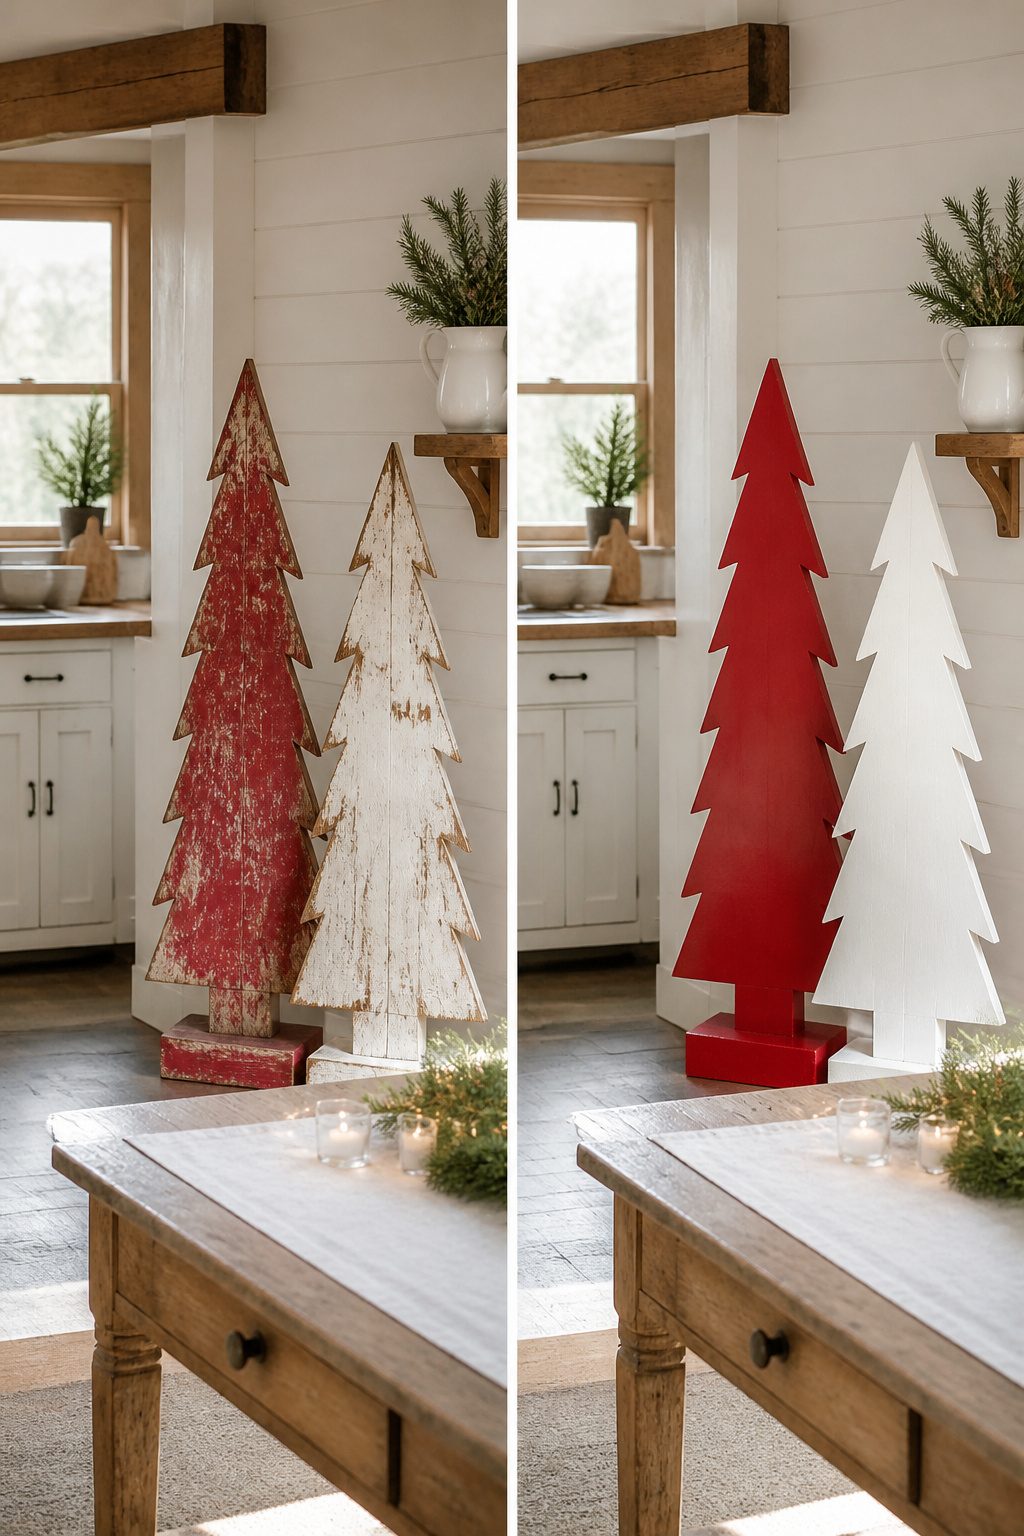
Paint turns a wooden Christmas tree into something that reads as intentional rather than improvised.
White latex paint gives a clean, modern silhouette that disappears against pale walls in small apartments, while deep red milk paint carries a folk-art weight that works in older houses with trim and moldings.
I have used both on the same basic 1×4 frame, and the color does more of the visual work than the joinery ever will.
The practical advantage is that paint forgives cheap wood. Pine and poplar from the home center look uniform once coated, though both bleed tannins through light colors if you skip primer.
I learned that the hard way with a pale blue tree that developed yellowish ghosting at the knots after two weeks indoors. Shellac-based primer blocks that bleed; water-based primer does not, and you will notice the failure by January.
Milk paint sits flatter and chalkier than latex, which can look plastic on large surfaces, but it needs a bonding agent on non-porous wood or it chips when the tree knocks against a doorframe in storage.
Tools and Materials
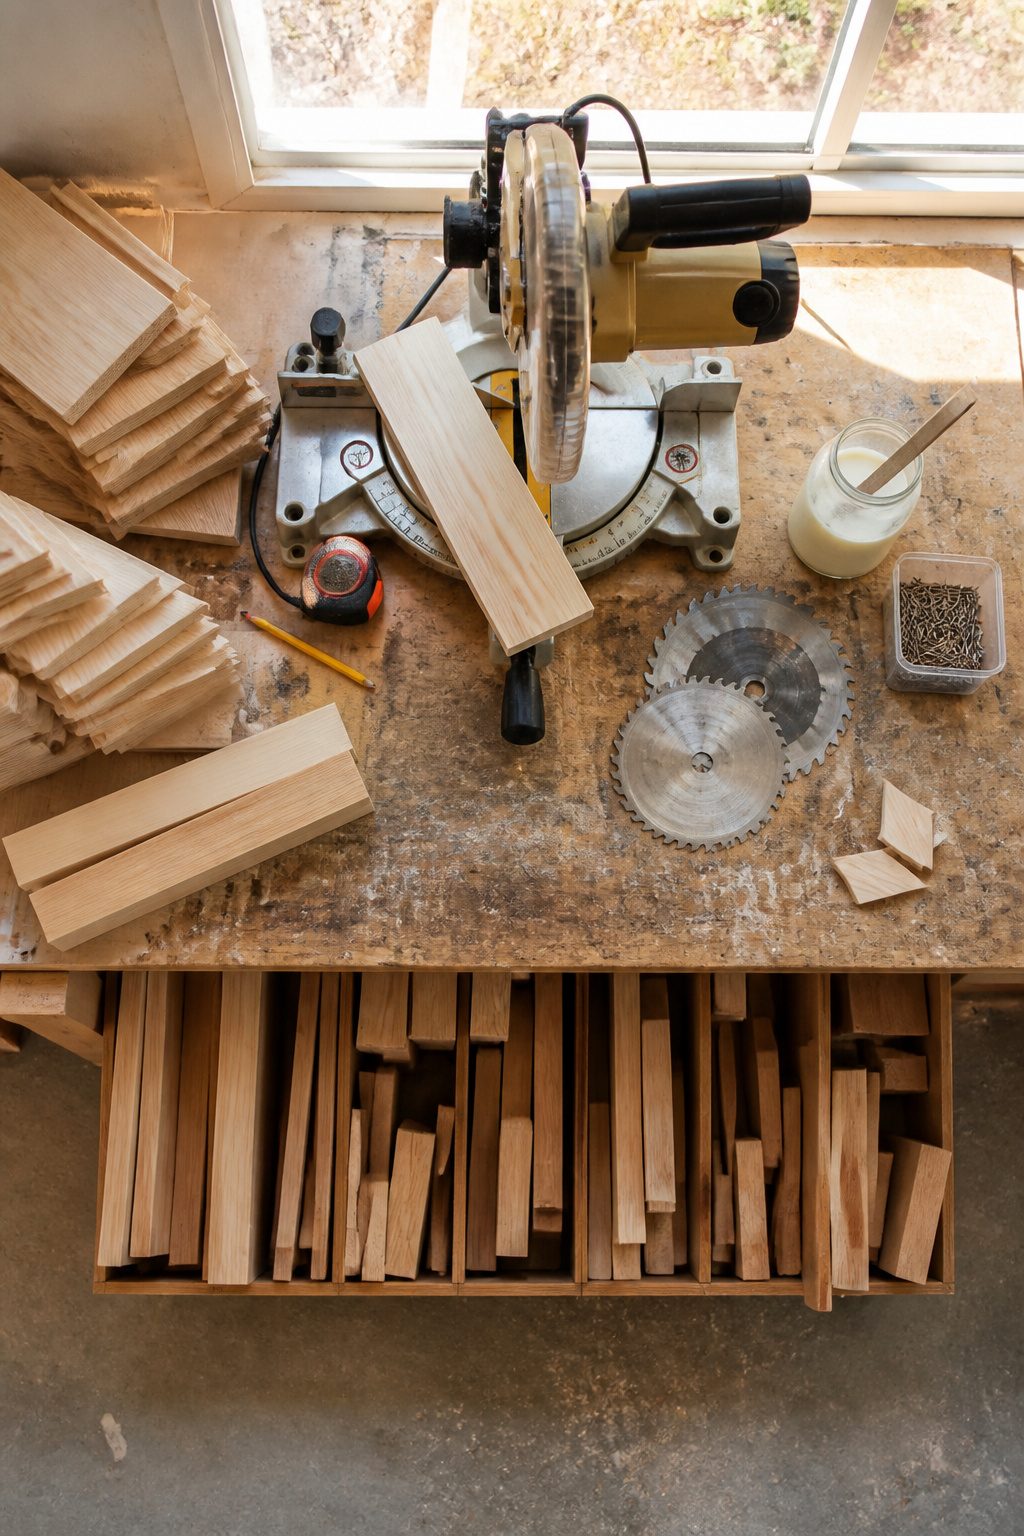
A miter saw earns its keep the moment you cut the first angled shelf for a collapsible tree. The plans call for repeated bevels, and a circular saw works but tests your freehand steadiness on every single board.
I borrowed one for my first build, then bought a basic ten-inch model once I realized fence pickets and 1×6 whitewood were going to keep showing up in my weekend projects.
For assembly, a drill with a countersink bit handles pilot holes and the 1-1/4" screws most of these trees need. A brad nailer speeds up the tray-style builds, though finish nails and a hammer get you there slower.
Wood glue is non-negotiable; skip it and the joints wobble by New Year’s. Sandpaper at 220 grit or a palm sander smooths the faces before stain, which matters more than you’d think on cheap cedar or 2×4 lumber.
A first-timer can skip the electric sander and the nail gun. Hand sanding takes longer, screws driven carefully split less than you’d fear, and the clamp-and-glue method holds while you pre-drill.
The one tool worth owning outright, even for a single tree: that miter saw. Rental costs add up, and angled cuts are the whole shape of the thing.
Cutting and Assembly
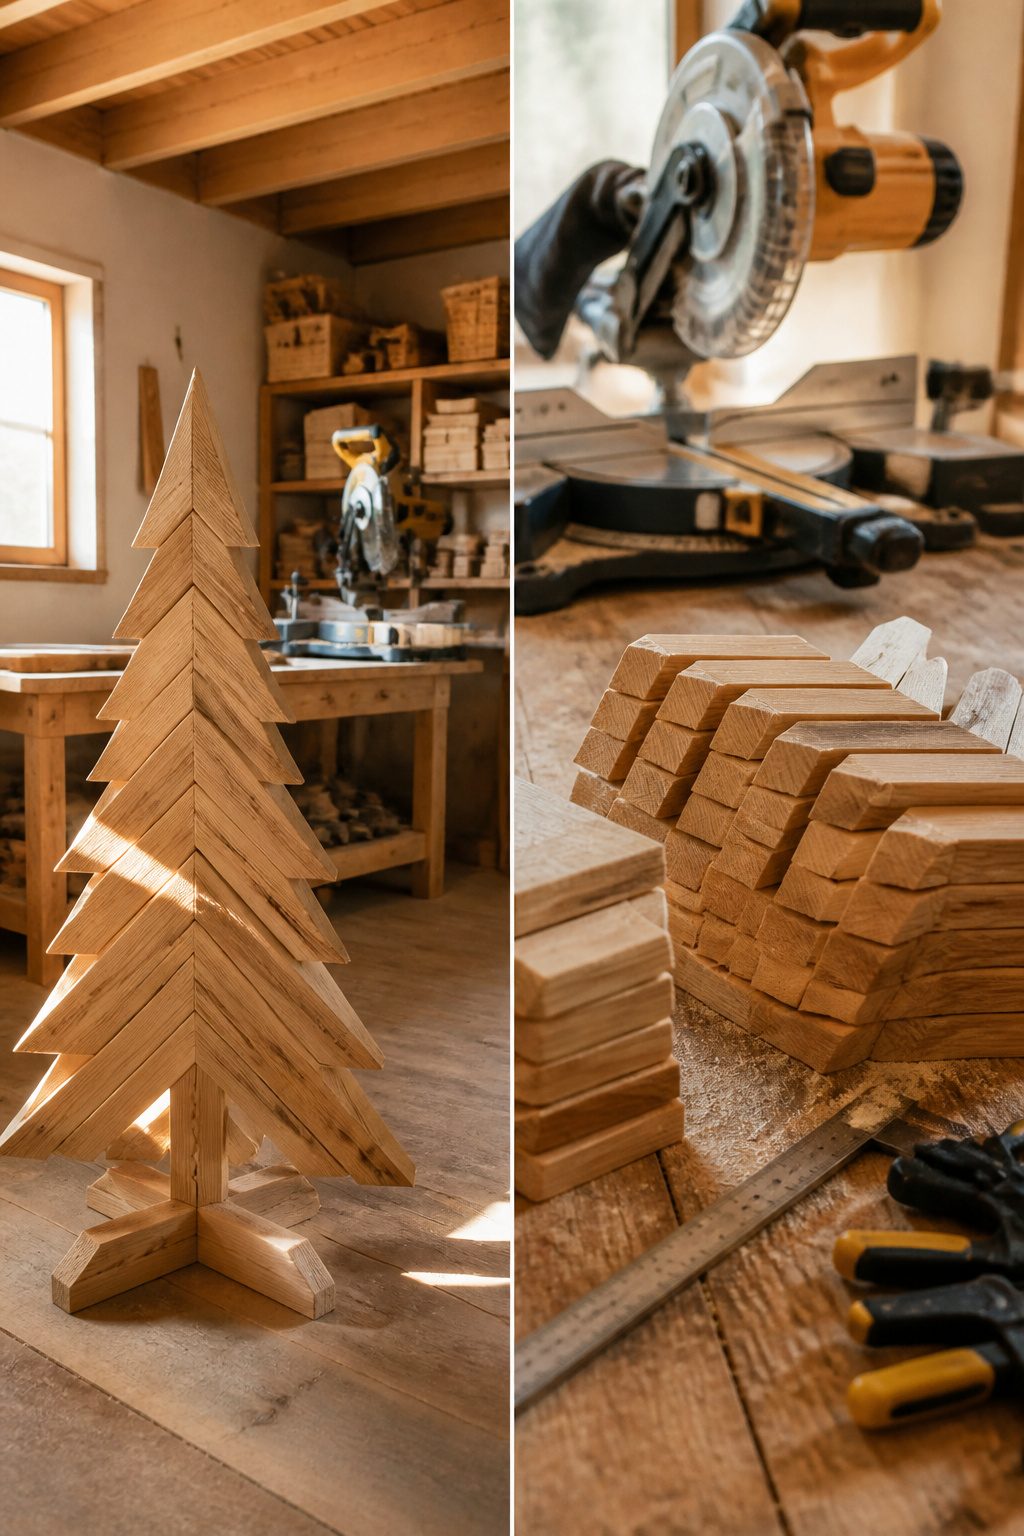
A 30-degree angle on each end gives a tree its classic slope without eating too much floor space; 45 degrees looks sharper but needs a wider base for the same height.
Set a stop block on your miter saw once you pick an angle, because every tier has to match or the stack will wobble like a drawer that never quite closes.
The sources I read ran both angles, and the 30-degree trees tended to use shorter pieces overall while the 45-degree profiles needed boards cut at 12, 10, 9, 8, 7, 6, 5, and 3 inches to keep stepping in evenly.
Wood glue does the real work holding these together, not the fasteners. Pin nails or brads mostly keep things from sliding while the adhesive sets.
One builder I followed glued in two sections because her clamps were too small for the whole profile at once; another weighted the assembly against a wall with anything heavy he had on hand. Both worked.
What mattered was giving the glue a full cure before moving on, not how tight the screws felt going in.
Rushing that part and stacking on ornaments the same evening is how you end up with a tree that leans by New Year’s.
For a 3-foot tree, plan on 2 to 4 hours of actual cutting and assembly, not counting the time the glue needs to dry. Sand before you assemble, not after; reaching between branches with 220 grit is a lesson you only need once.
Finishing and Decorating
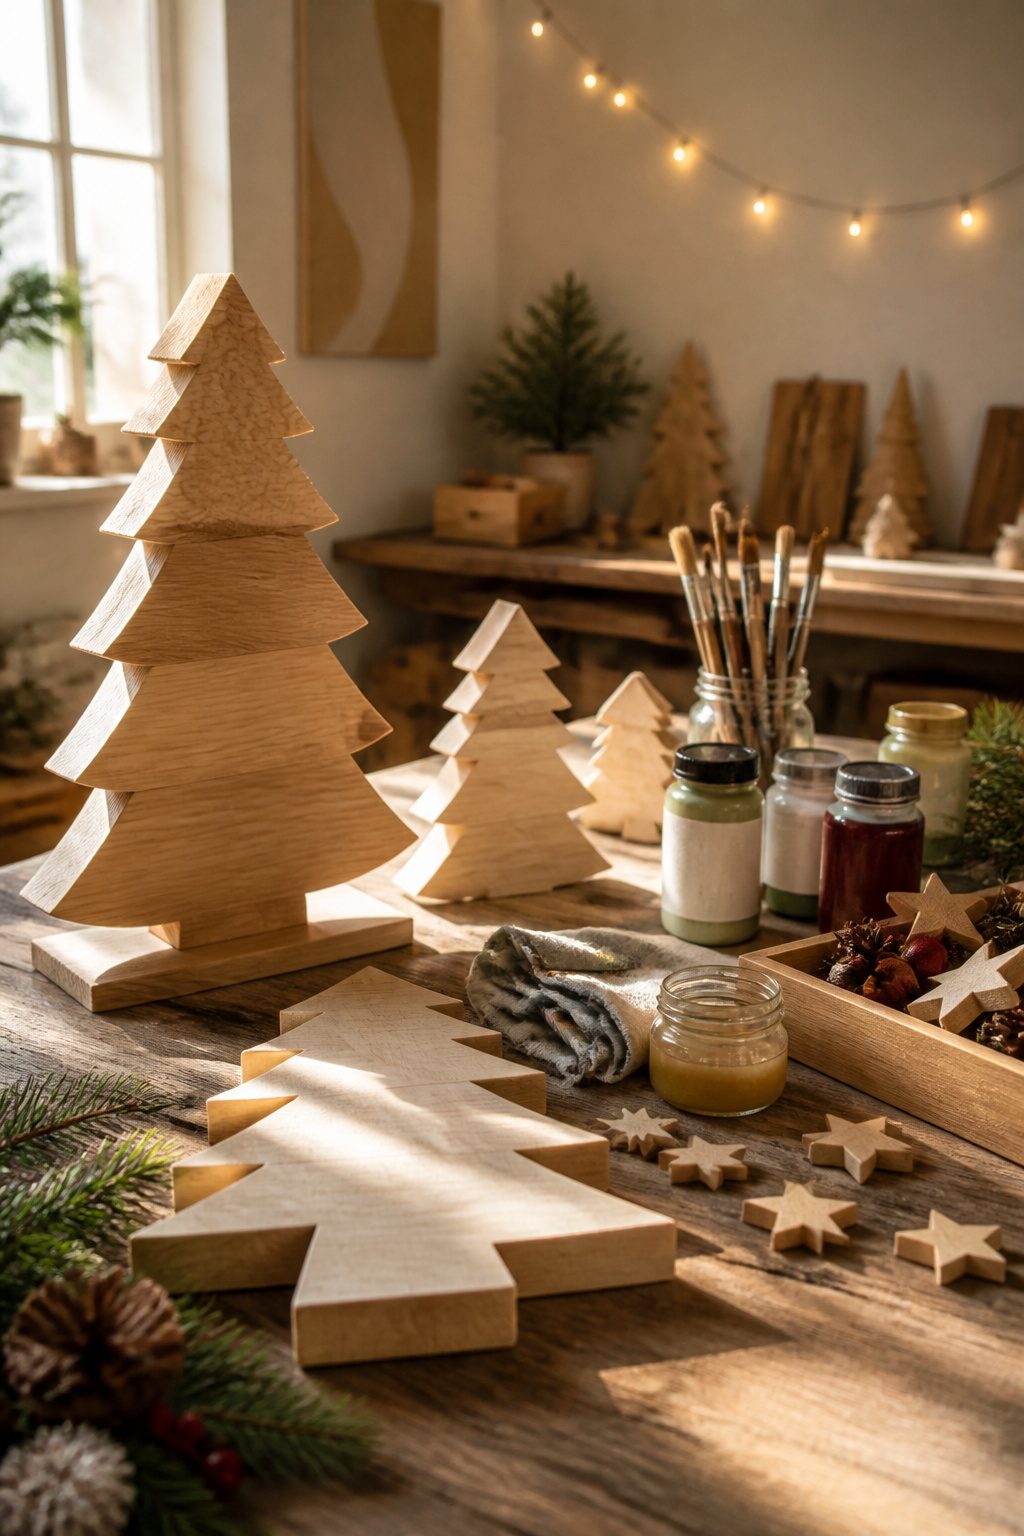
The 220-grit pass that knocked off saw marks before assembly was only the start. After the glue dries, the joints need another round, working up to 320 grit if you plan to leave the wood bare.
Sawdust hides in corners and will telegraph through any finish, so a vacuum or tack cloth between stages is worth the minute it takes.
Paint, stain, or bare wood sealed with shellac or polyurethane: each route changes the schedule.
Acrylic craft paint thinned slightly with water lets grain show through and dries in an hour or two, but a satin polyurethane coat needs overnight between passes. Shellac dries faster, though it stays softer under ornaments.
A dark stain reads rustic; a green like Rosemary leans traditional. Drying time is the real constraint that pushes weekend projects into a second Saturday.
For lights, battery-powered strands and a hot glue gun keep things reversible. Dab glue on the cord, not the tree face, and you will not scar the finish when January comes.
Small ornaments, twine, or bells string the same way. If you stenciled with something like Dixie Belle’s Chalk Mineral Paint, keep the hardware light; the texture can take only so many tugs before it flakes.
What to Know Before Starting
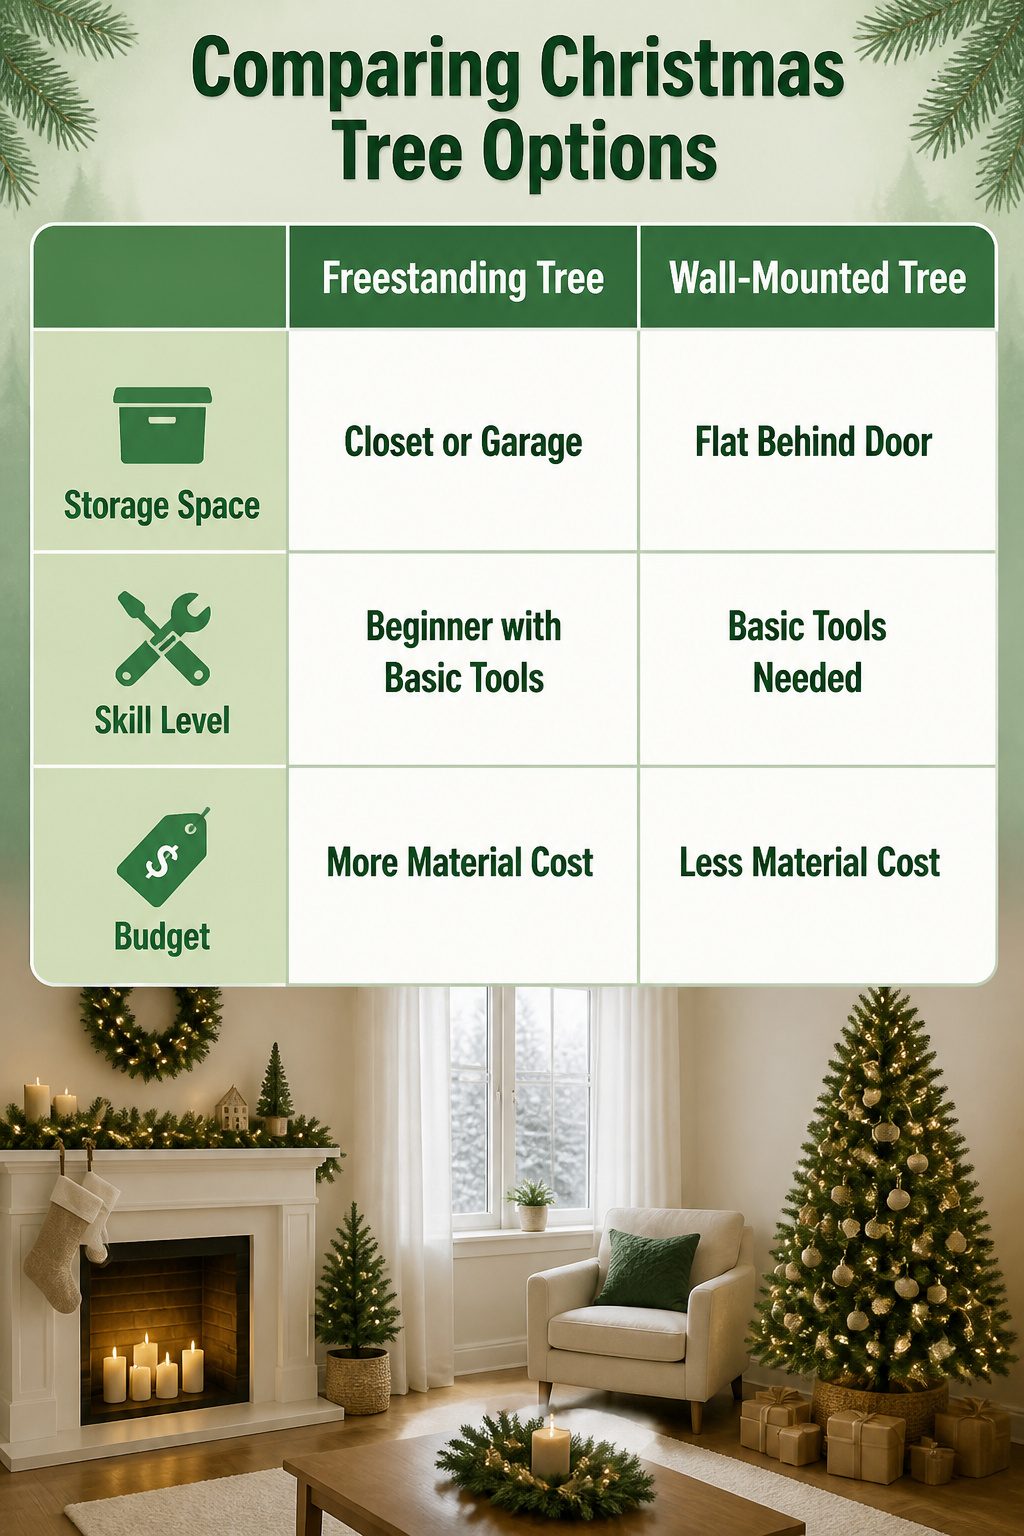
Storage space is the first filter that narrows the field.
A freestanding 2×4 tree built from Ana White’s plans needs a closet or garage corner to live in eleven months a year, while a wall-mounted version stores flat behind a door or under a bed.
That difference matters more than the build itself. Wall-mounted trees demand a stud finder and a level, because drywall anchors will not carry the weight of shelves loaded with ornaments.
Freestanding trees need a wide base, usually 24 inches or more, to keep from tipping when a toddler or a dog brushes past.
Tabletop trees need no structural engineering at all; a few glued or screwed 1x pieces on a plywood base sit quietly on a console table and store in a tote bin.
Skill level comes second. The beginner-rated 2×4 projects from Ana White require only a saw, drill, and sander; if you have built a simple shelf, you have the skills.
The smaller tabletop trees from Southern Yankee DIY ask even less, sometimes just a jigsaw and sandpaper. Budget runs third.
Two-by material is cheap per foot, but a six-foot freestanding tree eats more of it than a two-foot tabletop version. Factor in finish, too: paint or stain adds cost and drying time that a weekend build may not have.
Frequently Asked Questions
What wood is best for making a Christmas tree?
Cedar fence pickets, 1×6 whitewood, and 2x4s are the most common choices for budget-friendly builds. Reclaimed pallet wood works well if it carries an HT stamp for heat-treated, while scrap wood from previous projects keeps the cost at zero.
The best wood depends on whether you want a clean painted finish, a rustic weathered look, or something that stores flat after the holidays.
How do you make a wooden Christmas tree?
Most designs start with angled cuts, usually 30 degrees for a classic slope or 45 degrees for a sharper profile, then stack graduated lengths from a wide base to a narrow top.
Wood glue does the real holding work; brad nails or screws mostly keep pieces aligned while the adhesive cures. Sand all faces before assembly, not after, and give the glue a full cure before decorating.
Can I use scrap wood for my Christmas tree?
Yes, and many builders do exactly that.
The irregular widths become part of the style rather than a flaw to hide, and the zero-cost entry is the main draw when your only spend is a few brad nails and an hour of fitting.
Paint or stain covers mismatched species, or leave some boards raw and others washed white for a village effect.