
A homemade leaf wreath is a door decoration built from real or faux leaves layered over a grapevine or cardboard ring. The catch is that real leaves need microwaving in batches of 5–6 before they glue flat, while faux garlands clip apart with wire cutters and last years. Either way, the whole project lands in the $10–$15 range and takes about 15 minutes once your materials are out.
1. Gather Materials
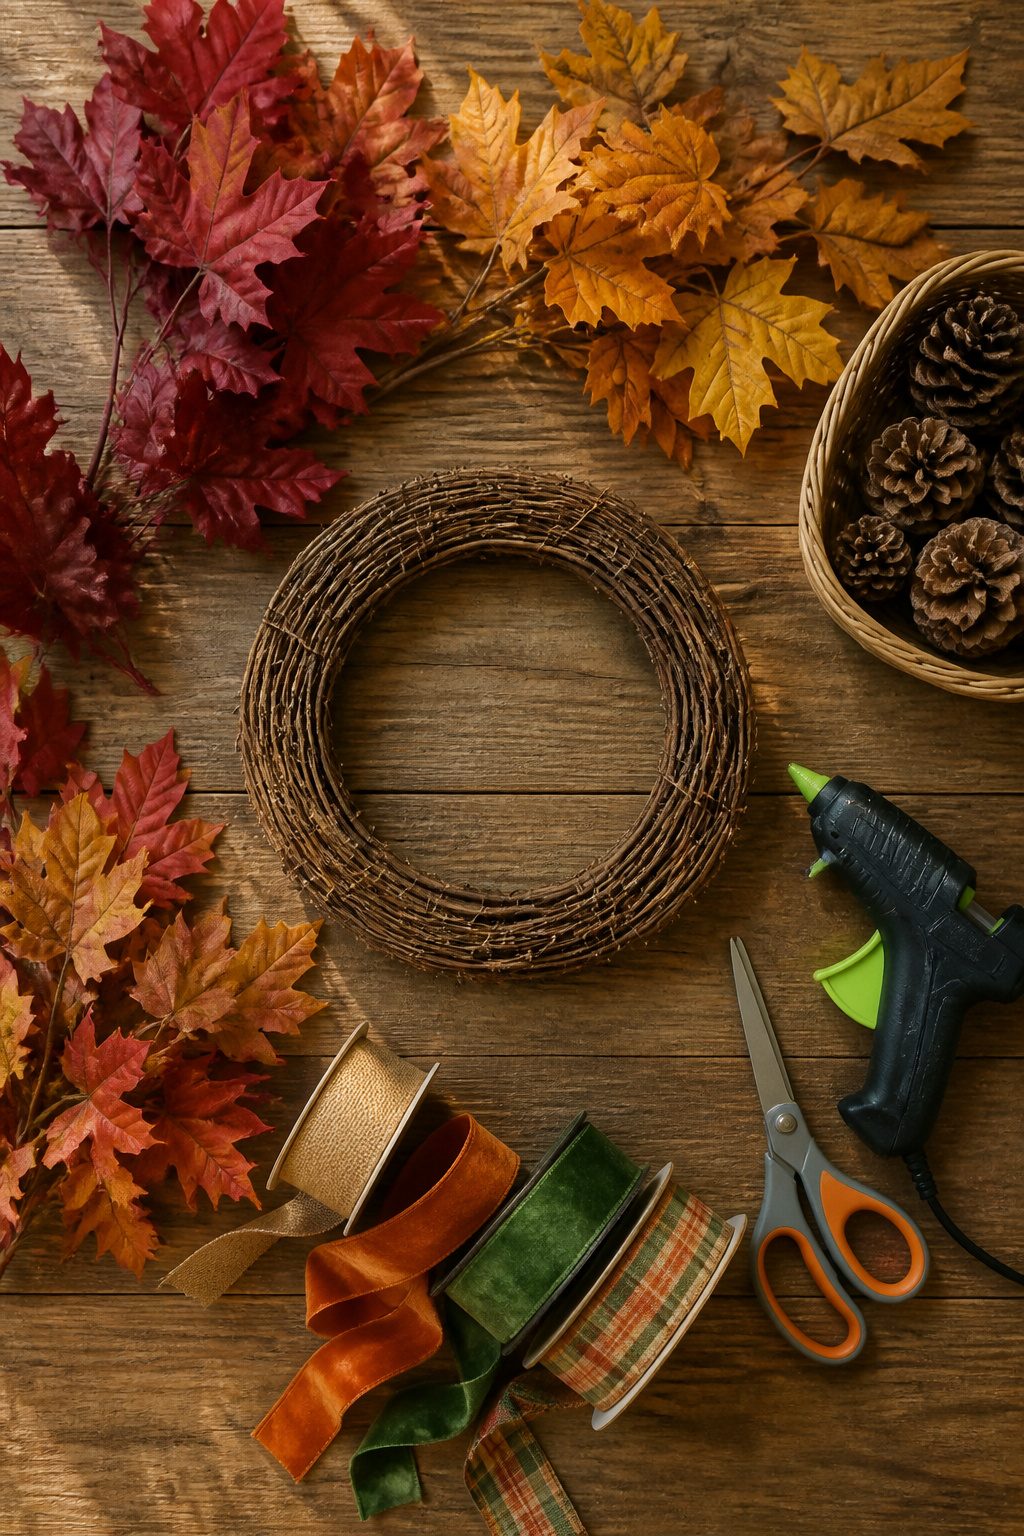
A grapevine wreath base, 8 to 12 inches across, is what I reach for when I want the finished piece to look like it grew that way. Cardboard or heavy-duty cardstock works fine if you are building the form yourself, especially for a one-season project you do not plan to store. For the leaves, a faux leaf swag runs under $20 and can be clipped apart with wire cutters, which beats buying individual picks. Real leaves need about 60 to 70 for a 16-inch wreath, so plan a walk before you start. Hot glue and a glue gun are the practical choice for either material; craft glue will do if you have the patience to let it set. Ribbon for hanging, pinecones, or pods add the finishing layer, but the wreath already reads as autumn without them. The whole supply list lands in the same $10 to $15 range if you skip the extras, and the build itself takes maybe 15 minutes once the materials are out.
2. Prepare the Base
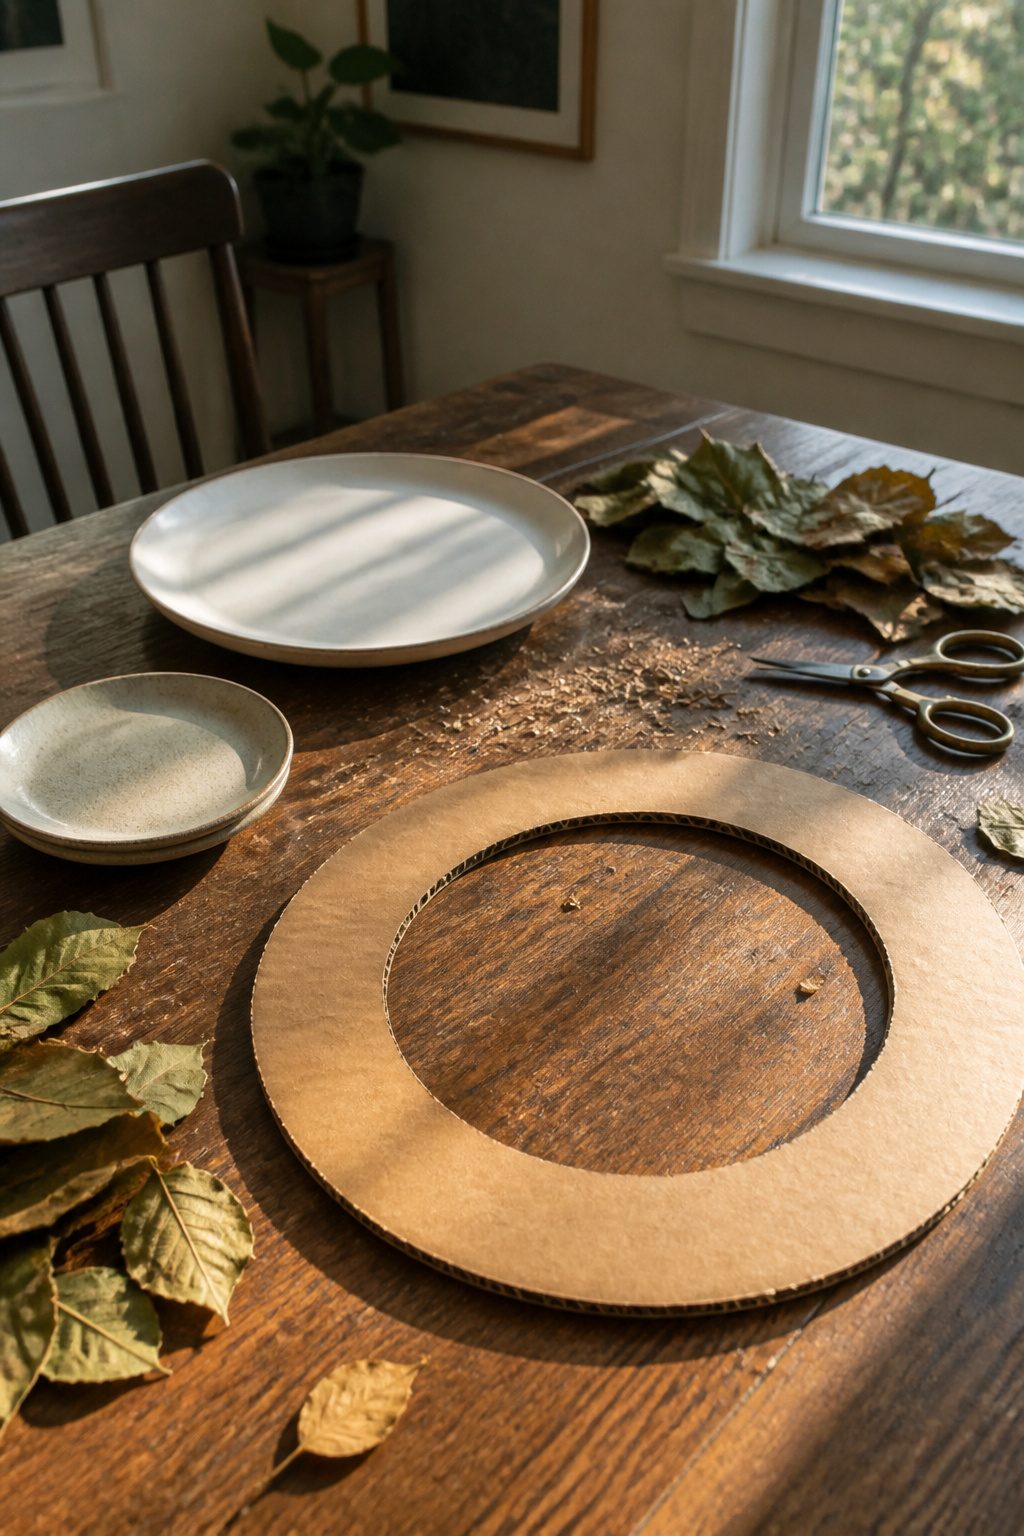
A cardboard ring about 2–3 inches thick is the cheapest way to start, and it will be covered completely so the shape does not need to be perfect. I trace a large dinner plate for the outside edge and a smaller plate for the hole, then cut the form from corrugated cardboard or heavy-duty cardstock. Staples and craft glue hold the leaves against it, though you will want a few spare leaves at the end to hide any staples that show through.
Grapevine skips all of that. The branches grip stems on their own and hide glue without any extra covering, so you can work straight onto a rustic base. An 8-inch grapevine wreath works for smaller doors or interior hooks; a 12-inch form is the size I see most often for a standard front door. Either way, the choice is between building a disposable base in twenty minutes or spending a few dollars more for something ready to use.
3. Attach the Leaves
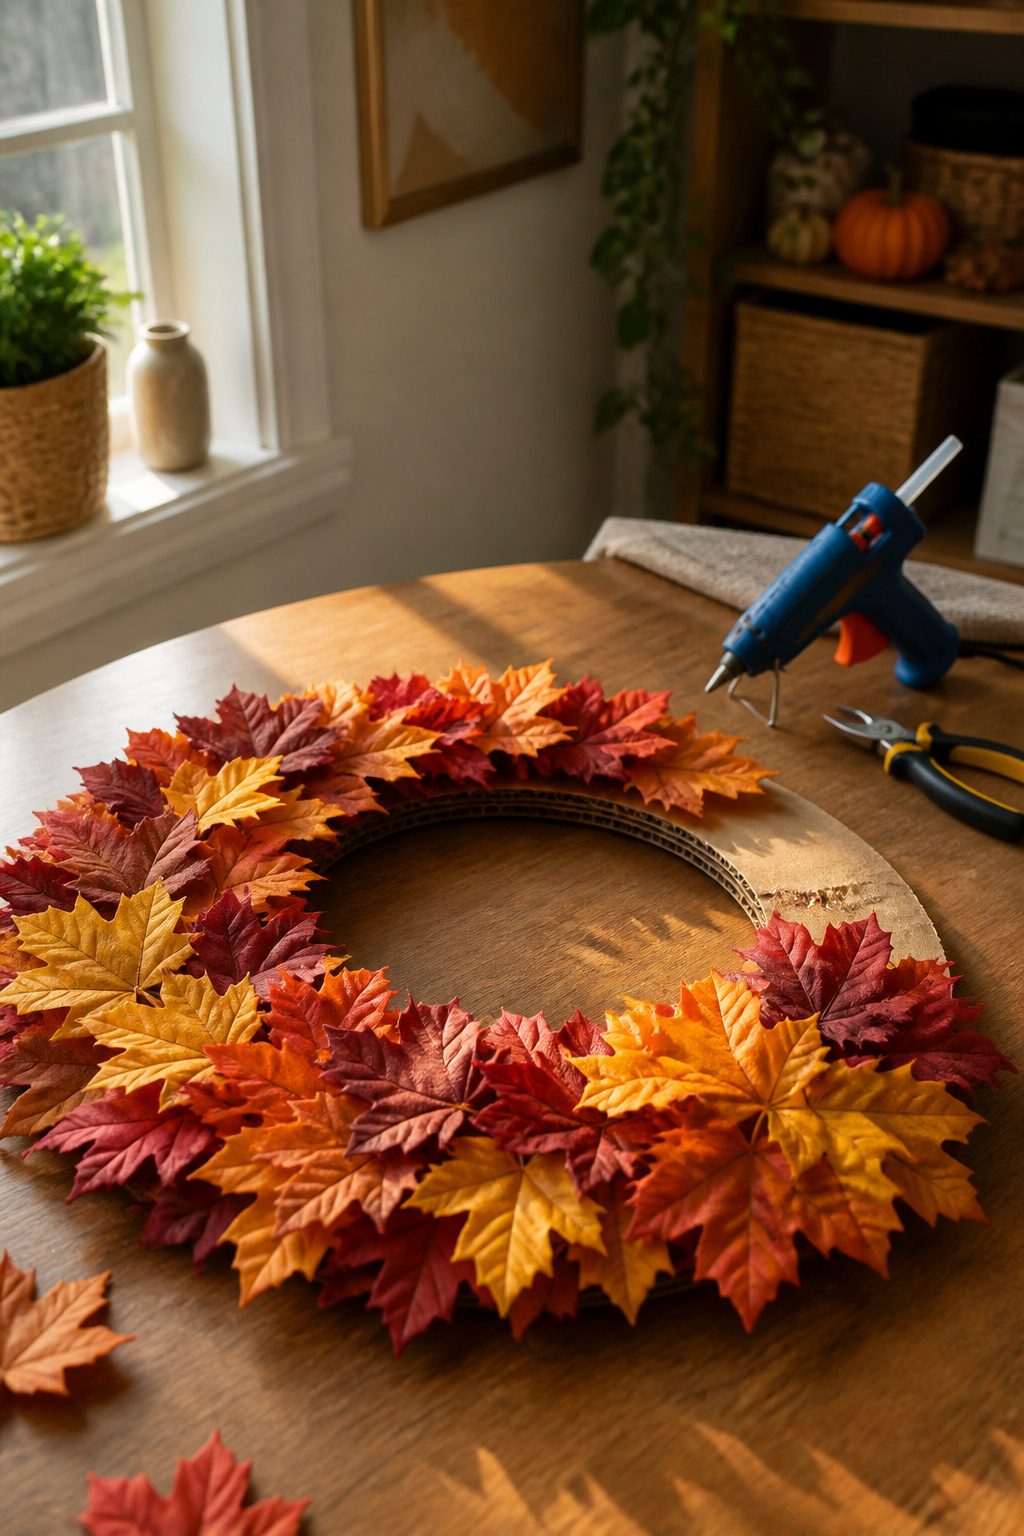
Hot glue works, but a stapler and cardboard form cut the mess entirely. I learned that the hard way after a glue-string incident on the kitchen table that took longer to clean than the wreath took to make.
Start with the biggest leaves you can find and lay them first, working around the ring so each new piece overlaps the last by about half its width. That overlap is what turns a sparse ring into something that reads full from the sidewalk. Once the larger shapes are down, tuck smaller leaves into the gaps that show cardboard or stem ends. The sources vary on count: sixty to seventy fresh leaves for a sixteen-inch wreath, or roughly one deconstructed faux garland clipped apart with wire cutters.
For a five-minute version, skip the glue gun entirely. Staple leaves straight to a cardboard donut, working fast and overlapping as you go. The staples grip immediately, no burned fingers, and the whole thing costs under fifteen dollars if you are gathering leaves from the yard. Storage is simpler too; pull the staples and the form is bare for next fall.
Trim or fold any stem that pokes past the inner edge. A leaf that sticks out reads as a mistake from three feet away, and fixing it now saves the awkward reach once the wreath is on the hook.
4. Add Accents
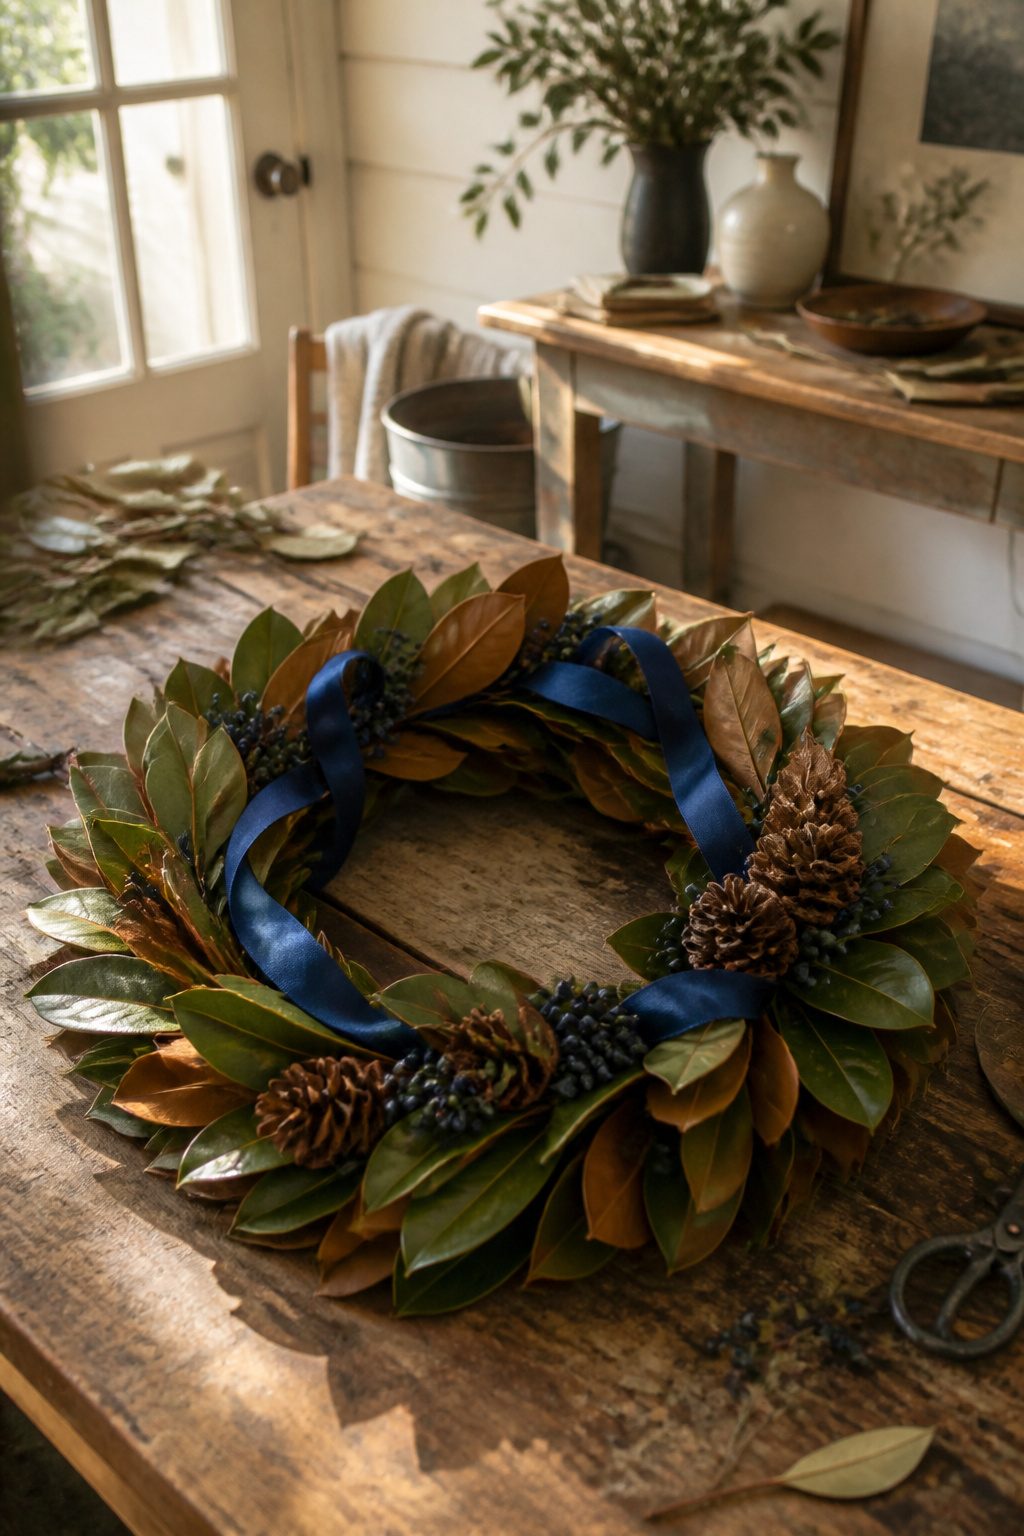
Berries and pinecones tucked into the leaves turn a full wreath into something that looks gathered rather than bought. The first time I tried this, I wired on too much: bittersweet, ribbon loops, a dried hydrangea head, three acorn caps. The door read as clutter from twenty feet away. Now I pick two accents at most, and I place them where the eye lands naturally, about a third of the way in from the outer edge, spaced so they form a loose triangle rather than a ring.
Faux bittersweet works well because the berries add texture without bulk, and the little green leaves fill gaps between the larger foliage. A deep navy or plum ribbon gives contrast against amber and rust tones on a white door, though I usually skip the bow entirely; the leaf coverage already carries enough weight. Grapevine holds hot glue reliably, so accents stay put once you press them into the weave. The rule I follow now: step back after each addition. If the new piece competes for attention, it comes off.
5. Finish and Hang
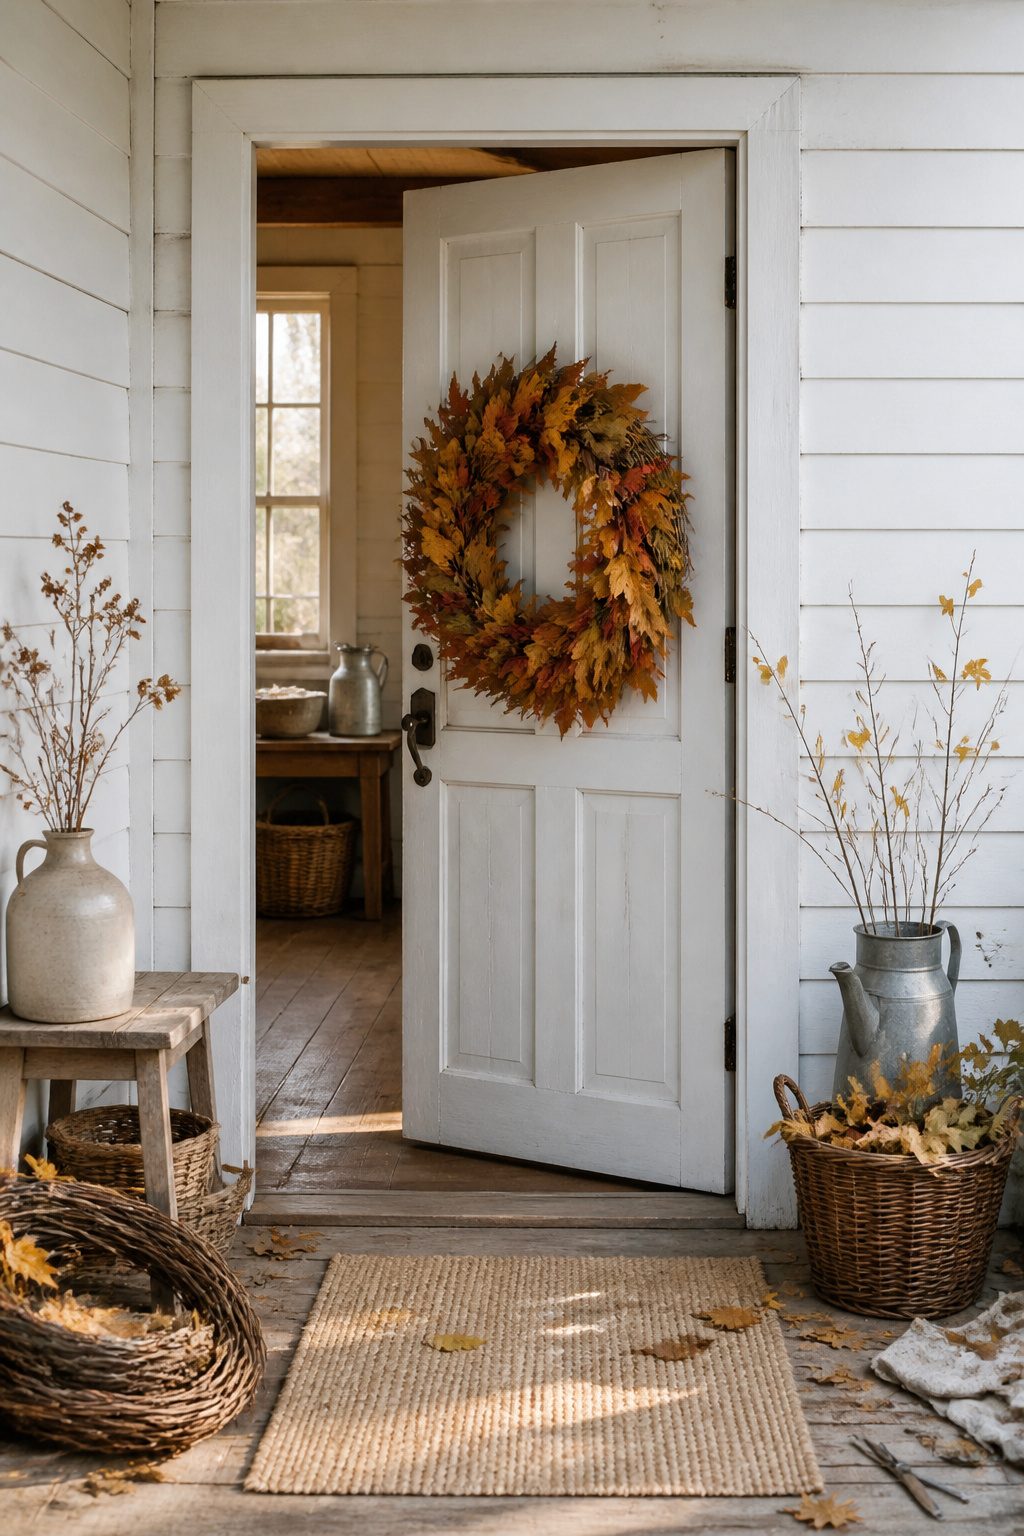
The last step is the one that separates a wreath that lasts from one that sheds on your porch. Wait until every spot of hot glue has cooled fully before you move the wreath at all. Warm glue looks set but will shift under its own weight, and a grapevine base gives it plenty of gaps to slide into. I check by pressing a fingertip to a few back-side dabs; if any still feel warm, I give it another five minutes.
Grapevine wreaths have no built-in hanger, so a loop of wire threaded through the densest part of the back frame keeps the weight centered. Twist the ends tight and point the cut side inward so it does not scratch the door. Faux leaves packed too flat read as craft-project from the sidewalk, so I fluff the layers outward from the center, bending wired stems where they have them until the shape looks grown rather than glued.
A ribbon bow at the top hides the hanger and gives you a few inches of adjustability for centering the wreath on a hook. Stand back at the distance your guests will first see it: the eye catches overall shape before it notices any single leaf.
Real Leaves or Faux
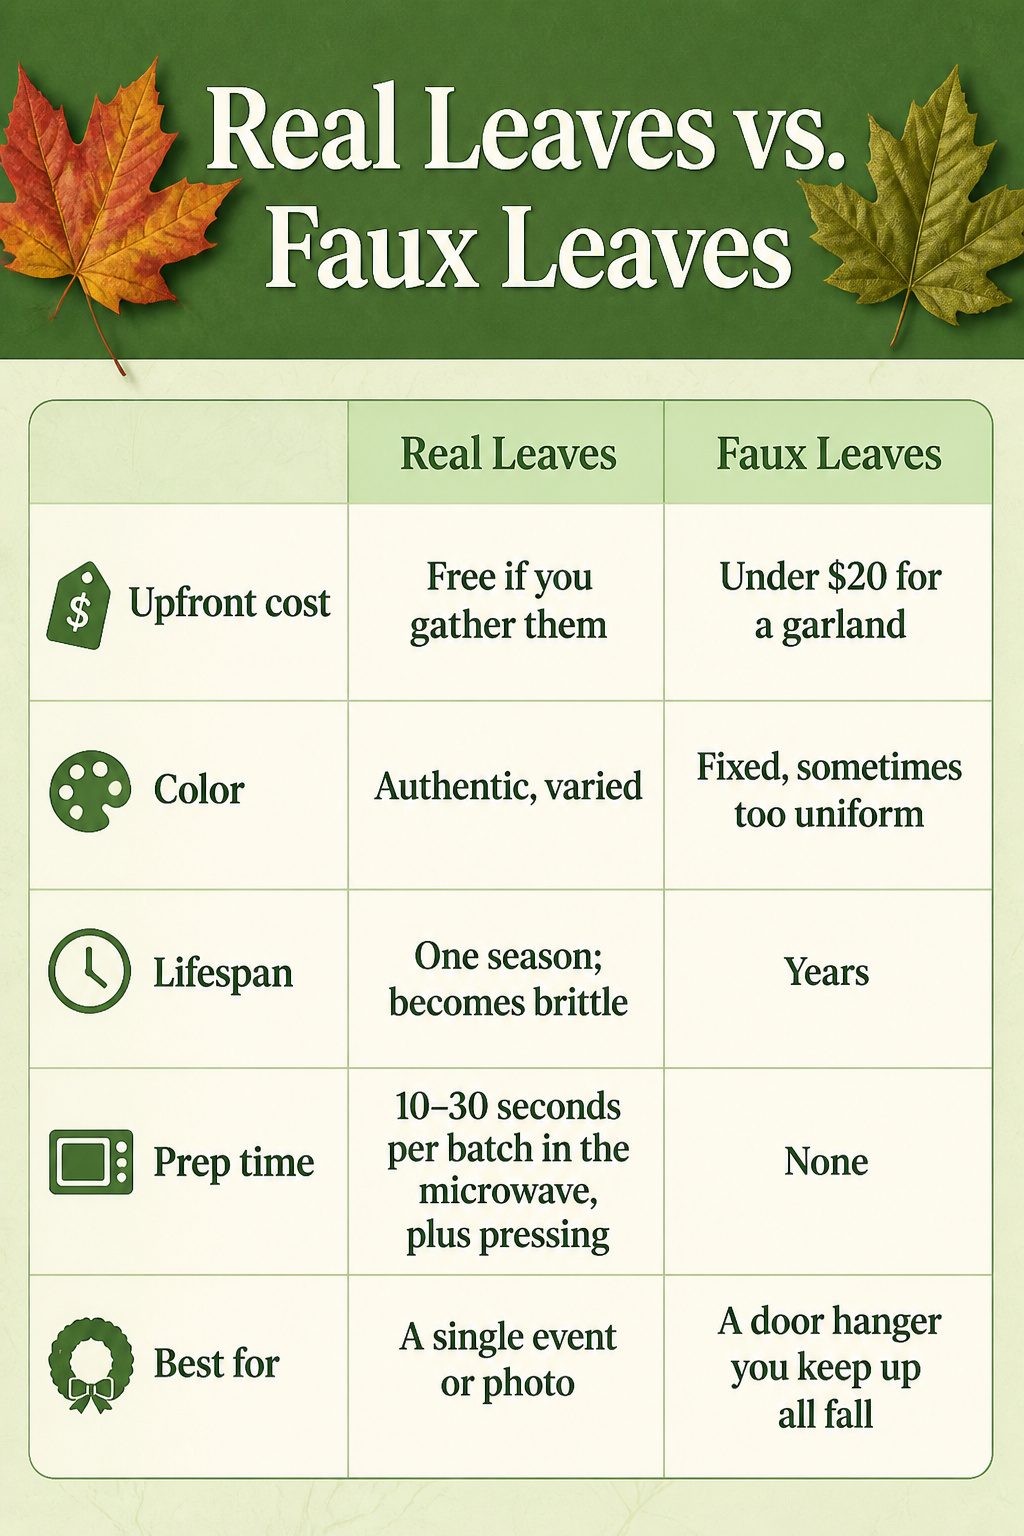
Real leaves carry color you cannot fake, but that color lasts maybe one season before the edges curl and crack. Faux leaves cost more at the register and keep their shape for years. The choice usually comes down to whether you want a wreath to last through Thanksgiving or through 2028.
| Real Leaves | Faux Leaves | |
|---|---|---|
| Upfront cost | Free if you gather them | Under $20 for a garland you can deconstruct |
| Color | Authentic, varied | Fixed, sometimes too uniform |
| Lifespan | One season; becomes brittle | Years |
| Prep time | 10–30 seconds per batch in the microwave, plus pressing | None |
| Best for | A single event or photo | A door hanger you keep up all fall |
If you are set on real leaves, microwave them in batches of 5–6 between parchment sheets for 10–30 seconds, turning once, then press flat with a hot iron. Check every few seconds; you want dry, not brittle. I press without parchment, but the paper keeps iron gunk off lighter leaves. Either way, the whole preservation step adds maybe half an hour to a project that is otherwise just gluing. For a weekend build with no surprises, faux leaves clipped from a garland win. The wire cutters take a minute, and you are gluing while someone with real leaves is still waiting for the microwave to beep.
Wreath Base Options
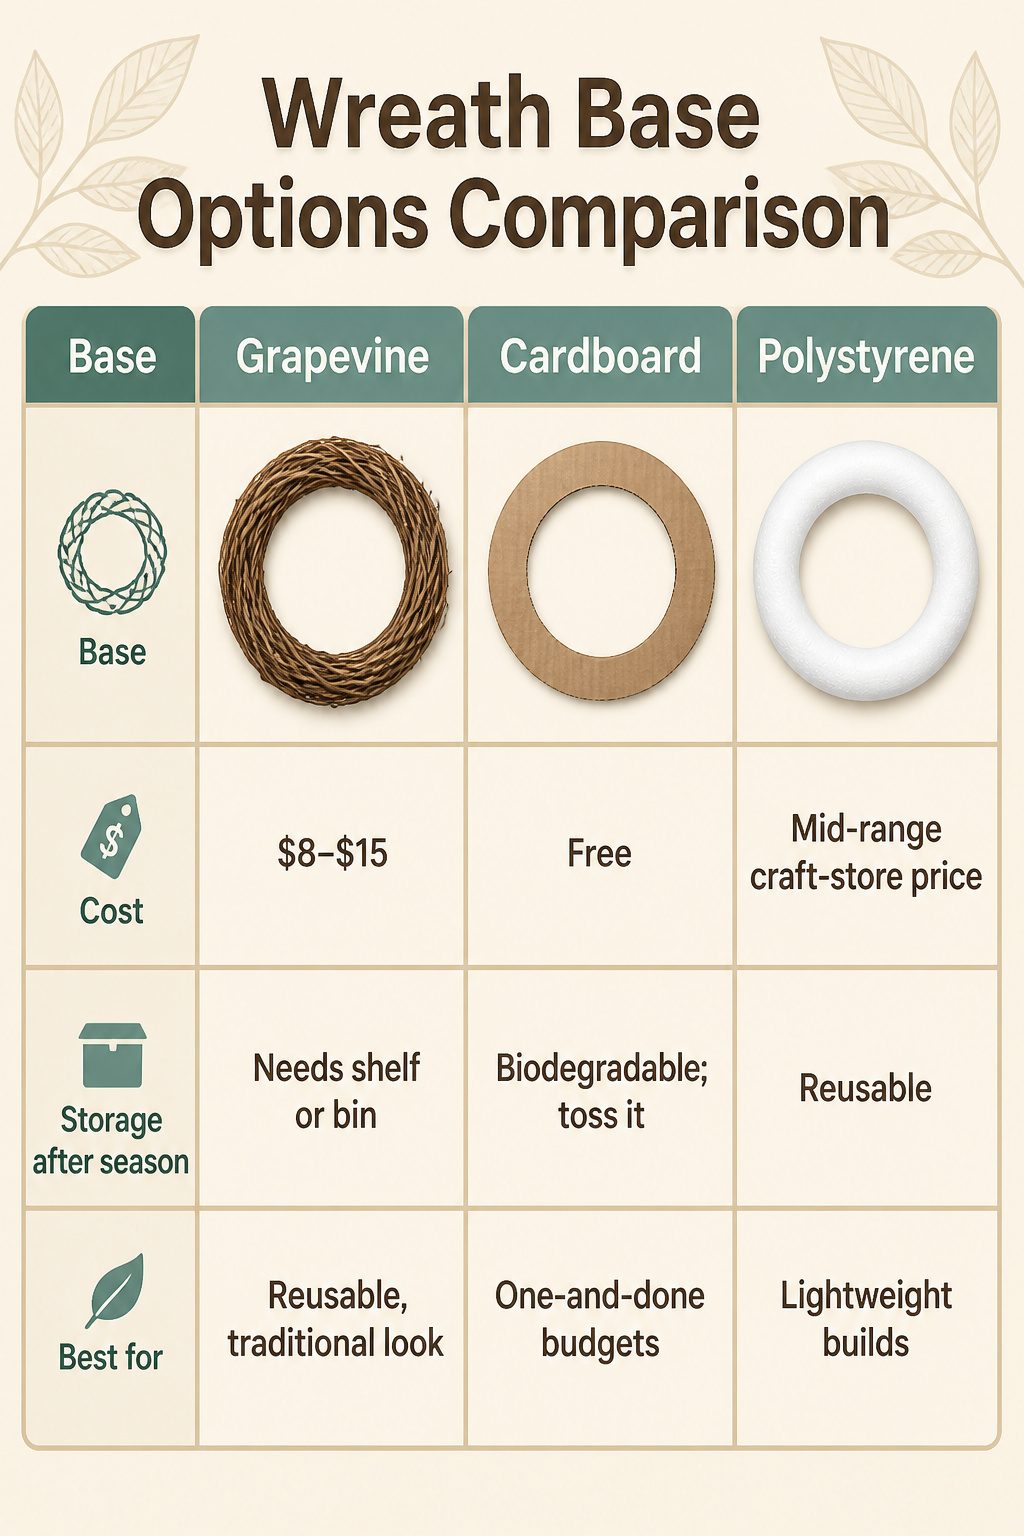
Grapevine wreaths give that ready-made rustic shape, but they run $8–$15 at craft stores and take up closet space year-round. Cardboard costs nothing beyond what you already recycled, and the whole thing goes straight into the compost or trash once the season ends. Polystyrene rings are light and hold hot glue well, though they feel more suited to ribbon or fabric projects than to something meant to look gathered from the yard.
| Base | Cost | Storage after season | Best for |
|---|---|---|---|
| Grapevine | $8–$15 | Needs shelf or bin | Reusable, traditional look |
| Cardboard | Free | Biodegradable; toss it | One-and-done budgets, small closets |
| Polystyrene | Mid-range craft-store price | Reusable | Lightweight builds, glue-heavy designs |
For a leaf wreath specifically, cardboard wins on practicality. A 2–3 inch ring cut from an old shipping box gives you enough surface to overlap leaves without fighting the gaps in grapevine, and by January you are not finding shelf space for another skeleton frame.
Preserve Real Leaves
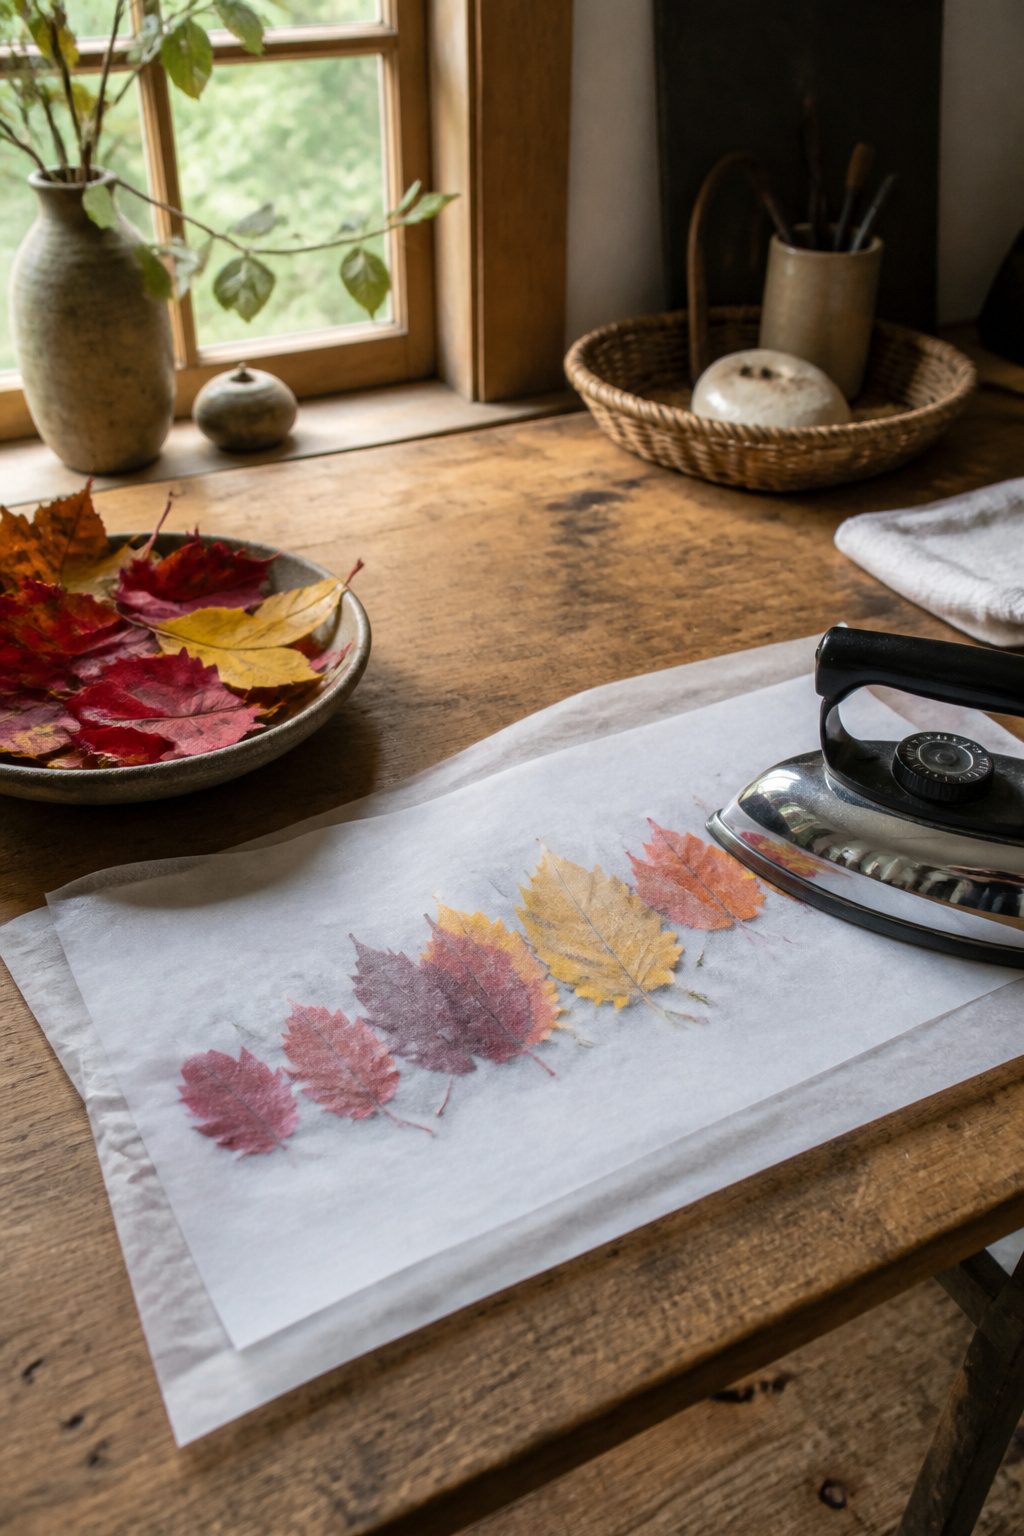
Fresh leaves hold color better than the ones that have been sitting on the ground for days, so I try to collect after a windstorm rather than a dry spell. Microwave them in batches of five or six, sandwiched between parchment paper, for 10 to 30 seconds. Turn them once, checking every few seconds until they feel dry but still flexible, not brittle.
A hot iron presses them flat and locks in what moisture remains. Parchment paper between the iron and the leaf keeps things clean, though I skip it when I am working fast and do not mind a little residue on the soleplate. The heat finishes what the microwave started, pulling out the last of the water so the leaf lies completely flat.
This method keeps reds and golds brighter than air-drying alone, which is why I bother with the extra step. Still, preserved real leaves are not permanent. A wreath made this way lasts one season, maybe two if you store it carefully in a closet between years. After that, the color dulls and the edges curl no matter what you did right.
Kid-Friendly Simpler Version
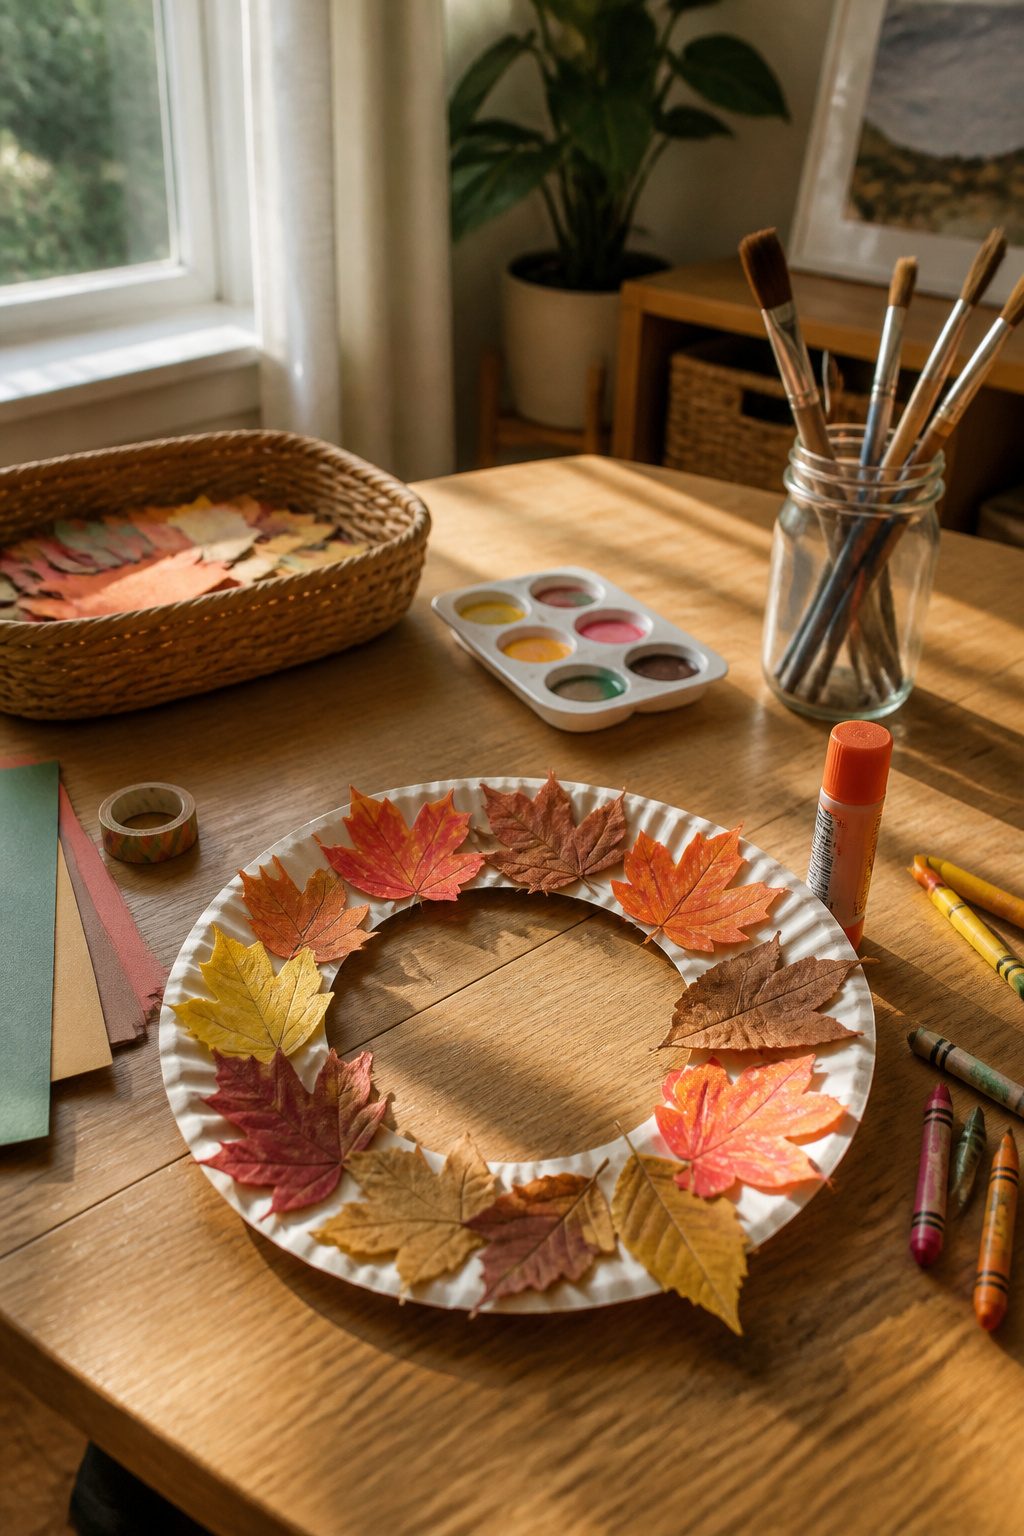
A paper plate ring keeps this project within reach of small hands that do not yet handle a glue gun safely. I glue two plates together when the single layer feels too floppy, then cut the center out to leave a sturdy ring about six inches across. The leaves themselves can go either way. Real ones collected from the yard work fine if they are still slightly flexible; paper leaves painted in fall colors on grocery-bag brown paper let a child finish the whole thing indoors on a rainy Saturday. Glue stick or white school glue is all the adhesive needed. Tacky glue works too, though it needs longer to dry and a preschooler’s patience may not stretch that far. Press the leaves onto the ring, overlap them a little, and loop a ribbon through the top for hanging. No sealant, no wire, no trip to the craft store for specialty supplies. The finished wreath will last the season, then compost quietly along with the paper plate.
Frequently Asked Questions
What materials do I need to make a homemade leaf wreath?
You need a wreath base (grapevine or cardboard), leaves (real or faux), hot glue and a glue gun, and optional ribbon or accents like pinecones. A faux leaf swag clipped apart with wire cutters runs under $20 and beats buying individual picks. The whole supply list lands around $10 to $15 if you skip the extras and gather real leaves from your yard.
How do I preserve leaves for a wreath?
Microwave them in batches of 5–6 between parchment sheets for 10–30 seconds, turning once, then press flat with a hot iron. Check every few seconds so they dry without turning brittle. The parchment keeps iron residue off lighter leaves, though you can skip it if you are working fast.
Can I use real leaves for a wreath?
Yes, real leaves work beautifully and carry color you cannot fake, but they last only about one season before edges curl and crack. You will need roughly 60 to 70 fresh leaves for a 16-inch wreath. Preserve them first with a quick microwave and iron press, or choose faux leaves if you want the wreath to stay up through 2028.