
The right diy christmas wreath ideas for your door depend on whether you need something that survives a storm door, a humid December, or a dog under forty pounds. Wired maple-leaf stems matter more than the leaf color; paper needs a cardboard collar or it turns soft in the damp; Styrofoam snowballs melt on contact with spray adhesive and shatter under chewing. The projects below range from four dollars of construction paper to forty dollars of vintage metal cars, and each one includes the single detail that usually trips the build.
1. Classic Colors Leaf Wreath
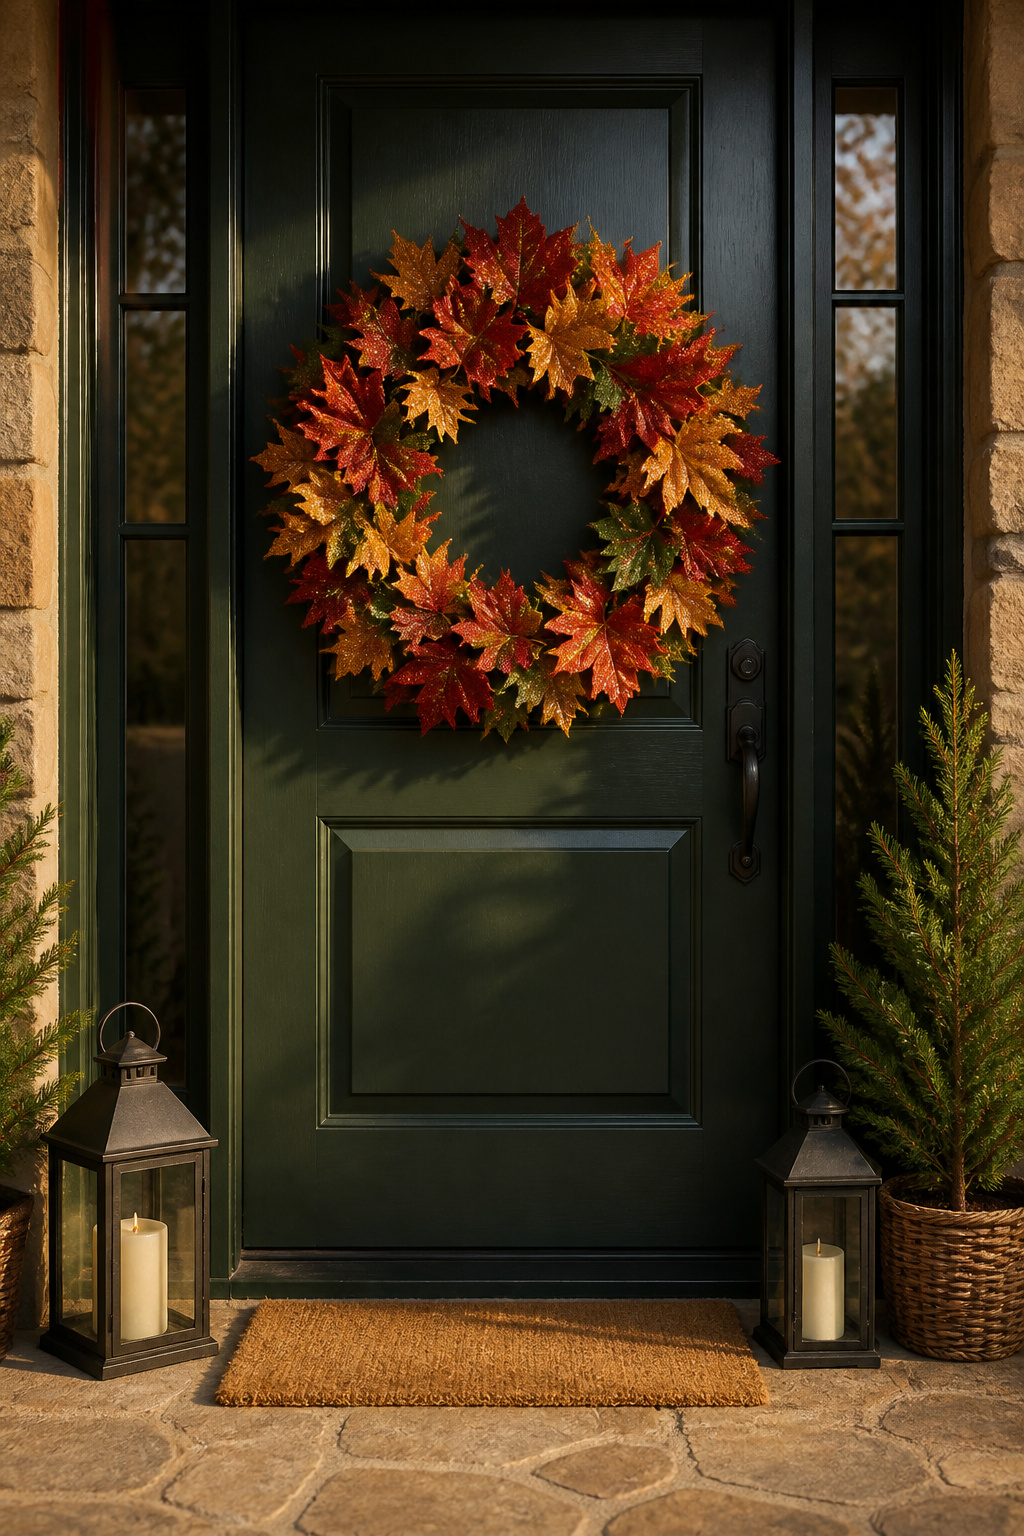
Faux maple leaves in the classic red-green-gold scheme will fade to rust and olive by New Year’s if you grab the cheapest bag on the craft-store shelf. The wired stems are what actually matter here, not whether the leaves themselves carry wire. A stem you can bend around a grapevine form lets you anchor each leaf individually; a leaf with wire sewn through its face but a floppy plastic stem just slides and bunches.
I learned this the hard way with a bulk bag from Michaels that ran me about twelve dollars. The leaves looked substantial in the cellophane, but the stems were thin injection-molded plastic. After two days on my door they had settled into a lopsided clump where gravity wanted them. The replacement batch had proper paper-wrapped wire stems, and the difference was holding a shape versus fighting one.
For a full 18-inch base, plan on roughly thirty to forty leaves. Layer them so the wired stems cross at the back, twist them around each other, and you have a structure that survives opening and closing the storm door. Wired stems let you rebuild the wreath in ten minutes if a cluster gets crushed, which matters more than any single leaf’s perfect color match.
2. Paper Wreath
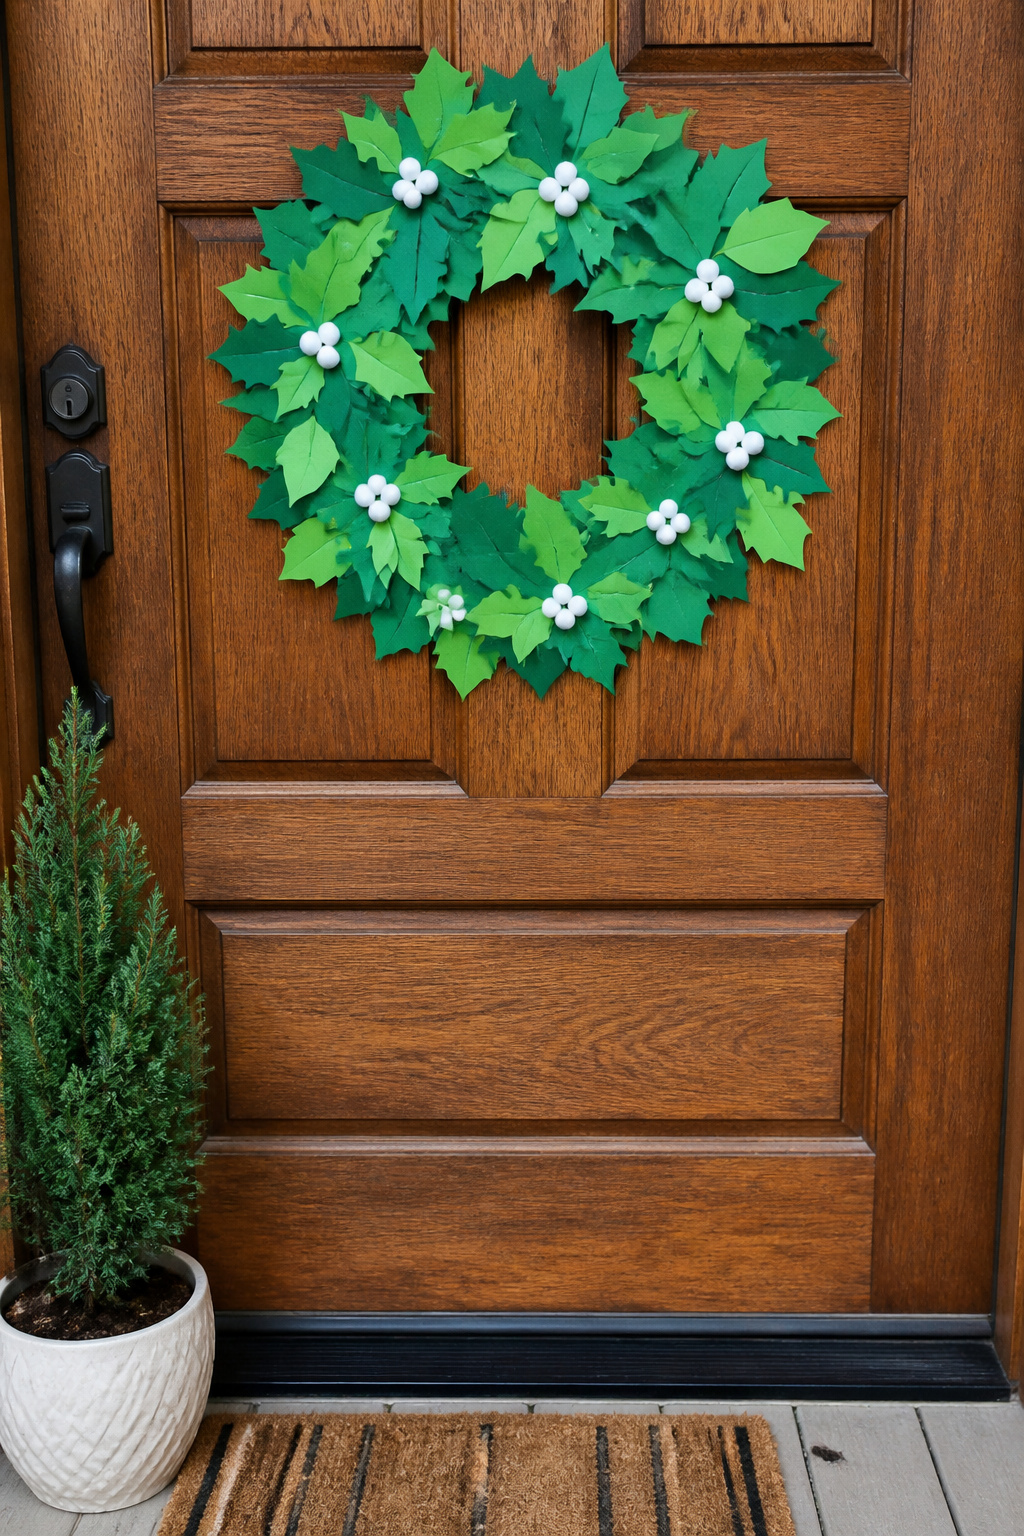
Construction paper wreaths land in that sweet spot where a Saturday afternoon and about four dollars of supplies still leave you with something that reads as intentional from the sidewalk. The build starts with a 18-inch outer circle and a 6-inch inner cutout, which gives you a six-inch band of green thick enough to hold its shape through a season of door slams. I traced a mixing bowl for the outer ring and a cereal bowl for the center hole, working on a folded sheet so the first cut gave me two identical blanks to layer for stiffness.
Twelve standard sheets of green construction paper covered the full ring with enough overlap to hide the cardboard backing I glued between the paper layers. The pom-poms came last, dotted on with white glue in clusters of three to fake holly berries without the berry price tag. What I would skip next time: the first wreath went straight to the door with single-layer paper, and a humid December week turned the edge into a soft taco. The doubled-up version with that internal cardboard collar has survived two winters now.
3. Snowcapped Village Wreath

Miniature villages on a wreath live or die by scale. Houses around 1:87, the classic HO train size, read as a village from the sidewalk without crowding the circle. Anything larger fights the curve; anything smaller disappears behind a bow.
I glue the buildings to a flat wooden craft ring, not the rounded grapevine most people grab first. The flat shelf keeps roofs level and gives spray snow somewhere to stick without sliding. Two coats of matte white paint on the ring itself turn it into ground that reads as drifts between the houses.
Spray snow from an aerosol can looks like wet cotton up close, but three feet back it softens into believable winter haze. The mistake is laying it on thick where you stand. A light dusting from twelve inches away, let dry, then another pass, builds translucency. Two inches away you get clumps; the doorbell camera sees clumps. Step back, move fast, trust distance to finish the illusion.
4. Ring of Roses Wreath

The glue gun won this round. I was rushing the third layer of roses on a 14-inch grapevine frame, squeezing petals tight to hide the gaps, and a dollop of hot glue seeped through a paper seam onto my thumb. The burn healed in a week; the wreath still has a bald spot where I jerked my hand away and took a rose with it.
A 14-inch frame needs roughly forty-five to fifty roses packed cheek-to-jowl for that domed, almost pillowy look. Fewer than that and the grapevine peeks through like a bad hairline. I learned the count the hard way, running out of crimson paper at rose thirty-eight and finishing with a mismatched pink that clashed against the door.
Spiral-cut paper rolls tighter than stacked circles because the grain follows the twist. Cut a stack of circles and you are fighting the paper’s memory every curl; cut a continuous spiral from a square and the tension pulls inward naturally, no tooling needed. The rose stays round, the base stays flat, and your fingertips stay farther from the nozzle.
5. Christmas Ornament Wreath

A wire hanger bent into a circle beats the $8 craft-store wreath frames, and the gap it leaves at the top is where the hook goes. I buy shatterproof ball ornaments even for indoor wreaths, because the glass ones crack when you thread them tight against each other and the whole piece flexes every time the door shuts. Dollar Tree sells 12-packs in two sizes for $1.25 each; Target’s Wondershop line runs $3–$5 for similar counts but the finish is thicker and the caps don’t pop off when you pinch them with pliers. The hanger trick saves enough to cover the whole ornament cost if you are making two wreaths. Graduated sizing matters: 60-millimeter balls fill the outer ring, 40-millimeter sits mid, and a cluster of 25-millimeter pieces hides the wire crossings at the hook. Thread them onto the straightened wire in sections, twist the hook end back on itself to close the circle, and the result reads as full and store-bought from the sidewalk.
6. Forget-Me-Knots Wreath
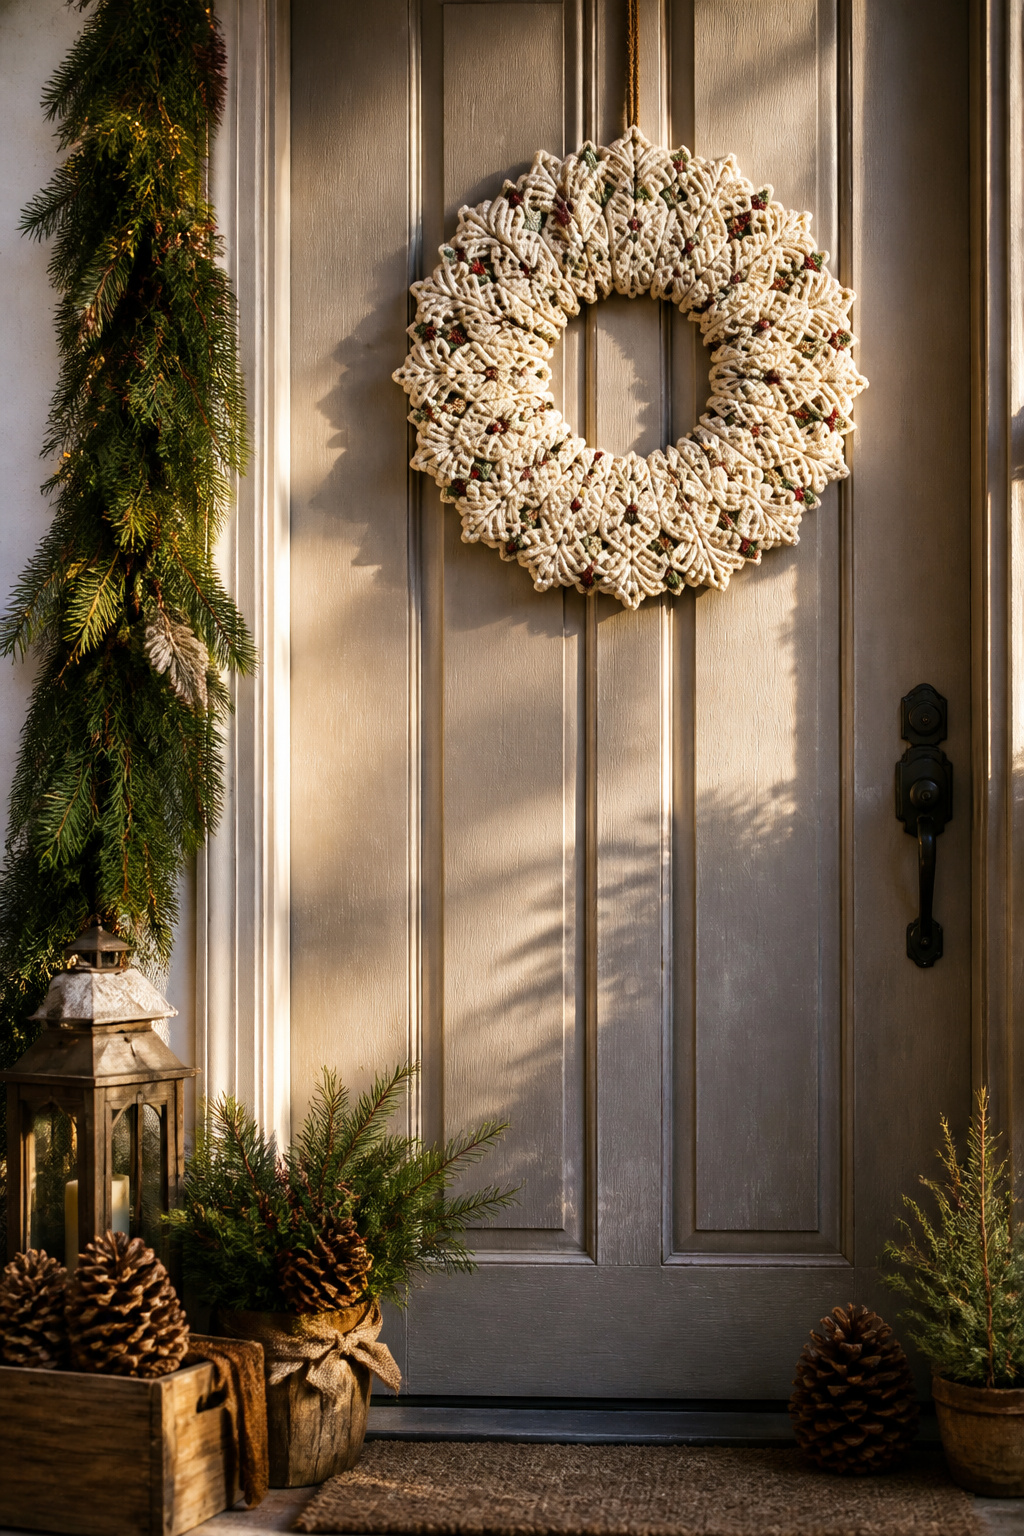
The cord weight matters more than the knot pattern. I once spent an afternoon trying to build a wreath around what I called a "sailor’s knot," only to realize later I’d mashed together a carrick bend and a turk’s head into something that existed nowhere in actual nautical practice. The rope itself, a half-inch sisal I’d grabbed because it looked right on the spool, was the real problem: anything thicker than quarter-inch cord reads dock line instead of holiday, no matter what shape you force it into.
Quarter-inch cotton sash cord or 4 mm macramé rope holds a fourteen-inch wreath form without sagging, and the knots stay small enough to read as texture rather than hardware. The half-inch stuff needs a sixteen-inch frame minimum just to keep the circle from collapsing under its own stiffness, and by then you’ve built a life preserver.
If you want the nautical note to survive as Christmas, keep the palette warm: cream cord, maybe a single strand of burgundy or forest green threaded through, and skip the galvanized anchor charms. The knot I finally settled on was a simple repeated overhand, pulled tight and flattened, which gives a braided look without the bulk of actual macramé.
7. Paper Cone Gratitude Wreath

A paper cone wreath sounds sentimental until you realize you have to make forty of them by hand. I drew my cone template freehand on the back of a cereal box, and every single cone came out a slightly different taper. Some sat flat against the wreath base, others flared like party hats, and the whole thing took on a lumpy, almost pinecone texture that I ended up liking more than a perfect grid would have looked. About thirty-two cones fit on a 12-inch foam base if you stagger the rows and leave a fist-sized hole in the center for the hanger. I expected my family to write earnest gratitude notes, the kind of thing that ends up on Instagram. Instead my kid wrote "mac and cheese" three years running, my partner listed "the dog’s weird eyebrows," and my mother-in-law filled hers with complaints about her neighbors that I had to tuck deep into the back row. The paper itself is just lightweight kraft, nothing archival, so this is a one-season wreath unless you swap the notes out next December. Hot glue held fine through a damp January, though a cone or two peeled at the seam where my freehand curve had been too shallow and the overlap barely existed.
8. Under Wraps Wreath

Foam gift-box forms from the craft store give this wreath its structure, and they cost about a dollar each in the two-inch size. I wrapped mine in kraft paper first, then in a thin metallic sheet, and the corners tore on every single box until I switched to scoring the paper before folding. Twelve two-inch boxes read fuller than four four-inch ones because the smaller scale lets you pack the ring tight and catch light on more edges; the big boxes leave awkward gaps and look sparse from the street. Ribbon loops between each box hide the hot-glue seams and give the wreath the stacked-presents look that reads "Christmas" from twenty feet away.
9. Vintage Truck Christmas Wreath

A metal truck hauling a miniature Christmas tree turns a wreath into a scene instead of just a circle of greenery. I found mine at a farm-supply store near the register where they stack impulse gifts for December, but hobby shops and estate sales are the quieter hunting grounds with better prices. The first truck I tried was resin, and my drill bit caught the front fender wrong and split it clean through; the second one I mounted with a dab of construction adhesive and wire through the bed rails instead. The truck should sit under six inches long, or the wreath becomes a frame for a toy instead of a toy becoming the wreath. A twenty-inch grapevine base holds the scale right; anything larger and the tree in the truck bed looks like a shrub. Wire the wheels down through the vines, not just the truck body, or a gust will flip your whole scene sideways.
10. DIY Pinecone Wreath
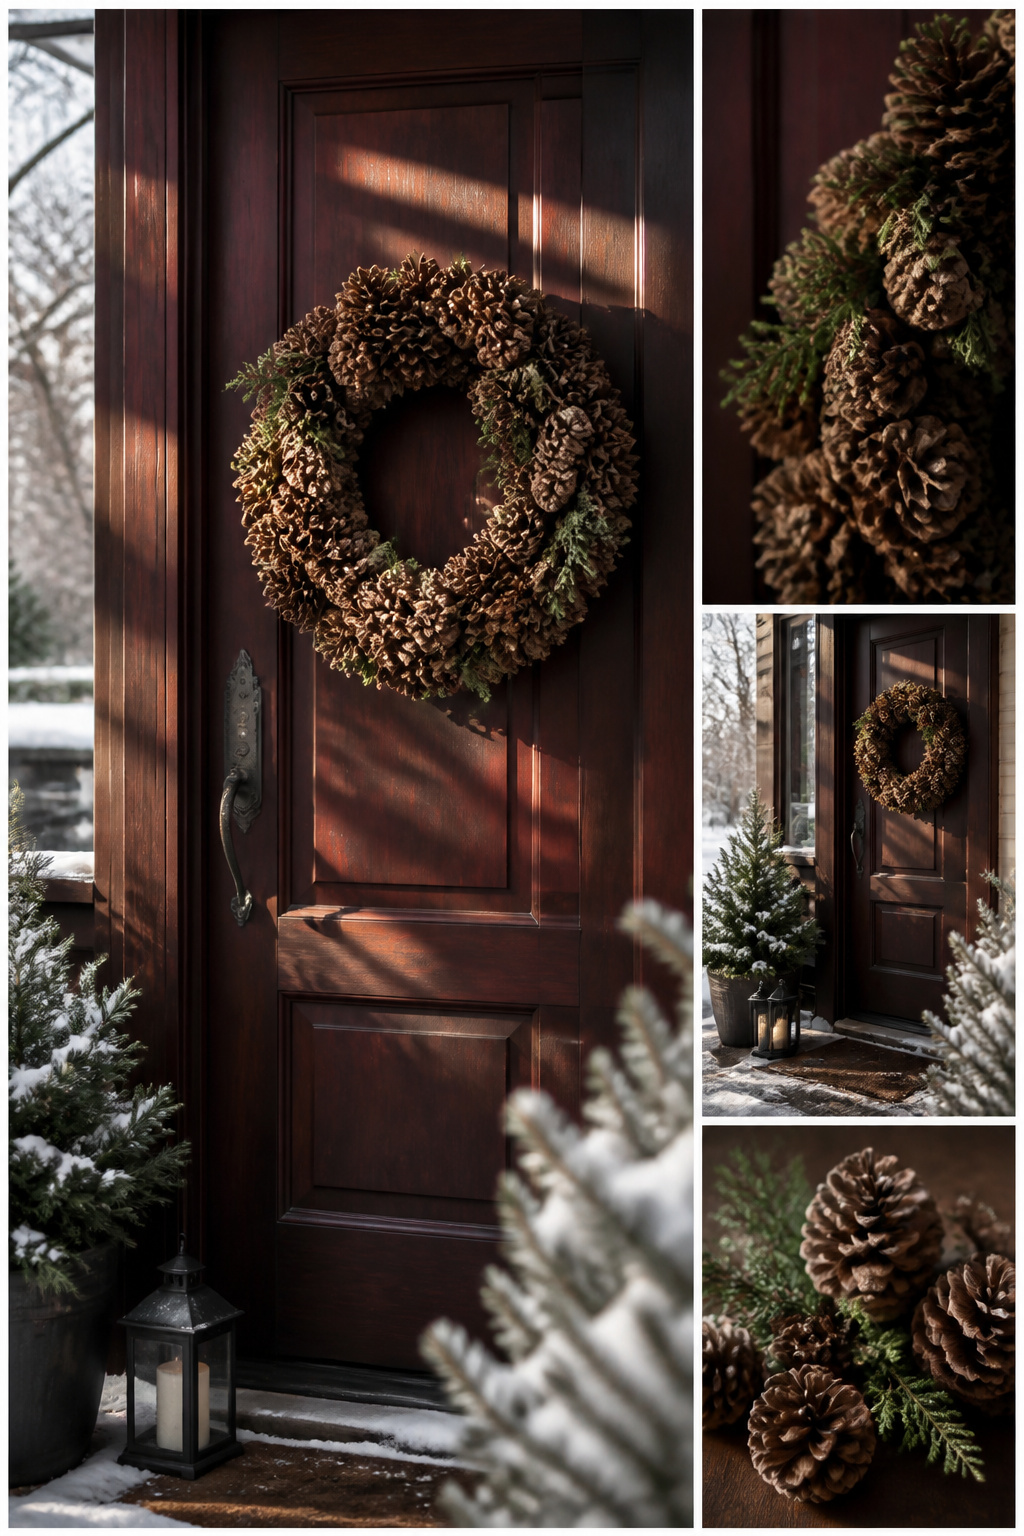
Pinecones pulled from the yard need 200°F for thirty minutes on a foil-lined baking sheet before they ever touch a wreath frame. Bugs you cannot see crawl out, and the sap softens enough that the scales open into that weathered shape store-bought cones mimic. Skip this step and your door hosts a slow insect migration through January.
Wire floral picks beat hot glue by a mile. Glue softens in summer heat or winter sun, and a wreath hung on a south-facing door sheds its cones one by one onto the porch boards. Picks threaded through the scales and twisted around grapevine or wire frame stay put through every season.
Battery fairy lights tucked between the cones look magical until the first hard rain. The battery pack housing on the set I tried claimed water resistance, but moisture seeped through the screw seam and killed the string before New Year’s. If you want lights, plan on bringing the whole wreath indoors when storms hit, or skip them and let the natural texture carry the look.
11. DIY Snowball Wreath

Styrofoam balls and yarn-wrapped cores both work for a snowball cluster, but spray adhesive melts cheap Styrofoam on contact. The first batch I tried dissolved into craters before I could even press them together. Hot glue through a low-temp gun is slower but keeps the shape intact.
A mix of sizes reads best: two-inch, three-inch, and four-inch balls grouped tight so the smaller ones fill gaps between larger spheres. All-white reads as snow; all the same size reads as a craft project.
My dog destroyed this wreath in one afternoon. The yarn-wrapped balls held up to chewing longer than the Styrofoam ones, which shattered into beads across the hallway. If you have a tail-wagger under forty pounds, hang this above nose level or skip the Styrofoam entirely.
12. Ice Skates Christmas Wreath

Vintage ice skates turn up at nearly every Northeast tag sale once the weather turns, and a laced pair hangs straighter than the hooked kind because the eyelets give the ribbon something to bite against. I found a white leather pair at a thrift store last winter, size seven with rusted blades that no one would ever lace up again. The hooks on older skates sit proud of the boot and let the whole thing twist on a nail; laced skates stay put.
A standard over-door hanger tops out around ten to fifteen pounds, which matters more than you think once you add evergreen, wire, and a steel blade. The skates alone came in under three, but by the time I wired in a grapevine base and a few clipped branches, the whole assembly pushed close to that ceiling. If your door is hollow-core, the hanger flexes and the wreath bangs every time heat cycles on. A solid door or a screw-in hook on the frame fixes that, though renters know the tradeoff.
13. DIY Dried Orange Wreath

Thin orange slices, about an eighth of an inch, dry best. Much thicker and the centers stay wet; much thinner and they curl into brittle chips that crack off the wire. A gas oven set to 170°F with the door propped on a wooden spoon handle took about four hours for my first good batch, flipping the slices once at the two-hour mark. The electric oven I tried later ran hotter at the same dial setting and scorched a tray in under three hours, so a cheap oven thermometer pays for itself here.
Grapevine frames work better than wire for the weight. The slices feel light individually, but twenty of them plus twine and a bow add up, and a wire hoop will sag by New Year’s. I learned the mold lesson the hard way: a basement door with no direct sun and poor airflow turned a wreath I was proud of into a fuzzy disaster inside ten days. The one that hung on a covered porch with morning light and moving air lasted the full season and then some.
14. DIY Marshmallow Wreath

A marshmallow cluster wreath looks like the vintage Christmas craft projects your grandmother might have clipped from a magazine: soft white spheres packed tight on a foam ring, dusted with fake snow, maybe pinned with a few red velvet bows. The illusion holds for about forty-eight hours.
By day three, ants had found mine. They arrived in a thin, determined line across the door frame, up the hanging ribbon, and into every crevice between marshmallows. The sealant I had sprayed to keep the wreath from getting sticky in humid weather, a standard craft lacquer, had already made the marshmallows inedible. So the ants were wasting their time and I was wasting mine, but there we were.
This project belongs on an interior door that never opens, or above a mantel, or anywhere with climate control and no direct path from the outdoors. A front door in any region that stays above freezing sees enough temperature swing to draw moisture through the sealant, and moisture draws insects even in December. The foam ring costs a few dollars, a bag of marshmallows about the same, but the twenty minutes of assembly turn into an hour of ant management if you hang it wrong.
15. DIY Yarn Wreath
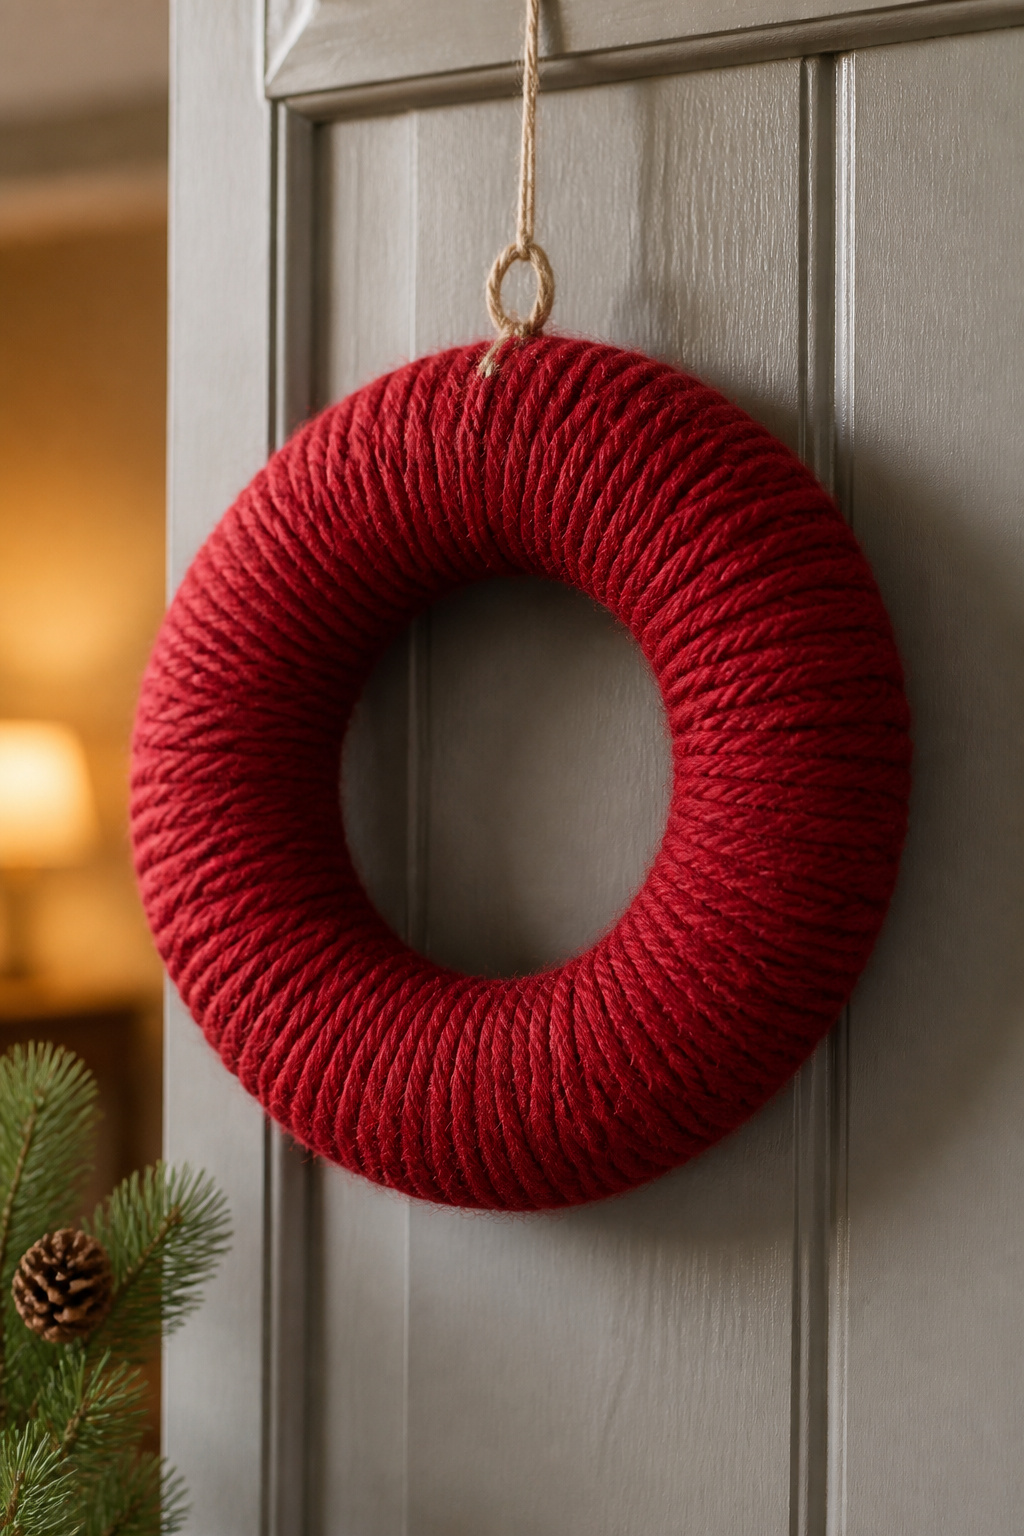
A 16-inch foam wreath form looks manageable until you are forty minutes in and your forearm starts to burn. Bulky yarn, the kind sold as "super bulky" or size 6, covers the surface fastest because the strands fill gaps in a single pass. Thin yarn or, worse, eyelash yarn with its wispy fringe demands twice the wraps and still leaves the base showing through. My first attempt with that novelty stuff came out patchy and shed fibers across the couch for a week. Straw forms grip yarn better than smooth foam, so the wrapping stays put without constant tucking. Hot glue the starting end to the back, wrap tight spirals, and knot the finish behind a loop of ribbon. The whole job takes one evening and under ten dollars in materials, but your shoulders will know you did it.
16. DIY Ribbon Candy Christmas Wreath

Real ribbon candy in March is an Easter-basket leftover or a specialty-shop find, and either way the cellophane cracks inside a week on a wreath. The first one I tried, the wrapper split at the bow and the whole piece went cloudy from humidity before I hung it. Printed ribbon is the safer bet, but the curves matter more than the print. Satin ribbon, even the heavy costume-grade, relaxes into droops in December humidity. Wired edge is what holds the looped candy shape; you pinch the fold, the wire remembers, and the ribbon stays arched like a pulled taffy twist. I use a 2.5-inch width, cut into eight-inch strips, loop each end toward the middle, and wire the overlap to a grapevine frame. Three rows, staggered, fills a fourteen-inch base with no gaps showing. The wired ribbon costs about a dollar more per yard than satin, but the shape survives the season.
17. DIY Braided Yarn Wreath

Three-strand braids of worsted-weight yarn build up faster than the wrapped method, where you coil single strands around a frame until the surface looks solid. The braid gives you a rope-like texture with visible grooves, and you can work in two or three colors without tangling. I started with a 14-inch wire wreath form from the craft store, the kind with two concentric rings and crossbars.
The problem showed up around the third ring of braids. I had pulled each section tight to keep the shape crisp, and the tension slowly squeezed my circle into an oval. By the time I noticed, the top and bottom had flattened enough that the wreath hung crooked on the door. Loosen the braid tension so the yarn still has give when you press it, then tack it to the frame with floral wire every quarter turn instead of gluing. That lets the frame keep its shape and makes the whole thing easier to fix if a section goes wrong.
Wrapped yarn takes roughly twice as long because you are covering the same surface with half the material per pass, but it lies flatter and reads as felted from a distance. The braid reads as craft, which is either the point or not, depending on your door.
18. DIY Christmas Bow Wreath
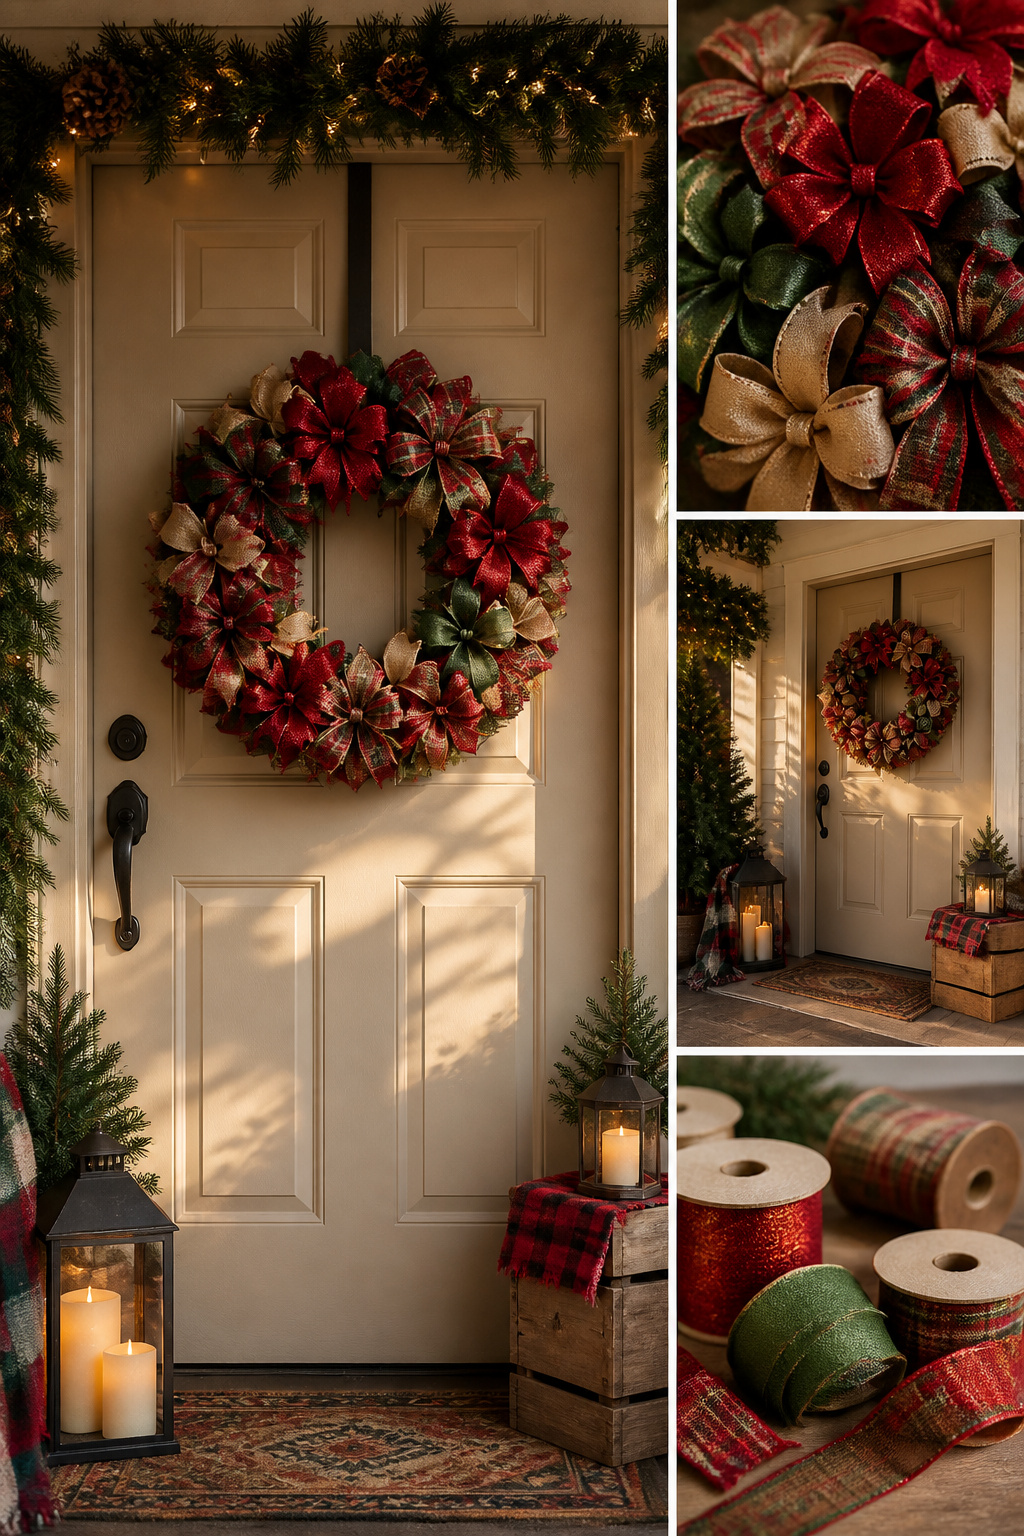
A bow wreath lives or dies on whether the loops hold their shape after you fluff them. Wired edge ribbon is the only material that lets you bend each loop into place and have it stay there through December wind and door slams. Satin or grosgrain without wire will collapse into sad ribbons within a week.
I made a simple bow jig from a piece of cardboard about the size of a paperback book, with two slits cut an inch apart. The ribbon feeds through the slits, wraps back over itself, and the wire edges let you pinch the center tight without creasing the loops. Three yards per bow fills the jig with enough bulk for a wreath-scale loop, and I needed roughly two dozen bows to cover a 14-inch straw form with no gaps showing.
The cardboard jig costs nothing and saves the hour you’d spend hand-tying each bow to match the last one. What convinced me, reading through a dozen of these projects, was the number of makers who finished their wreath only to watch non-wired bows flatten by New Year’s.
19. DIY Vintage Toy Cars Wreath

Small metal cars carry the weight this idea needs. Plastic ones, even the detailed die-cast lookalikes, catch light wrong from twenty feet away and read as toy aisle leftovers. The resin and metal lot I found on eBay ran about forty dollars for twenty pieces, most with chipped paint that worked in my favor.
A #50 drill bit opens the chassis for wire without splitting the casting. I tried a standard bit first and ruined two Fords. The metal is harder than it looks, especially on 1960s chassis, and the bit walks if you do not start with a center punch.
Tree details came from a bag of miniature bottle brush trees, the kind sold for railroad layouts. I wired three to a station wagon roof so they sat at different heights. Gift boxes, wrapped in brown paper and tied with baker’s twine, stacked in a pickup bed with hot glue. The glue holds through December but peels off clean in January with a fingernail, which matters more than I expected the first year I tried permanent adhesive and spent an evening scraping a Tonka flatbed.
Scale is the part that trips most builds. Mix a three-inch sedan with a two-inch semi and the wreath reads as junk drawer, not curated. I laid every vehicle on the base before attaching anything, moving them until the sight line from the street looked balanced rather than crowded.
20. DIY Pom-Pom Wreath

A wire wreath frame and a pile of yarn pom-poms in three sizes will fill an evening and half the next morning. The fork method works in a pinch: wind yarn around the tines, tie the bundle through the middle, and snip the loops. A plastic pom-pom maker halves the time once you figure out the notch system, though the first three will look lopsided while your fingers learn the tension. Budget about four minutes per pom-pom if you want the thing dense enough to hide the frame. I quit at midnight with a twelve-inch ring two-thirds covered; the gaps showed wire, and sparse reads cheap from the sidewalk. Full density needs roughly twice what you think, especially if your pom-poms vary in size. Cluster the largest ones first at the outer and inner edges, then pack mediums and smalls into the valleys. Hot glue holds well on wire, but the yarn itself gives the real grip; a dab every third pom-pom is plenty.
21. DIY Winter Ice Wreath

A bundt pan makes the mold for this wreath because the center hole leaves a clear spot for hanging once the ice freezes through. I set holly sprigs, red berries, and thin orange slices into the water before it goes to the freezer, where they drift to whatever angle they settle at. Unmold it when the outer surface turns matte and the pan feels cold rather than biting, usually ten to fifteen minutes after you pull it from the freezer, because the ice contracts just enough to release cleanly while still holding its shape. Leave it longer and the surface starts sweating; rush it and the ring cracks where the pan grips. On my porch in December this lasts about two hours before the details blur and the whole thing slumps. That is the honest window, not a flaw in the method: ice wreaths are meant for the morning of a gathering, not for the season. The cost is nearly nothing if you already own the pan, and the twenty minutes of hands-on work fits an evening before the event rather than a full weekend project.
22. DIY Christmas Package Wreath

Small wrapped boxes can read as clutter from the street, so the trick is keeping every package the same size and spacing them tight against a flat backing. I tried this last year with foam-core gift boxes cut from 2-inch cubes, each one hollow so the wreath stays light on a door hook. The paper cost stung more than I expected, roughly $18 for a roll of heavy kraft and another $12 for satin ribbon, which put me past the $25 ceiling I set for most of these projects. Two ways to trim that: use leftover wrapping from gifts you are already buying, or switch to a single wide ribbon and skip the layered bow.
The scale lesson from the Under Wraps method applies directly here. That design works because the boxes are tiny, about palm-sized, and clustered densely enough to read as texture rather than objects. My first attempt used larger boxes, four inches, and the gaps between them turned the wreath into a lumpy circle of obvious cardboard. Downsizing to two inches and adding a plain burlap loop for hanging pulled it back into shape. A 14-inch wreath form holds about eighteen of the small cubes; anything wider and the weight shifts enough to torque the hook overnight.
23. DIY Felt Christmas Wreath

Felt holds a shape without sewing, which makes it the fastest route from cookie cutter to finished wreath. I traced holiday shapes onto two kinds of felt one afternoon and learned the difference the hard way. The wool blend I ordered first cost more but kept clean edges even after I cut it. The acrylic squares from the craft bin frayed into fuzz at every curve, so those trees and stars became test pieces instead of the final layer.
I glued the wool shapes onto a flat grapevine base with hot glue, working from the back rim forward so nothing overlapped awkwardly. The flat appliqué sits close to the door, which matters more than I expected. My cat bats at anything that projects even an inch, and the layered felt lies too smooth to hook a claw. Three winters in, she has knocked it down exactly once, and it survived the fall without a tear.
24. DIY Embroidery Hoop Wreath

A wooden embroidery hoop gives you a clean circle without the gnarled texture of grapevine, which is why the finished piece reads modern rather than rustic. The hardware already built into every hoop, that little brass tension screw, sits perfectly at 12 o’clock and holds the weight once you tighten it against a nail. Nesting two hoops, an 8-inch inside a 12-inch or a 10-inch inside a 14-inch, creates negative space you can leave bare or span with a few stems of eucalyptus. I like that you do not need to wrestle floral wire through a woven base; the inner ring clamps greenery in place if you tuck stems between the two wooden bands before tightening. For ornaments, the flat inner surface of the outer hoop acts like a shallow shelf, so small glass balls sit inside the circle instead of dangling from it. The tension screw is your hanger; do not cover it with ribbon. That single exposed brass detail against painted wood or bare bamboo is what makes the whole thing look intentional on a front door.
25. DIY Snowflake Wreath

Paper snowflakes look delicate on a wreath, but getting them there took more patience than I expected. The first cutting pattern I tried had six points, which sounds right for a snowflake until you fold it and realize the layers bunch up at the center and tear when you cut. A five-point pattern, folded from a circle rather than a square, opens cleaner and lies flatter against the base. That was attempt two. Attempt three was just refining the angle so the arms didn’t look stubby.
Spray adhesive warped every paper flake I tried, curling the edges within an hour. A thin line of white glue applied with a toothpick, pressed flat under a book for ten minutes, held without the buckling. Wooden cutouts from the craft store skip this entirely, though they cost more and read heavier on the door.
Arranging them, three or five flakes grouped around the wreath reads balanced; four or six looks like a clock face no matter how you rotate it. The odd number lets your eye rest somewhere instead of hunting for symmetry that isn’t quite there. I ended with five wooden flakes, off-center, none of them matching in size.
26. DIY Candy Cane Wreath

The candy cane wreath looks straightforward until you try to wire the first row together. Plastic canes, especially the hollow dollar-store kind, crack under the pressure of a tight twist. Real sugar canes hold up better but draw ants within two days on a warm porch, something I should have thought through before hanging one on my sister’s front door in Georgia. The hook direction matters more than you’d guess: face every cane’s hook the same way, all curving clockwise, or the whole ring torques sideways when you lift it. For a circle, that means staggering lengths so the inner curve of each cane meets the outer curve of the next. A heart shape is more forgiving because the two lobes let you hide the wire crossings at the center V, but you still need that uniform hook direction on each side or the bottom point sags. Ribbon helps, threaded through the crook of each cane rather than wrapping the body, which is where the stress concentrates and the plastic gives way.
27. DIY Tinsel Wreath

Tinsel wreaths look like the easiest win on the list, and they are, until you find strands of silver in your couch six months later. The vintage-style wrap, where you coil loose tinsel around a wire frame, sheds worse than the garland version because every cut end is an exit point for glitter. I learned that after brushing my apartment floor twice a day for a week.
Modern tinsel garland is lighter, cheaper, and stays put better, but it also hangs flatter and catches light differently. Vintage lead-weight tinsel had drape and density; the plastic replacement needs twice the bulk to read as anything more than a fuzzy pipe cleaner. The fix is distance and dim light. Up close in daylight, the gaps show. From a porch at dusk, the whole thing compresses into a solid shimmer that reads expensive even though the materials ran under ten dollars. If your door gets direct afternoon sun, skip this one; the glare turns it into a disco ball, and not in a good way.
28. DIY Putz House Wreath

A 16-inch wreath leaves more room than you think, but the scale still matters. The pre-made Putz village ornaments I found at Target sat too high on a standard pom-pom base, so I cut off the bells and wired the houses flush against the yarn. For a second attempt, I printed a PDF sheet of miniature houses on 110-lb card stock and built them with a glue gun. Those flat-bottomed paper houses tuck tighter to the curve and leave space for lights.
Battery-operated fairy lights, the kind with a 20-bulb strand, fit inside the card stock versions if you punch a hole through the back wall before assembly. The pre-made resin houses rarely have that access, so the glow ends up sitting behind them instead of inside. Either works, but one looks like a village at dusk and the other like a village with porch lamps.
29. DIY Christmas Ornament Tree Wreath

A circular wreath frame reads as a Christmas tree only when the ornament placement is deliberately lopsided. I learned this after my first attempt looked like a traffic cone: ornaments spaced evenly in three tidy rows, shrinking toward the top. The trick is heavier visual weight on the left side, with branches that jut at irregular angles and a trunk line that drifts slightly off-center. Real trees grow crooked; symmetry kills the illusion.
My first top ornament was a glass ball, maybe three inches across, and the wire I had on hand, standard floral gauge, bowed within a day. The whole tree sagged left like a question mark. For anything larger than a golf ball at the peak, 18-gauge wire minimum, doubled and twisted, is what keeps the silhouette upright. I now thread it through the frame holes rather than wrapping around the rim, which gives the top ornament something solid to pull against without torquing the whole shape. The lower ornaments can hang on lighter wire or even ribbon; they are not fighting gravity the same way.
30. DIY Christmas Rag Wreath

The rag wreath starts with a wire frame and fabric strips cut from whatever soft goods turn up at yard sales. I keep a bin of faded flannel sheets and worn cotton pillowcases for this, nothing precious, because the charm is in the mix of plaids and florals that would clash anywhere else. Cut strips one inch wide and six inches long; narrower than that and the knot slips, wider and the bundle turns bulky against the door.
Tying each strip, knotting it over the two rungs of the frame, takes longer than wrapping yarn or ribbon straight around. A fourteen-inch frame ate up most of a Sunday afternoon, though the mindless repetition works well with a movie running. The result reads heavier and more interesting than the time suggests, like a quilt you inherited rather than bought.
Woven cotton frays at the cut edge, which softens the whole silhouette after a week or two. Knit fabric, old t-shirts or jersey sheets, curls into tubes instead. That curl hides the wire better but the texture turns uniform, almost like yarn. I use knits sparingly, one in every six or seven strips, just for the variation in surface.
What to Buy and Where I Found It

Most of what I used for these thirty projects came from six places, and the price spread between them is wide enough to matter.
- Michaels carries the hula hoops that become giant wreath bases; the 36-inch size is the one that reads as oversized without blocking the door swing. Paper leaves, pom-pom berries, and wired ribbon for the bow all came from the same aisle.
- Dollar Tree is where the holiday berry stems live. Three bunches cover a 14-inch grapevine form with enough density that the gaps do not show.
- Target stocks the smaller shatterproof ornament sets that work on wire hanger frames. A standard hanger, straightened and formed into a circle, holds roughly eighteen to twenty-four 60mm ornaments before the weight starts to pull the hook out of shape.
- Thrift stores turned up the brassy wire hangers I actually prefer for ornament wreaths; the older metal bends cleaner and keeps its circle under tension.
- eBay filled in the vintage glass when I wanted a single color story and the local stores only sold mixes. Shipping time matters here: two weeks minimum, so this is not the move for a Saturday project.
- My own yard supplied birch twigs, teasel seedheads, and rose hips for the rustic wreath. The eucalyptus on one hula hoop version came from a neighbor’s tree after a windstorm; fresh cut lasts three days before it starts to curl.
The wire hanger math is simple enough to memorize: one hanger equals one 14-inch ring. Need 18 inches? Two hangers, twisted at the hooks, give the extra span without buying floral wire.
How Long Each Wreath Lasts
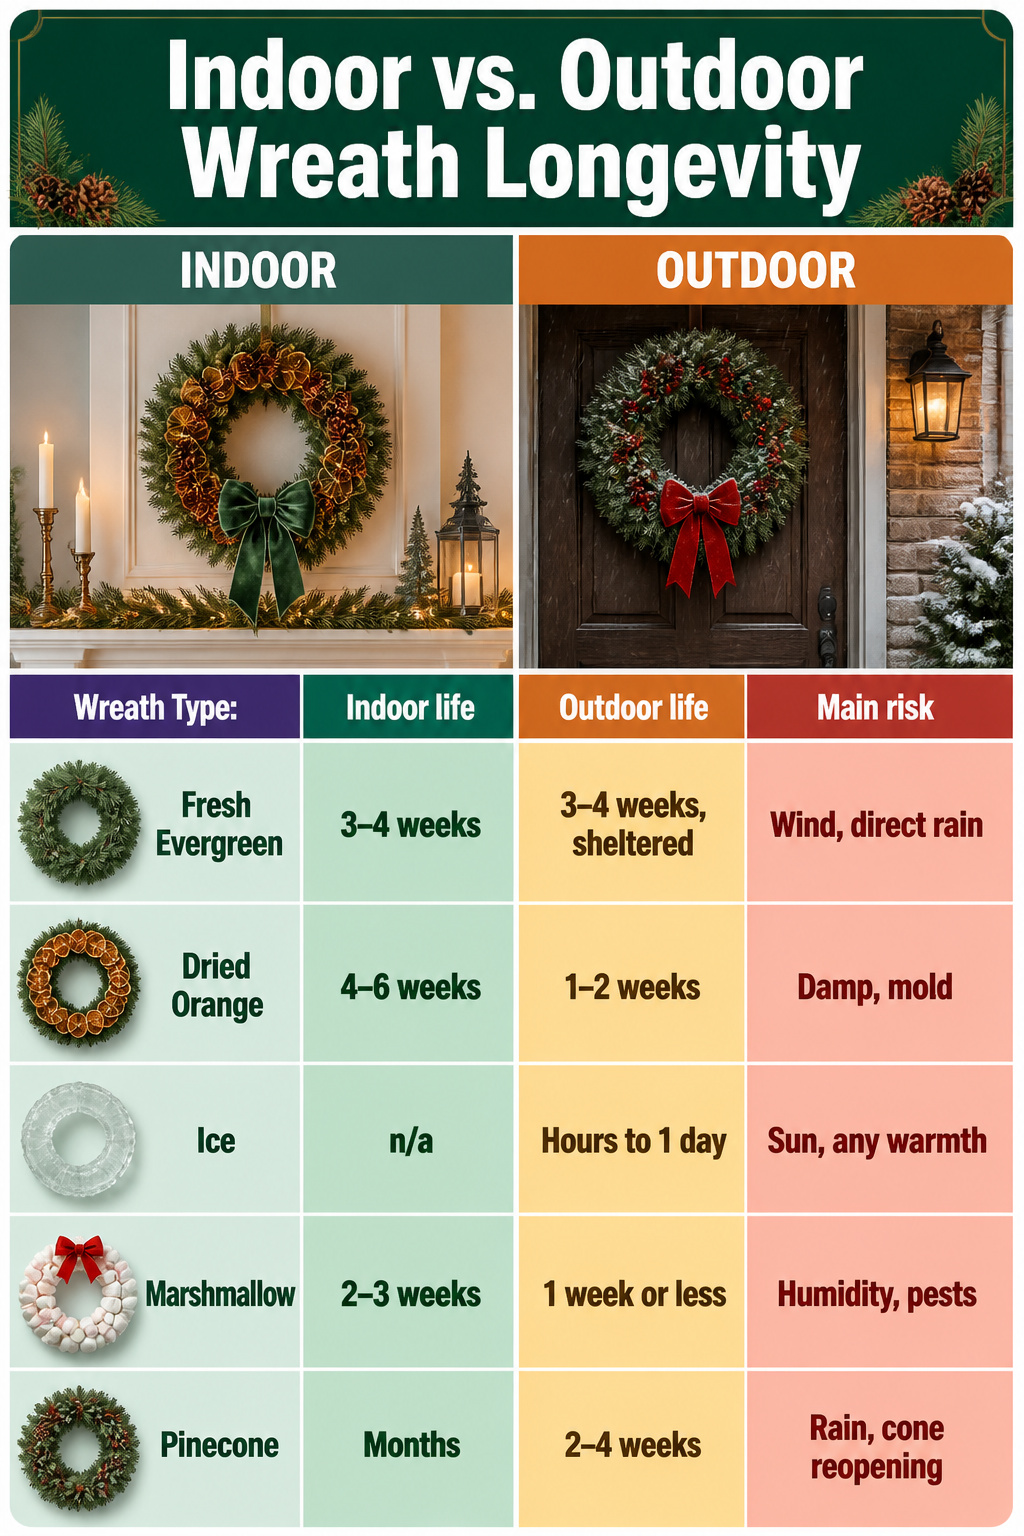
Indoor wreaths and outdoor wreaths age like two different species. A dried orange wreath hung above a fireplace in Denver stayed crisp through January, but the same style in a damp basement closet grew white mold before New Year’s. The ice wreath I tried on a Texas front door made it through one sunny afternoon before it slumped into a puddle that refroze on the porch and nearly took out the mail carrier.
As long as the wreath is not exposed to too much direct wind and rain, it will last well for three to four weeks.
That three-to-four-week window assumes a fresh evergreen base with some shelter. Marshmallow wreaths and yarn wreaths face a different enemy: humidity turns them sticky or musty regardless of temperature. Pinecone wreaths hold up longer outdoors than you’d expect, but rain eventually opens the cones and loosens the glue. For anything edible or biodegradable, plan on two weeks outdoors or four weeks inside, then rebuild or store it dry.
| Wreath type | Indoor life | Outdoor life | Main risk |
|---|---|---|---|
| Fresh evergreen | 3–4 weeks | 3–4 weeks, sheltered | Wind, direct rain |
| Dried orange | 4–6 weeks | 1–2 weeks | Damp, mold |
| Ice | n/a | Hours to 1 day | Sun, any warmth |
| Marshmallow | 2–3 weeks | 1 week or less | Humidity, pests |
| Pinecone | Months | 2–4 weeks | Rain, cone reopening |
Skill Level and Weekend Timeline
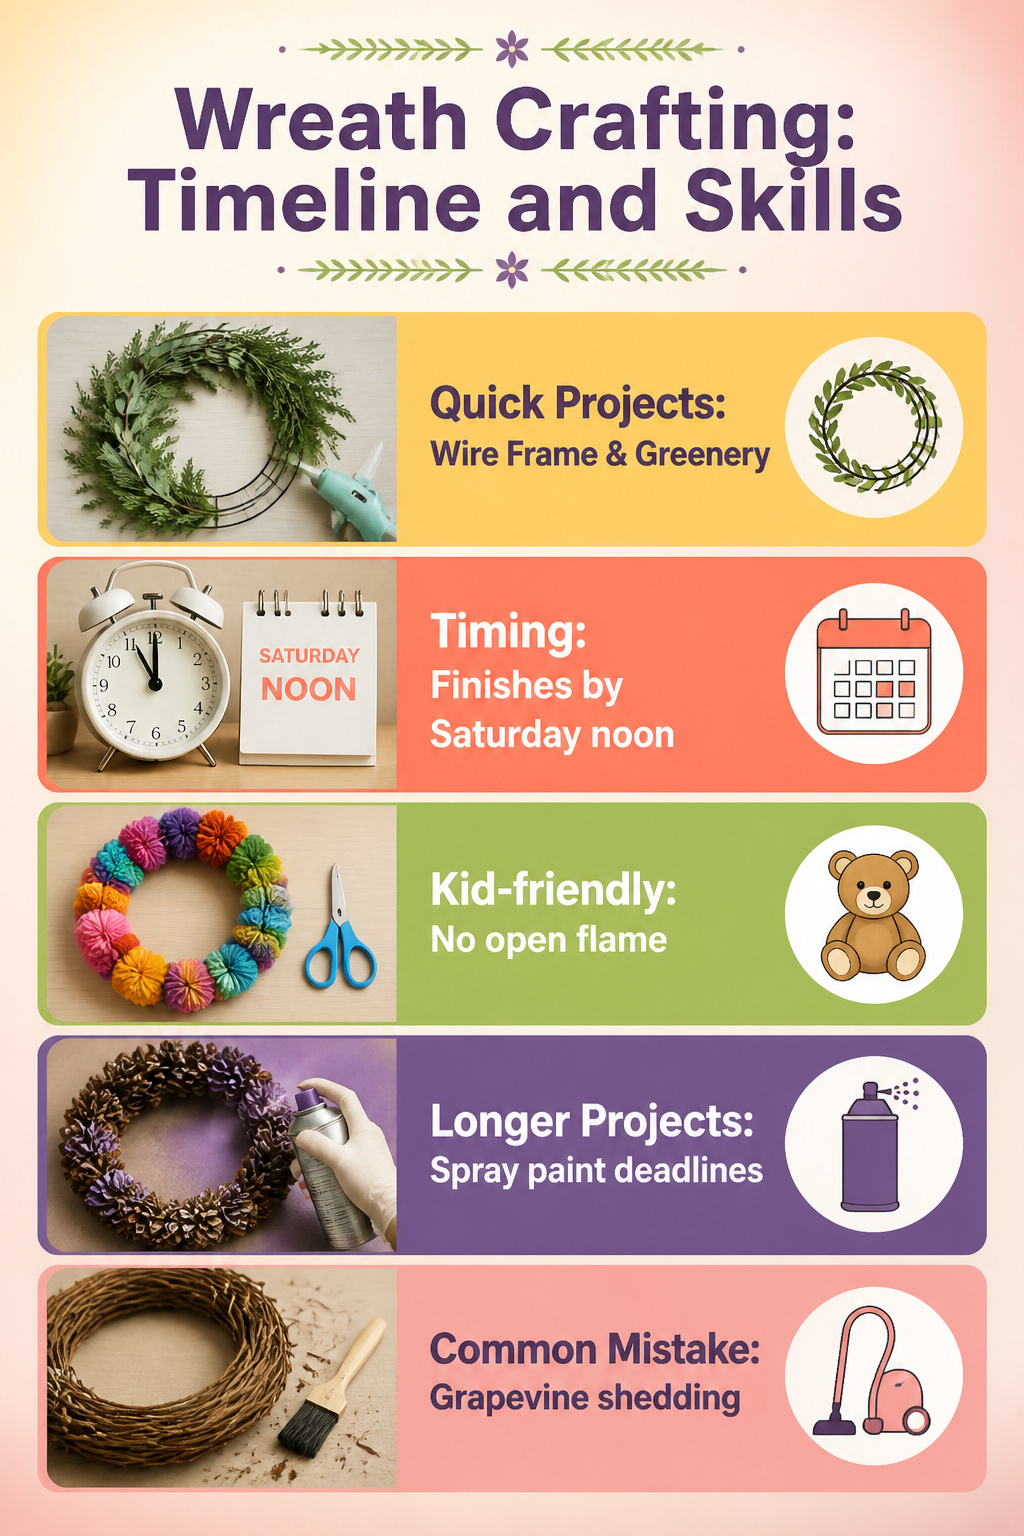
The projects that actually finished by Saturday noon were the ones built around a wire frame and pre-made greenery picks: hot glue cools in minutes, and the door gets dressed before lunch. Anything with spray paint or watered-down glue needed Sunday evening whether I planned it or not; that matte sealer I loved on the pinecone wreath stayed tacky through dinner and I hung it Monday morning with crossed fingers.
Kid-friendly, in my house, meant no open flame and no waiting. My seven-year-old managed the pom-pom wreath because the yarn wrapped around cardboard and the scissors were blunt. The dried orange slice wreath that needed three hours in the oven at its lowest setting, then overnight cooling, was strictly a glass-of-wine solo job. The mistake I repeat every other year is forgetting that grapevine bases shed until sealed; what reads as a two-hour project becomes a vacuum-and-wait affair.
Seasonal Themes That Hold Together

Picking a palette before you touch a single stem saves both money and the Saturday afternoon you would otherwise spend staring at mismatched ribbon in the craft store. I learned this the expensive way two years ago, when I tried to merge traditional red-green-gold, winter white-silver-blue, vintage pastels, and rustic brown-green-cream into one wreath. The result looked like four different holidays arguing on my door. Choose one palette and stay inside it, even when the clearance bin tempts you with a perfect burgundy berry that belongs to a different story.
Traditional red-green-gold reads warm and familiar, but the gold can turn garish fast if every element competes for attention. White-silver-blue feels cleaner and works well on doors with cool-toned paint, though silver accents read as gray in low winter light and can disappear against pale siding. Vintage pastels need a deliberate hand: too many soft pinks and mints and the wreath drifts toward Easter, so I keep the shapes distinctly Christmas, rounded baubles and stiffened ribbon rather than florals. Rustic brown-green-cream is the most forgiving palette, since natural materials already share the same muted saturation, but it risks looking muddy if every brown is a different temperature.
My failed four-way wreath now hangs in the garage as a reminder. The wire frame alone cost eight dollars, and the materials pushed past thirty before I admitted the problem.
Frequently Asked Questions
What are some easy DIY Christmas wreath ideas?
Paper wreaths built from layered construction paper circles, ornament wreaths strung on a bent wire hanger, and yarn-wrapped foam forms all come together in a single afternoon with minimal supplies. The article covers eighteen distinct styles total, from classic leaf wreaths to vintage toy car arrangements, with most projects running under ten dollars in materials.
How do I make a Christmas wreath?
Start with a base that fits your material: grapevine for greenery or pinecones, flat wooden rings for miniature villages, foam forms for yarn or paper cones. Anchor decorations with wire floral picks or hot glue, and always test the weight against your door hanger before finishing. A 14-inch frame needs roughly forty-five paper roses or thirty-two paper cones packed cheek-to-jowl to hide the base completely.
What materials do I need for a DIY Christmas wreath?
Wire wreath frames or grapevine bases form the skeleton; construction paper, yarn, or faux greenery provide the bulk; and hot glue, floral wire, or wired stems attach everything. Specific projects call for extras like shatterproof ornaments, quarter-inch cotton cord, or bulky size-6 yarn, but the common thread is a secure fastener matched to the material weight.