
The best diy christmas ornaments for 2026 sit anywhere between a twenty-minute wrap job and a full evening of gluing and painting, with the deciding factor being how much patience you have for drying time.
Hot glue sets in minutes; dried orange slices need three to four hours in the oven, and pomanders sit for weeks before they harden.
A single spool of twine covers three or four block letter ornaments, while a mini wreath build runs under an hour once you settle on a size small enough that the branch does not bow.
1. Mini Wreath Ornaments
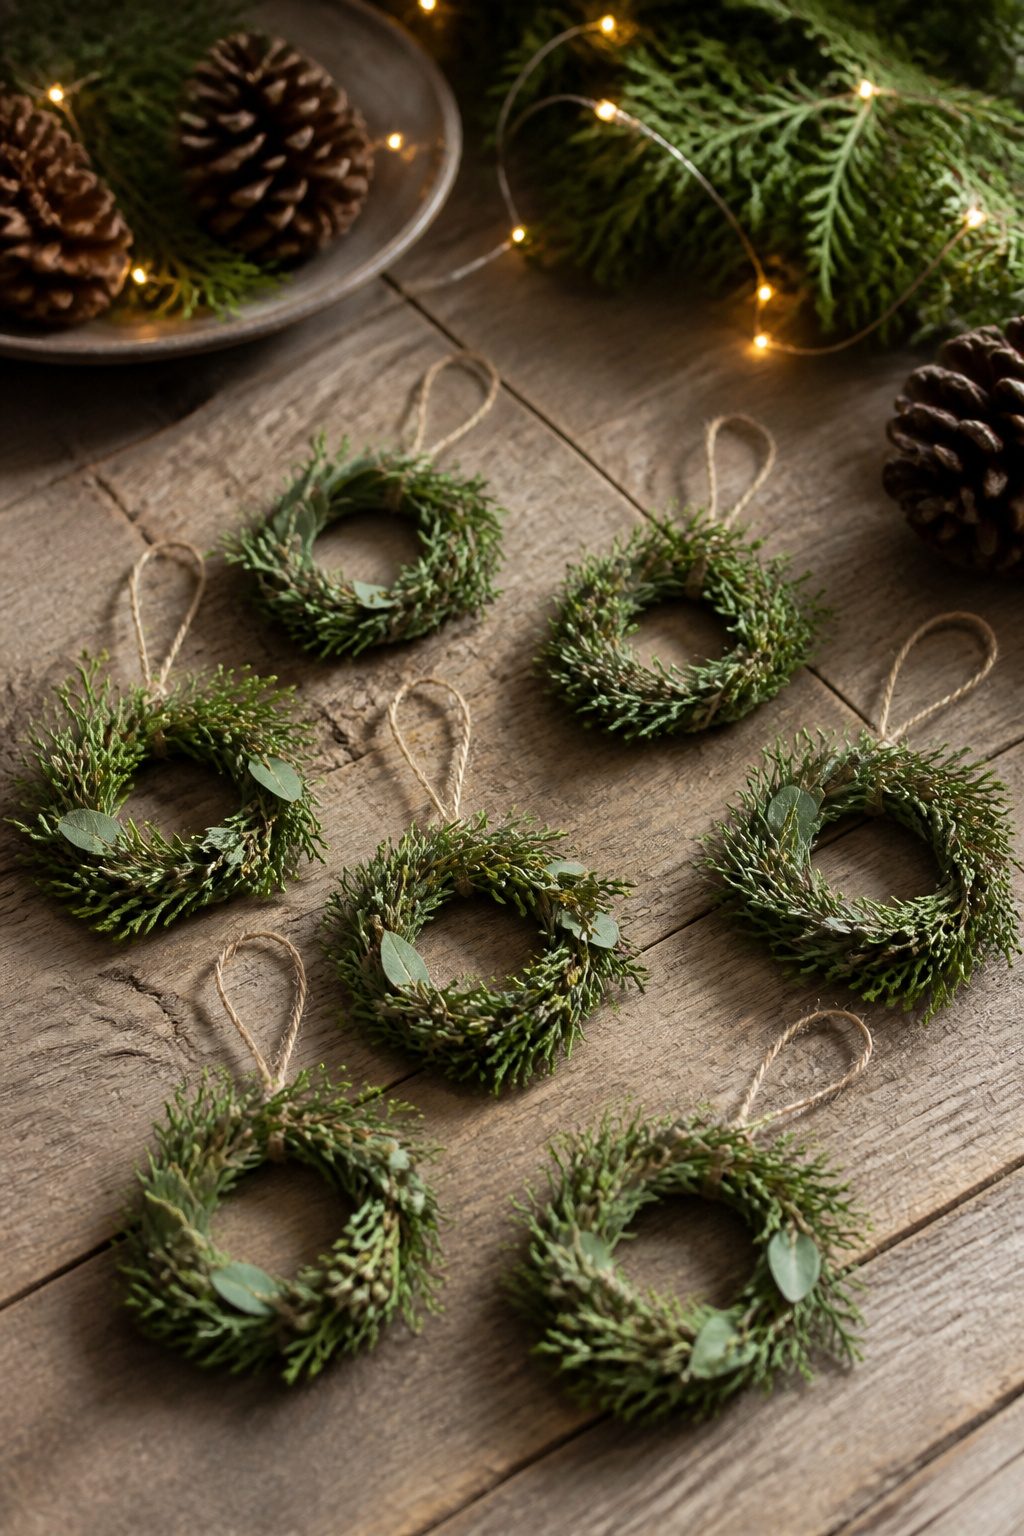
Mini wreath ornaments reward patience with scale.
A 2–3 inch diameter is the ceiling; anything wider and the branch bows like a question mark. I learned this the year I wired rosemary sprigs into a four-inch ring that sagged against every ornament beneath it.
The base shapes faster than you expect.
Floral wire doubled and twisted into a circle gives you a skeleton in under two minutes. Twine works too, wrapped around itself until the ring holds firm, though it drinks glue and takes longer to dry.
For greenery that stays put through January, hot glue set in thin lines along the wire, not blobs grips stems without the lumpy silhouette.
Floral tape wrapped first creates a grippy surface if you are working with slick leaves like boxwood.
Dried cedar and seeded eucalyptus hold color for years; fresh magnolia browns at the edges by New Year’s. A loop of wire at the top, pinched closed with pliers, beats string for longevity.
The whole build runs under an hour once you settle on a size, and a spool of wire plus clippings from a neighbor’s hedge costs less than a coffee.
2. Orange and Clove Pomander Ornaments
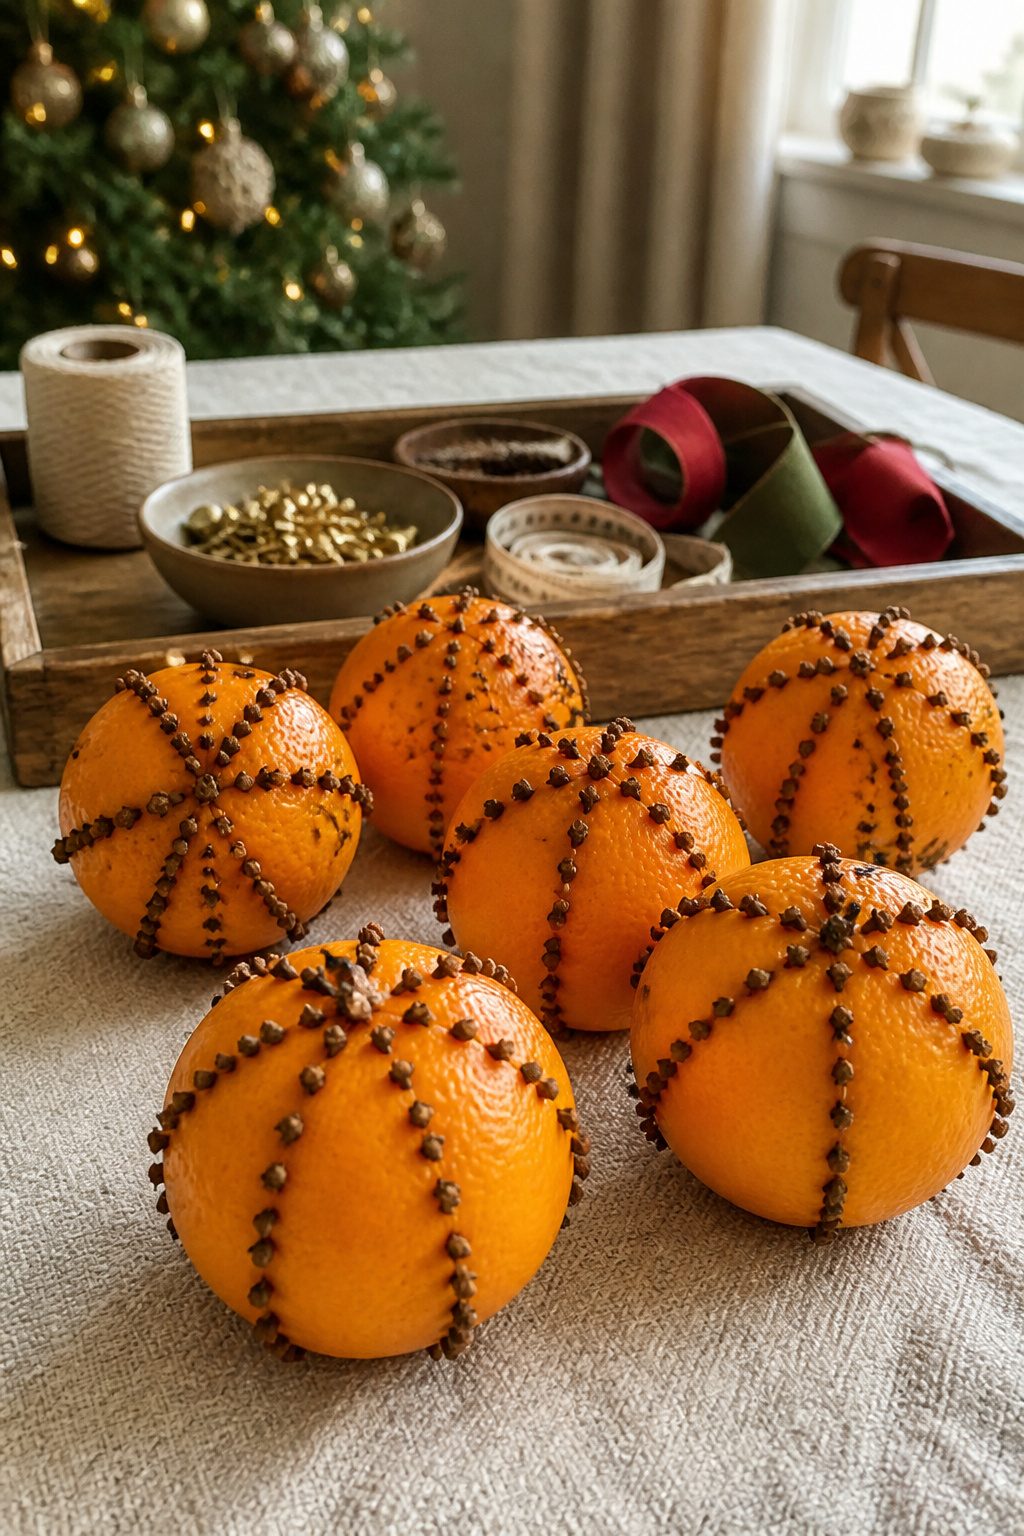
Whole oranges studded with cloves in a star or spiral pattern dry into hard, fragrant spheres that keep their scent for months.
A medium orange takes roughly 20 to 30 cloves depending on how dense you want the pattern; pressing them in with a thumbtack first saves your fingertips.
The drying happens slowly, two to three weeks in a dry spot with decent airflow, not a humid kitchen.
I rotate mine every few days so no side stays flat against the counter. The smell starts strong and mellows into something warmer, still noticeable well into January if you keep them out of direct sun.
Ribbon looped through the top with a tapestry needle makes the hanger; the pith inside hardens enough to hold it.
3. Paper Candle Ornaments
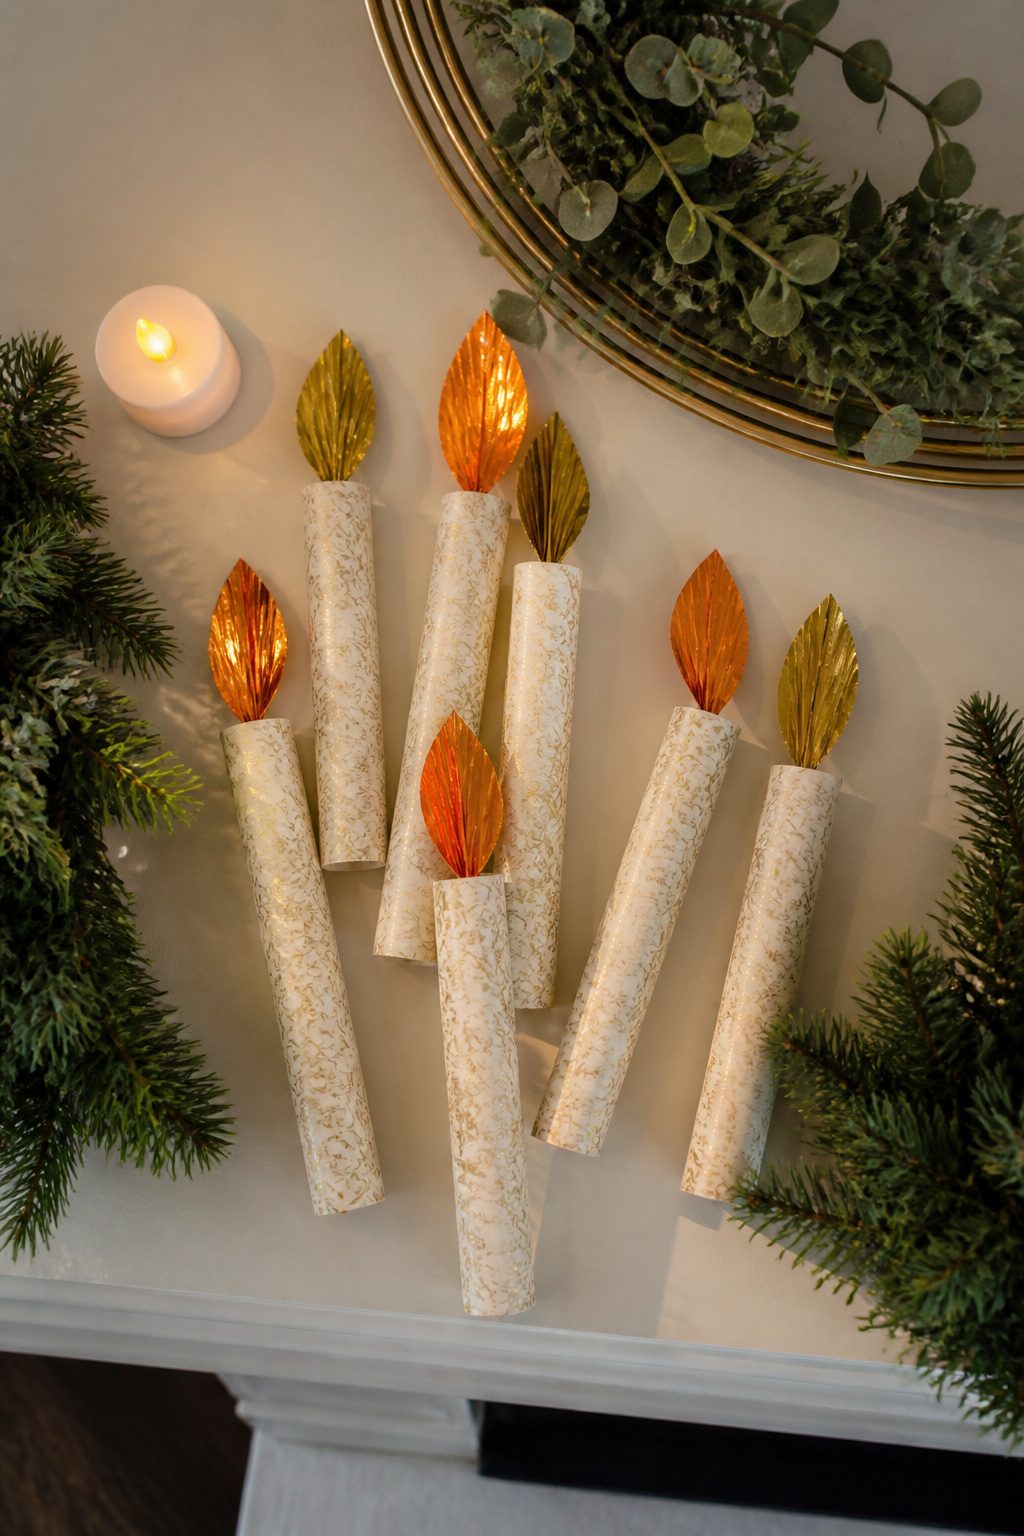
Paper candle ornaments read as real tapers from across the room, but the construction is safer than it looks.
A paper tube forms the body, rolled from cardstock or heavy construction paper and glued shut. The flame comes from a flattened metallic mini cupcake liner, with gold and orange craft paper cut to shape and glued on top.
A small circle punch puts silver dots on the flame for the hot center, and the whole liner assembly slips into a slit cut at the tube’s top. Twine or wire looped on the back finishes the hanger.
The safety angle matters because these look convincing enough to fool someone at a glance. Never put a real tealight or flame inside, even for a photo; paper, glue, and metallic liners are all fuel.
The illusion works on the tree, not in a candlestick. If you want glow, battery tea lights sit safely nearby on the mantel while the ornament hangs above.
4. Half-Eaten Gingerbread Cookie Ornaments
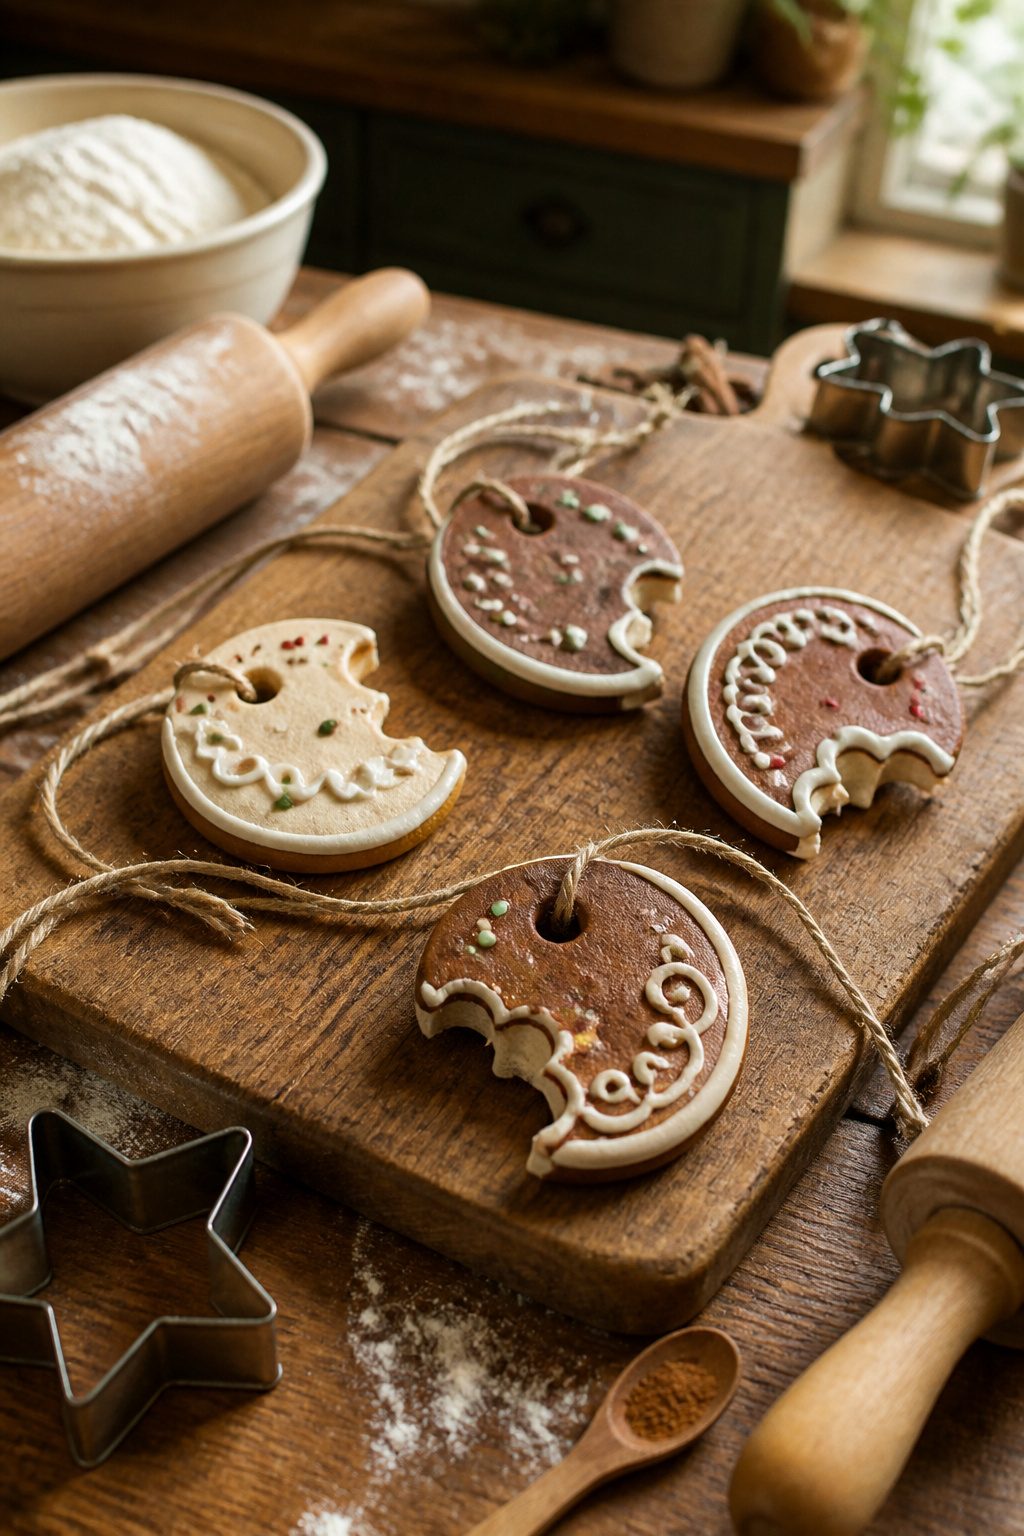
The half-eaten gingerbread cookie ornament works because the joke lands before anyone asks why your tree has food on it.
Salt dough bakes lighter than polymer clay and takes acrylic paint without any prep, though polymer clay survives a fall off the mantel better.
Either way, press the cookie cutter only about halfway through to score the outline, then pull the cutter away and carve the bite freehand with a butter knife or the edge of a spoon.
A real bite mark is too ragged; the knife gives you that clean arc a cartoonist would draw.
Paint is where the gag pays off.
The bitten edge needs two passes: first a pale cream or butter yellow for raw dough, then a thin wash of warm brown feathered outward so it reads as baked cookie right up to where someone took a chunk.
The rest of the surface gets a darker brown, almost milk chocolate, with a speckle of watered-down black for the baked look.
I skip the full gingerbread spice palette; the brown-to-cream contrast does the work, and too many colors turns it into a craft-store project.
A matte varnish over salt dough keeps the paint from looking plastic. Polymer clay gets its shine baked in, so leave it alone or the joke goes slick and weird.
5. Craft Stick Christmas Trees
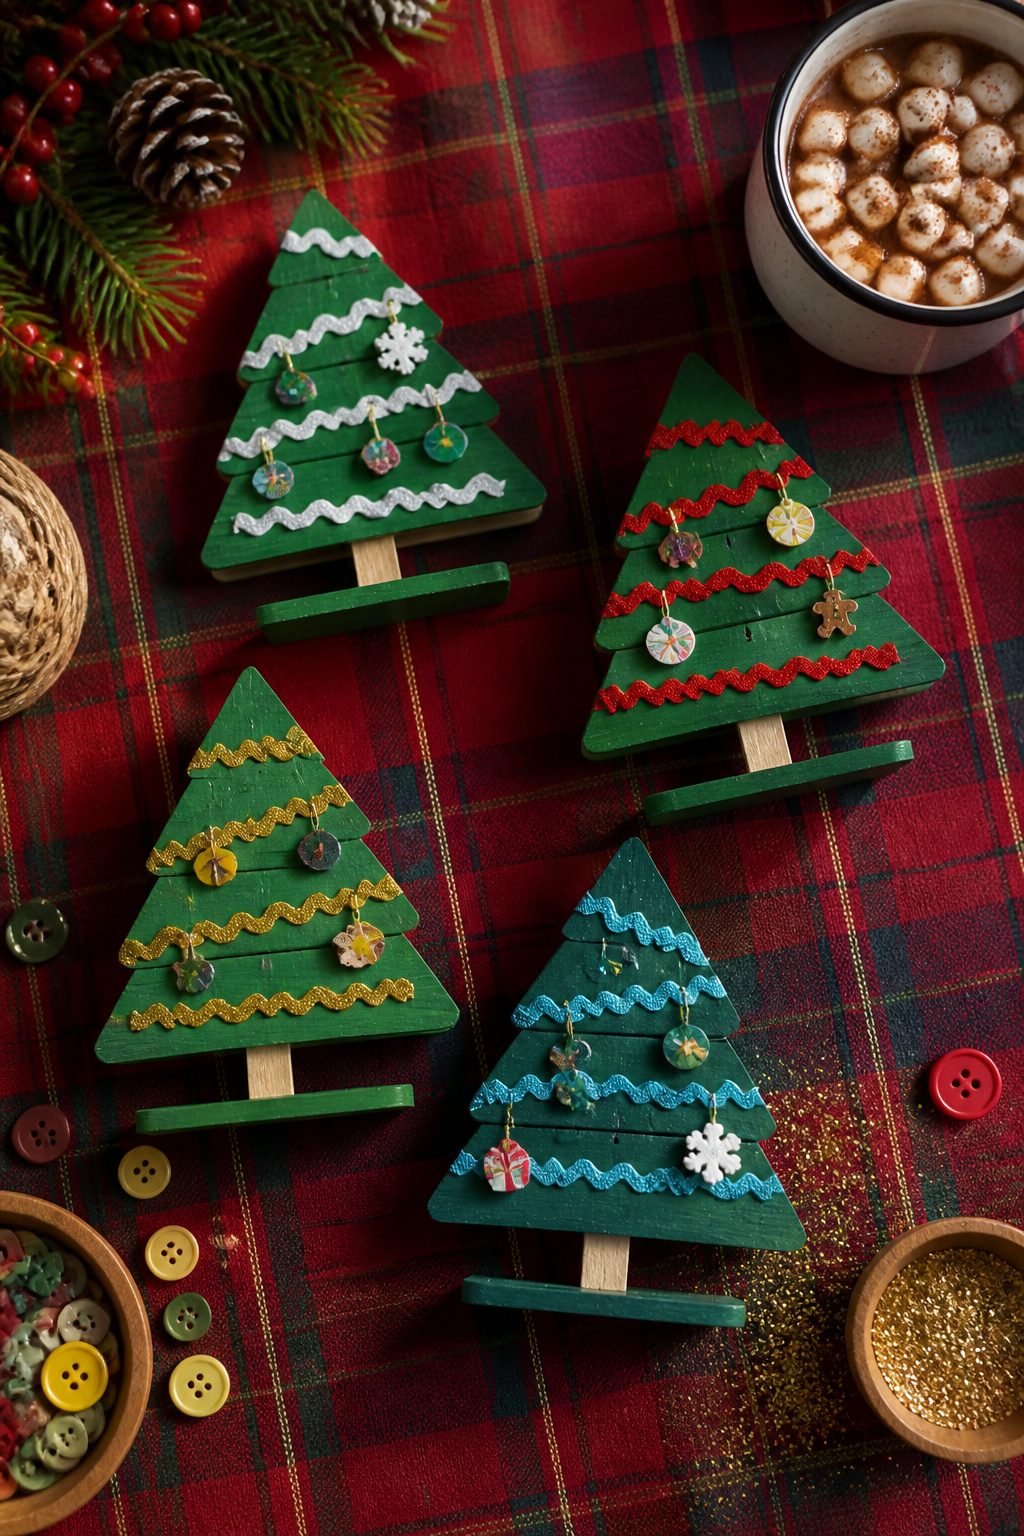
A 4-inch base works for most craft stick trees, with each layer up losing 3/4 inch so the whole thing tapers without looking forced.
Hot glue sets fast enough that you can build the triangle frame right on the kitchen table, no clamps needed.
Green acrylic paint covers the wood grain in two thin coats; the second one goes on after the first is dry to the touch, usually twenty minutes or so in a warm room.
The decorating is where personal taste takes over. Rickrack wrapped around the tree reads as garland, and mini buttons or painted wood bobbles fill in as ornaments.
I have also seen these finished with nothing but glitter glue, which catches light on a real tree but tends to shed if you pack them too tight in storage.
If you want a more rustic look, backyard sticks and kitchen twine replace the craft supplies, though you will spend more time cutting to even lengths.
These dry flat, store flat, and cost next to nothing if you already keep a glue gun around.
The only real mistake is cutting every stick before you check the first layer against your base measurement; a quarter inch off compounds by the top, and then the tree leans whether you want it to or not.
6. Waldorf Stars
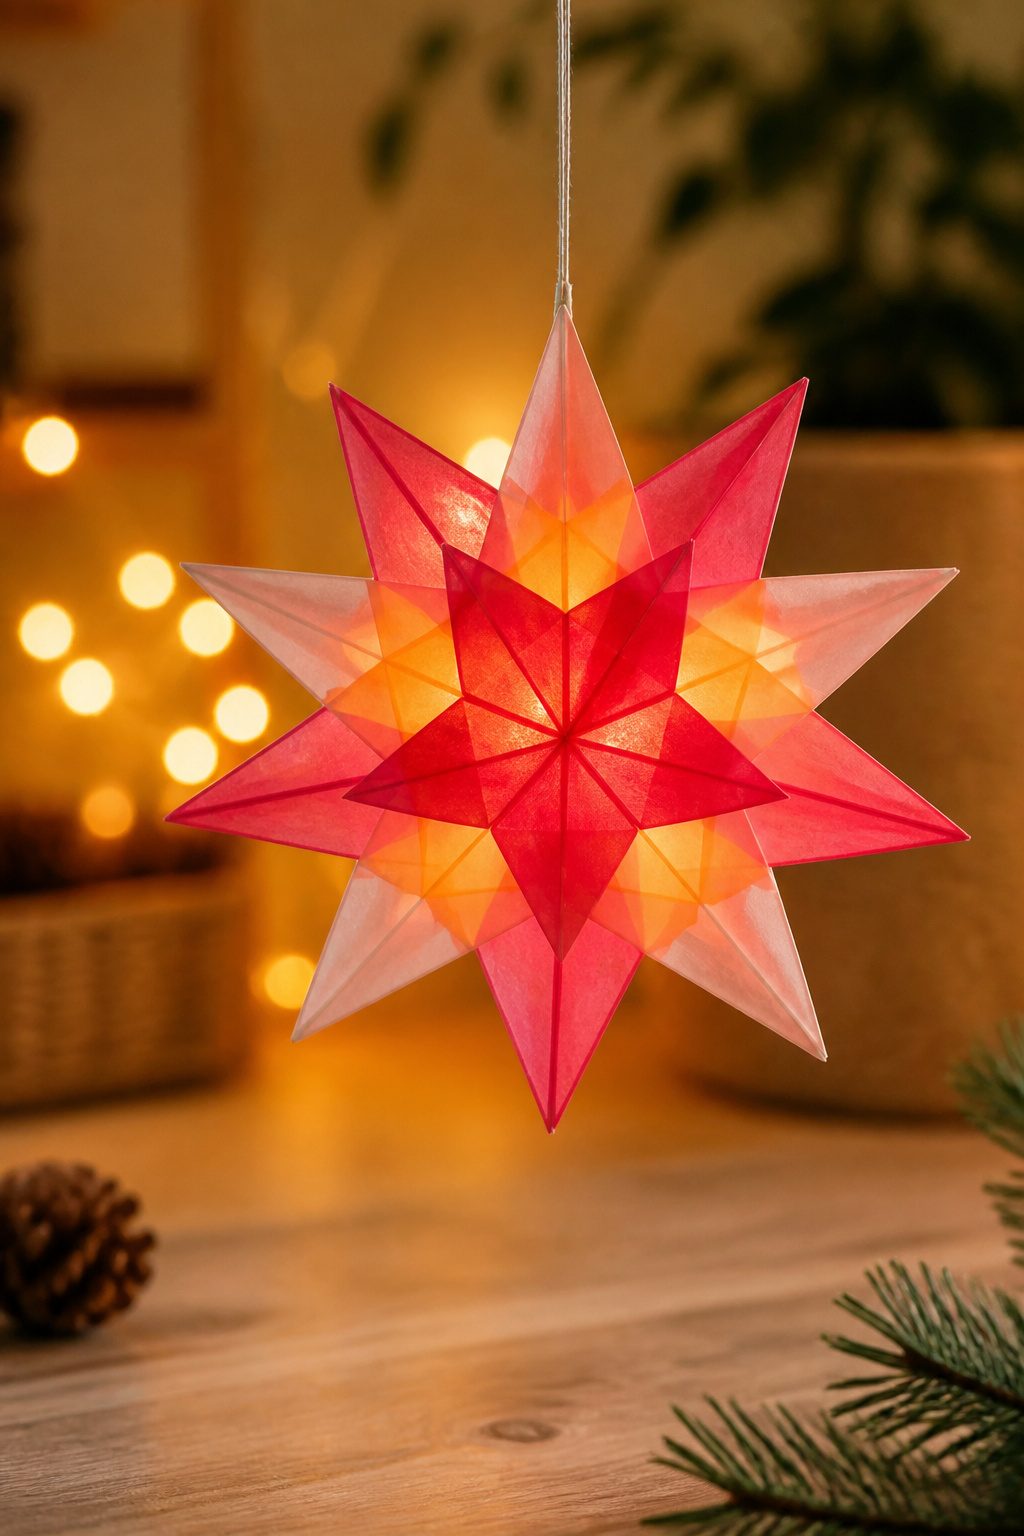
Waldorf stars fold from a single square of kite paper or thin wrapping paper, and the sequence matters more than the cutting skill.
Start with a square, fold it into a kite base, make the cuts, and the opening reveals a four-pointed star with perfect symmetry.
The tradition runs through Waldorf schools, where the stars hang to brighten winter rooms, and the philosophy behind them treats making as part of learning, not just decoration.
Yellow, red, or white paper against a dark tree gives the clearest glow. The paper is thin enough that light passes through, so the color reads from both sides.
I have seen them sized from palm-sized to nearly a foot across, and the variation comes from starting with different squares, not from scaling the same pattern. A string through one point turns any size into an ornament.
The cut is the only place to go wrong. Too deep, and the star tears when you open it; too shallow, and the points stay blunt.
The forgiving part is the paper: at a few cents a sheet, a miscut costs almost nothing. A kite base folded well but cut cautiously beats a rushed cut every time.
7. Yarn Trees
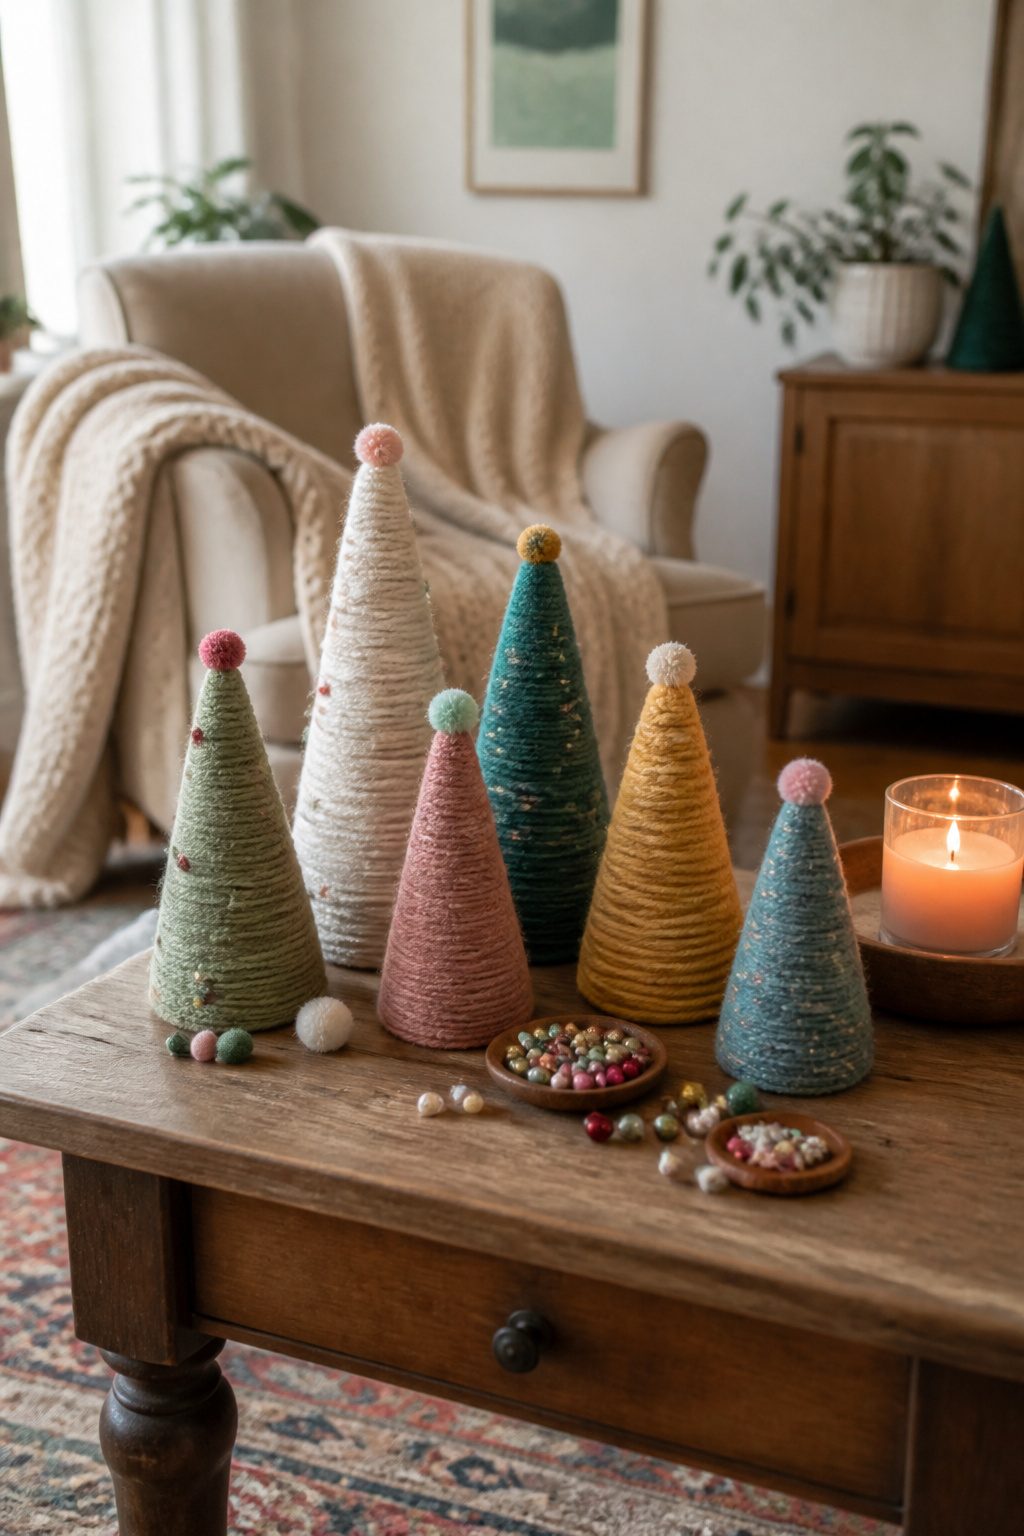
A cardboard cone and a ball of yarn will fill an evening with something that actually looks finished.
The cone itself can come from a craft store shelf, or you can roll a cereal box into a tight spiral and tape the seam. Either way, the yarn does the work of turning scrap into tree.
Yarn weight changes the whole look.
Worsted covers ground fast with fewer wraps and a plush, solid surface. Fingering weight takes longer but leaves the individual strands visible, almost like bark texture.
I used school glue to tack the starting end to the cone and the same to secure the tail when I reached the top. A dot is enough; too much and the yarn stays damp for hours.
Once the cone is wrapped, a strand of tiny pom-pom garland or a few beads threaded on wire can pin to the yarn and fill the gaps. I tried gluing sequins directly to the yarn once.
They flaked off by New Year’s. Stick to things that can tie or loop around the strands, not to the strands themselves.
8. Wood Carrier Ornaments
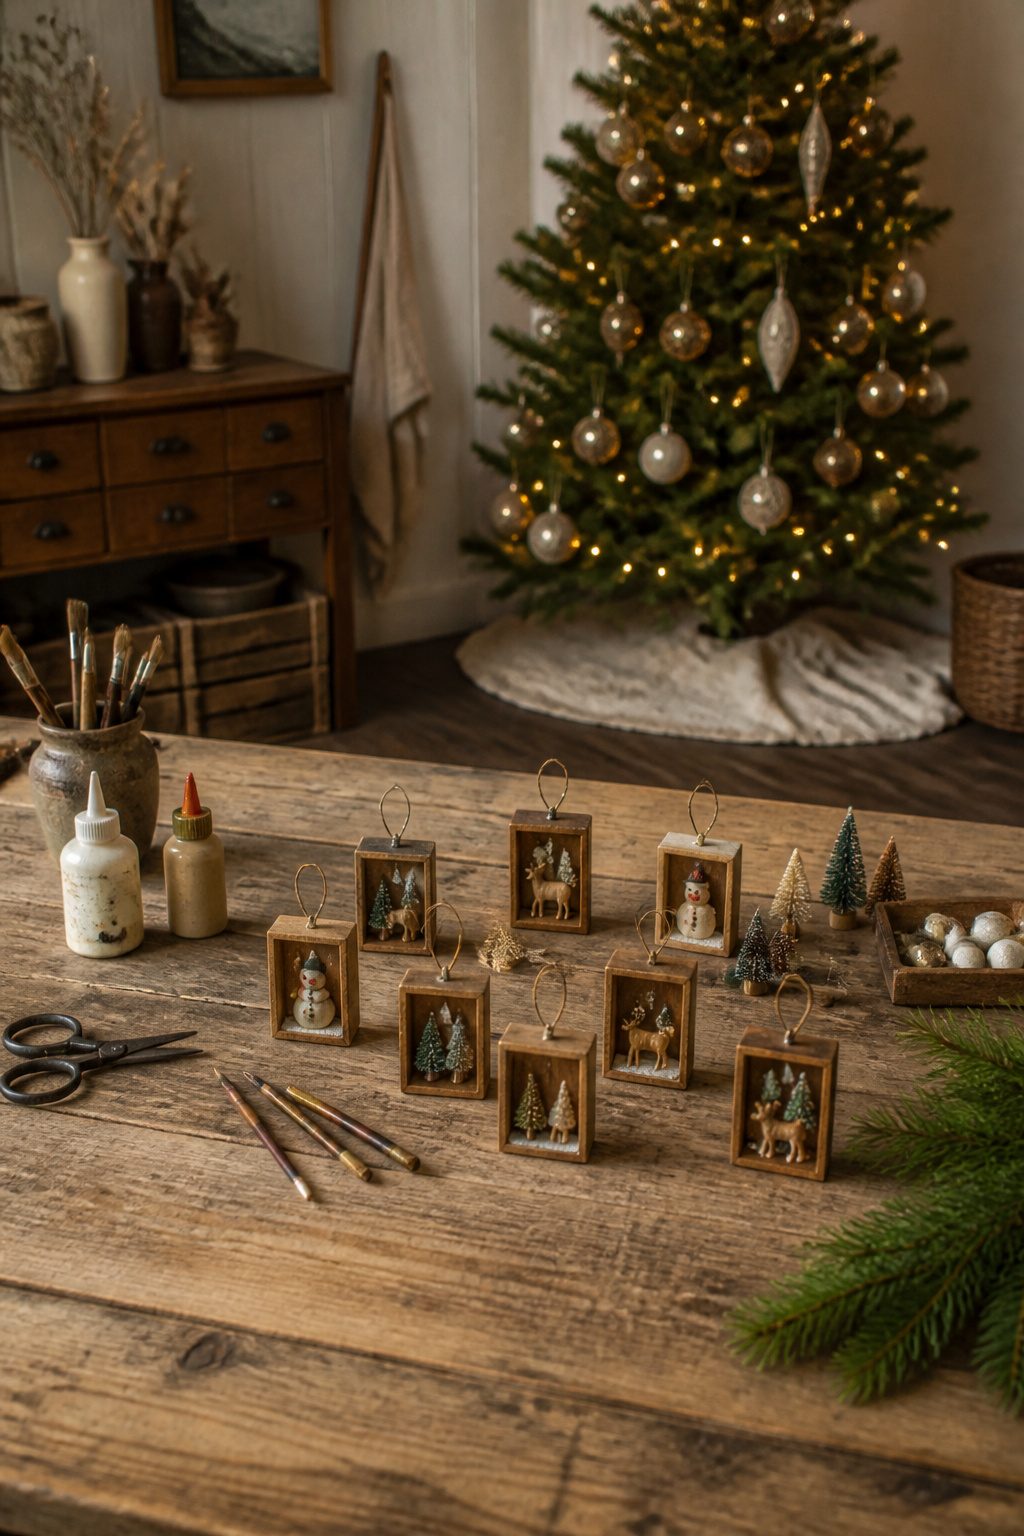
Vintage German carrier ornaments have a particular boxy frame with a scene pressed inside, and the trick is keeping them small enough to hang.
Two inches square is the ceiling before the piece starts reading as dollhouse furniture instead of tree trim. Craft wood quarter-inch thick builds the cleanest box, though popsicle sticks sanded flat work if you are already stocked.
I glue the frame first, let it dry, then add a thin back panel. The interior needs one focal item: a bottle brush tree, a tiny deer cut from felt, a miniature wreath.
One item reads; three items fight and the box looks cluttered from three feet away. A dab of hot glue on the base holds the figure, and a wire loop through the top rail finishes it.
Paint goes on before assembly, always.
Raw wood edges show at the corners otherwise, and touch-up there never quite matches. I use milk paint or a thin acrylic wash so the grain stays visible; heavy coverage looks plastic on this scale.
The whole build takes an evening, and the material cost sits under four dollars if you already own the brush tree.
9. Mason Jar Lid Wreath Ornaments
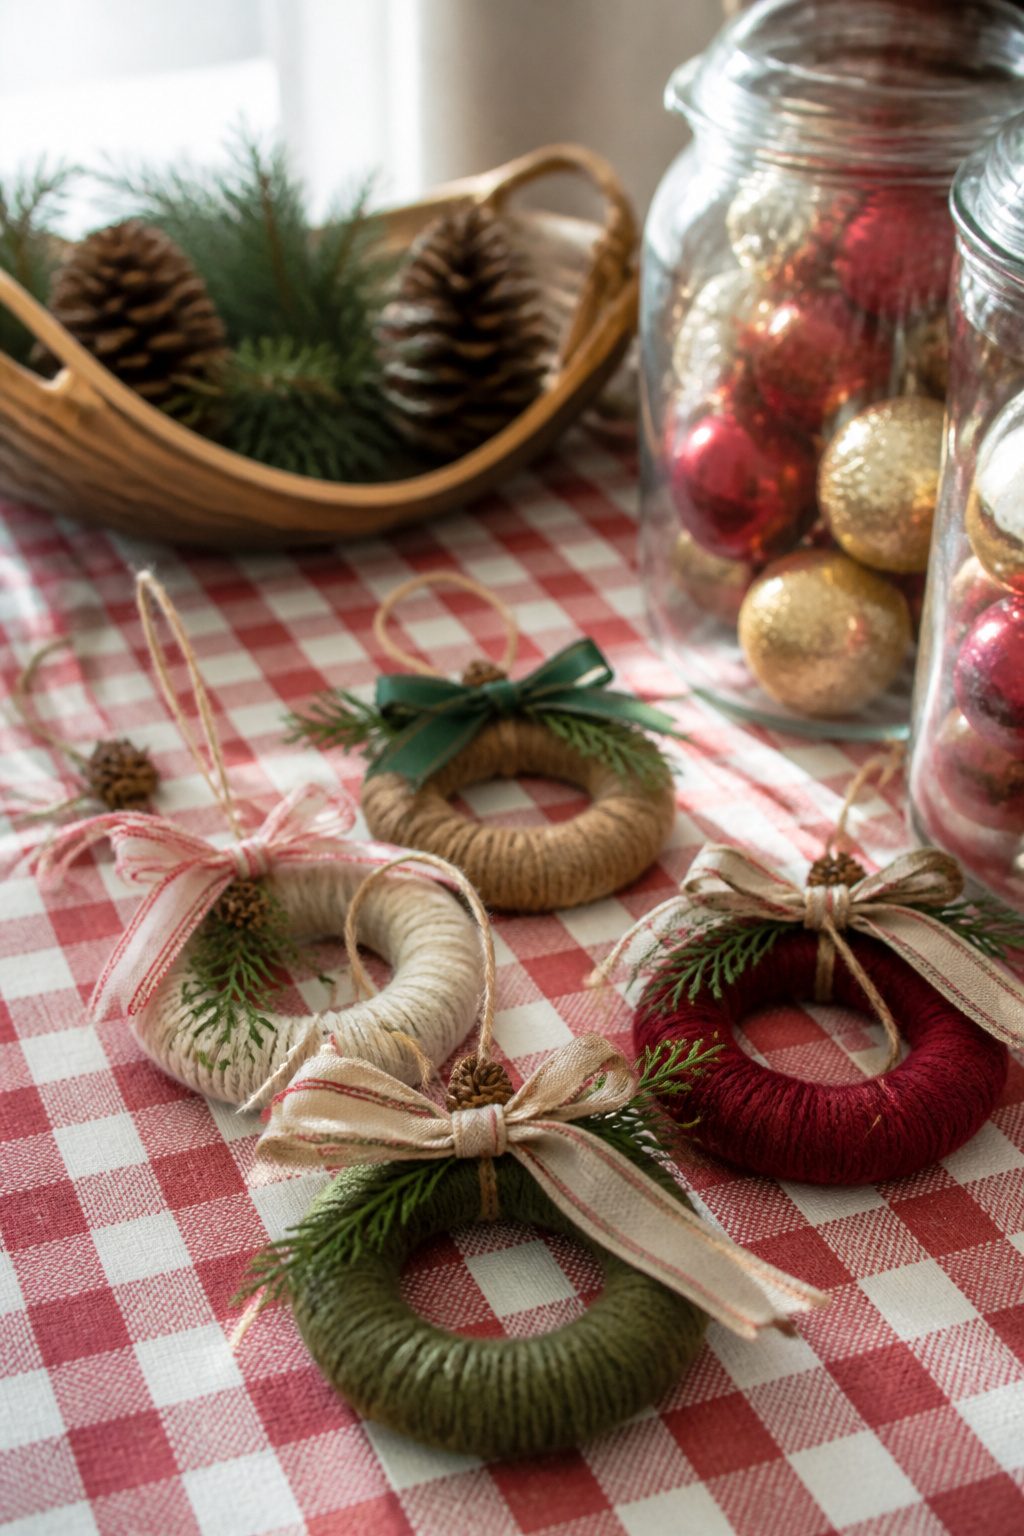
Mason jar screw bands left over from canning season make the smallest possible wreath form, and the size is what sells the ornament.
A standard-mouth band measures 2–3/8 inches across, which reads as miniature without disappearing on the tree. I wrapped mine with worsted-weight yarn, the kind sold in skeins for a few dollars, anchoring the start and finish with dabs of hot glue.
The yarn fills the threads and ridges that would otherwise catch light wrong. Once the band is covered, a loop of ribbon threaded through the center becomes the hanger, and a narrow bow at the bottom finishes it.
Some makers add miniature baubles or sequins, though I kept mine plain; the texture of the yarn against the metal rim already looks like something that took longer than the twenty minutes it actually needs.
These work well as gift tags too, since the flat back takes a Sharpie label without competing with the front.
10. Gnome Ornament

Gnome ornaments work because the silhouette does all the heavy lifting. A tall hat, a beard, and a nose are the only required parts, so the materials can be whatever you have on hand.
The body builds fastest from a wooden peg, spool, or cone of stuffed fabric. A peg gives you that classic rounded shape without any sewing.
A spool works if you want something narrower and more toy-soldier. Fabric cones let you weight the bottom with rice so the gnome stands on a shelf instead of hanging, which some people prefer for mantel displays.
Noses are where the character lands.
Wood beads, small wooden craft pieces, or even a single pom-pom each read differently: bead is rustic, craft piece is tidy, pom-pom is whimsical. Glue it high on the body so the beard can flare out below.
The hat is the decision that defines the whole piece. Tall and pointed reads Scandinavian; floppy and bent suggests something wandered out of a garden.
Felt is the usual choice because it holds the crease and does not fray, though a sock with the toe cut off and the cuff rolled makes a perfectly good hat in about thirty seconds.
Beards are just a triangle or rectangle of faux fur or looped yarn glued to the front. Trim them short or let them shaggy; the hat overshadows everything anyway.
11. Dried Orange Fox Ornaments
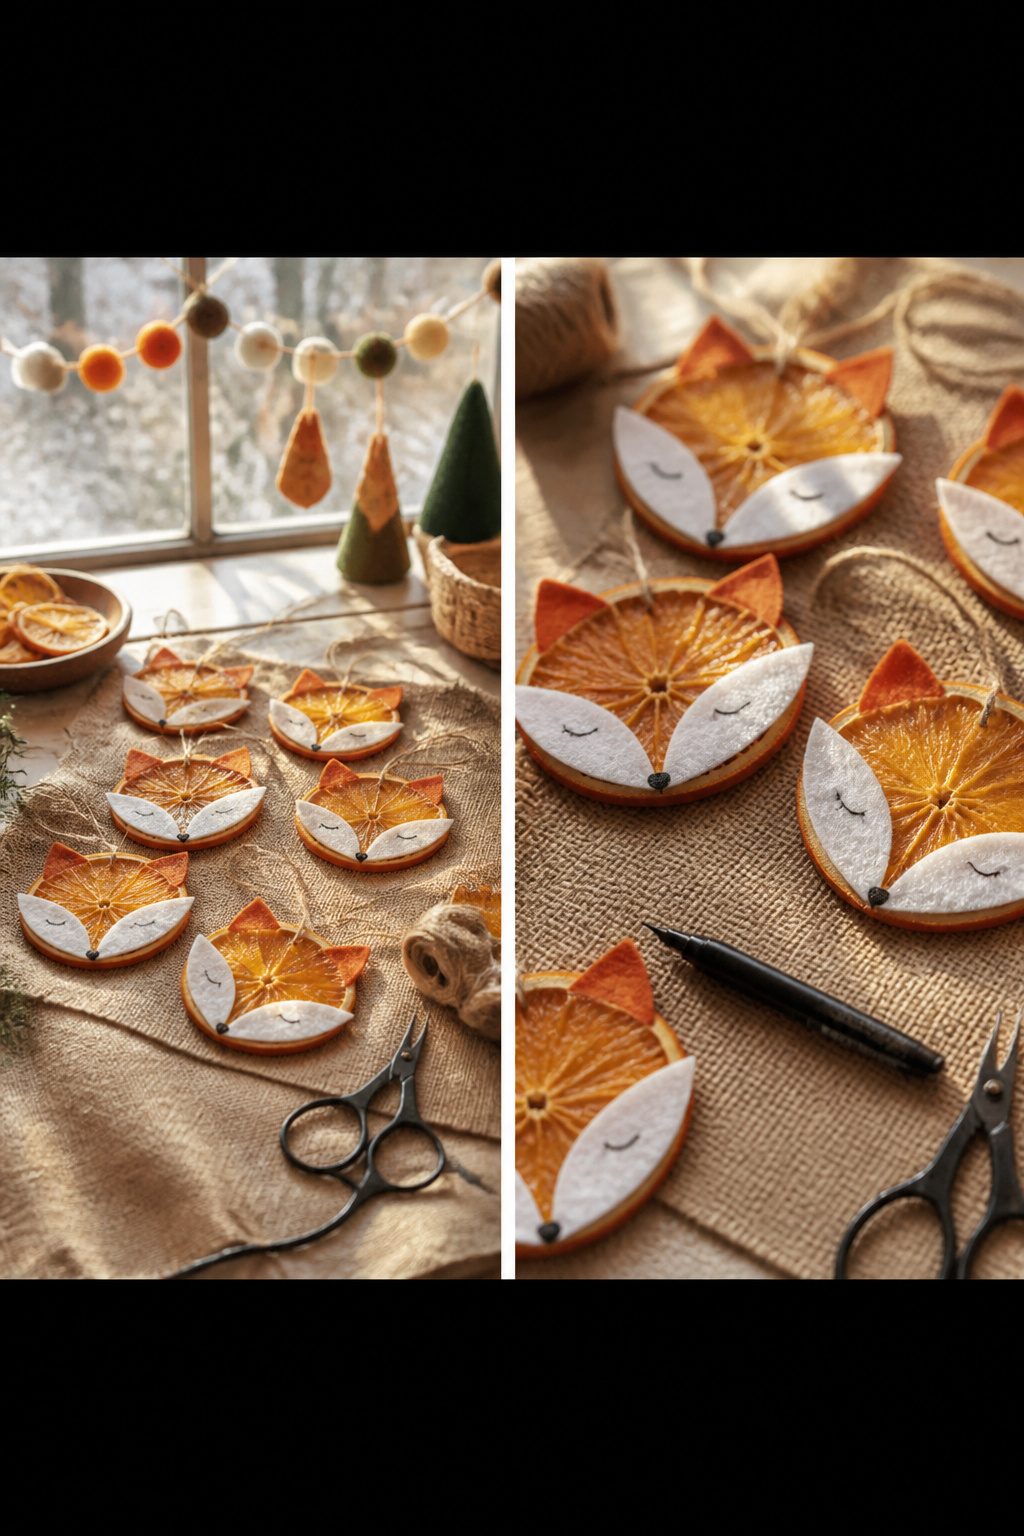
Dried orange slices already look a little like round animal faces once they shrivel and darken at the edges, so pushing them toward fox is mostly a matter of adding ears and features.
I slice the oranges thin, maybe an eighth of an inch, and lay them on a wire rack at 200°F for three to four hours, flipping once around the halfway mark.
Thinner slices dry flatter and hang straighter on the tree; thick ones curl into cups that swing awkwardly and split at the pith.
For the ears, small felt triangles in rust or cream work fine. I hot-glue them to the back rim so they peek above the slice, then draw on eyes and a nose with a fine-tipped permanent marker.
Paint works too, but marker is faster and you are less likely to smudge it while handling the ornaments. A loop of twine through the top, poked through the dried pith, holds the weight without tearing.
12. Egg Carton Jingle Bell Ornaments
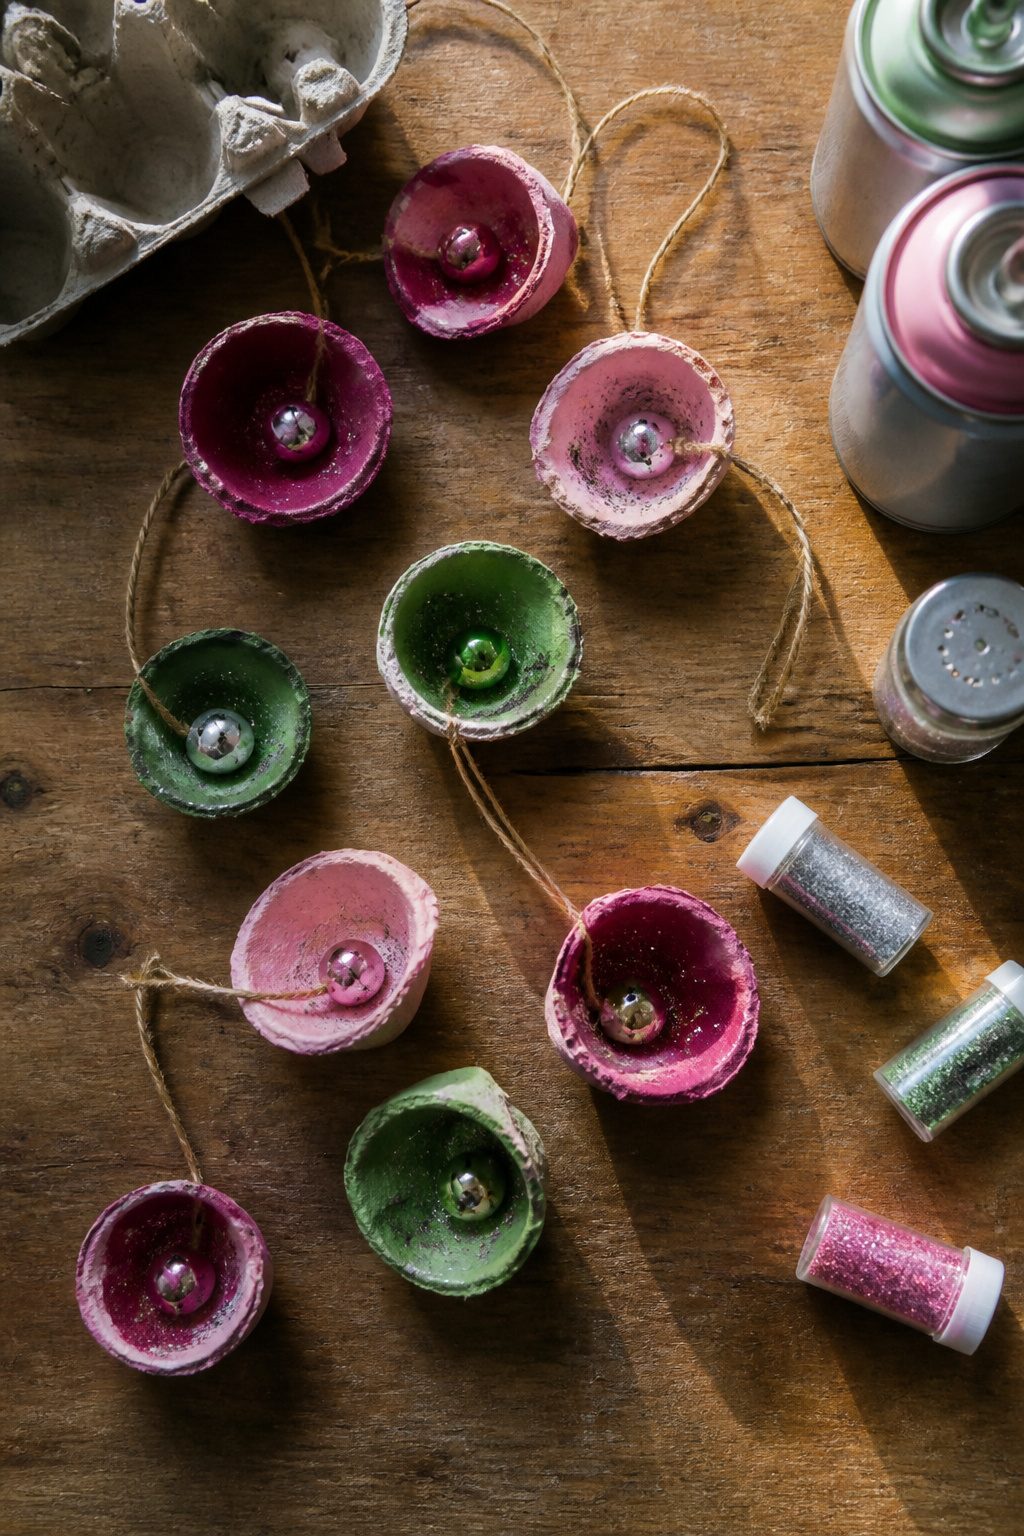
Paper egg cartons and the sturdier duck egg cartons both work for this, but foam cartons will melt under paint and should be skipped entirely.
Cut each cup free along with its center divider, which becomes the ornament’s roof. Spray paint reads fastest: pink, green, or silver, then top with matching glitter or metal leaf while the paint is still tacky.
Punch a hole through the peak, thread silver string through, and tie a jingle bell at the end so it hangs suspended inside the cup.
The bell needs to sit below the carton bottom to ring freely, so knot the string where it exits the hole and adjust the length before the final tie.
One cup makes one ornament, and the fishing line or silver string keeps the whole thing light enough for even a paper branch.
13. Block Letter Twine Ornaments
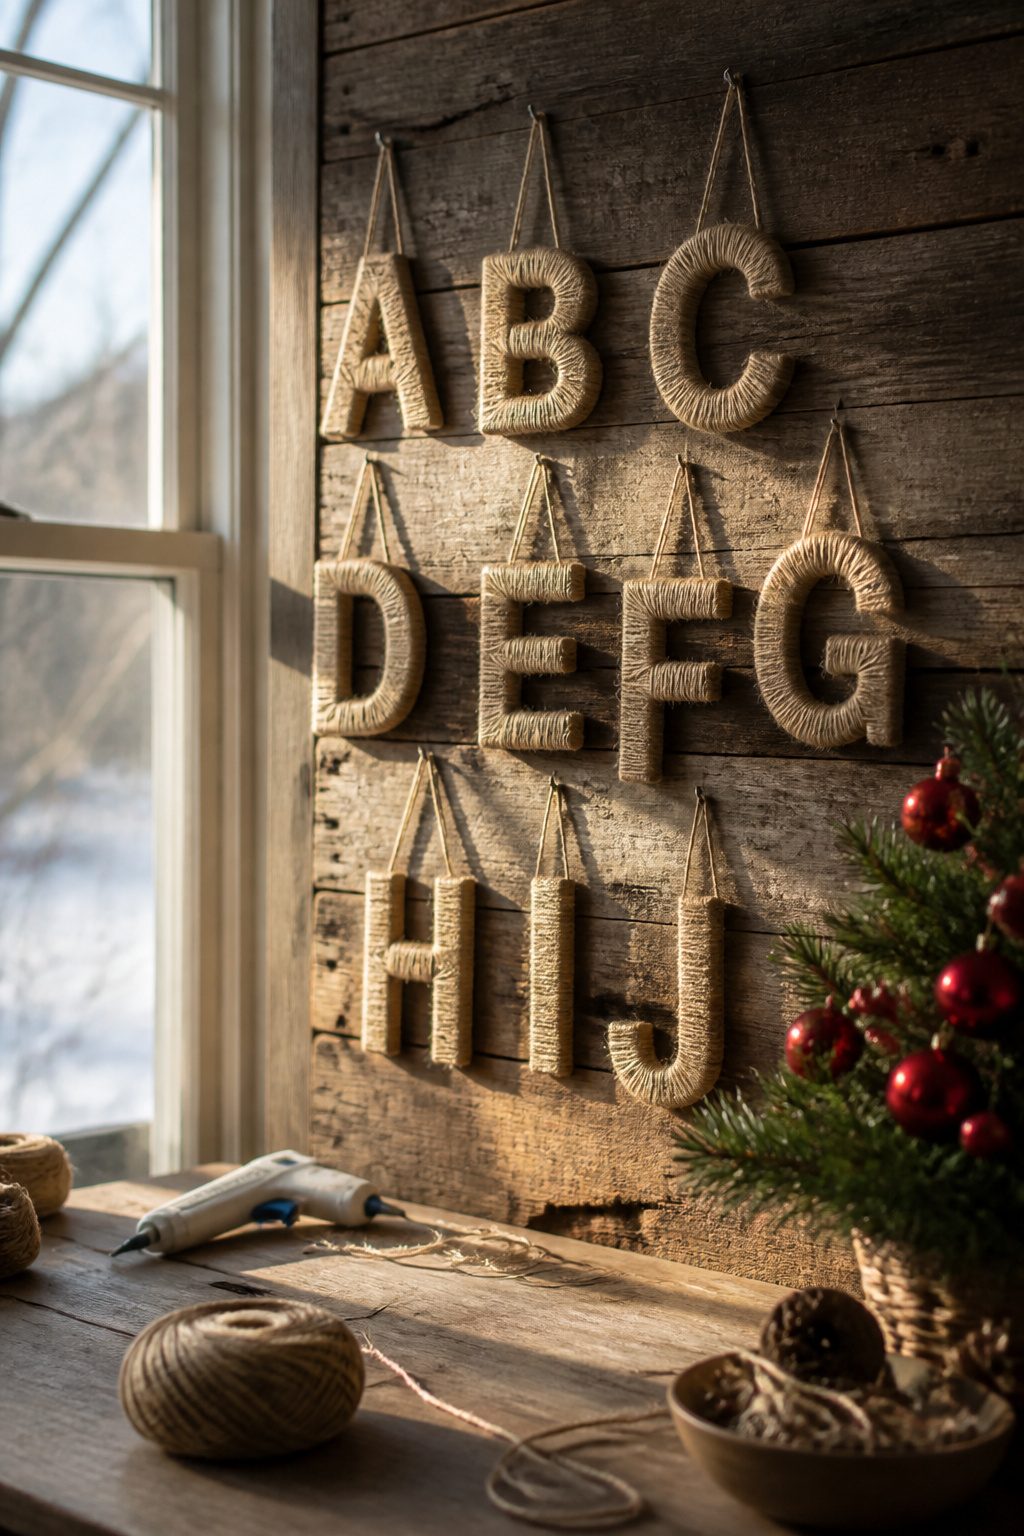
Cardboard block letters from the craft store work best, though freehand cutting from shipping boxes saves a few dollars and leaves you with the same rustic result.
The twine does the heavy lifting here, so the cardboard underneath only needs to hold its shape.
Starting at a corner and working around the perimeter first, then filling the face, keeps the letter readable once the wrapping builds up.
Hot-glue dabs every inch or so keep the twine from slipping, but too much glue squeezes through the strands and looks messy against the natural fiber.
A single roll of twine covers three or four medium-sized initials, and the whole project sits well under ten dollars even if you spring for the pre-cut letters.
The finished ornament hangs light enough that a standard thread loop works fine, no reinforced hook needed. I like these for a family tree where each person gets their initial, or for tagging gifts the recipient can reuse afterward.
14. Yarn Ball Ornaments
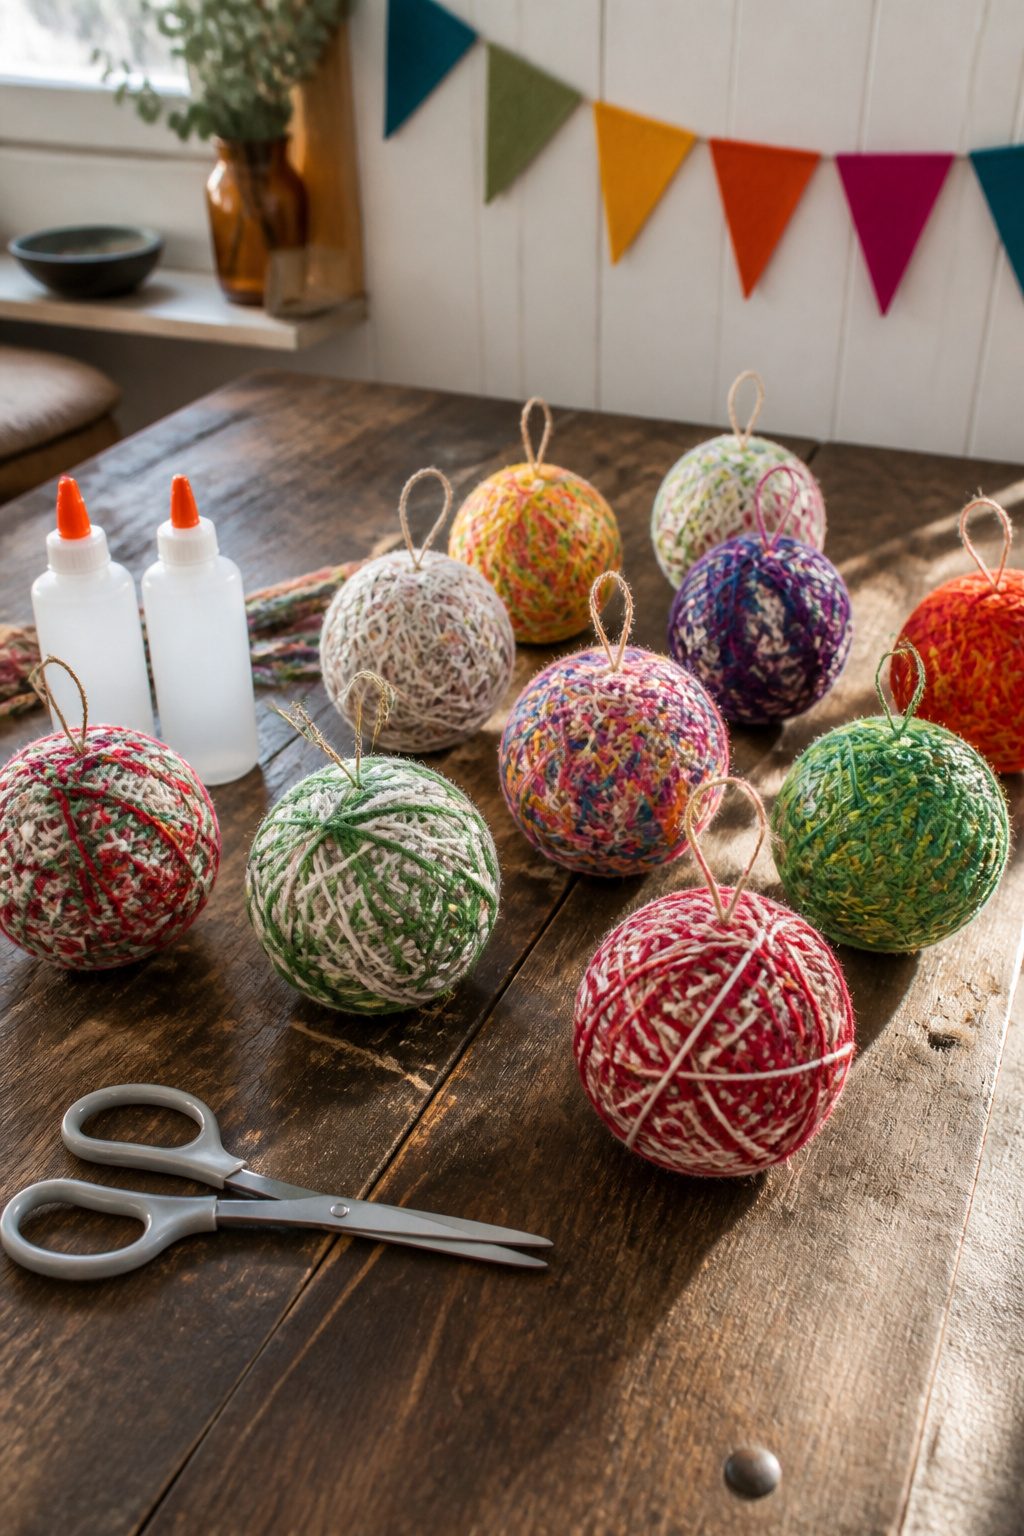
Yarn ball ornaments start with a plain sphere and end up looking like something from a craft fair at ten times the price.
Styrofoam balls two inches across keep the weight low enough for thin branches, which matters more than you’d think until one drops through the needles and shatters on the floor.
Cardboard works too, though the glue softens it over time and the shape can go slightly lopsided by year three.
A dab of hot glue anchors the first wrap.
After that, tension does the work. Changing colors is just cutting one strand and starting the next, tucking both ends under existing wraps so nothing shows.
The neatest ones I have seen use three colors in random bands rather than strict stripes; the irregularity hides the seams where the yarn meets.
The whole job takes one episode of a show you have already seen.
Tuck the final end under three or four previous wraps while the glue is still warm, then trim flush. A loose tail unravels the whole ball by January.
15. Yarn Stars

Yarn stars work best when the cardboard loom is cut from a cereal box or shipping box, thin enough to notch cleanly but stiff enough to hold tension.
A five-point star needs ten slits, one at the tip and one at the inner valley of each point. Wrap the yarn in a repeating figure-eight from point to point, and the center fills itself after twenty or thirty passes.
The trick is removing the star without the whole thing springing apart.
I leave a tail long enough to sew through the back with a yarn needle, tacking the crossing strands at the center before sliding the cardboard out. Cut another tail and tie the two together behind the finished star.
Wire frames skip the removal problem entirely. Floral wire or a wire hanger bent with pliers makes a skeleton you wrap directly, no loom needed.
The result is airier and reads more as outline than solid shape, which suits a tree that already has busy ornaments elsewhere. Either way, a drop of glue on the starting knot keeps it from working loose by New Year’s.
16. Shiny and Bright Cookie Cutter Ornament
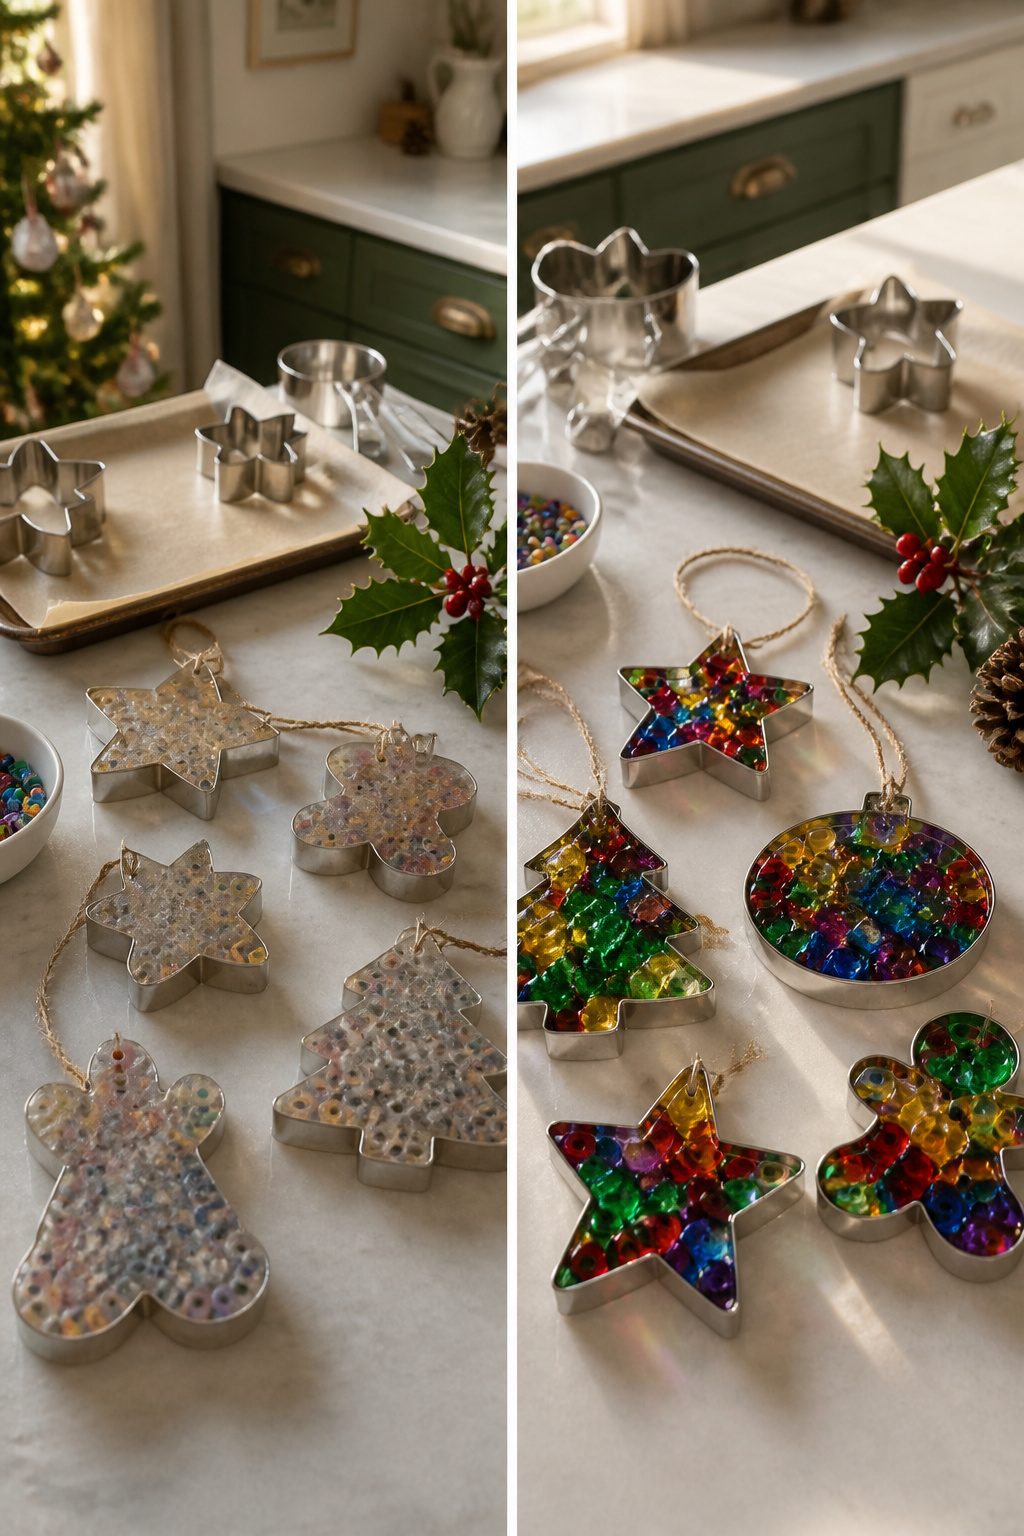
Metal cookie cutters with solid backs make natural frames for ornaments, and the gap inside is where the project happens. Aluminum cutters work best because they hold their shape under heat.
I line a baking sheet with aluminum foil, set the cutter on top, and fill the center with plastic beads. 400°F for ten minutes melts them into a solid, colored disk that keeps the cutter’s outline.
The smell that comes off is sharp and chemical, so this one stays in adult hands only. Tinsel and mini Christmas notions hot-glued into the same backed cutters give a faster, cooler option with no oven time at all.
Both versions need a loop of twine or ribbon through the cutter handle before the fill goes in, or you will be drilling later.
17. Mini Bell Ornaments
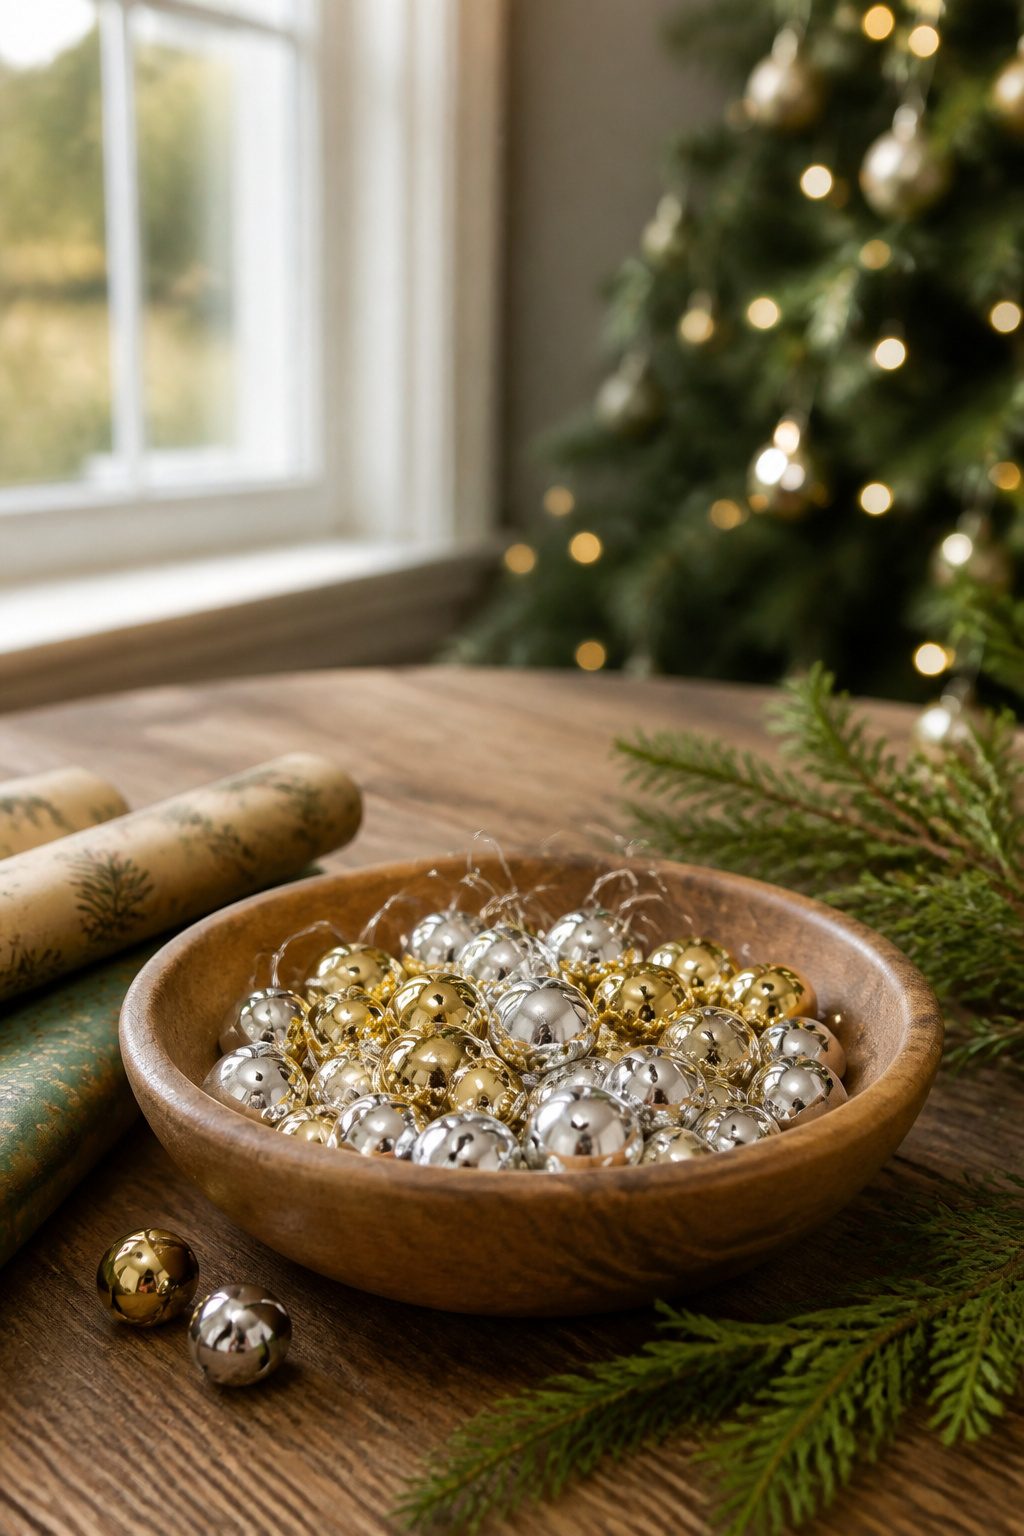
Jingle bells smaller than an inch ring higher and brighter, but their tiny loops fight anything thicker than embroidery floss.
I learned that the hard way after threading a satin ribbon through a half-inch bell and watching the knot bulge through the hole like a bad tooth.
Fishing line or beading wire disappears entirely and still holds if you tie a surgeon’s knot instead of a simple double.
For the cluster I hang near the tree’s trunk, three bells on one loop give enough mass to swing and actually chime.
Space them two finger-widths apart so the clappers can reach each other; jam them tight and you get a dull thud instead of a ring.
I use 1–1/4 inch bells for that grouping and save the single bells for outer branches where weight matters less.
18. Twine Wrapped Cookie Cutters
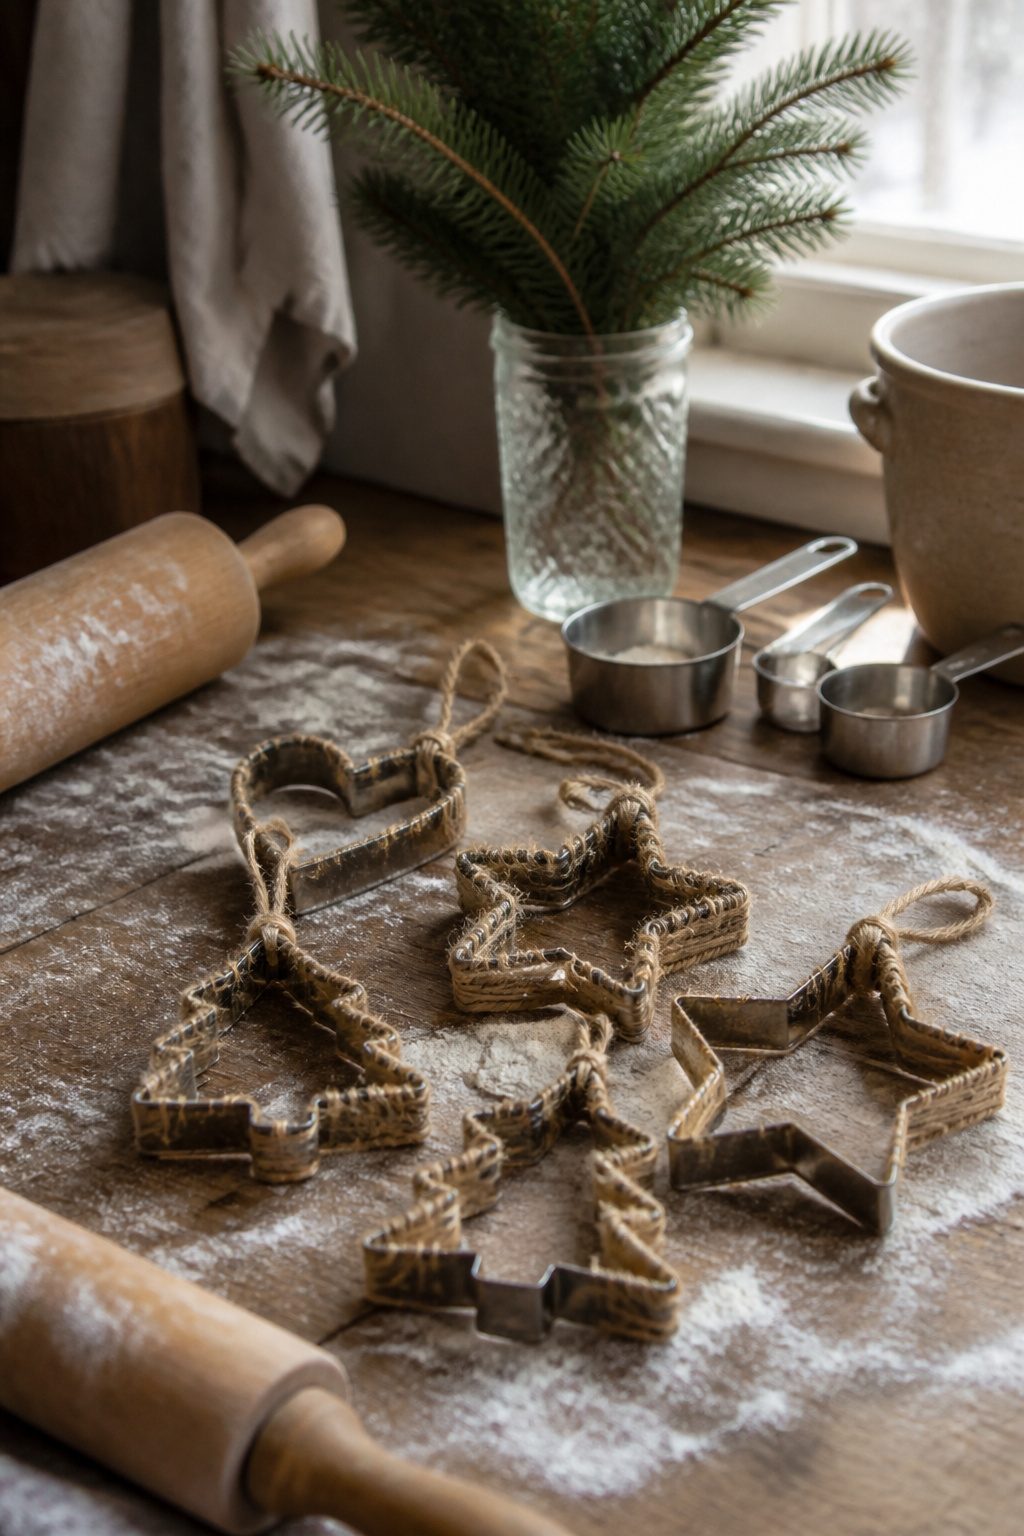
Twine wrapped cookie cutters turn a kitchen drawer staple into a rustic silhouette ornament, but the shape you pick matters more than the wrap itself. Stars, hearts, and simple trees hold their outline under layers of jute or cotton yarn.
A snowflake or gingerbread man with cutout details loses its definition fast; the twine fills the negative space and you end up with a fuzzy oval no one can name.
I start by anchoring the twine with a dab of hot glue inside the cutter rim, then wrap tight spirals until the metal disappears entirely.
The back needs a second anchor and a hanging loop of the same twine so nothing metallic shows.
A full wrap on a standard four-inch cutter takes roughly ten minutes and half a spool of twine, so budget one spool per three ornaments rather than buying per piece.
Texture changes the look more than color.
Rough jute reads farmhouse; smooth cotton yarn looks softer against tree lights. Either way, keep the wraps touching but not overlapping, or the silhouette bulges and the shape goes soft.
19. Mini Santa Sleigh Ornament
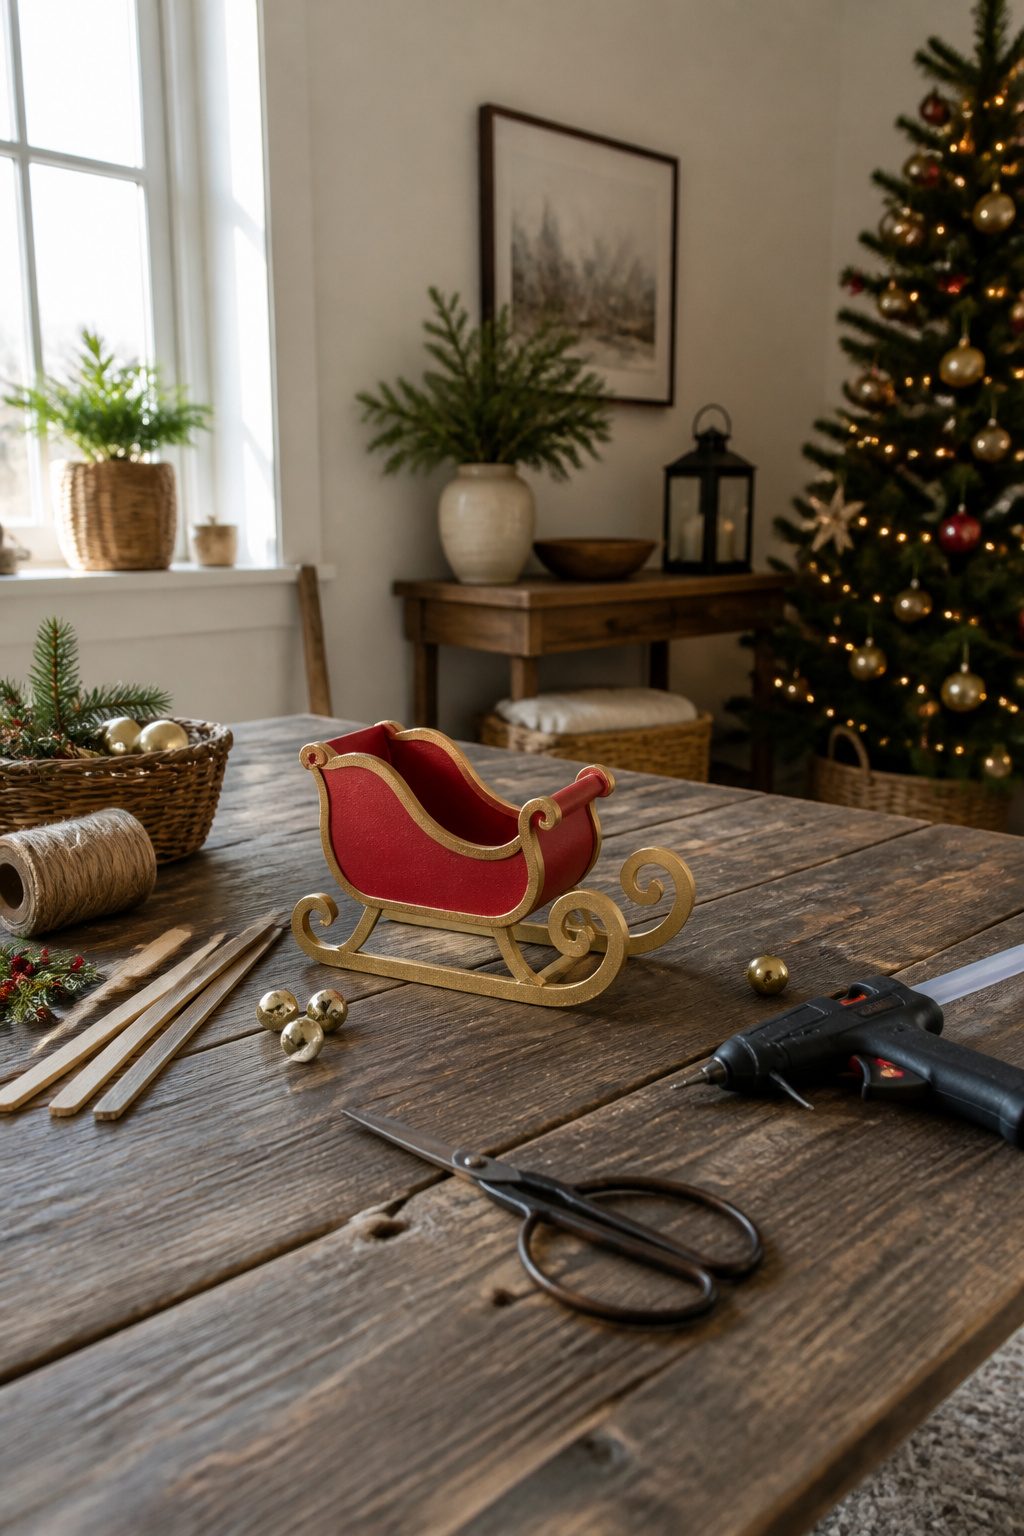
A mini sleigh ornament lives or dies by its runners. The body is forgiving; craft sticks, a balsa strip, or even a sturdy cardboard box cut to shape will take paint and ribbon once dry.
Glue the sides, add a seat, and the thing already reads as a sleigh. But without runners that actually curve, it looks like a toy boat.
Bent wire works if you have pliers and patience.
I tried 18-gauge floral wire first and found it too springy; it fought the bend and slowly straightened under the glue. 22-gauge craft wire or a thin wood strip steamed over a kettle holds the curve better.
Attach each runner with wood glue or a strong craft adhesive, then bridge them with a crossbar glued underneath. That crossbar is non-negotiable; without it, the runners splay or snap off by January.
Keep the whole piece under four inches long. At three inches it hangs cleanly on standard branches; push to five and the weight shifts, the hook strains, and your ornament becomes shelf clutter.
Paint the body first, assemble second, and touch up the glue spots last. I skip the glitter and use a satin acrylic; it catches light without shedding.
20. Clothespin Ornament
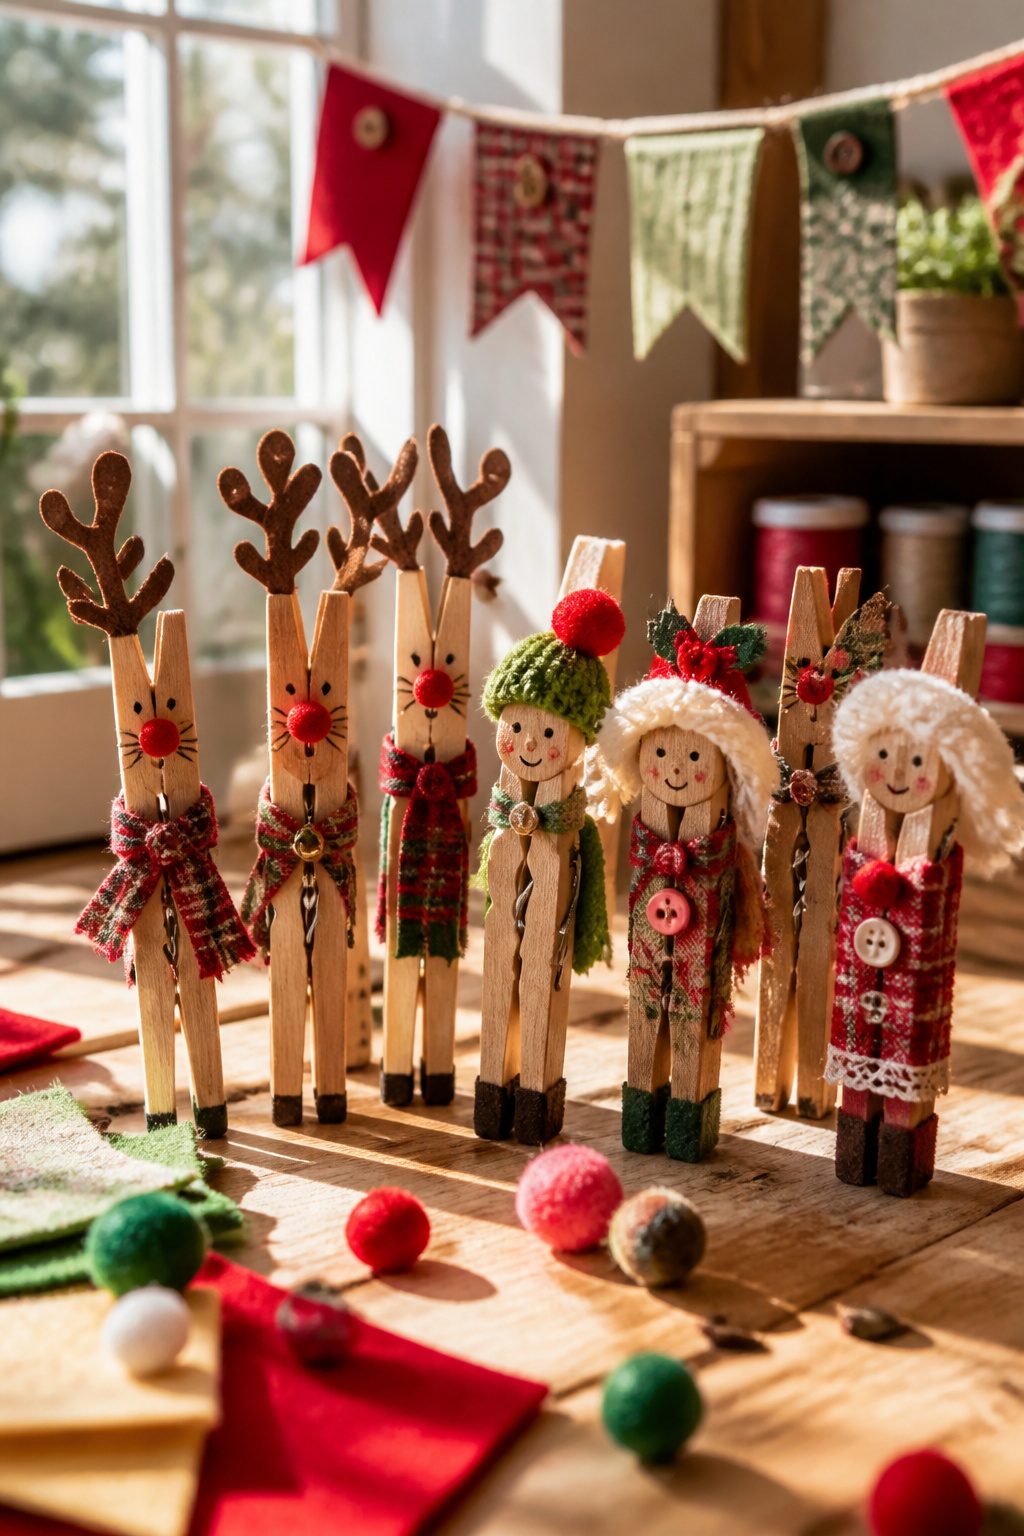
Spring clothespins have that split down the middle that practically begs to become something else. The two halves spread apart like reindeer antlers, or close back together like a doll’s legs waiting for a skirt.
I painted mine brown one Saturday afternoon, the kind of flat acrylic that dries in twenty minutes and covers the wood grain enough to look finished without pretending to be anything fancy.
Googly eyes belong on the top half, the flat back where the spring anchors, not on the sides where they stare off in two directions like a flounder.
Hot glue works; a strong craft glue works if you have the patience to let it set overnight.
The spring itself disappears in the reindeer version, or you lean into it. I twisted thin pipe cleaners around that coil, two loops per side curling up into antlers.
The metal spring gives them something to grip, so they hold shape without glue at that joint. A tiny red pom-pom pressed into the center covers the spring entirely and gives you Rudolph in one move.
Doll figures need more planning. The split legs want a fabric skirt or trousers to look intentional, and the arms come from a second clothespin cut apart, glued crosswise just below the spring.
I tried skipping the second clothespin once, drawing arms on with marker instead. The result looked like a hospital patient in a gown, not a caroler.
21. Stenciled Wood Slice Ornaments
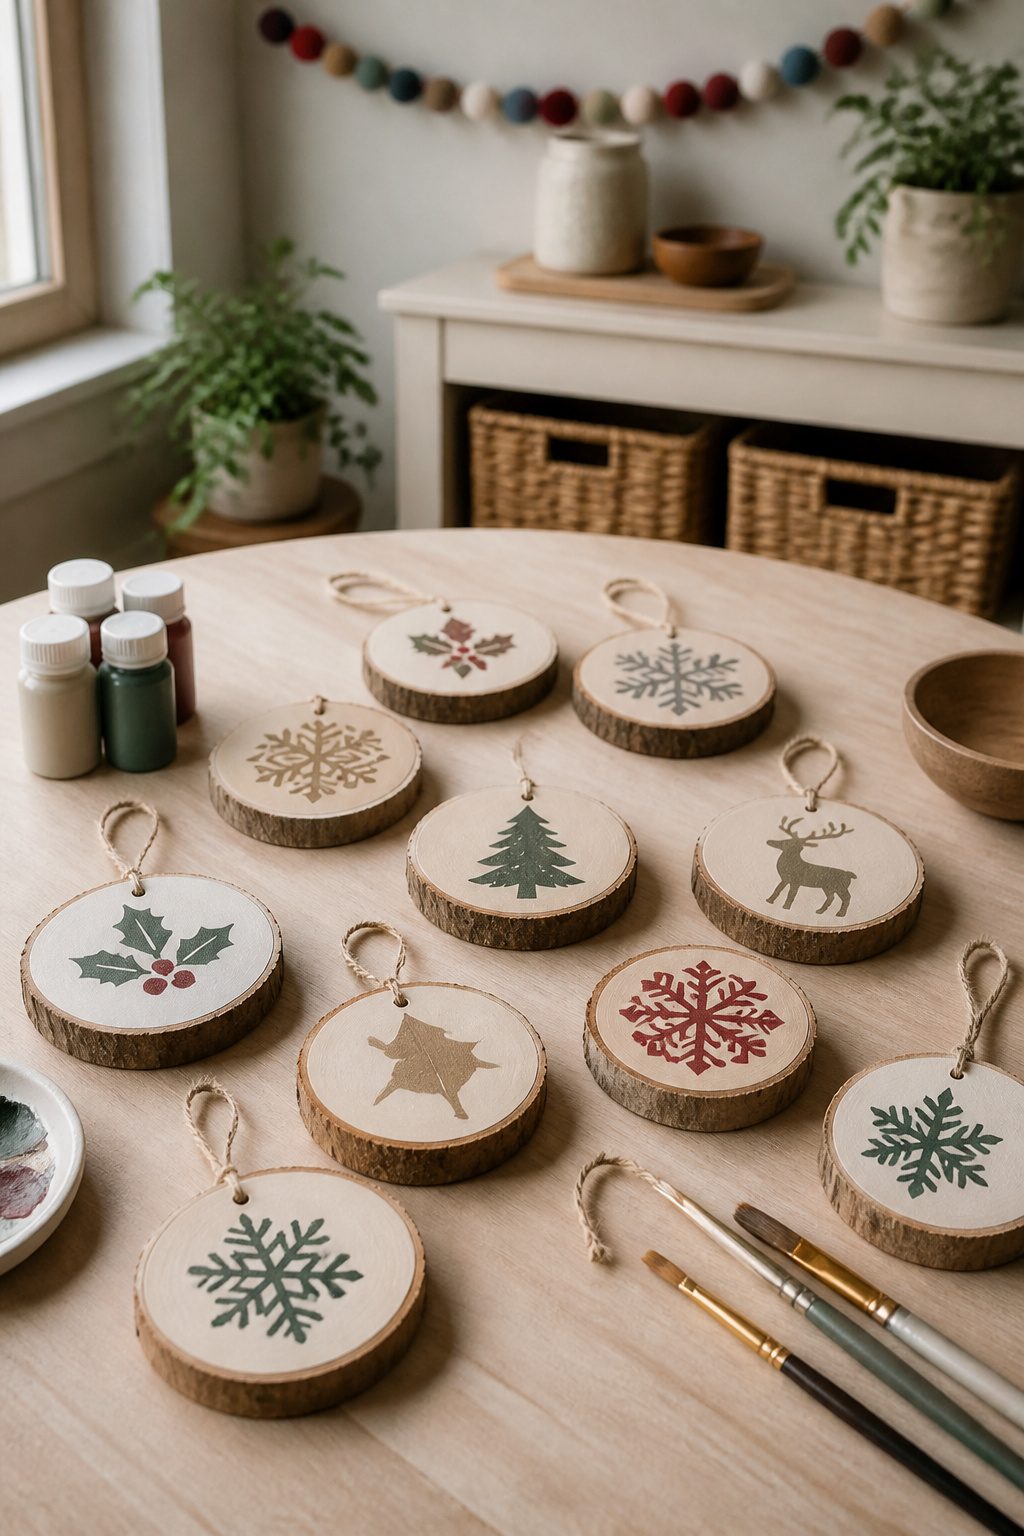
Cross-sections from a fallen branch, sanded to 220 grit, take acrylic paint through a stencil better than you’d expect from something that grew in a yard.
The trick is the hole: drill a 1/8-inch hole near the edge before you do anything decorative, not after, because paint or pyrography near a fresh drill bit smears every time.
Bark left on gives a rustic, uneven edge that some people love; I peel it off. Clean edges mean the stencil sits flat and the burn lines stay where I put them.
A small F-clamp holds the slice to scrap wood while drilling, and the same scrap catches the sawdust so your kitchen table survives the project.
For hanging, twine beats wire here; it knots through the small hole without fighting you, and the rough wood grips it enough that ornaments don’t walk off the tree by New Year’s.
22. Upcycled Cardboard Ornaments
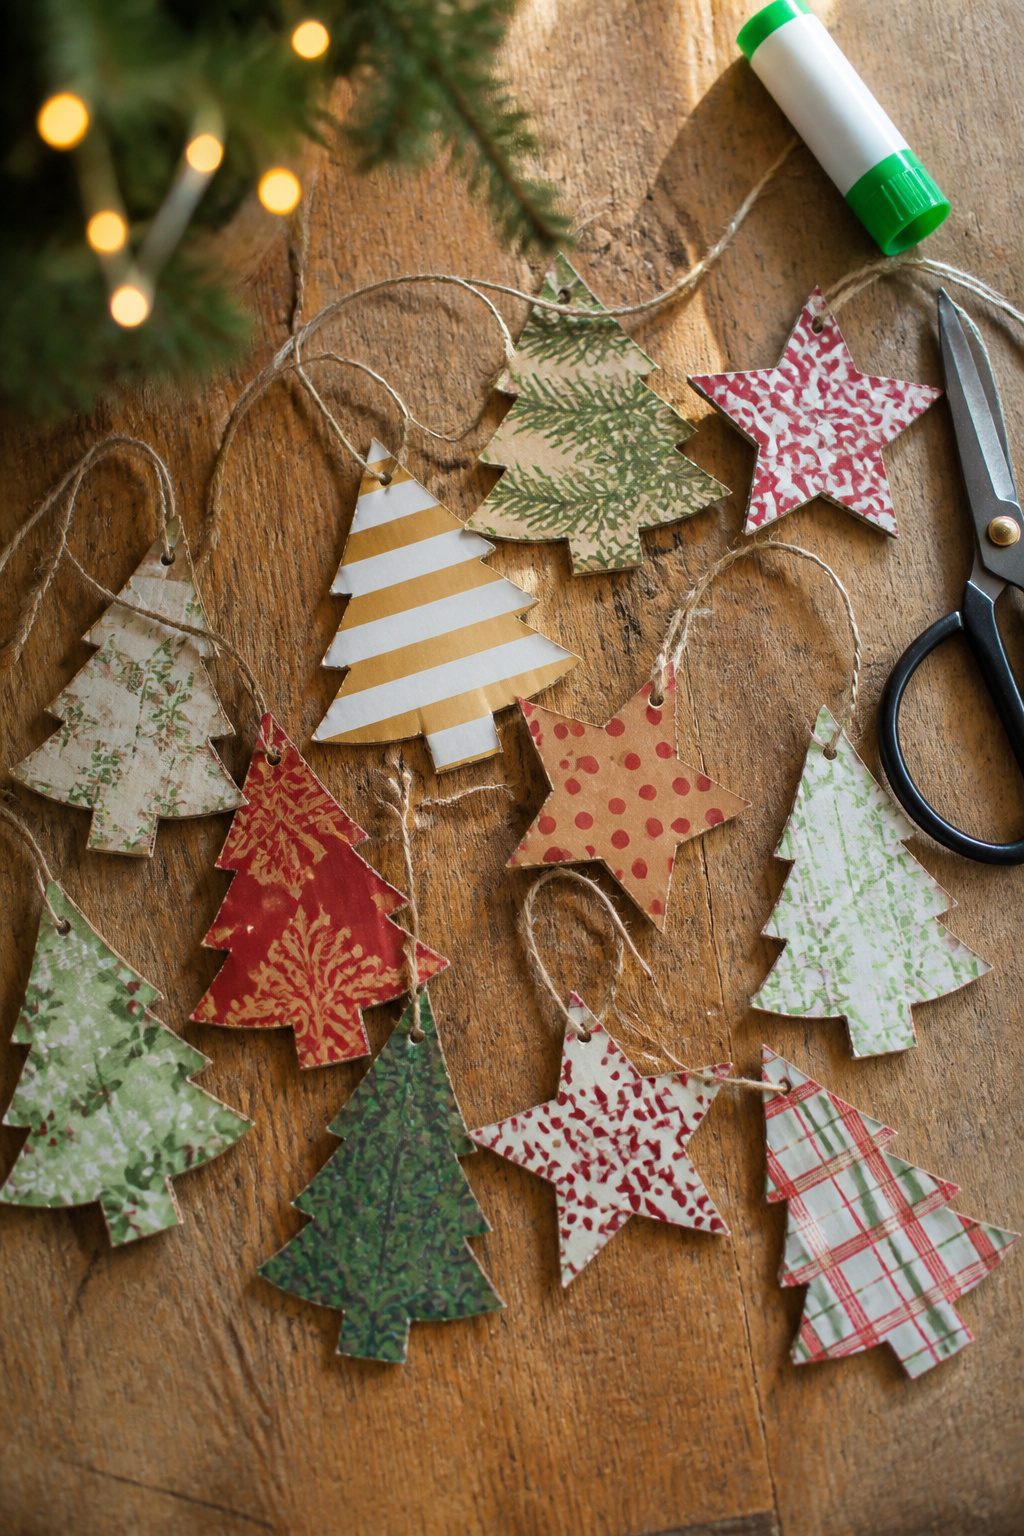
Cereal box cardboard hits the sweet spot for this: thick enough to keep its shape once hung, thin enough that regular scissors cut clean edges.
I traced cookie cutters onto the plain side, which gave me consistent stars and trees without freehand guesswork. The rolls of wrapping paper from last year that I kept meaning to toss finally earned their shelf space.
A thin layer of Mod Podge on the cardboard, the paper smoothed flat on top, and a second coat over the surface once it dried. The whole piece needs about an hour before you can handle it without fingerprints.
Paint works if your paper stash ran out or the patterns feel too busy. I tried both; the painted batch took two coats to cover the box printing that ghosted through the first.
Either way, punch a hole near the top with a skewer while the cardboard is still bare, before glue or paint seals the surface and you are wrestling a needle through layers.
Cereal box weight, not shipping box weight, is the line between an ornament that hangs straight and one that tilts the branch toward the floor.
23. DIY Mod Podge Photo Transfer Ornaments
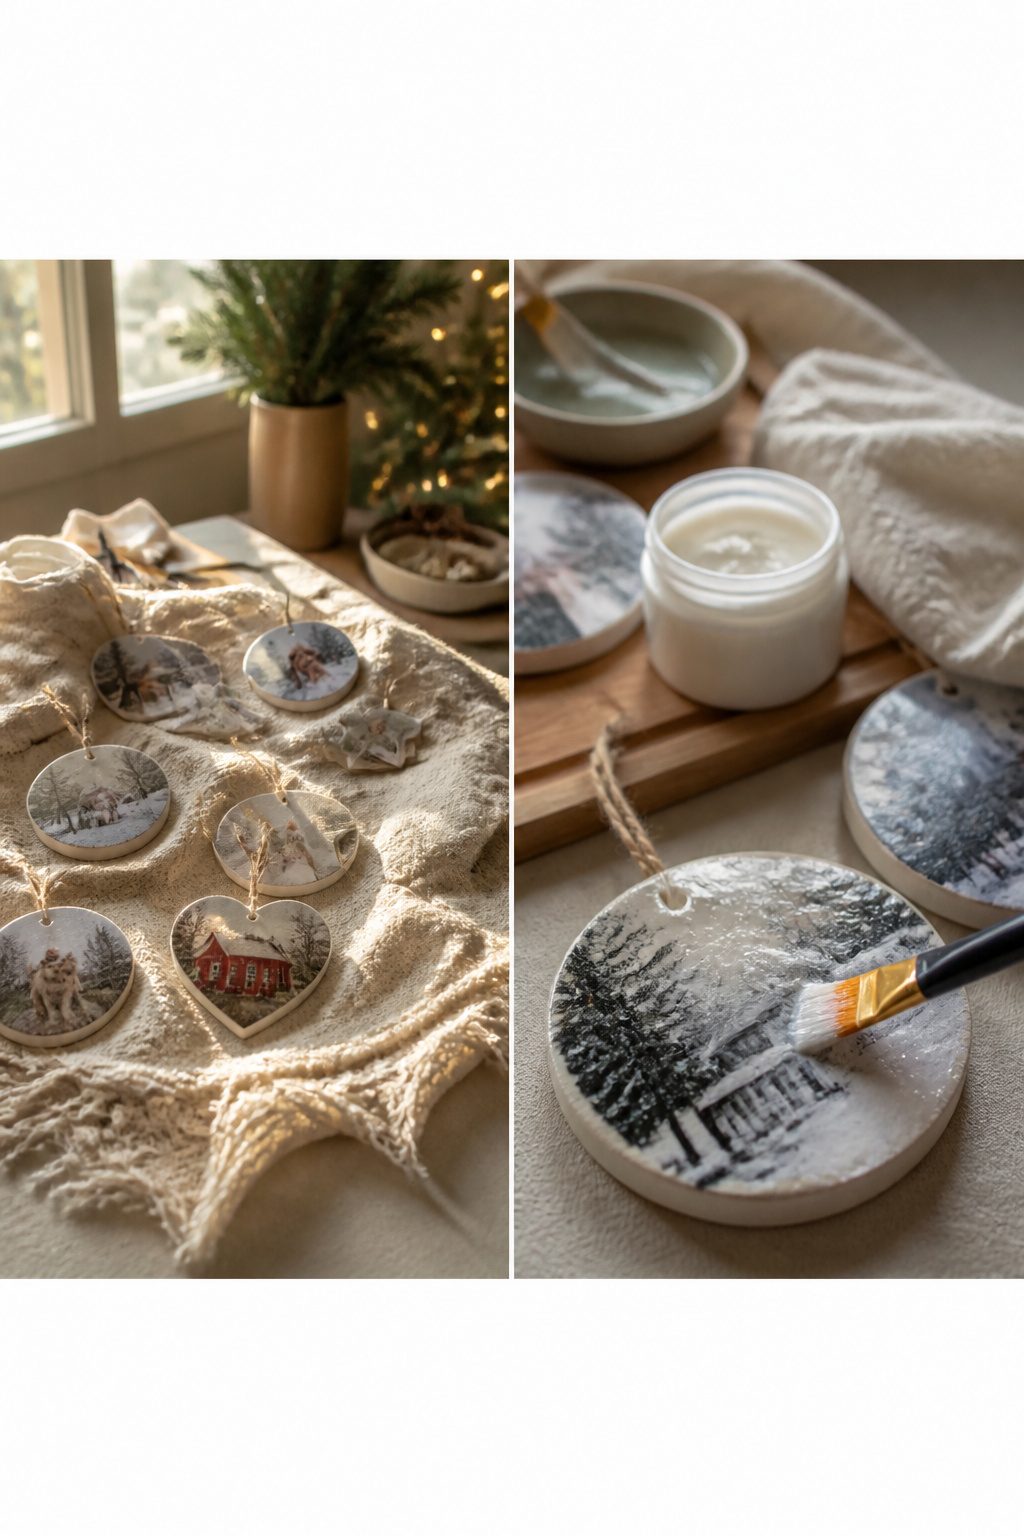
Mod Podge photo transfers look like heirloom pieces once the paper rubs away clean, but the first three I tried ended up as smeared ghosts on wood blanks.
The trick is pressure, not patience. Print your image mirrored on regular copy paper, brush a generous layer of Mod Podge onto the ornament surface, and press the photo face-down with a straight edge to chase out every bubble.
After twenty-four hours of drying, wet the back of the paper with a damp cloth and rub in small circles.
Too light, and paper fibers cling to the ink; too hard, and the image lifts with them. The fourth ornament came out crisp because I used the pad of my finger rather than a thumb, working from the center outward.
Wood rounds and flat ceramic tiles both take the transfer well, though tile needs a quick sand first so the adhesive has something to grip.
Seal the finished piece with another coat of Mod Podge or a spray acrylic if you want a satin sheen instead of the brush-stroke look.
24. DIY Wood Turning Ornaments
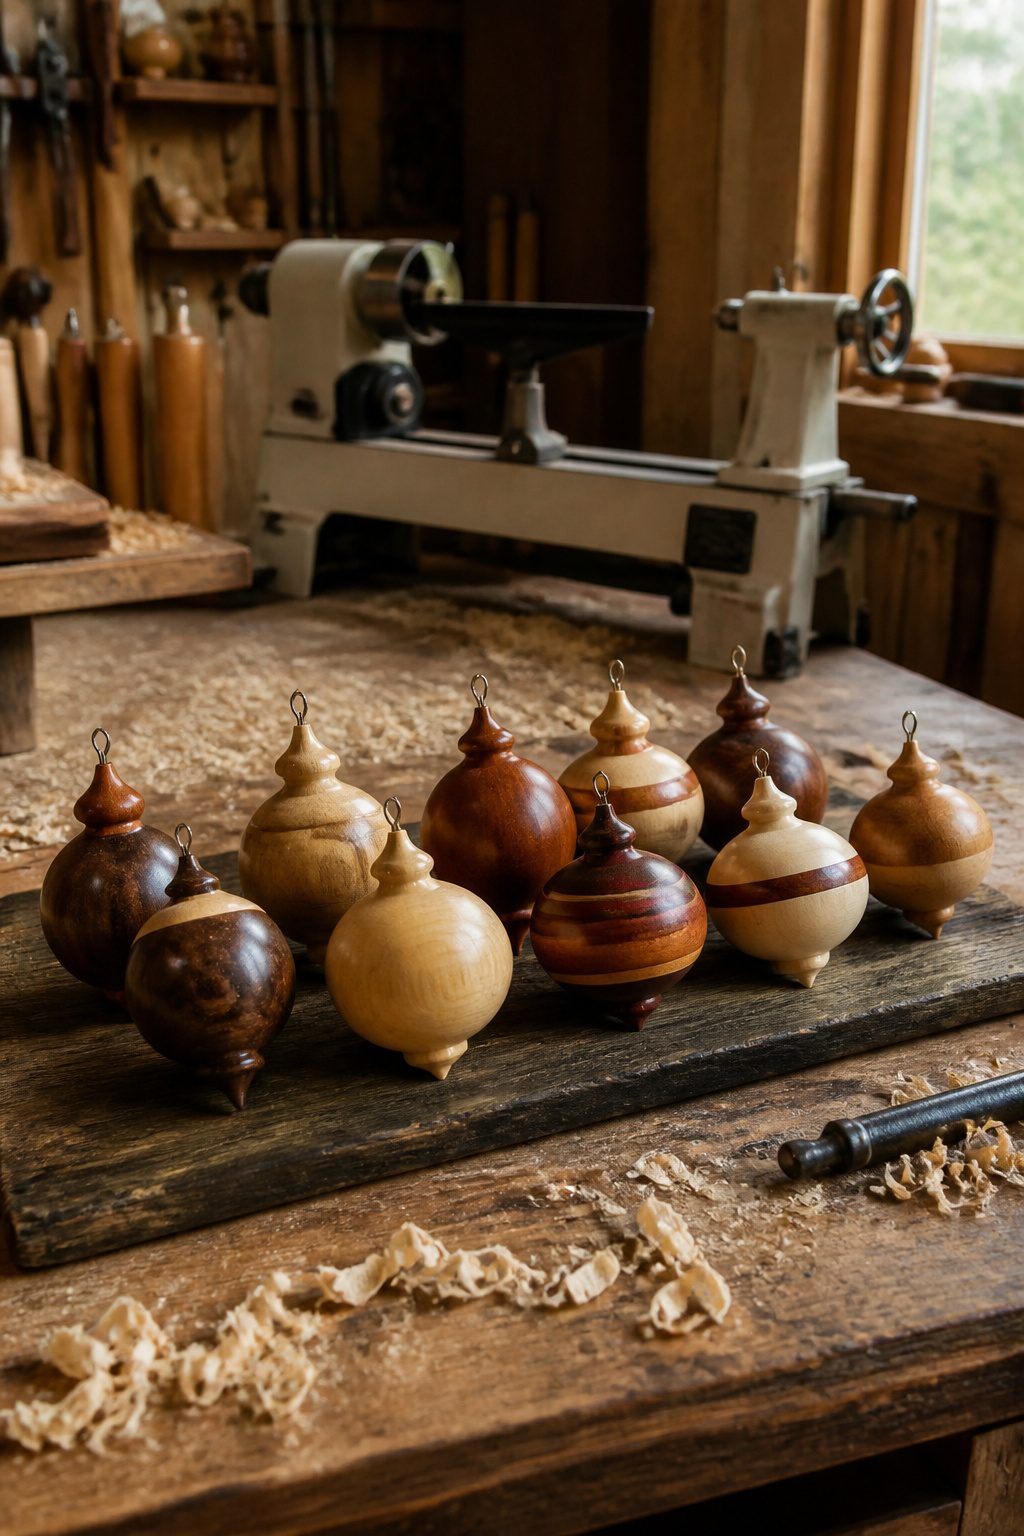
Wood turning on a lathe produces ornaments with a weight and polish that craft-store supplies rarely match.
Finials, icicles, and simple round baubles all start as small blanks of maple, walnut, or cherry, spun against a gouge or skew chisel while the shavings fly.
A lathe and turning tools are the hard requirement here, so this path is only open if you already have access to shop equipment or a makerspace membership.
The blanks themselves run a few dollars each, and a single afternoon of turning can yield a half-dozen pieces once the muscle memory returns.
Sanding through progressive grits and finishing with beeswax or shellac gives the surface that warm glow people reach for instinctively on a tree.
I have not touched a lathe since high school shop class, where I turned a mallet handle and nothing smaller, so I am not the person to walk you through the cut sequence.
What I can say is that the learning curve is real, the tools are sharp, and the results when it works justify the setup for anyone who already owns the gear.
For the rest of us, the other thirty-nine ideas on this list need no machinery beyond what most renters already keep in a kitchen drawer.
25. Tin Monogram Ornament
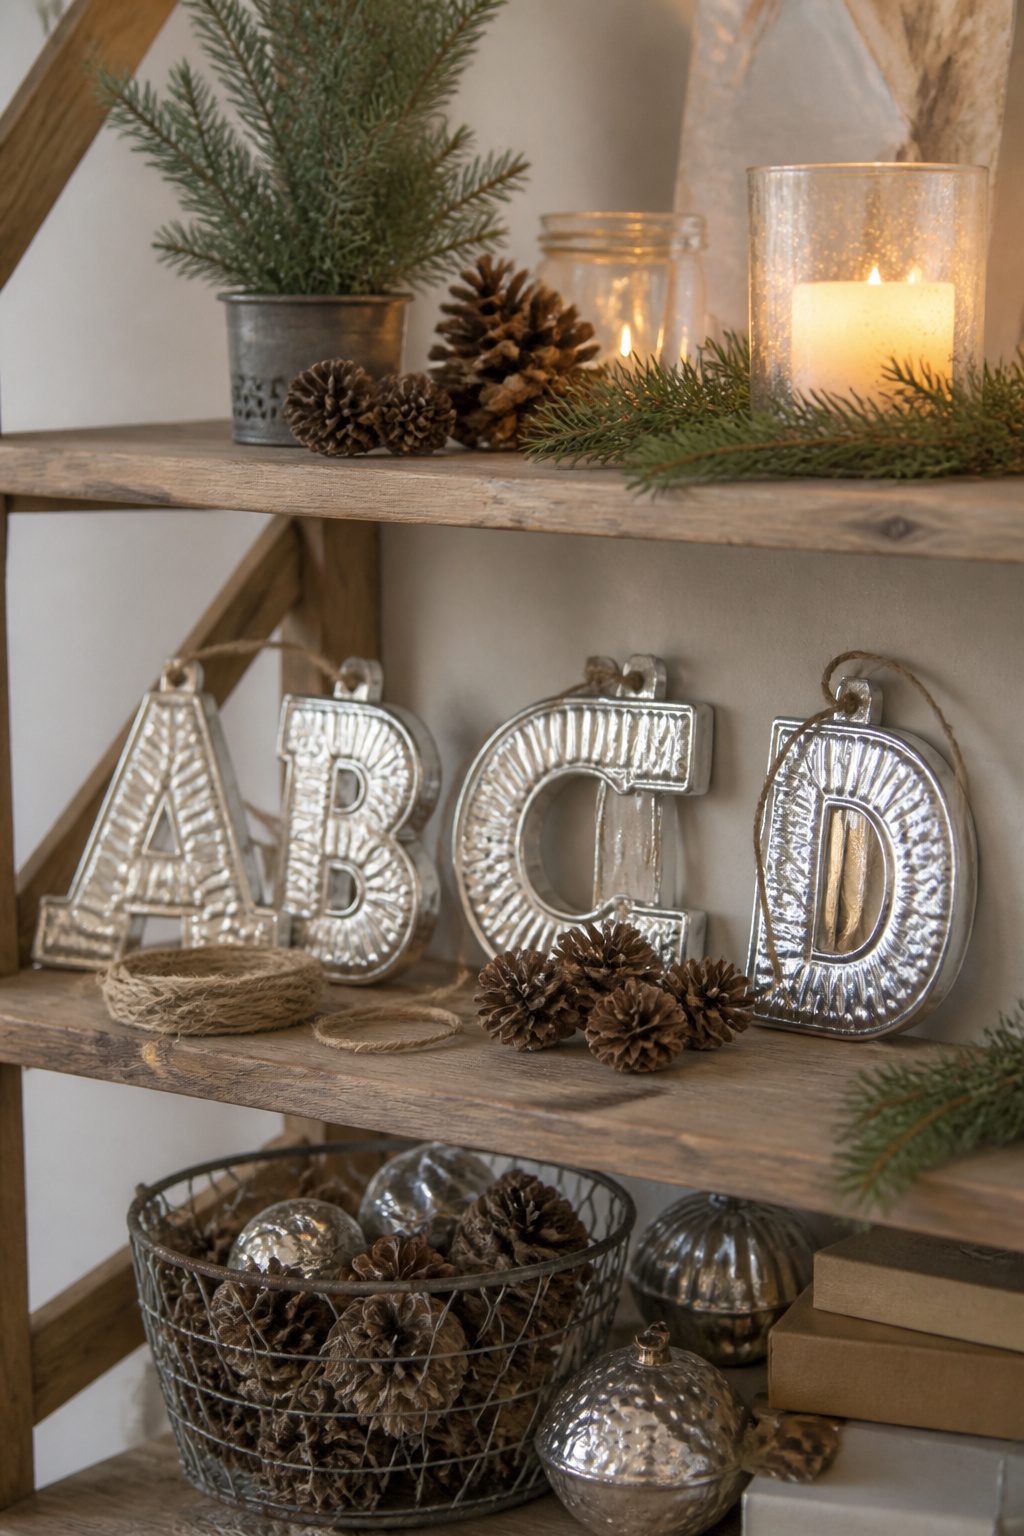
Disposable aluminum baking pans from the grocery store are thin enough to cut with ordinary scissors, which makes them perfect for letter shapes that stay light on the branch.
I trace a block letter onto the flat bottom, cut it out, and emboss the surface from behind with the rounded end of a ballpoint pen or a blunt knitting needle.
The metal dents easily and holds a crosshatch or swirl pattern without tearing if you work on a towel-backed surface.
The edges come up sharper than you expect.
I sand every cut side with 220-grit paper until the shine turns matte, then fold a quarter-inch border all around with needle-nose pliers. That rolled lip stiffens the whole shape and hides whatever raggedness the scissors left behind.
Poke the hanging hole with a nail or an awl before you start any bending; the flat sheet gives you leverage, and trying to punch through a finished curve is a good way to crease the letter or stab your palm.
26. Faux Finish Paper Mache Ornament
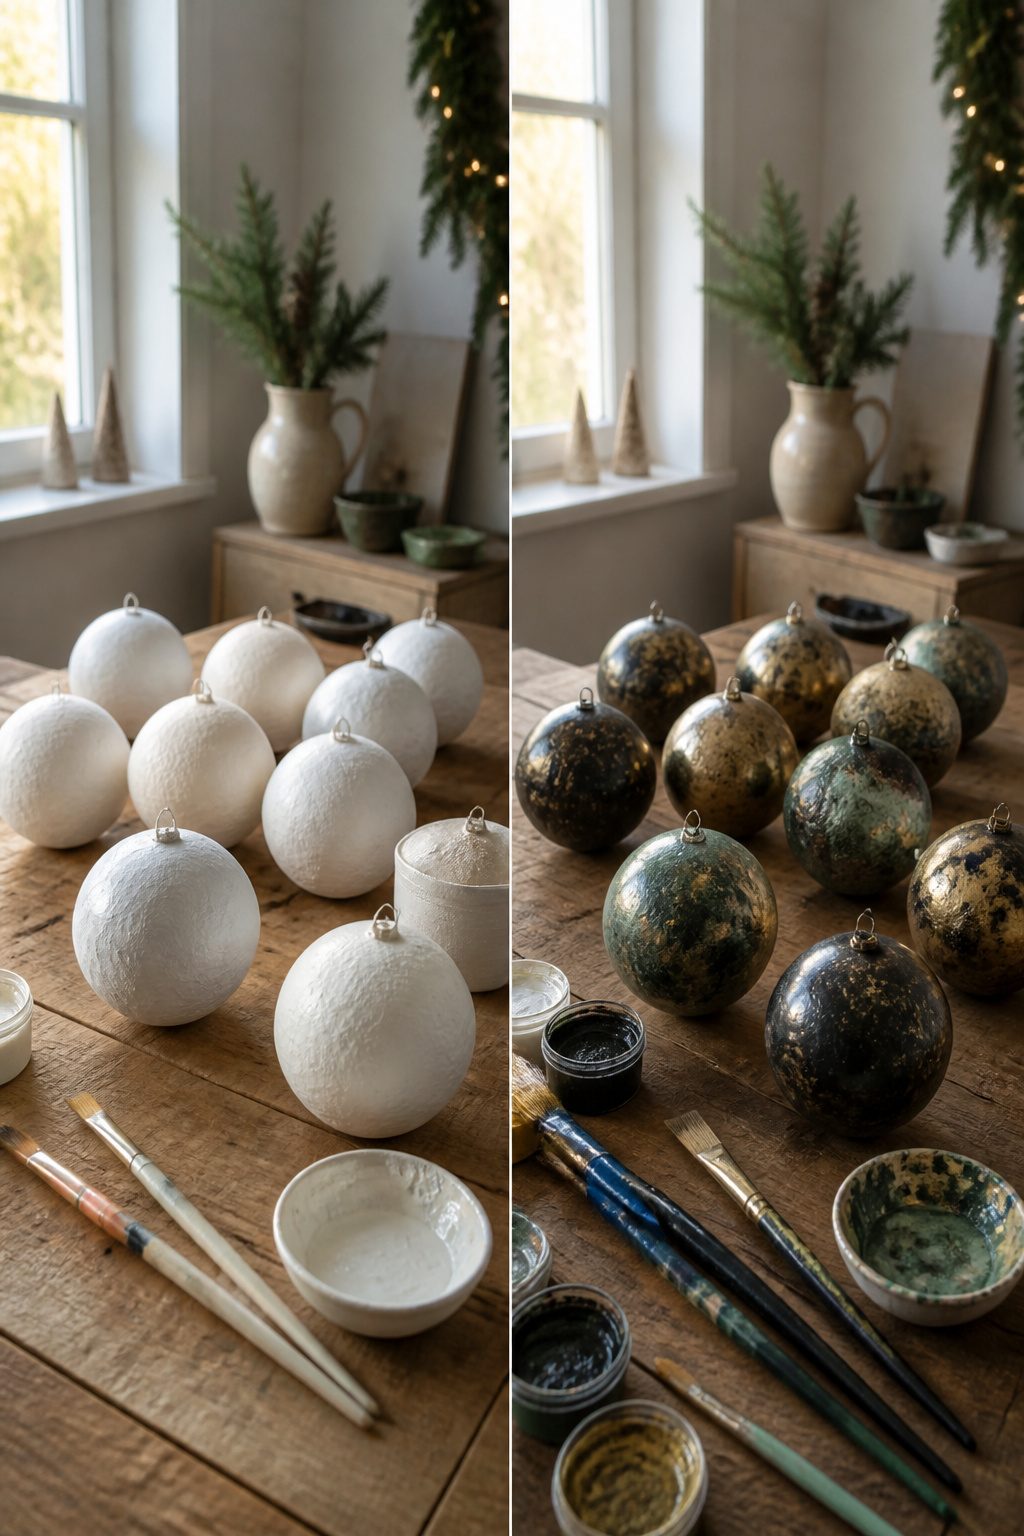
Paper mache ornaments get interesting when you stop trying to make them look like paper.
The base form barely matters: a balloon, a cheap craft-store blank, even a bowl pressed into service as a mold. What matters is what happens after the shell dries.
I spent one December obsessed with fake bronze.
The method is straightforward and unforgiving: a base coat of flat black, then dry-brush layers of gold and a muted green, working from dark to light so the recesses stay shadowed. The green is the trick.
Without it, you get shiny plastic. With it, the gold reads as oxidized metal catching lamplight.
Dry brushing is non-negotiable here: load the brush, wipe most of the paint onto a rag, then drag what remains across the high points. Anything wetter kills the illusion.
Crackle medium buys you aged ceramic in about ten minutes of actual work, though the drying takes overnight.
Brush it between two incompatible colors, let it shrink, and the top layer fractures like old glaze. The effect is convincing from three feet, which is the distance most people will ever stand from a Christmas tree.
The real limit is time, not skill.
Each layer needs its window: base coat, dry, crackle, dry, top coat, dry, then the dry-brushed finish. Start Wednesday if you want them hanging by Sunday.
27. Painted Mason Jar Ornaments
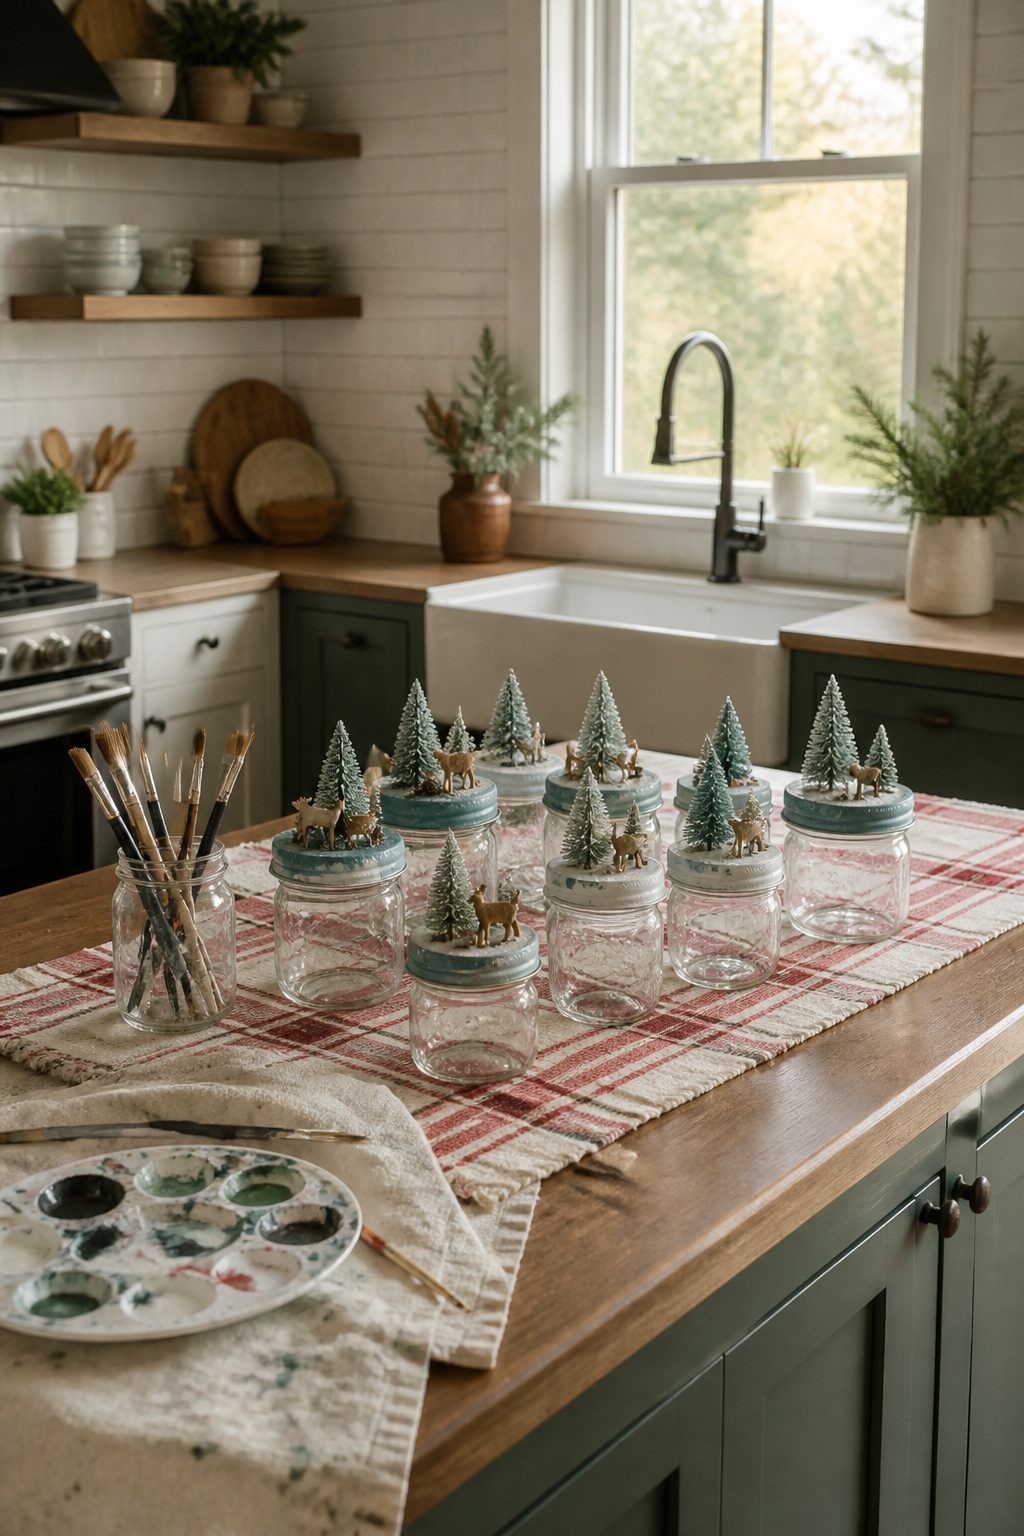
Pint jar lids are the right size for a tree, and the flat surface gives you a frame to work inside.
I painted mine with two coats of matte white acrylic, let them dry overnight, then pressed a tiny bottle-brush tree and a deer figure into the center with hot glue.
The hanger is just twine knotted through a hole I punched with a nail before painting; the raw edge hides under the paint and nobody sees it.
The hole placement matters more than the decoration.
Dead center keeps the lid from tilting when it hangs. Off by even a quarter inch and the whole scene swings crooked every time someone walks past the tree.
A full jar works too, though the weight adds up fast on branches.
I tried filling one with fake snow and a miniature house, but the glass caught the lights in a way that looked cheap, like a snow globe that had lost its water.
The lid alone, hung flat like a tiny shadowbox, reads better from across the room and costs nothing extra if you already have the jars.
28. Milk Paint Christmas Ornaments
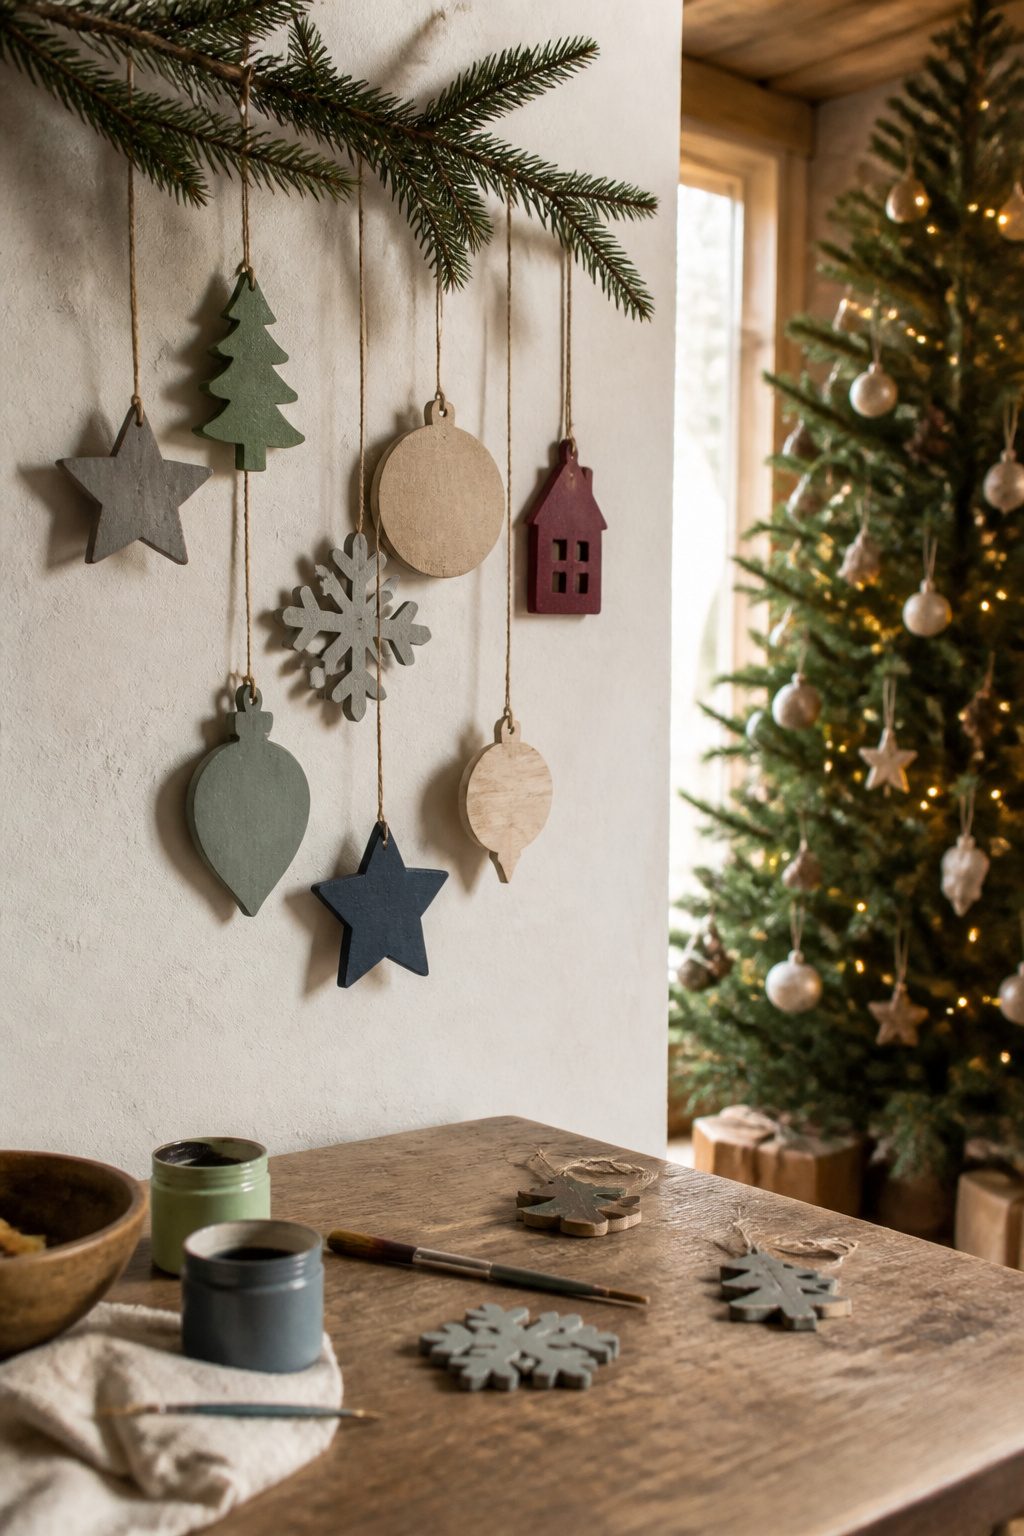
Milk paint behaves nothing like the acrylic craft paint most of us keep in the junk drawer.
It arrives as a powder you mix with water, and the chemistry is different: it soaks into raw wood instead of sitting on top, which means the grain stays visible and the color wears soft at edges and corners.
That chalky, almost antique surface is exactly what you want for a Scandinavian or farmhouse tree, but the look is fragile until you seal it.
I learned the hard way that sanding after painting, not before, gives the rubbed, time-worn effect that makes these ornaments convincing.
A light pass with 220-grit over the dried milk paint raises the wood grain slightly and knocks the color back at high points, as if the piece had been handled for years.
After that, clear furniture wax applied with a rag and buffed by hand adds just enough sheen to keep the surface from looking dusty under tree lights.
The whole process, mixing included, fits an evening; the ornaments dry overnight and take wax the next morning.
29. Snowman Handprint Ornament

White acrylic paint on a dark ceramic or glass ball turns a child’s handprint into a small cluster of snowmen.
The fingers become bodies, the thumb becomes the head, and a single print yields five tiny figures if you paint all five digits.
A second approach uses just one handprint for a single snowman, with the thumb as the head and two fingers stretched out as stick arms.
The paint layer needs to dry completely before you add faces, scarves, and hats. A toothpick dipped in black paint handles the eyes and coal buttons; the tip of a skewer draws a cleaner smile than most fine brushes.
For hats, a strip of felt glued across the top of the thumbprint works faster than painting a top hat, and it survives the tree better.
The real risk is thickness.
Two thin coats of white paint beat one heavy coat that cracks when the ornament cools. I learned that after a batch I did in a single thick layer flaked off by New Year’s.
If you are working with a toddler, press the hand to the ornament yourself; letting them grip the ball usually smears the print and wastes the dark base coat underneath.
30. DIY Gnome Christmas Ornament
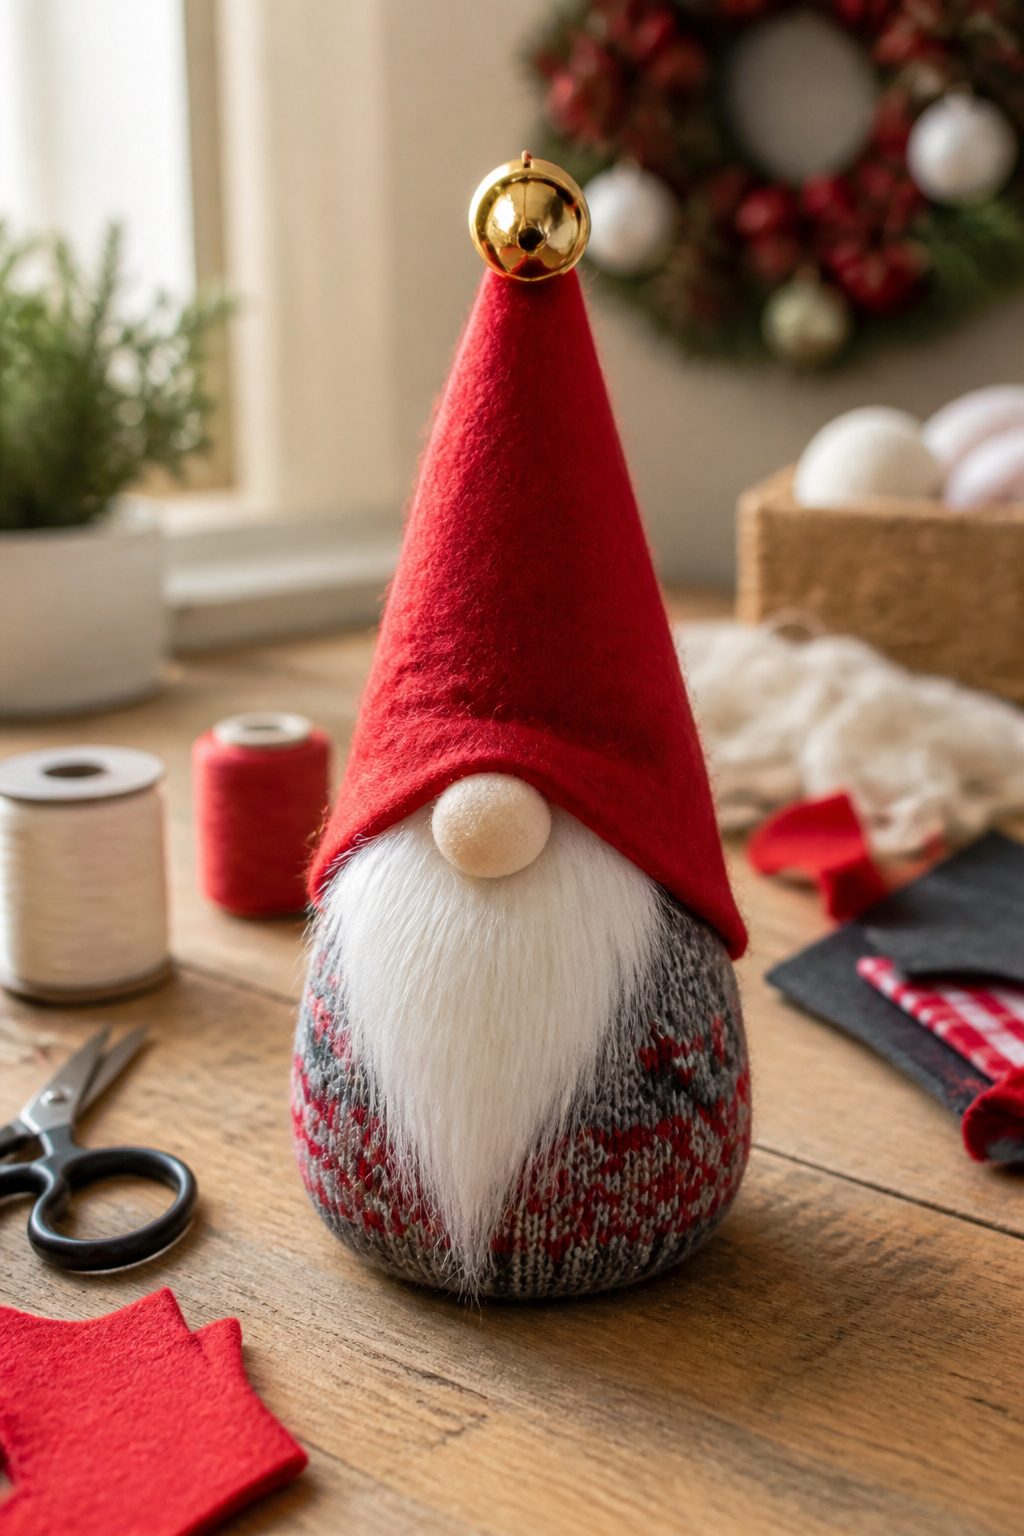
The Christmas gnome differs from the everyday version mostly in color and prop.
I made mine from the same rice-filled sock body, but this time I used a red crew sock with a green felt hat instead of the neutral tones.
A tiny felt tree, glued to one hand and braced against the brim, turns the figure into a holiday piece that reads instantly as Christmas rather than Scandinavian folk decor.
Rice gives the body weight so the gnome hangs straight, but do not overfill or the hat will look like a deflated stocking instead of a cone.
I left about two inches of empty sock at the top, then gathered it tight with thread before adding the felt brim and cone. The trim matters more here than on a plain gnome.
I cut a strip of white felt for a snowy brim edge and a tiny jingle bell for the hat tip, both cheap additions that read as festive from across the room.
The mistake I made on the first one was gluing the felt tree directly to the rice-filled sock fabric. The glue held, but the sock surface flexed and the tree tilted within a week.
For the next batch, I stitched a small felt square to the body first, then glued the tree to that square. The backing keeps the prop upright through a season of handling and packing.
31. Salt Dough Handprint Ornaments
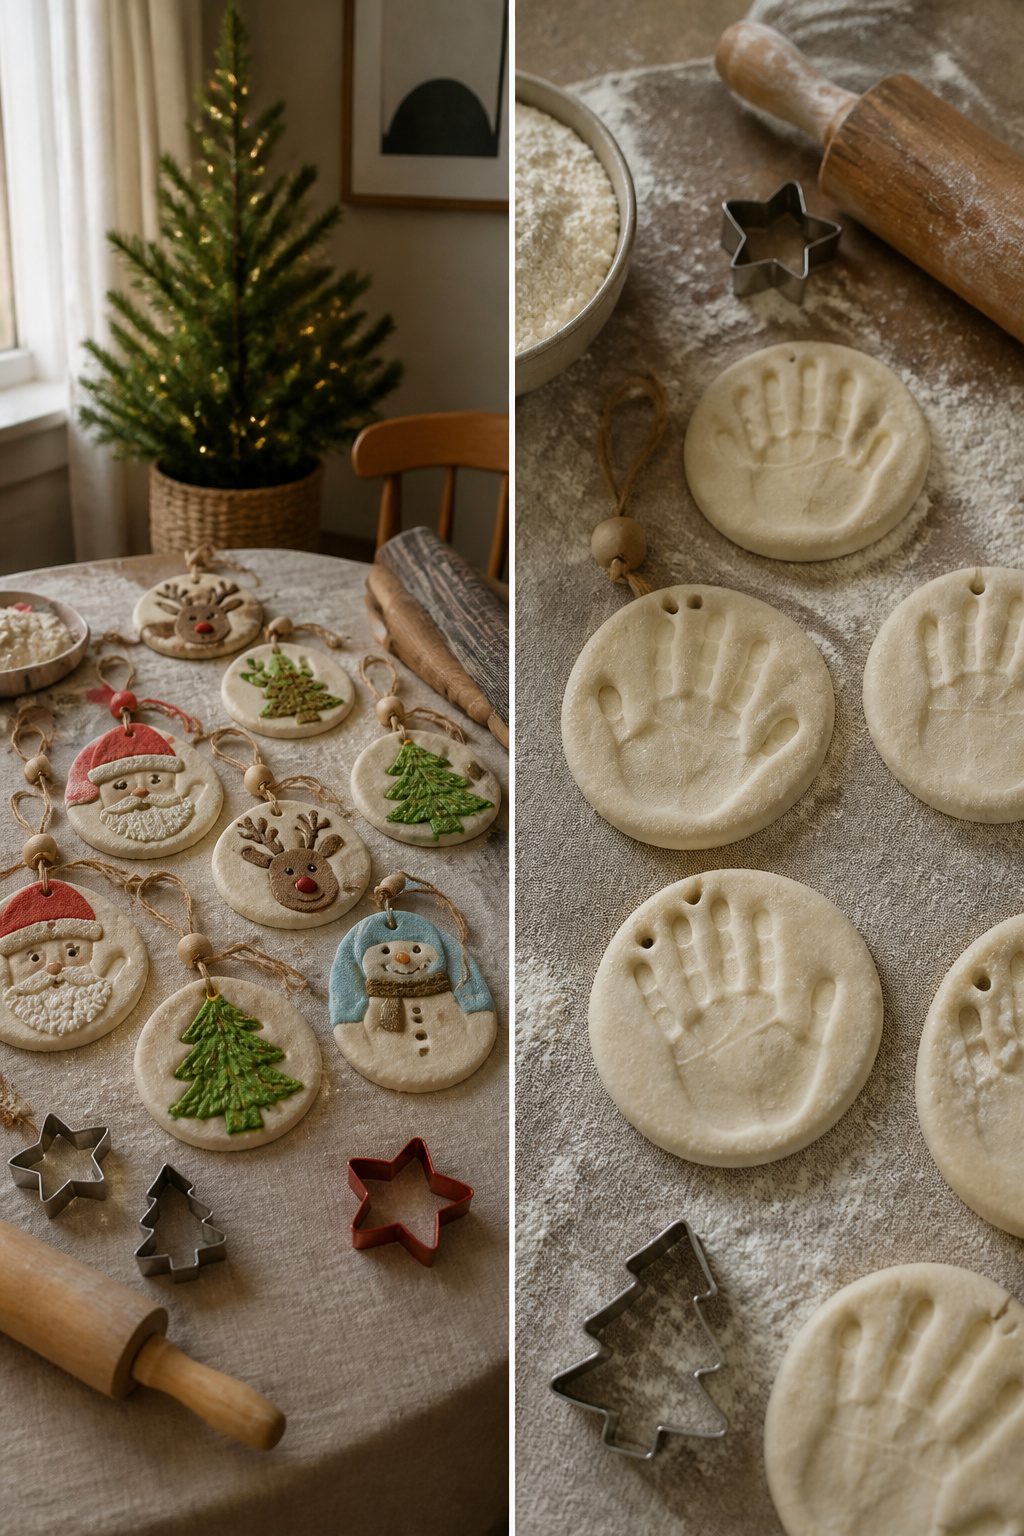
Salt dough is the cheapest clay you will ever work with, and that is exactly why it still belongs in a 2026 ornament lineup. The recipe is 2 cups flour, 1 cup salt, and 1 cup water, mixed until it forms a stiff dough.
Roll it to about a quarter-inch thick, press in a small handprint, and the palm becomes Santa’s face while the fingers turn into beard and hat trim.
Cookie cutters work too if the handprint phase has already happened in your house and the result was tears.
Baking at 200°F takes roughly 2 to 3 hours until the pieces feel rock-hard and no longer cool quickly to your lip.
Air-drying is an option if you started this project four days before you need it and have a spot where no one will move the pieces.
Paint goes on after real cooling, not warm-to-the-touch cooling, because wet-looking dough and actual sealed paint are different things and you will find out the hard way if you rush it.
The final step most people skip is a clear coat. Unsealed salt dough weeps in humid storage, which in most of the eastern half of the country means your 2026 ornaments turn into soft, salty mush by 2027.
A basic acrylic spray or brush-on sealer costs maybe six dollars and saves the whole project.
32. Cinnamon Stick Christmas Tree Ornaments
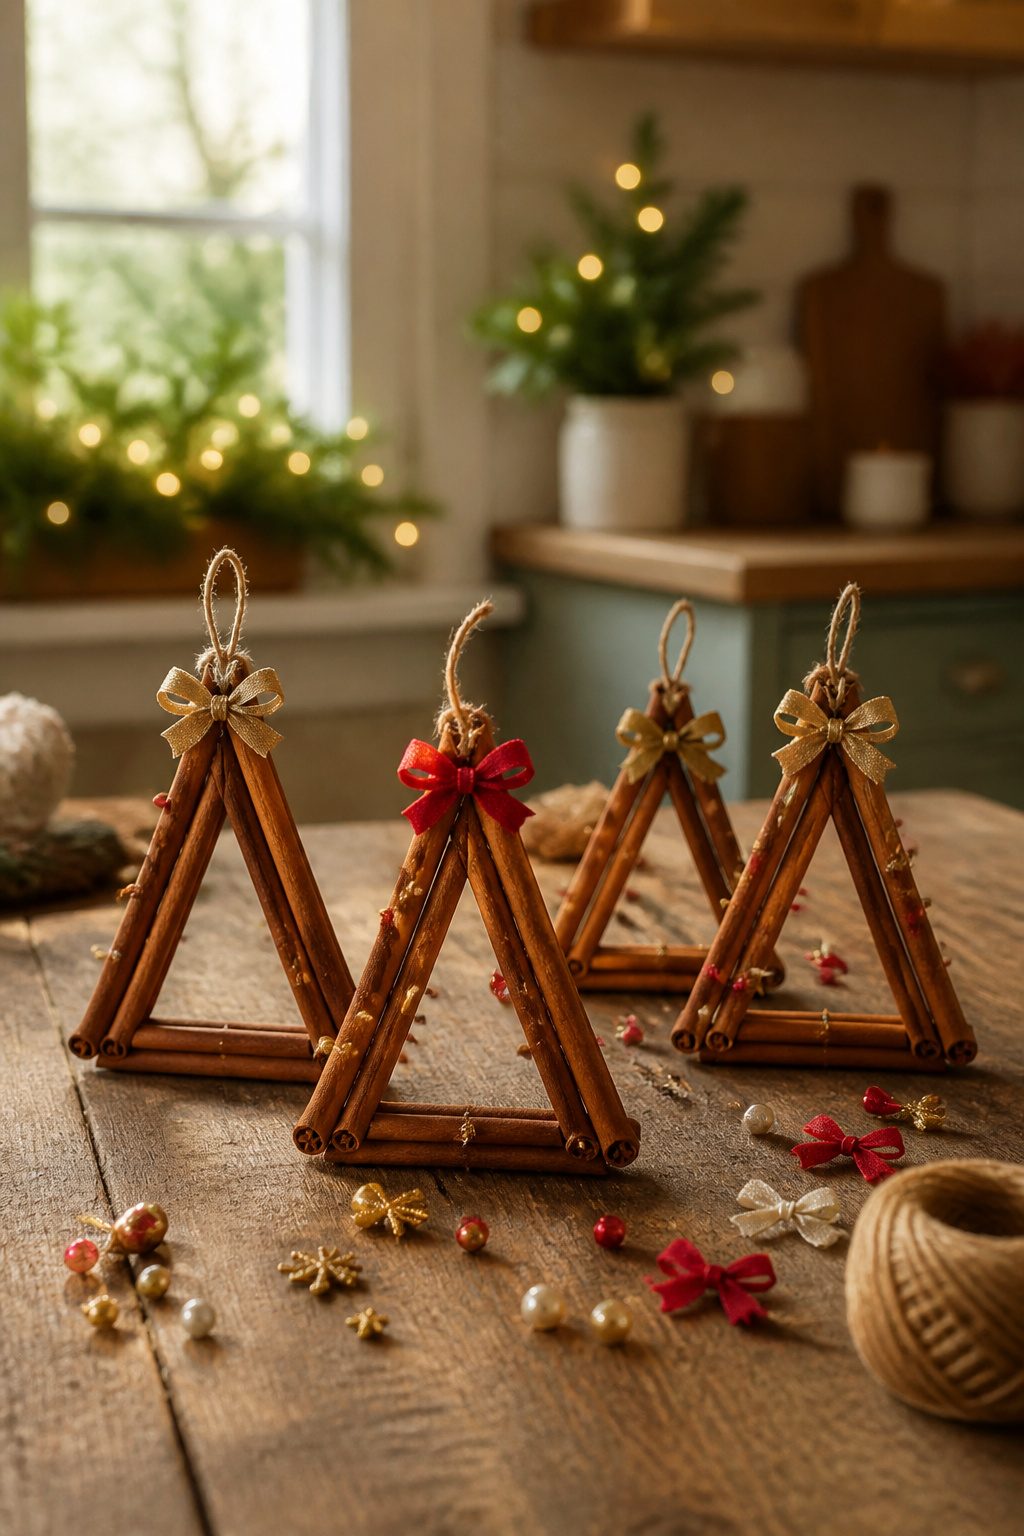
Cinnamon sticks read as miniature trees with almost no effort, which is why this shape lands on so many ornament roundups.
Three sticks form the teepee, tied at the center with twine so the base fans out into a stable triangle. The bark catches light like bark should, and the gaps between sticks let the tree behind show through.
Bulk cinnamon sticks from the grocery aisle or an online bag run cheap enough that a miscut stick is not a crisis. A dot of hot glue at the twine intersection keeps the angle from drifting while you work.
Small bows, wooden beads, or a loop of thin rickrack dress the front; the sticks carry enough visual weight that overloading them looks crowded fast.
The smell is real but not loud. After a season in storage the scent fades to faint spice, which some people prefer to the full bakery blast of fresh cinnamon.
Either way, the silhouette reads as a tree from across the room, and the materials cost less than a single store-bought bauble.
33. DIY Rudolph Christmas Ornament

Brown felt and a sharp pair of scissors will get you most of the way to a reindeer that actually looks like one.
The body is just two identical shapes, a head and a torso, blanket-stitched together and stuffed with whatever scrap filling you have on hand.
Kids handle the tracing and the stuffing fine; the part that needs your hand is the face, because antlers are where these projects fall apart.
Pipe cleaners twist through a hole punched at the top and hold their shape through December, though they read more whimsical than rustic.
Twigs glued to the back look better in photos and worse after a week of dry heat, when the bark starts to lift. I made a batch with button eyes and a pom-pom nose, and the buttons won.
Pom-poms come in bags of mixed sizes; the 15 mm ones sat right on the felt without overwhelming the face, while anything larger looked like the reindeer had walked into a wall.
Felt antlers cut from the same brown as the body disappear in photographs. A shade lighter, or the natural oatmeal felt sold in the same craft-aisle rack, gives just enough contrast to read against a green tree.
Glue the face details before you stitch the second side closed; reaching through a two-inch gap with a hot glue gun teaches patience the hard way.
34. DIY Ugly Christmas Sweater Ornaments
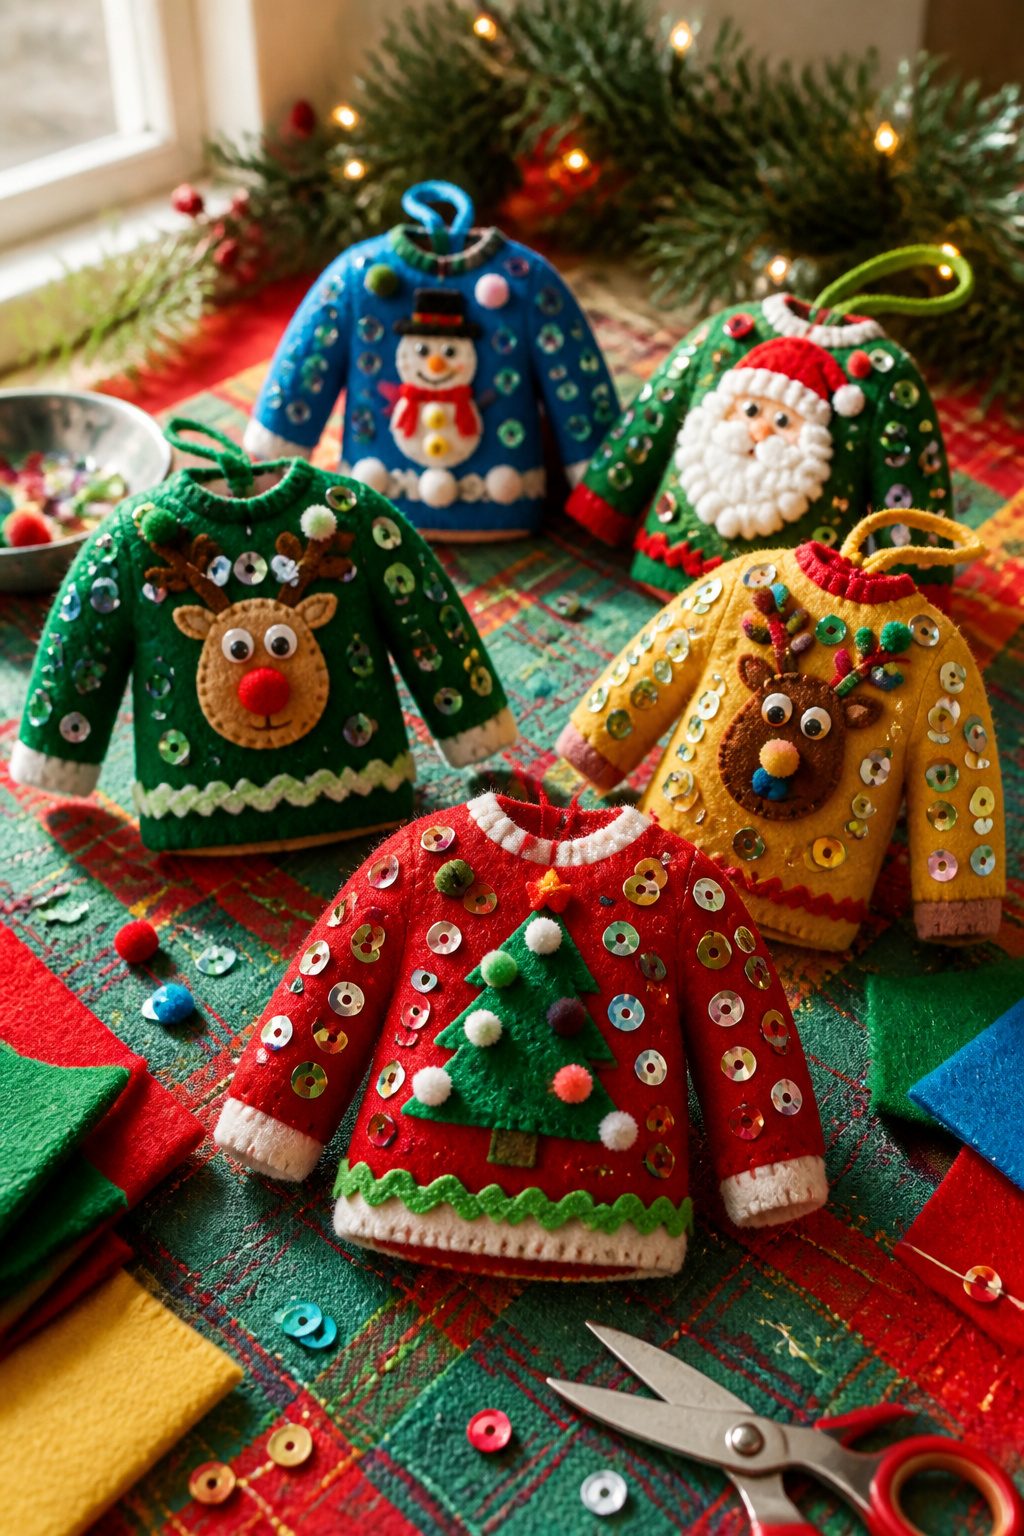
Felt holds its shape without sewing if you’d rather not thread a needle, though a running stitch does keep the layers from shifting after a season in storage.
I trace a sweater-shaped cookie cutter onto doubled felt, cut through both layers at once, and hand the pieces off.
My kid covers every surface with sequins, pom-poms, and fabric scraps from the bin; the goal is deliberate bad taste, not restraint.
Cardboard works too if you want a stiffer mini-sweater that won’t droop on the branch. Glue beats stitches for anyone under ten, and the messier the pattern, the better the joke lands when guests spot it on the tree.
35. Melted Peppermint Candy Ornaments
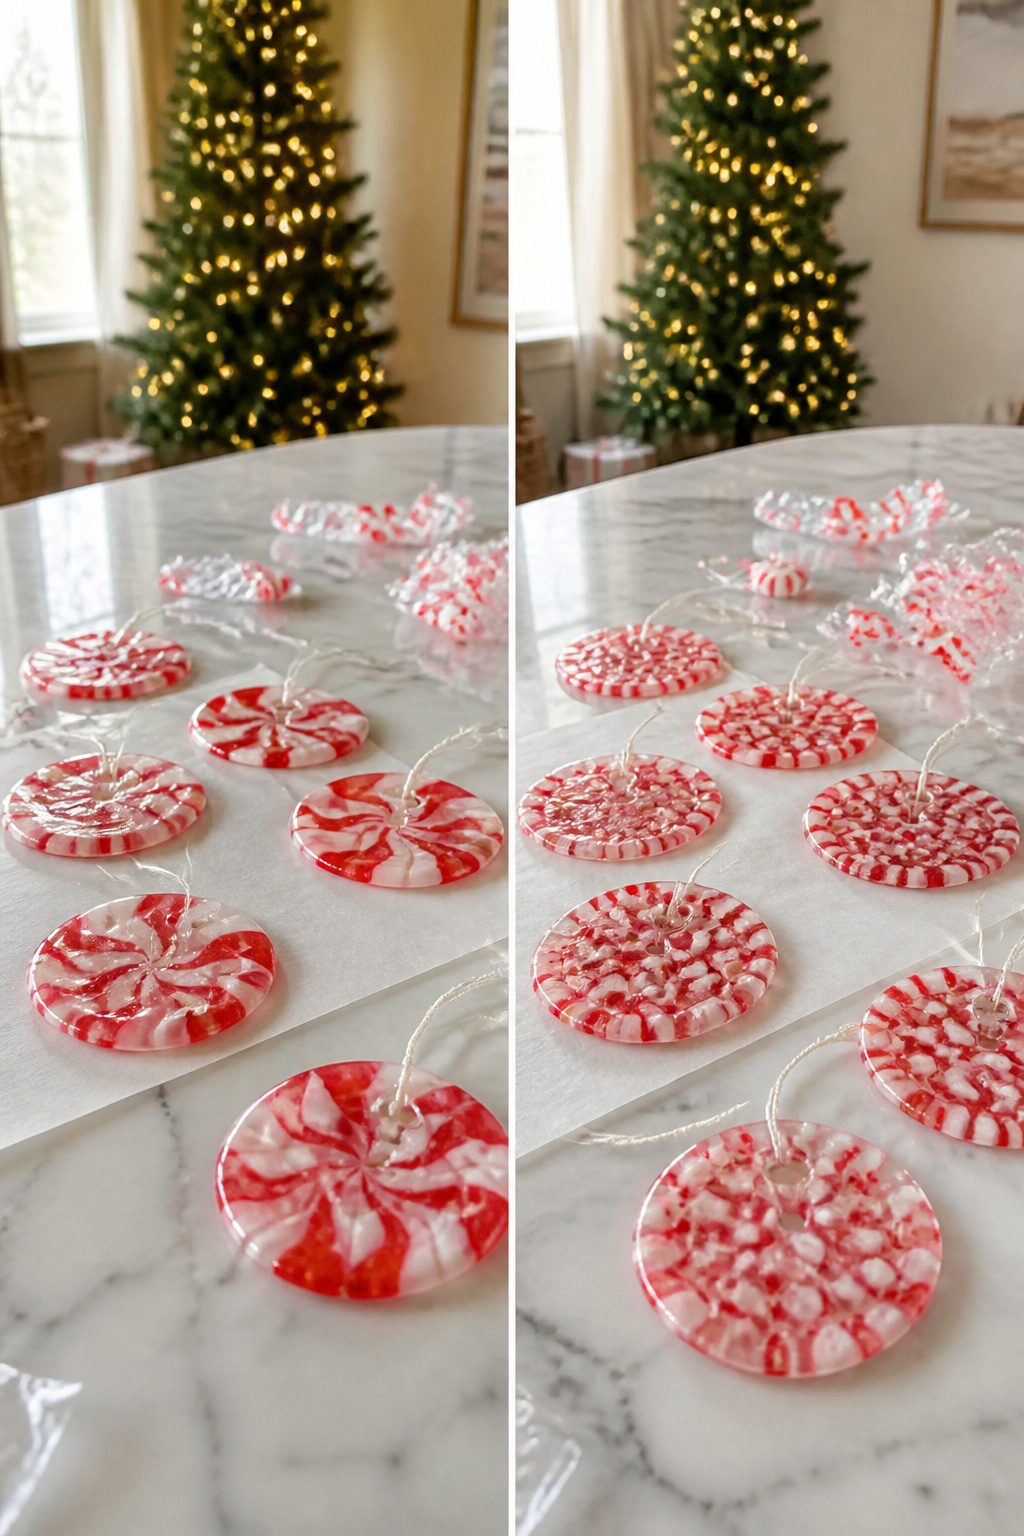
Hard peppermint candies melt into translucent disks in about five minutes at 350°F, but the window between "almost there" and "burnt puddle" is narrow enough that you will want to stand at the oven door with the light on.
Arrange the candies on parchment paper in a single layer, touching at the edges so they fuse as they soften.
A metal cookie cutter set on the parchment contains the spread into a clean star or circle, though you will need to lift it off quickly once the shape sets or it sticks permanently.
Poke the hanging hole while the candy is still warm and pliable, within the first thirty seconds out of the oven; once it cools, the disk turns brittle and the drill or needle cracks it instead of piercing cleanly.
The finished ornament looks like stained glass and weighs almost nothing, which makes it a good choice for a lightweight branch or a kid’s tree, but it also attracts humidity and can go tacky in a steamy kitchen.
Store these in a dry closet between seasons, not the ornament box in the damp basement.
36. Crystal Candy Cane Ornaments
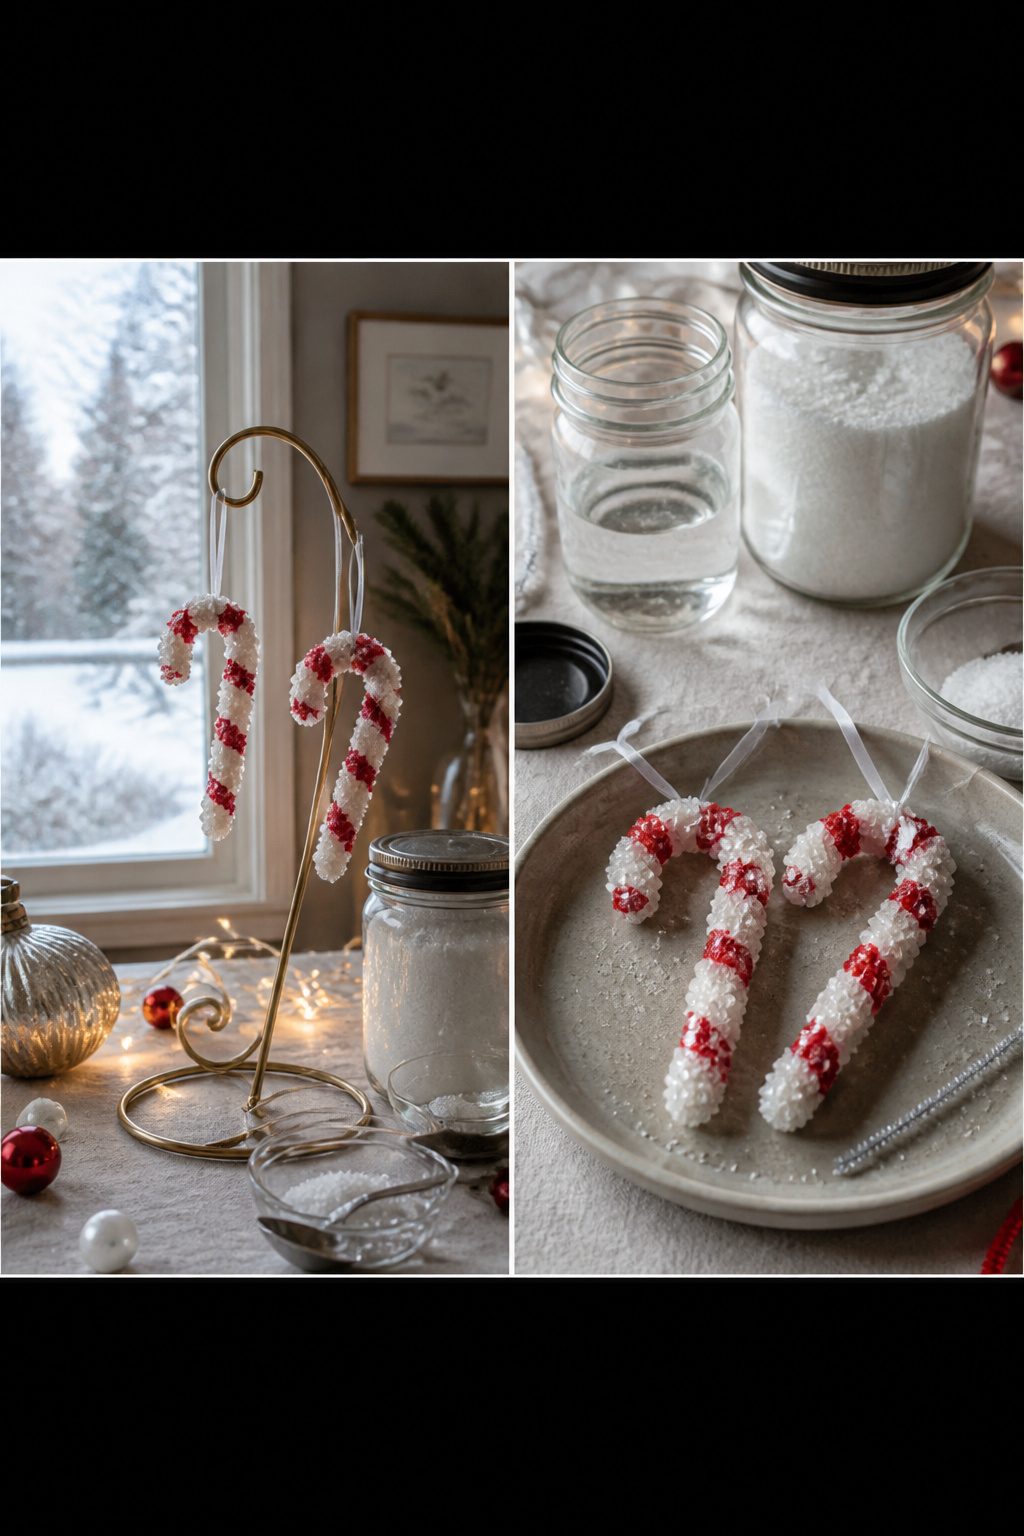
Pipe cleaners bent into candy cane shapes and suspended in a supersaturated borax solution grow a crust of crystals overnight.
3 tablespoons of borax per cup of boiling water is the ratio that works; less leaves you with a thin, patchy coating, and more tends to fall out of solution before the pipe cleaner ever touches it.
The fuzzy surface gives the crystals something to grip, which is why smooth wire versions never come out as thick.
The science-craft hybrid angle is genuine. Watching the solution cool and the crystals climb the pipe cleaner still feels like a minor magic trick, even when you know the chemistry behind it.
A mason jar holds the shape upright while it works, and a ribbon loop tied beforehand lets you lift the finished ornament without touching the fragile surface.
These look edible, which is the one real hazard.
The borax and the pipe cleaner core make them strictly decorative, so if you are gifting them, label them clearly. I would not send them to a household with very young children unless the parents already know what they are.
The crystals themselves are reasonably sturdy once formed, but a drop onto a hard floor will crack the coating, so hang them high on the tree or in a window where they catch the light and stay out of traffic.
37. Pressed Flower Christmas Ornaments

Pressed flowers look fragile on a branch, but the trick is keeping them dry. Moisture trapped inside a sealed ornament will brown the petals in a single season.
I press mine for two weeks between the pages of a thick book, swapping in fresh blotting paper after the first few days. A flower press speeds that to about a week if you are impatient.
Glass disk ornaments with copper tape edges let you see the bloom from both sides.
I run a thin line of clear glue around the rim only, never across the face of the flower. The petal stays visible, and the bond holds through years of handling.
Plastic fillable ornaments work too, but the seam splits the view. Copper tape edges are worth the extra dollar or two for the finished look.
Flat ornaments on wood or cardstock need a different seal. Brush-on clear adhesive works if you build it in three thin coats, letting each one dry to the touch before the next.
One thick coat pools and clouds. I learned that the hard way on a hydrangea that turned milky by New Year’s.
38. DIY Grinch Ornaments
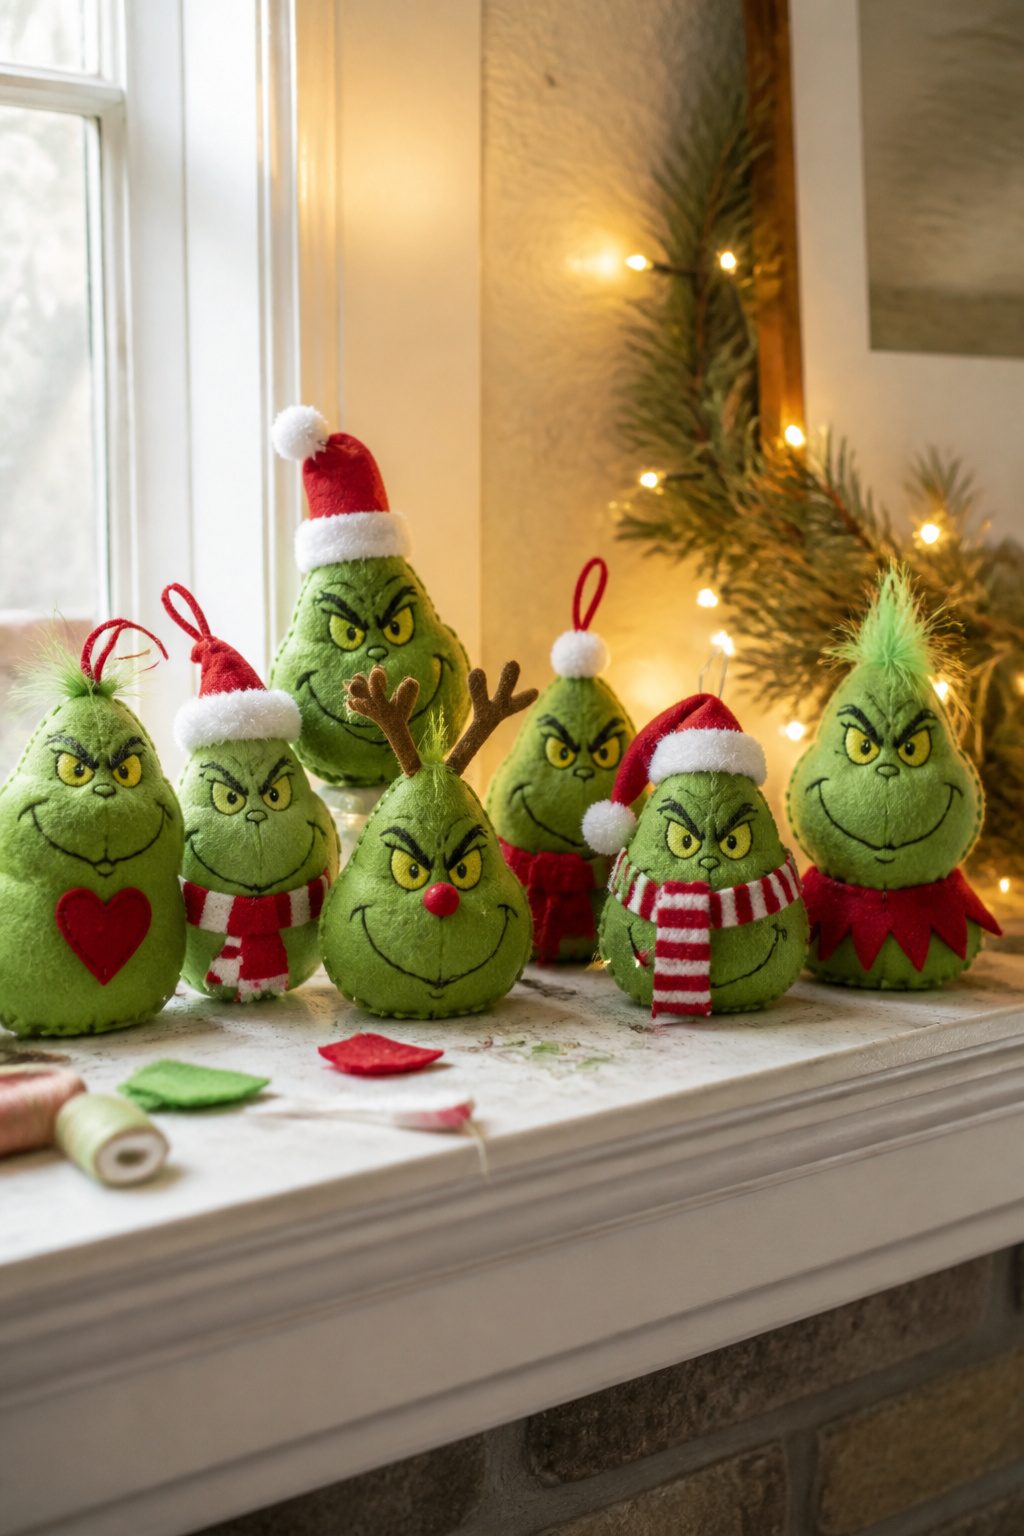
The Grinch works because the face does all the storytelling.
Green fur, paint, or felt over cardboard all read the same from tree distance, so the material choice is mostly about what you already have and how much texture you want.
I went with a three-inch wood slice, painted it with leftover acrylic in a color close to Christmas-tree green, and let it dry overnight.
The face came next: yellow oval eyes, red pupils placed slightly off-center so he looks annoyed rather than surprised, a heavy brow line drawn lower on one side, and a mouth that curves down hard at the corners.
I used a black Sharpie for the outlines and filled the eyes with a yellow paint pen.
A scrap of red felt, cut into a rough triangle and glued at the back edge, became the Santa hat. A tiny white puffball from the craft drawer finished it.
The brow line and the downturned mouth matter more than perfect circles for eyes.
Get those two elements right and the rest is forgiving. Without them, you have a green circle with a hat.
Pom-pom versions skip the painting entirely: a large green pom-pom body, smaller pom-pom or felt pieces for the face, and a hat made the same way.
Felt over cardboard lets you sew or glue the face layers, which some find easier than freehand drawing. The wood slice hangs flat and reads clearly; pom-poms catch light differently and look softer on the tree.
39. DIY Painted Santa Ornaments
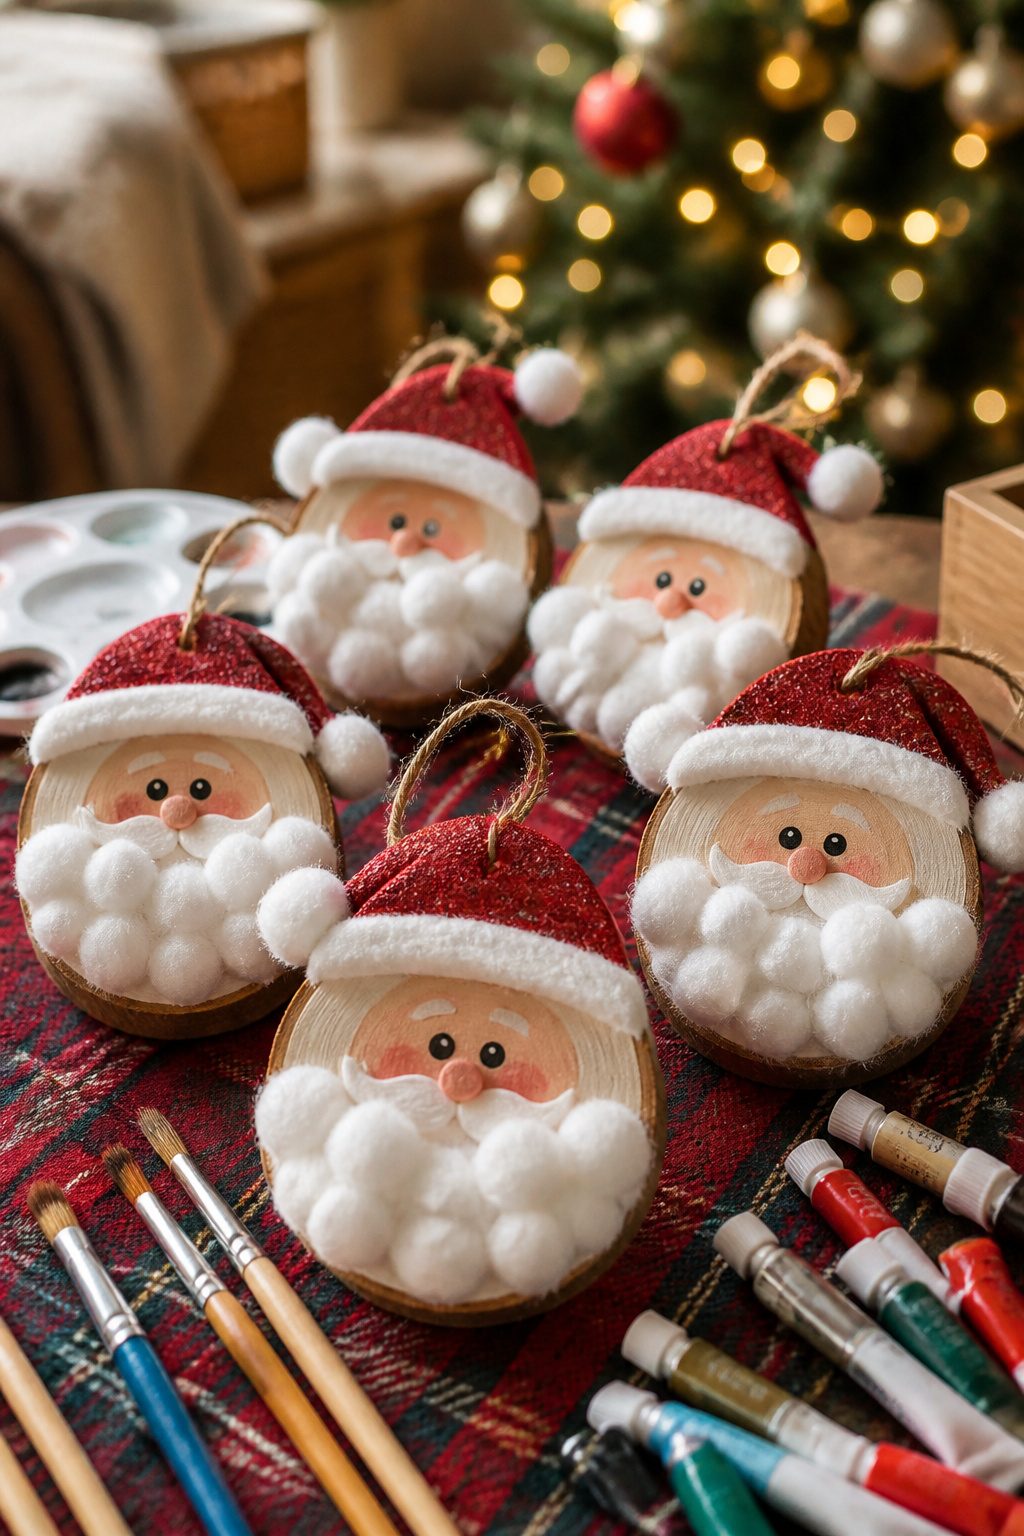
Three-inch wood rounds make the best canvas for a painted Santa face because the grain adds texture under cheap acrylics.
I buy mine unfinished, drill a small hole near the top for twine, and prime with whatever off-white paint is already open in the garage.
Flesh tone goes on next, pushed high on the round so the beard has room below; the mistake is centering the face, which leaves the hat crowding the top edge and the beard looking like an afterthought.
Eyes and nose stay small and sit above the halfway mark. A dot of red for the nose, two blue-gray dots for eyes, and the expression already reads as Santa without any mouth at all.
The beard and hat trim are just cotton balls pulled thin and glued in overlapping rows; hot glue sets fast but leaves strings, so I switched to tacky glue and let the rounds dry overnight on a cooling rack so nothing sticks to the table.
A coat of clear spray sealant keeps the cotton from shedding red fluff onto the tree skirt all December.
40. DIY Cookie Cutter Christmas Ornaments
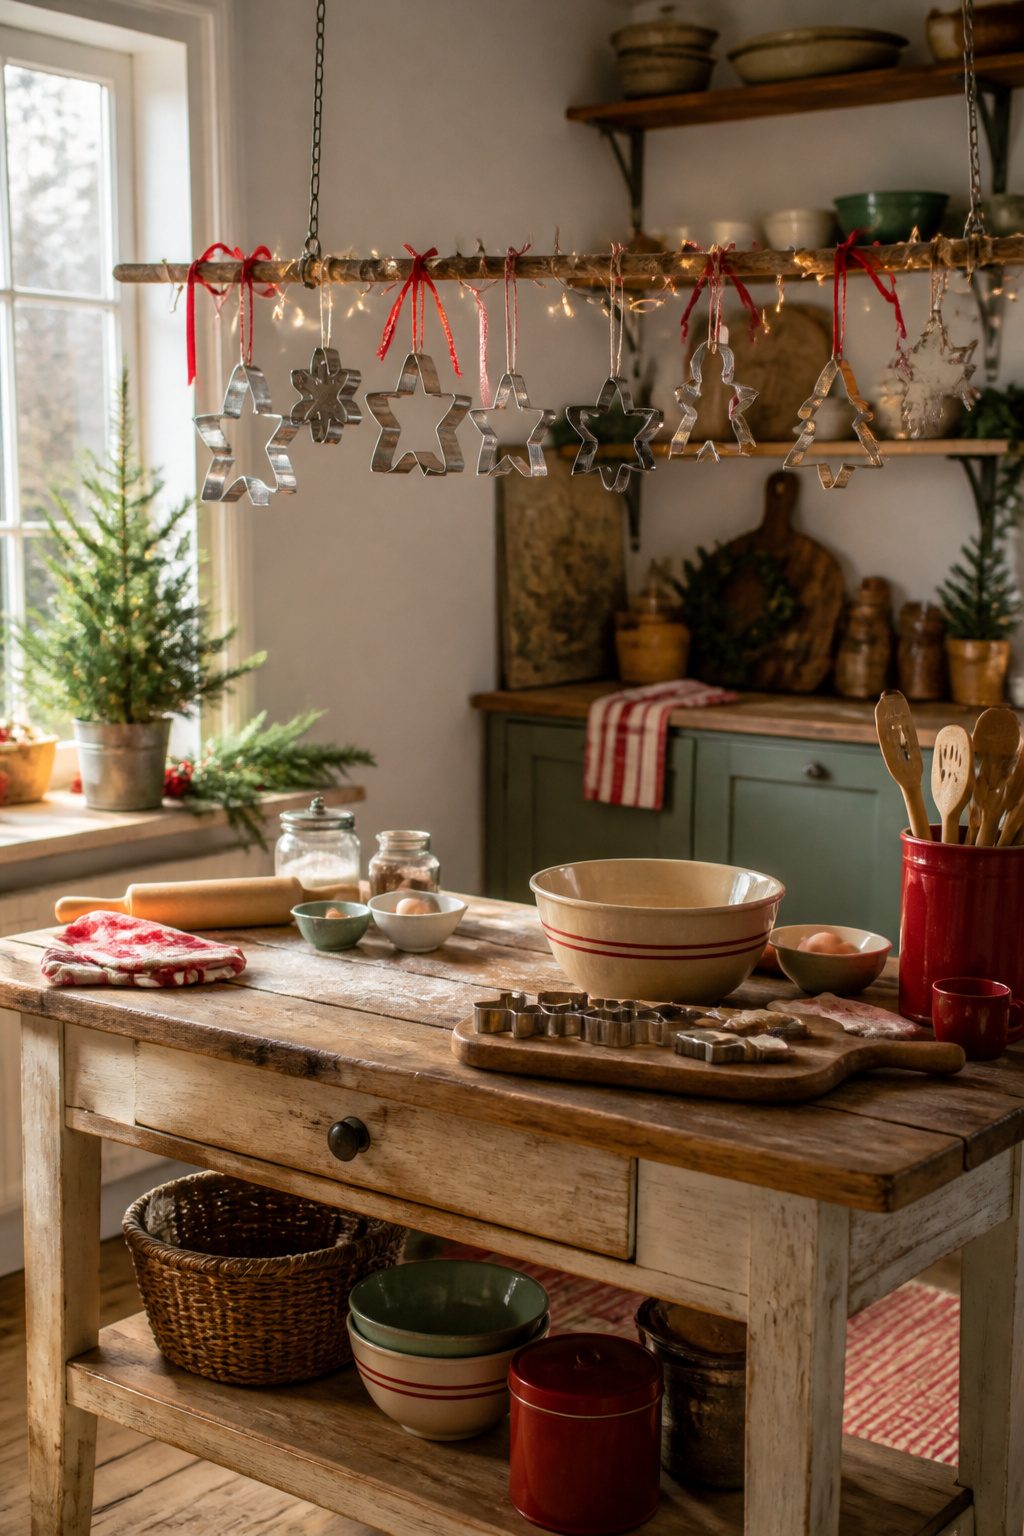
The third route with cookie cutters skips the filling and the wrapping entirely and just hangs the cutter itself.
Metal cutters with a built-in hanging loop at the top make this almost too easy, but a short length of wire threaded through the cutting edge works for the plain ones.
What convinced me, reading through a dozen of these projects, was how much the surface matters.
A shiny new cutter reads as kitchenware that wandered into the wrong season. Vintage tin with thrift-store patina already looks like it belongs on a tree.
I collected mine over two years of casual browsing, never paying more than a dollar or two, and the dulled finish and occasional rust spot are exactly the point.
Ribbon through the loop finishes it, though thin wire or twine keeps the industrial feel if that suits your tree.
Frequently Asked Questions
What are some easy DIY Christmas ornaments for kids?
The article covers several projects children can handle with supervision: craft stick Christmas trees built with hot glue and painted green, paper candle ornaments rolled from cardstock, and Mason jar lid wreath ornaments wrapped in yarn.
The egg carton jingle bell ornaments also work well for kids, since cutting cups and threading string are skills most school-age children already have.
Adult help matters most where hot glue or ovens are involved, as with the melted-bead cookie cutter ornaments.
How do you make homemade Christmas ornaments?
Most projects in the article follow a simple pattern: choose a base form, add surface material, and attach a hanger.
Mini wreath ornaments start with floral wire twisted into a 2–3 inch ring, glued with greenery. Yarn ball ornaments wrap Styrofoam spheres in color bands, with the final end tucked under previous wraps while the glue stays warm.
For the half-eaten gingerbread cookie gag, press a cutter halfway through salt dough, carve the bite with a butter knife, and paint the raw edge cream before the baked brown.
What materials do I need for DIY ornaments?
The projects run on craft basics: hot glue and a glue gun, acrylic paint, twine or yarn, and floral wire.
Cardboard from cereal boxes or shipping boxes serves for loom stars and letter forms. Household extras like Mason jar screw bands, egg cartons, clothespins, and dried orange slices become the structures themselves.
A few specialty items help: kite paper for Waldorf stars, metallic mini cupcake liners for paper candles, and small wood pieces or felt for gnome details.