
DIY fall lantern decor is the practice of filling and arranging lanterns with seasonal materials for autumn displays, but the approach changes completely depending on whether the lantern sits indoors or on a porch that sees wind and rain. A battery-operated candle with a dusk-to-dawn timer runs about 600 hours on one set of alkalines, roughly $3–$4 per lantern for the full season, while real votives drown in their own wax after the first storm. The article covers builds from dollar-store twine-and-leaf wraps up to iron porch lanterns that weigh eight pounds empty and need a beeswax coat to survive coastal air.
Outdoor Tablescape Lanterns with Pumpkins and Gourds
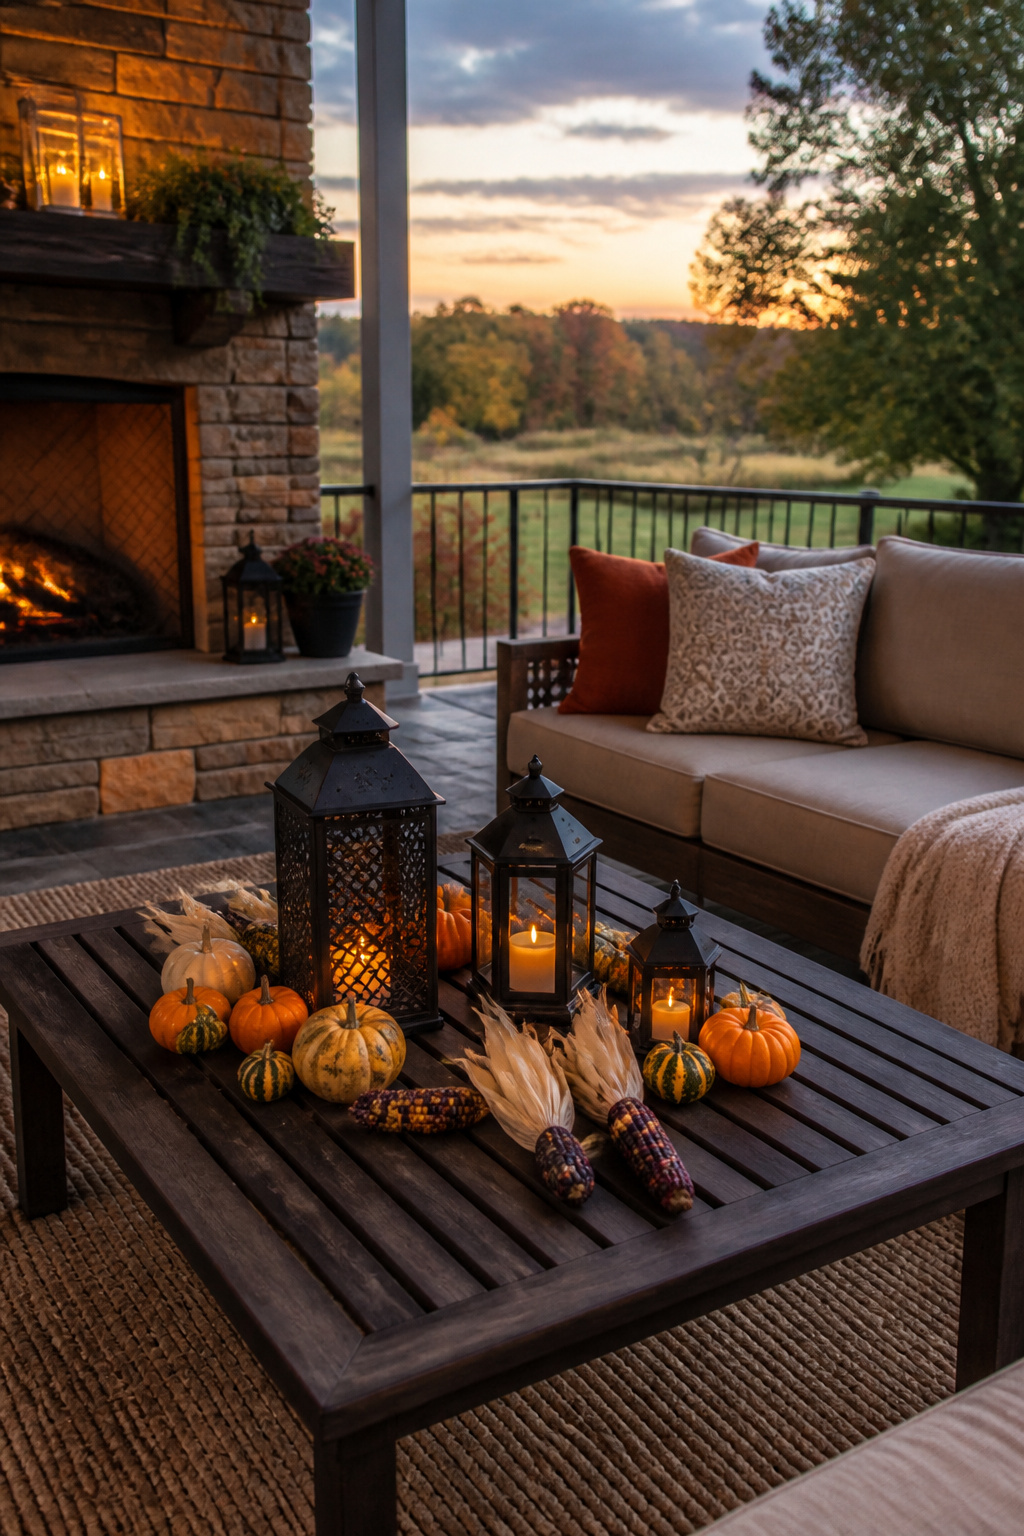
Battery-operated candles are the safer choice for outdoor lantern displays, and they hold up better than you’d expect through autumn evenings. I set mine out at dusk and let them run for hours without tending a flame or swapping in fresh candles. The wind that blows out real votives every ten minutes barely registers on a flameless tealight.
For an outdoor tablescape, lanterns work best when you vary the heights and mix real gourds with faux ones. A tall lantern flanked by smaller ones keeps the eye moving across the table rather than flattening everything to one plane. Real mini pumpkins and gourds bring in texture and that rich autumn color, but they soften and rot faster outdoors than most people plan for. Faux gourds fill the gaps and keep the arrangement looking intact through a whole season of entertaining.
The cohesion matters more than matching everything exactly. If you have multiple lantern sizes, keep the fillers similar, like tucking Indian corn toward the back of each one and layering small pumpkins in front. That repetition ties the whole table together without making it look staged.
Fall Porch Decor with Pillows and Lanterns
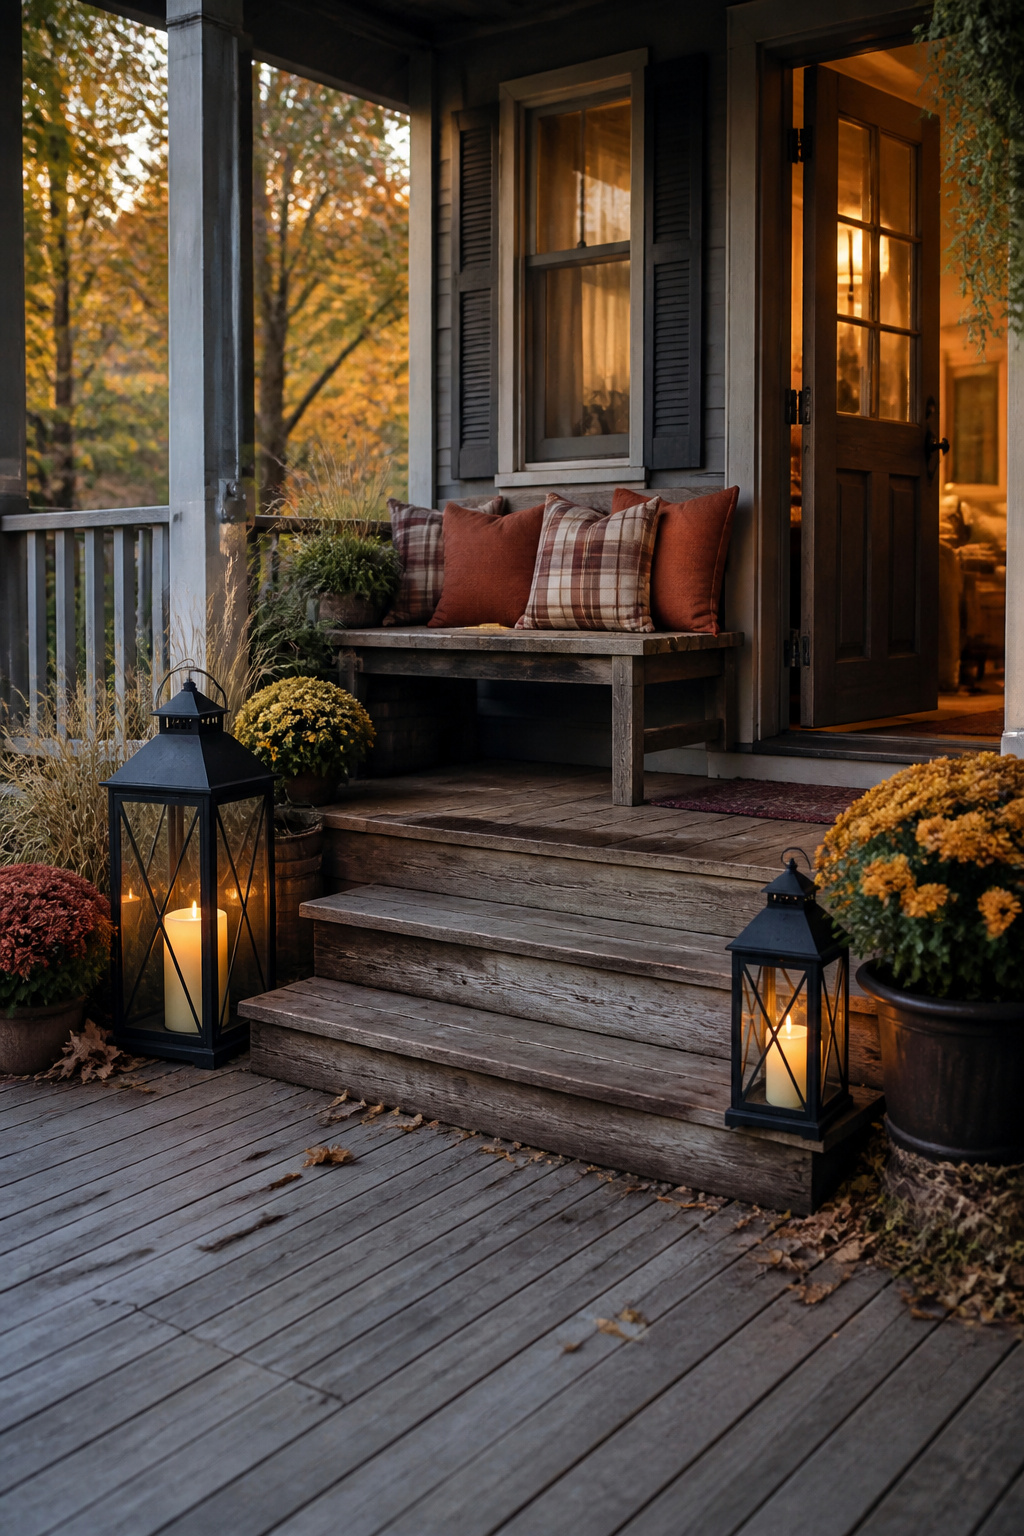
Flanking a door with matching lanterns and a stack of weather-resistant pillows gives a porch symmetry that reads as intentional even when the rest of the setup is thrifted. Two iron lanterns in different sizes, set on either side of a step or bench, carry enough weight to anchor the space without looking staged. The pillows do the soft work: a plaid throw or a couple of rust-colored covers layered against the railing make the lantern light feel like an invitation rather than a display.
Weather resistance matters more than looks on a porch that sees actual rain. Metal lanterns hold up; paper and thin wood do not. After one October storm soaked a real candle arrangement I had left out, the wax pooled, the wick drowned, and the whole thing turned into a cleanup job instead of ambience. LED candles or battery-operated lights are the safer call for any outdoor lantern you are not willing to haul inside every evening. The glow is close enough, and the lanterns can stay put through weather that would ruin anything with a real flame.
Rustic Fall Porch with Battery-Operated Candle
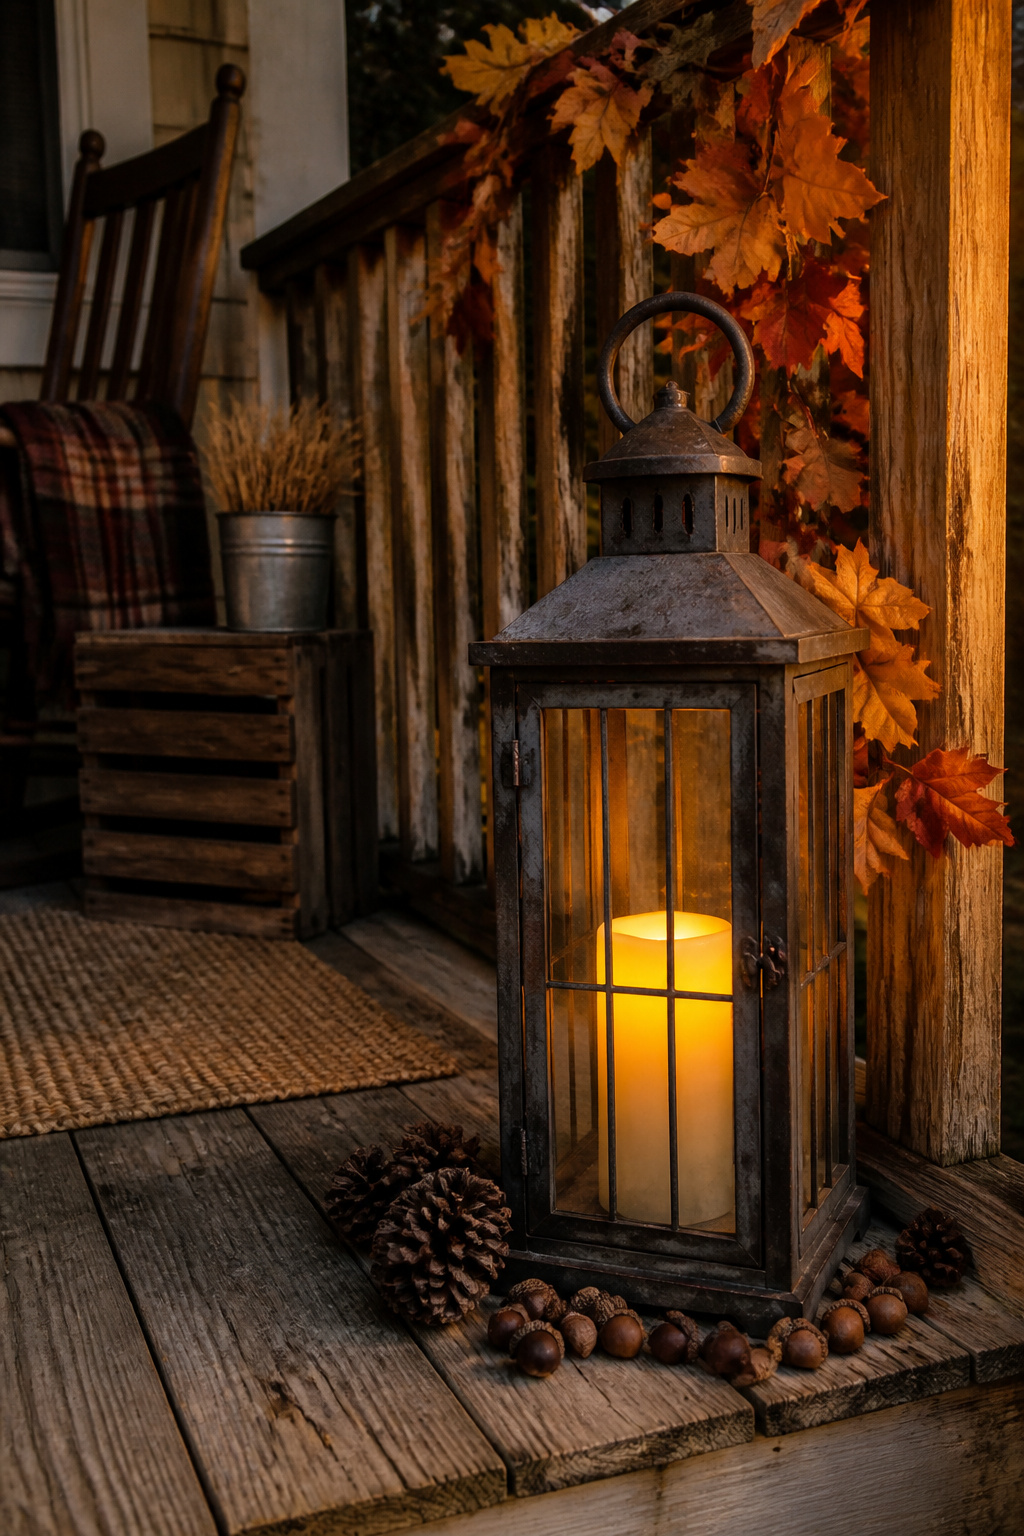
A real candle on a porch lasts about as long as my patience for relighting it. After three seasons of chasing flames across my step every time the wind picked up, I switched to battery-operated pillars and never went back.
A timer is the detail that makes it work. I set mine for dusk-to-dawn hours and forget them until Thanksgiving. The ones that actually last a full season on one set of batteries tend to come from Luminara or Enkore, though any LED pillar with a wax exterior and a remote timer will do the same job. The wax shell matters more than you’d think; from the street, it reads as real flame, and up close it catches the lantern glass the same way.
For a rustic porch display, I use a single large lantern with one pillar inside, nothing else crowded in. The lantern does the visual weight; the candle does the living warmth. Pine cones or a few acorns scattered at the base finish it without stealing the light.
Dollar Store Fall Lantern
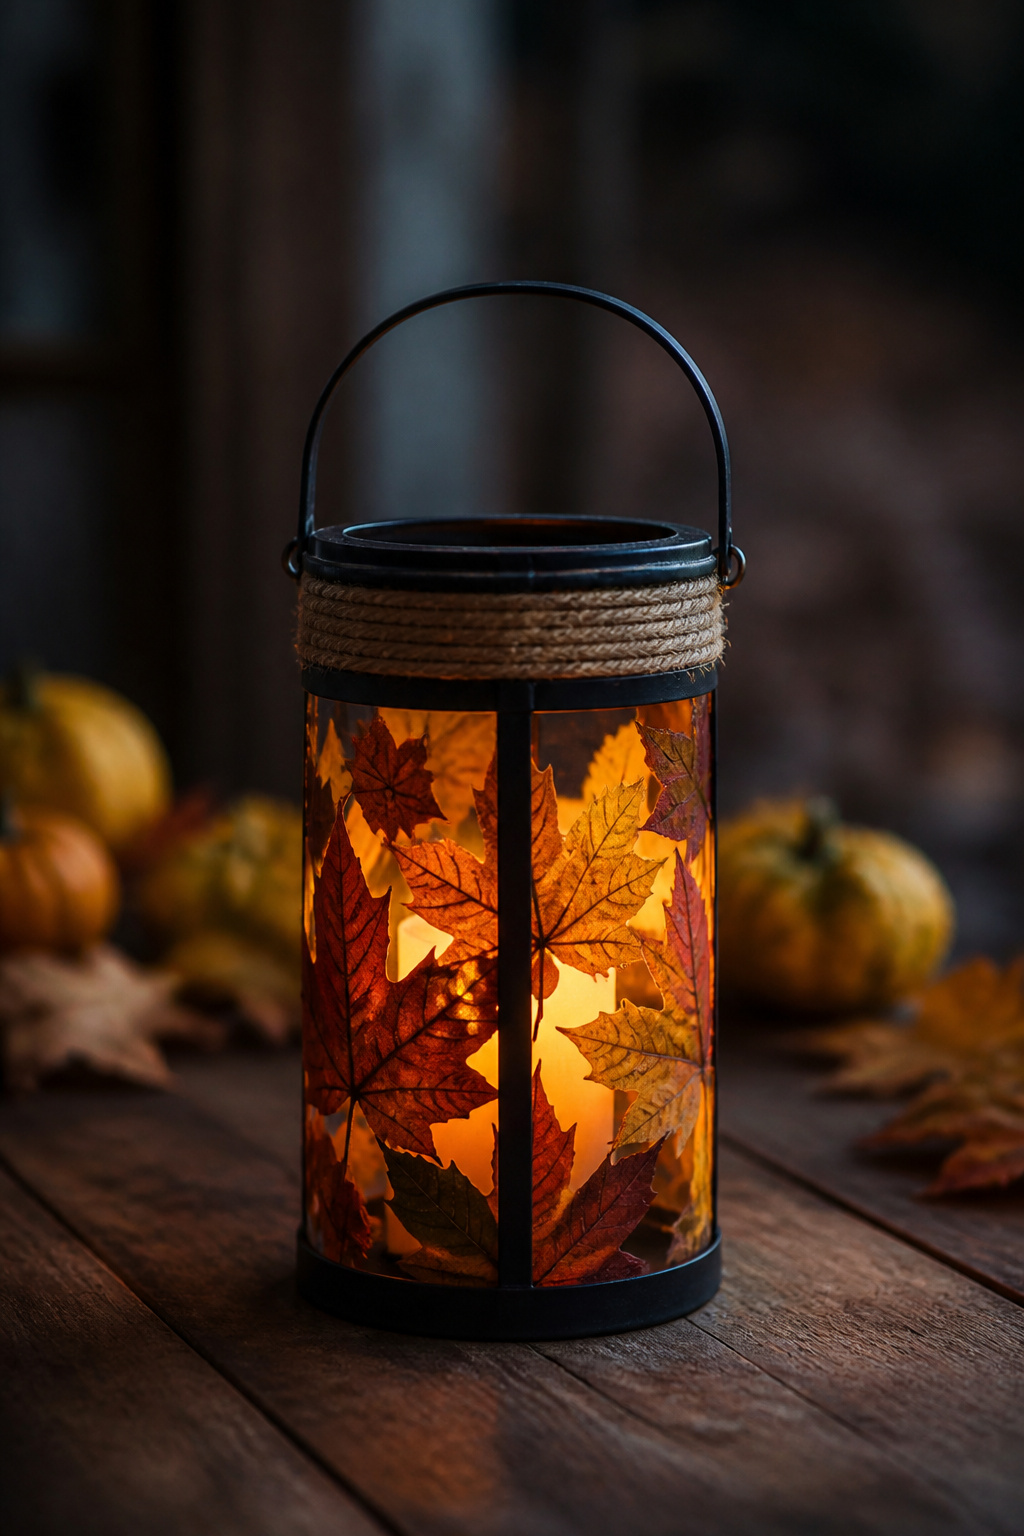
Three dollar stores in one October afternoon turned up the same rough mix: plastic maple leaves on wire stems, burlap ribbon with glued edges that frayed the second you cut them, and cinnamon-scented pine cones that smelled like a car air freshener left in the sun. I spent $7 total, mostly on the leaves and a spool of twine that actually held up.
The burlap ribbon was the first failure. The glue backing turned gummy in the humidity of my covered porch, and the whole strip slid down the lantern glass within a week. I replaced it with the twine, wrapping the top rim in three tight rows and tying the leaves directly to that. The wire stems poked through easily, no extra adhesive needed.
The plastic leaves surprised me. A year later they still keep their color on the mantel, though the ones I hung outside faded to a dull rust by Thanksgiving. The cinnamon pine cones went straight in the trash; the scent gave me headaches and the cones themselves were hollow plastic shells.
The lantern itself was already mine, a black metal frame from a garage sale two summers back. If you’re starting from zero, any basic frame from a thrift store works the same. The dollar store finds don’t need a perfect base, just something with bars or a rim to anchor the twine. The twine wrap at the top rim is what holds everything together; skip it and you’ll be picking leaves off your floor by Wednesday.
I still use this one indoors, rotated away from the window so the leaves keep that fake-but-convincing orange a little longer.
Fall Tablescape Details
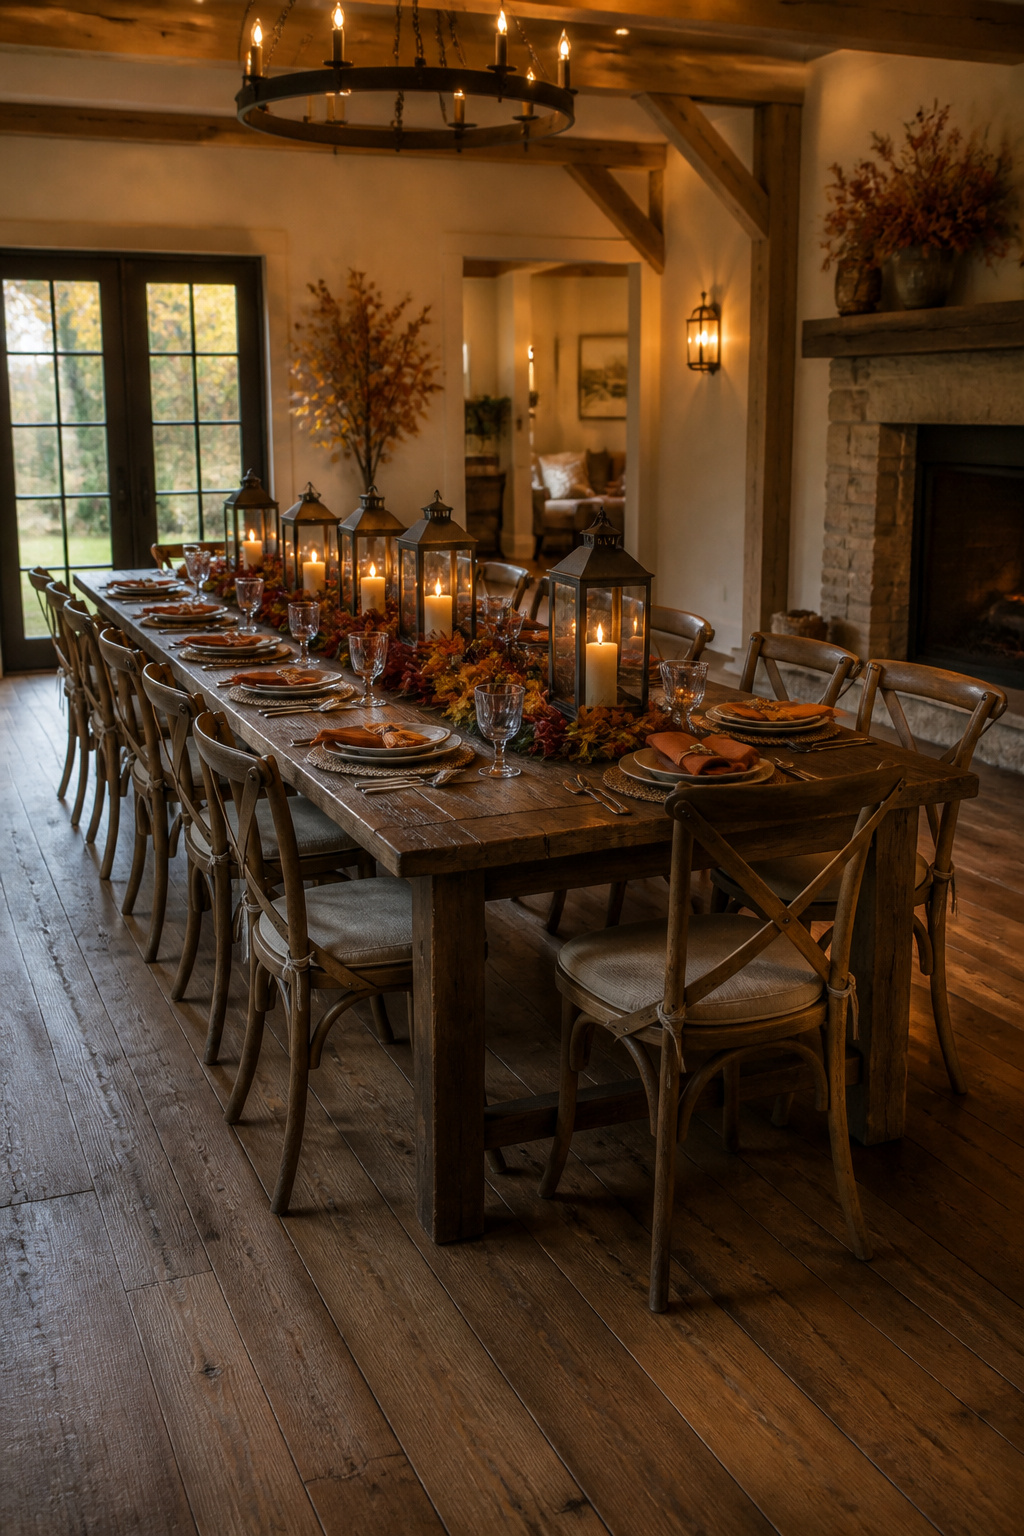
Lanterns down the center of a long table give everyone their own pool of light, but the height is where I misjudged it. A lantern that clears the dinner plate by more than twelve inches turns into a wall the person across from you disappears behind. The first time I tried this, the tapers inside brass lanterns I’d found at a yard sale looked beautiful from the doorway and ruined conversation for anyone seated. Now I keep the total height under ten inches, or I set taller lanterns at the ends where no one sits opposite.
Pairing them with slender tapers, not pillars, keeps the glow low and flickering. The sources that get this right use battery-operated candles or real flame in glass hurricanes, but the move that matters is spacing: one lantern every two place settings so the light staggers rather than marches. A long basket of faux leaves and berry garlands can bridge the gaps if the table runs longer than your lantern collection, though I prefer the simpler route of clustering three at the center and leaving the rest of the length to plates and the actual meal.
Console Table Pumpkins
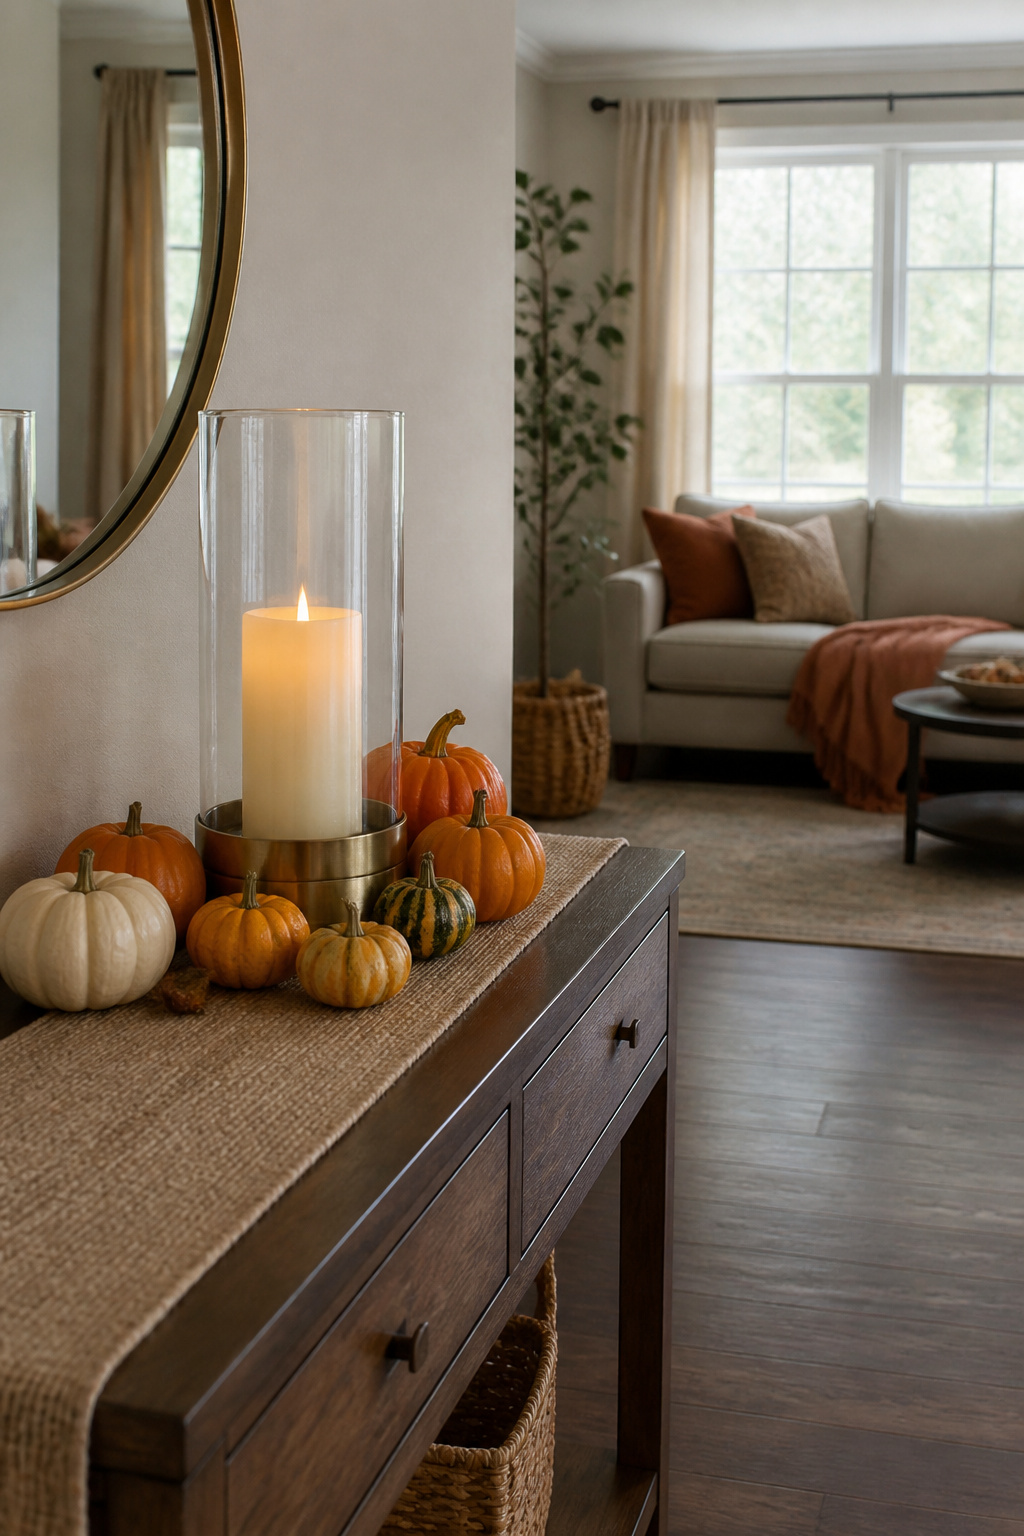
A console table leaves you almost no room to work with, so the lantern has to earn its keep without shoving everything else off the edge. Mini pumpkins or small gourds sit lower than the candle flame and keep the glass clear enough to actually cast light. My first try packed the base too full, and the pumpkins rose high enough to block the glow completely. The lantern turned into a shadow box instead of a light source, which defeats the whole point on a surface where you already need every bit of warmth you can get. Leave at least two inches of open glass above the flame line so the light frames the pumpkins rather than hiding behind them. For narrow tables, one lantern and two or three mini gourds is plenty; anything more reads as clutter in a hallway you walk through every day.
Dining Table Centerpiece with Faux Leaves and Berry Garlands
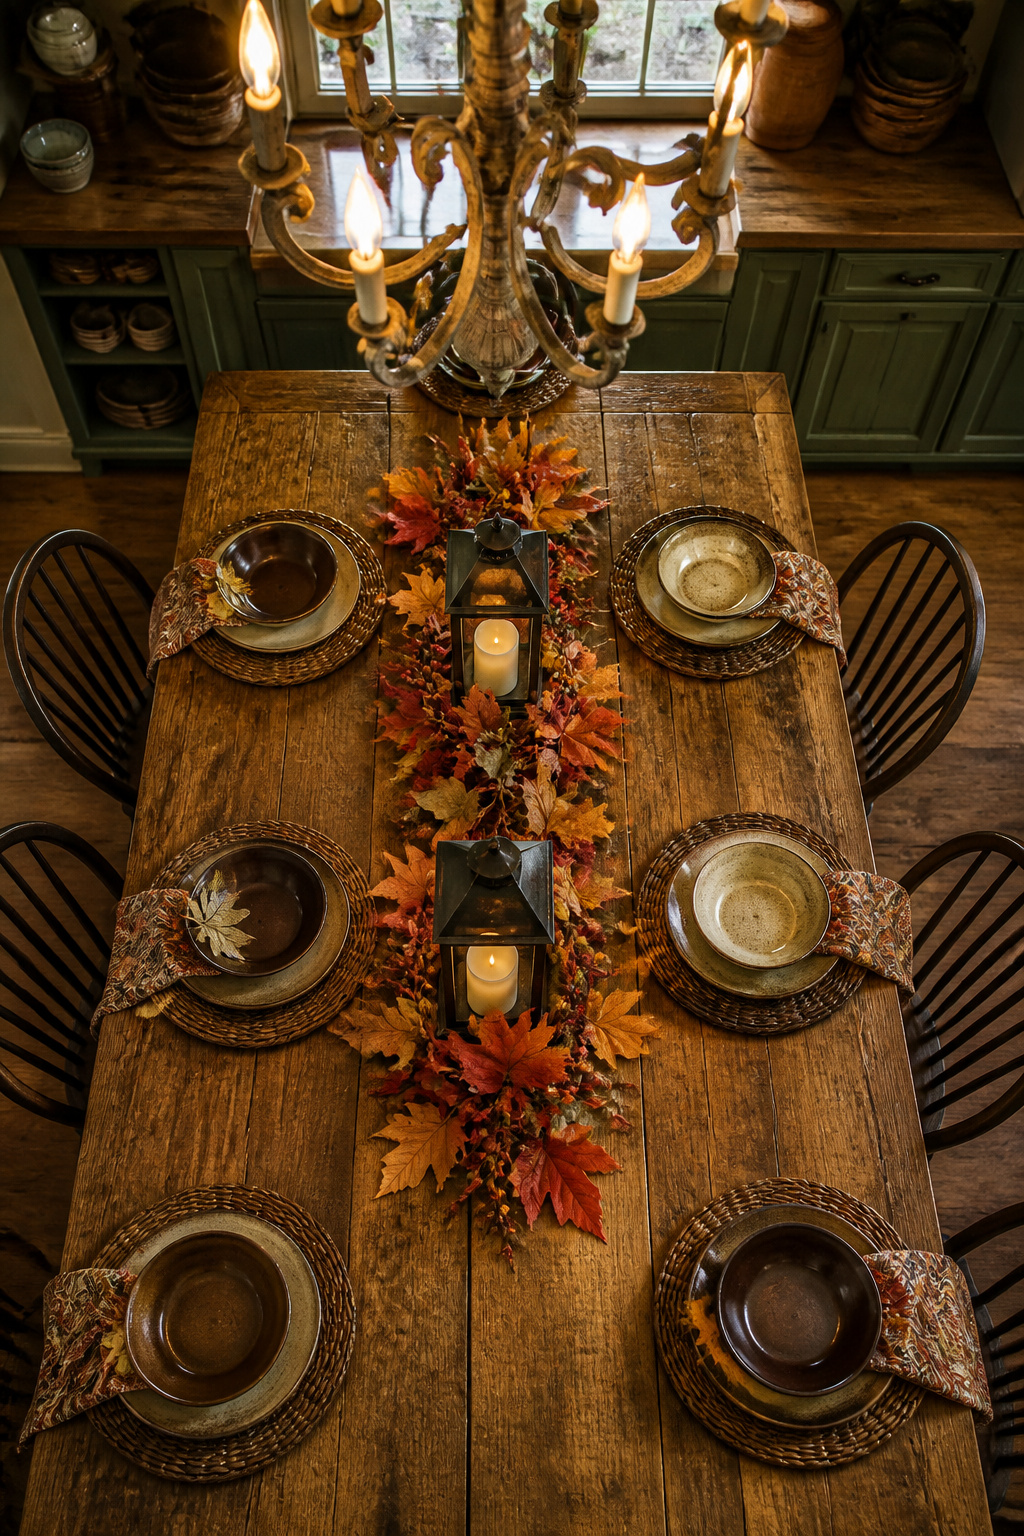
Faux berry garlands wrap around lantern bases easier than real ones, but the wire inside cheap versions will poke through the foam berries by Thanksgiving. I learned that the hard way after one season of red crumbs scattered across the tablecloth every time someone reached for the gravy.
The fix was switching to garlands with wrapped wire and molded plastic berries, which cost about three dollars more per strand but hold their shape through setup and teardown. I thread the wire between the lantern base and the glass, not over the top, so the greenery reads as growing from the bottom rather than sitting on it.
Leaf strands layer best when you alternate directions: one clockwise, the next counter, so the stems interlock and the whole thing stays put without tape or glue. Two garlands and one leaf strand fill the space between a pair of twelve-inch lanterns without looking crowded. Three starts to look like a hedge.
Higher-end faux foliage has a coating that catches light the way real leaves do after they dry. The cheap stuff goes flat and dusty under a chandelier. After replacing everything, the centerpiece now stores in a shoebox and comes out intact the next October.
Fall Mason Jar Lanterns with Fairy Lights
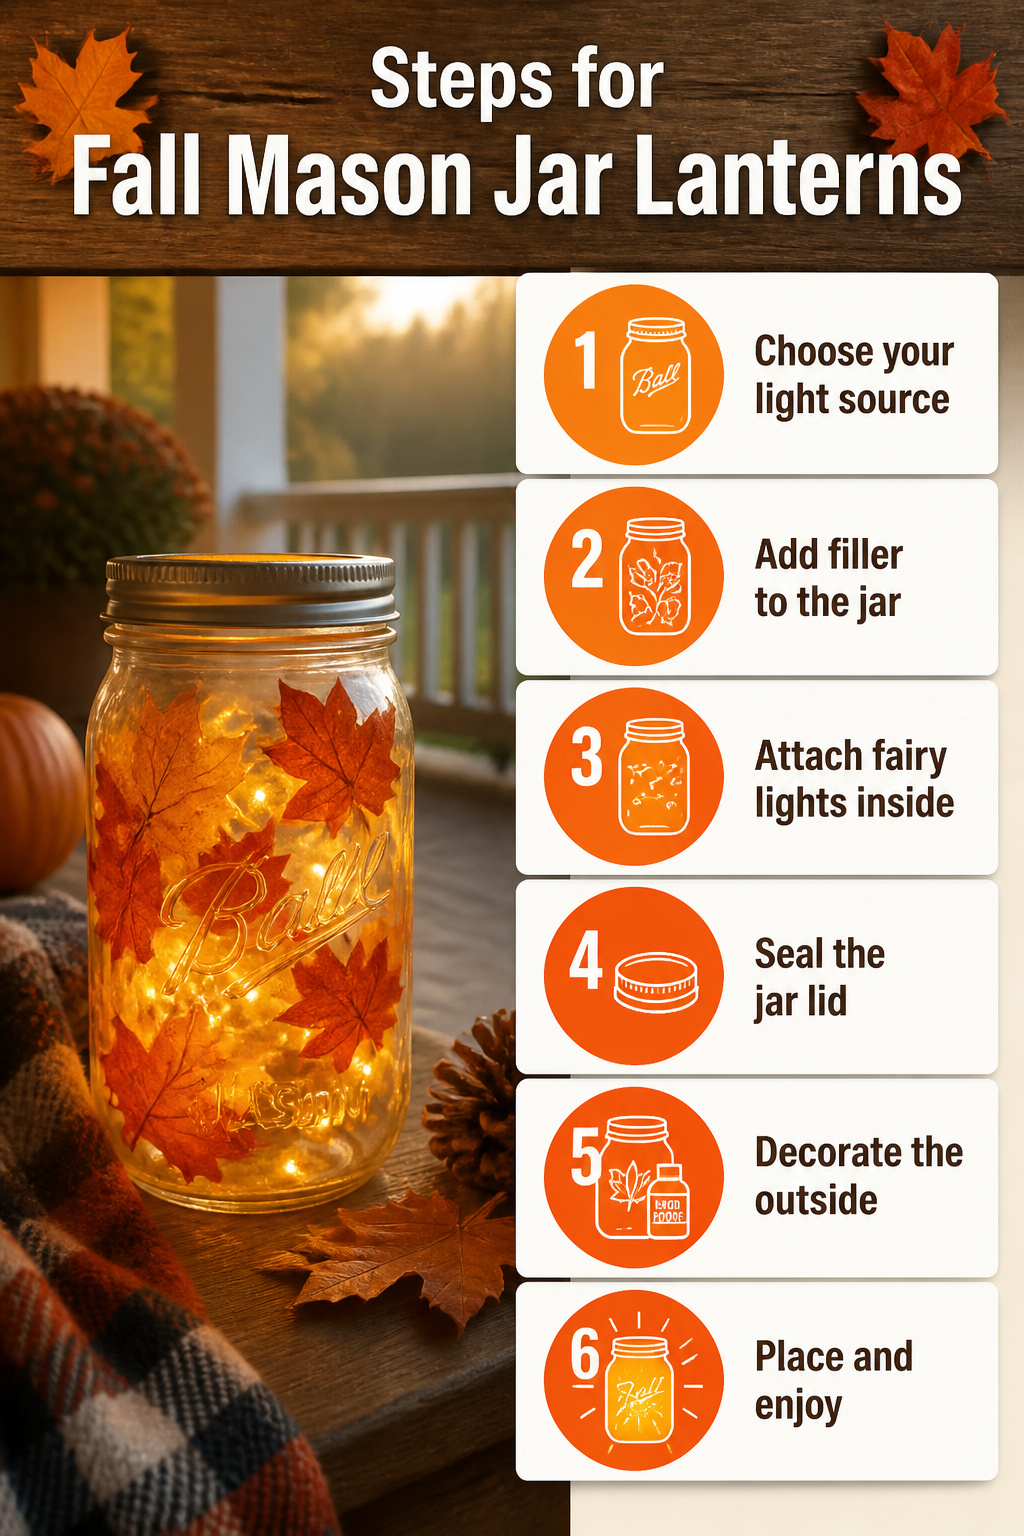
Mason jars and fairy lights are about as simple as fall lantern decor gets, but the light source you pick changes the whole build. I learned this after ruining a jar one October evening.
Copper wire fairy lights are the easier route. The battery pack hides inside the jar, and the thin wire wraps around whatever filler you add. No hole needed, which means no glass under drill pressure.
Battery puck lights sit flatter and throw more even light, but they need airflow or the jar fogs. Some makers drill a vent hole in the lid for this. A 1/4-inch bit works if you go slow, which I did not.
The jar that cracked was a standard Ball quart. Garage sat at maybe fifty degrees, I rushed the drill, and the thermal shock split the glass clean across the base. Warm the jar indoors first, use a diamond bit at low speed, or skip the hole entirely and stay with wire lights that need nothing but the lid off.
Mod Podge and artificial leaves on the outside turn the plain glass into something seasonal without blocking the glow. The jar sits on a mantel, a porch rail, anywhere the cord won’t show.
Autumn Rustic Lantern Centerpiece with Dried Flowers
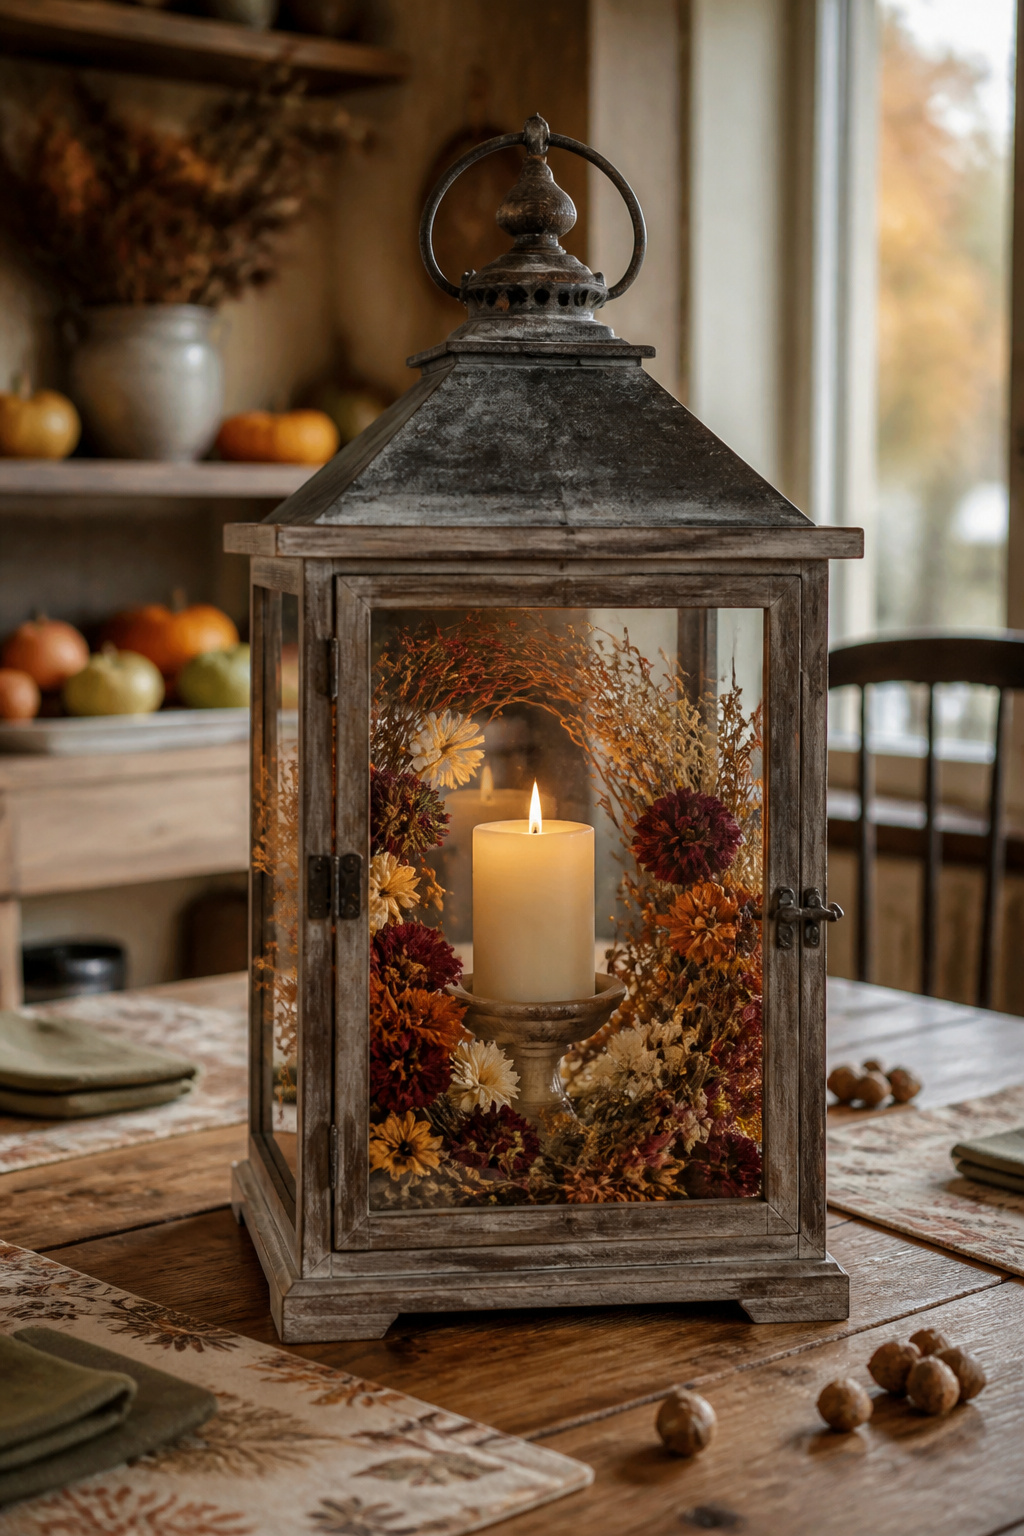
Dried flowers that keep their color through October are harder to find than you’d expect. Strawflower, statice, and globe amaranth hold rust and burgundy tones without going dusty, while dried lavender fades to gray within a season and sheds tiny seeds through any gap in the lantern frame. I learned that the hard way at a dinner party last year; by dessert the tablecloth looked like someone had ground pepper across it.
The trick to arranging stems without killing the glow is to build a ring, not a bouquet. Tuck the tallest pieces against the glass walls so the center stays open for light to travel upward. Wire the stems to the frame with floral tape if the lantern has bars, or lean them against the sides and fill the middle with a single pillar candle on a raised dish. The candle sits below the flower heads, so nothing scorches and nothing blocks the flame from view.
For a table that actually gets used, keep the stems short enough that guests can see across. A lantern stuffed to the brim reads romantic in photos and impractical when you’re trying to pass the potatoes.
Weathered Wood and Faux Pumpkin Lantern
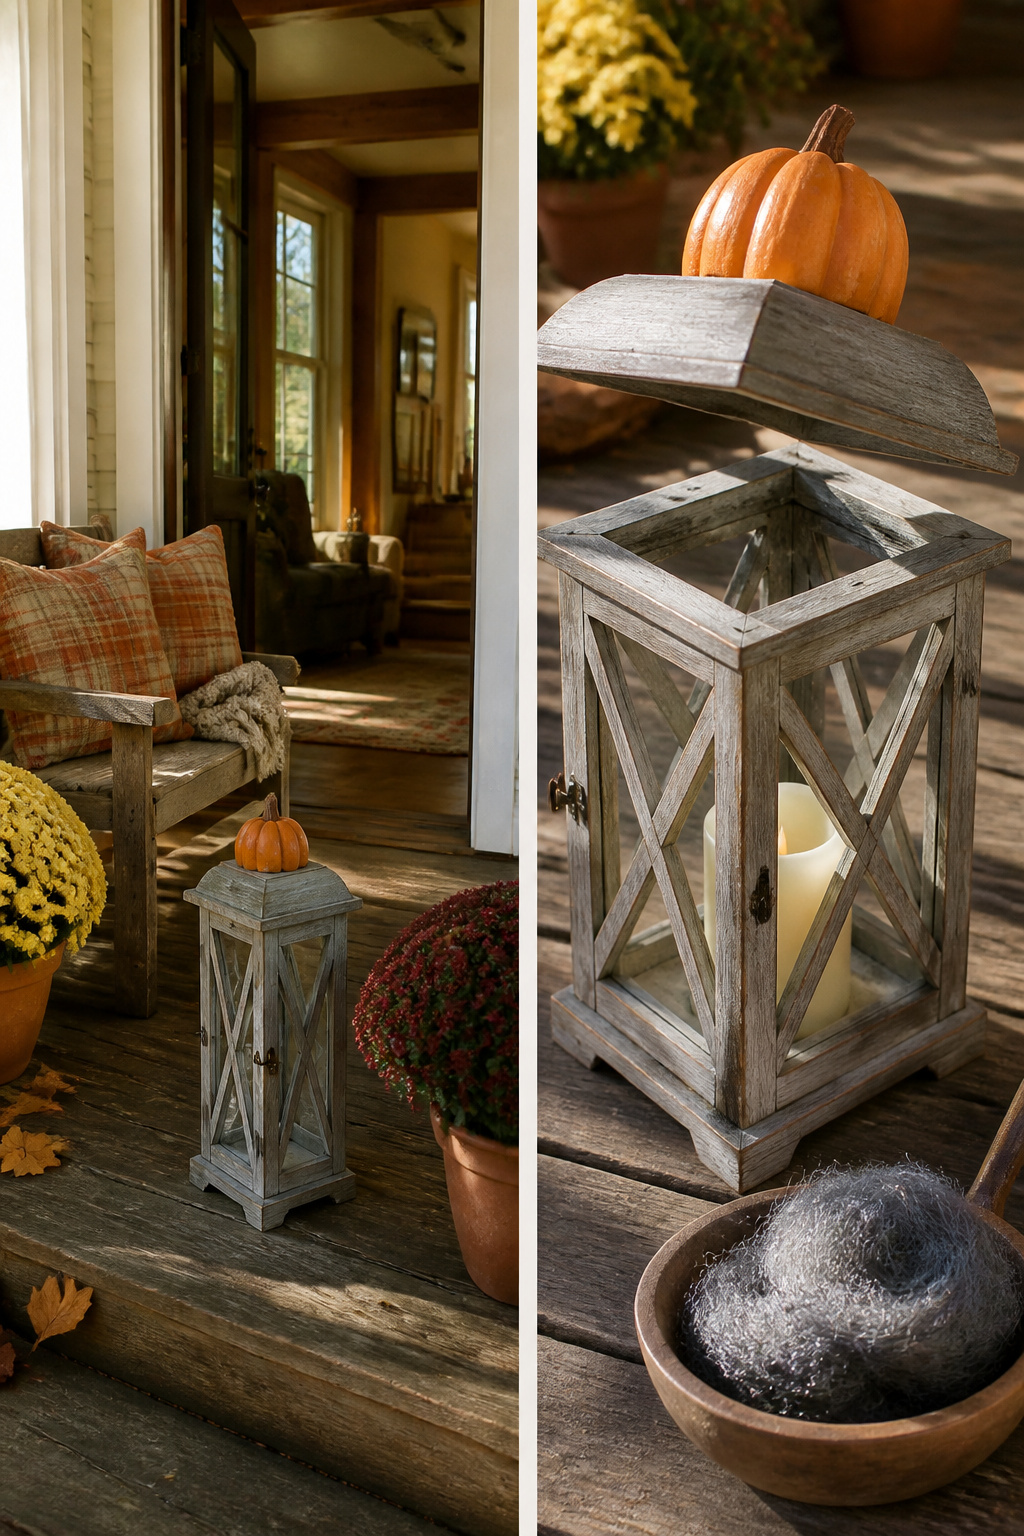
Distressing wood with vinegar and steel wool is the cheapest weathered finish I have found. I keep a jar of the solution under the sink: let steel wool sit in white vinegar for a day or two until it turns dark, brush it on bare wood, and the surface grays within hours as it reacts with the tannins. For a lantern, this beats buying reclaimed lumber at boutique prices.
Mini faux pumpkins from the craft store glue on easily with hot glue once the wood is dry. I learned the hard way that foam pumpkins melt in direct sun. The first lantern I made sat on a windowsill that caught afternoon light, and within two weeks the pumpkins had dimpled and warped where the glue heated up. Switching to plastic or resin pumpkins solved it; they cost about a dollar more per piece but hold their shape through a full season.
Welcoming Fall Porch with Iron Lanterns
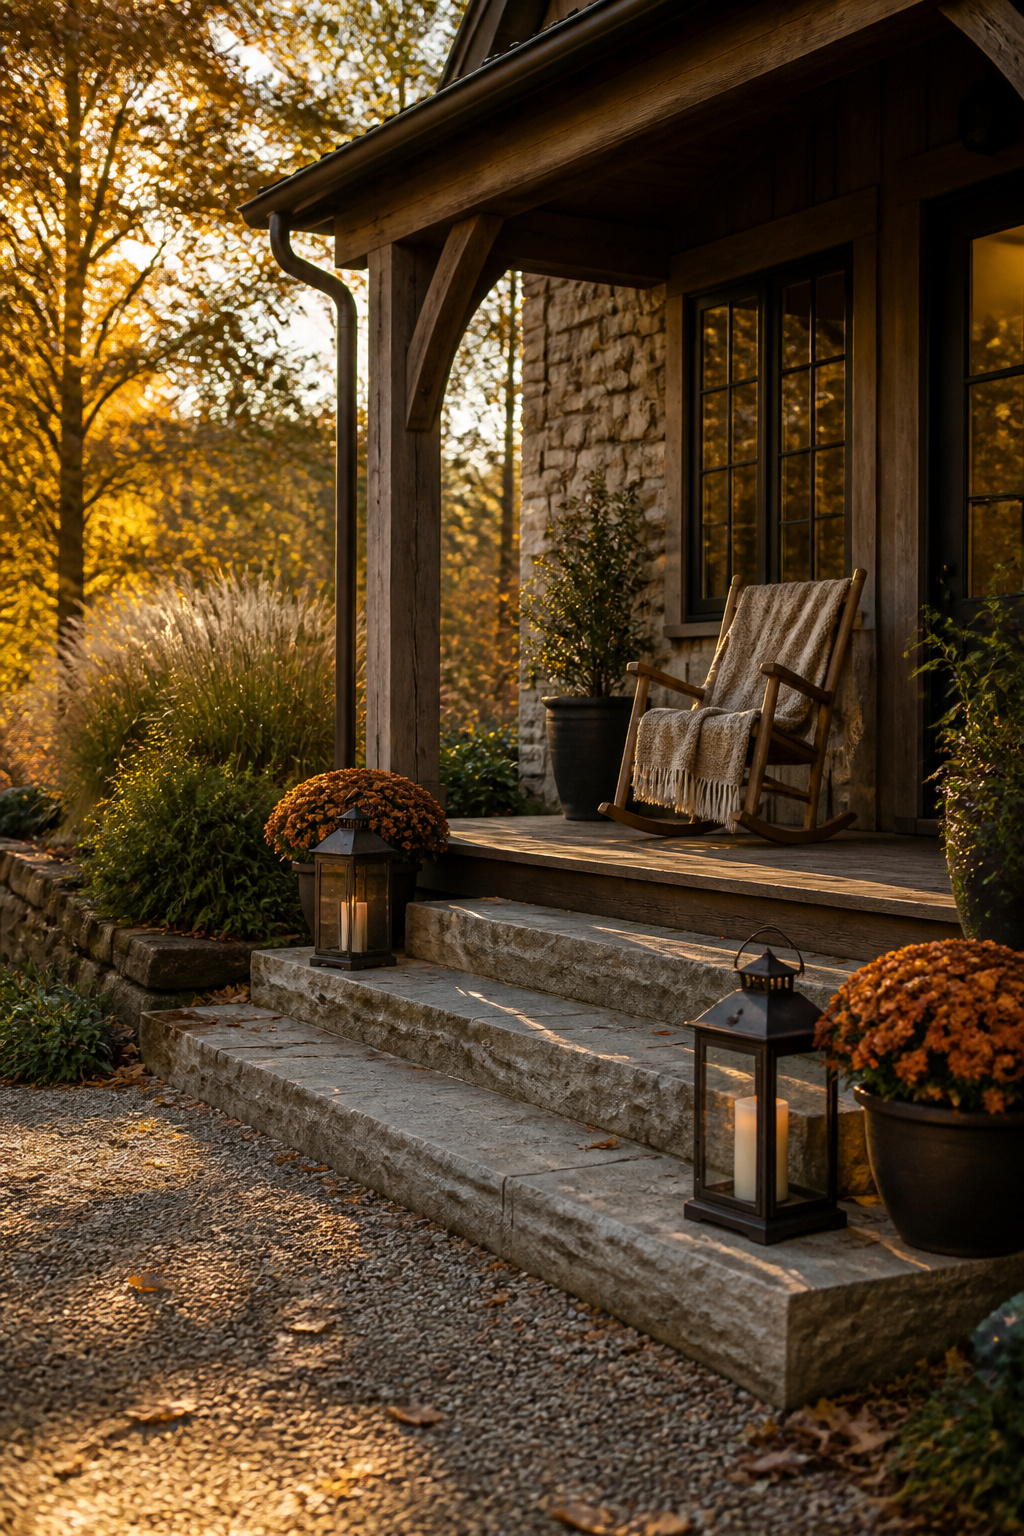
Iron lanterns look right on a fall porch because they already carry the weight of the season in their casting. The mass is the first thing you notice when you lift one. A 14-inch lantern can run eight pounds empty, which matters more than you’d think when autumn winds pick up. Set them on a step rather than a railing unless you want to chase them down the sidewalk.
The finish needs attention if you are anywhere near salt air. A light coat of beeswax, rubbed in with a cloth and buffed when it hazes, slows the rust that wants to bloom under the powder coat. I learned that after one coastal fall when a cheap lantern I assumed was properly sealed rusted through at the seams in a single season. The coat had looked solid, but moisture found the thin spots where the hanger met the frame.
Better iron holds up for years with that simple waxing. The patina deepens to something warmer than rust, more brown than orange, and the lantern keeps its shape through winters far harder than the fall you bought it for.
Rustic Lantern with LED Candle and Burlap Bow
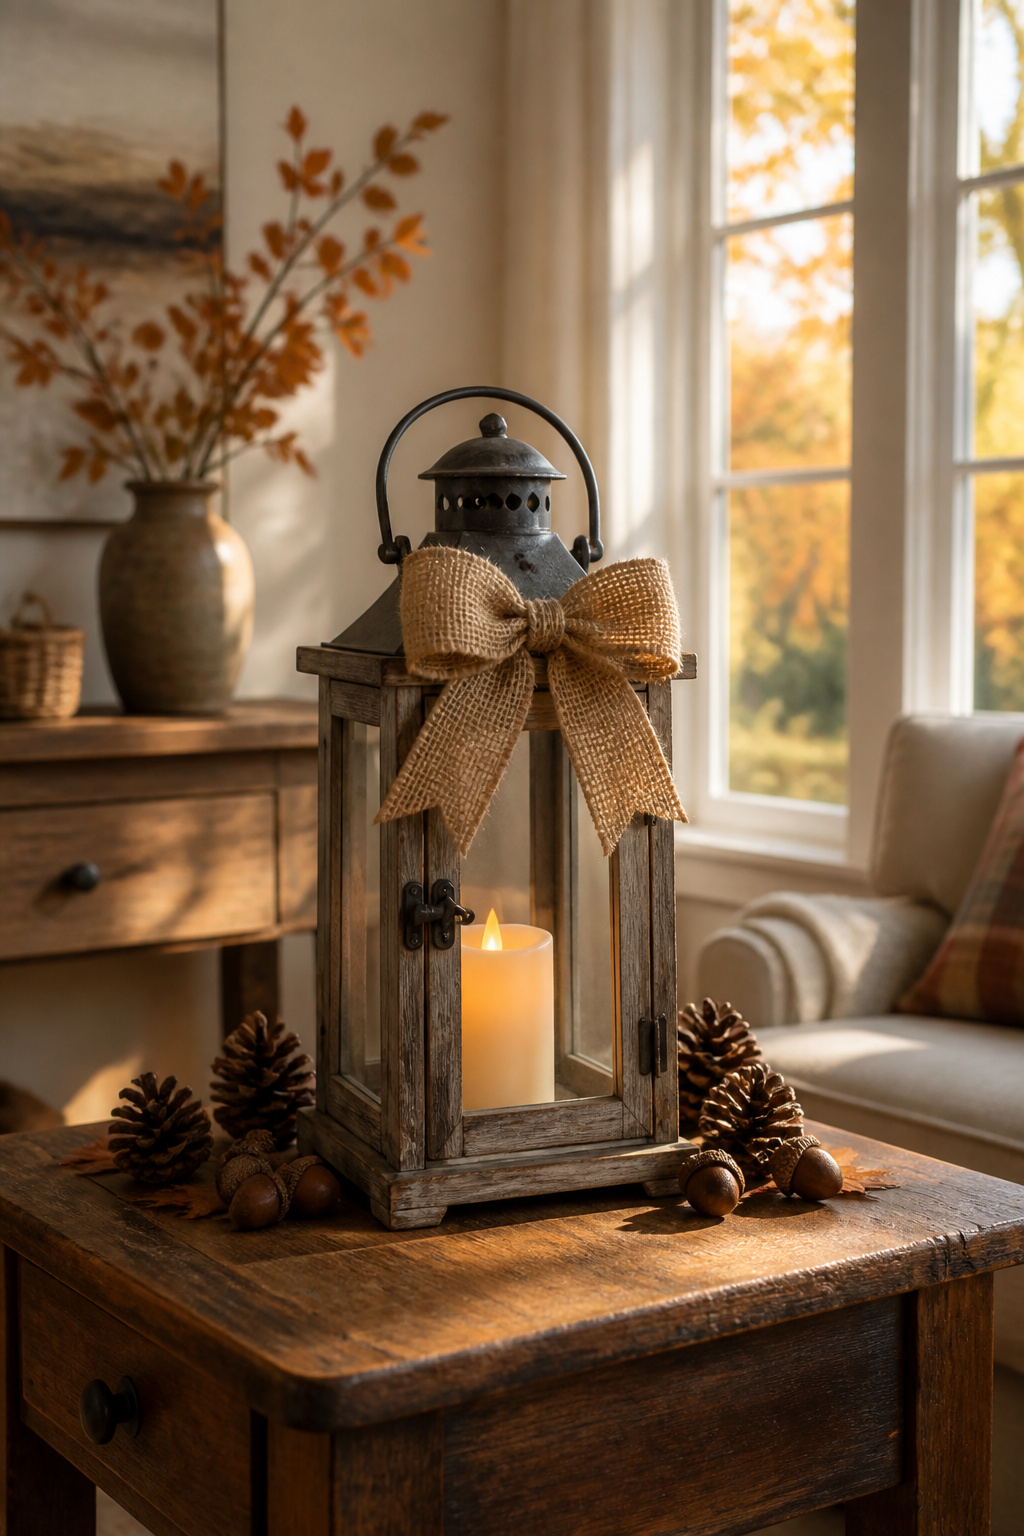
A burlap bow on a rustic lantern reads as farmhouse, not craft-store, when the loops stay smaller than the lantern’s roof overhang. Four loops, two per side, give enough fullness without blocking the handle or looking like a gift topper. I hand-tie my own, starting with half the tail length, forming the loops, then finishing with the other tail and cinching the center with floral wire. Wired ribbon holds the shape through wind on a porch; unwired slumps within a week and needs retying.
The burlap I used, from Hobby Lobby, frayed past charm into unwrappable strings the first time I cut it. Clear nail polish on the cut edges solved it. Brush it on thin, let it dry, then tie. Inside the lantern, an LED candle is the safer call for anything left unattended, especially with burlap and faux leaves gathered at the top.
Miniature Lantern Jack-O-Lantern
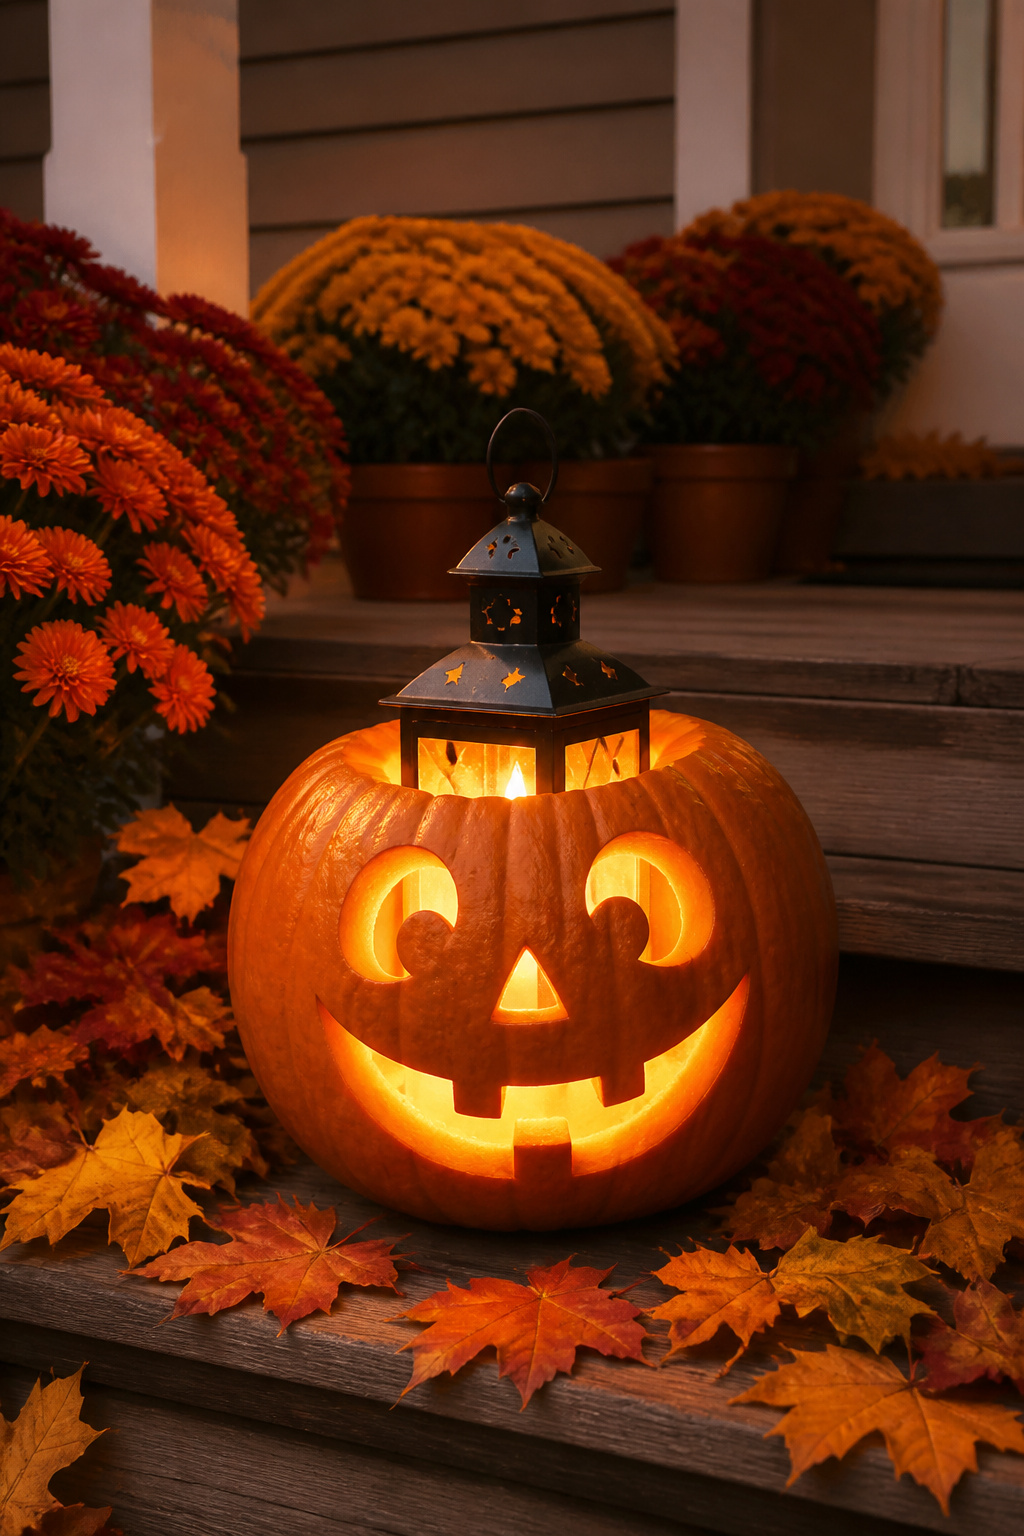
A miniature lantern tucked inside a jack-o-lantern solves the wind problem that blows out tea lights on porches, but the fit takes planning. Carve your opening at least an inch wider on all sides than the lantern base so light escapes around the edges rather than pooling in one bright spot. The pumpkin walls are thick enough that an extra half inch of flesh left around the carved face still glows.
Heat matters more than most people expect. A real candle inside the lantern heats the metal frame, and that frame sits against raw pumpkin. After about twenty minutes the flesh softens where it touches. A battery-operated votive removes the risk entirely and lasts the full evening.
The lantern I used had a wire handle that sat too low to clear the pumpkin lid. I bent the handle upward at a shallow angle with pliers so the curve hooked over a notch cut in the lid rim. The lid sits canted open an inch, which also vents any warmth and throws a sharper shadow from the cut face.
Fall Leaf Upcycled Jar Lanterns
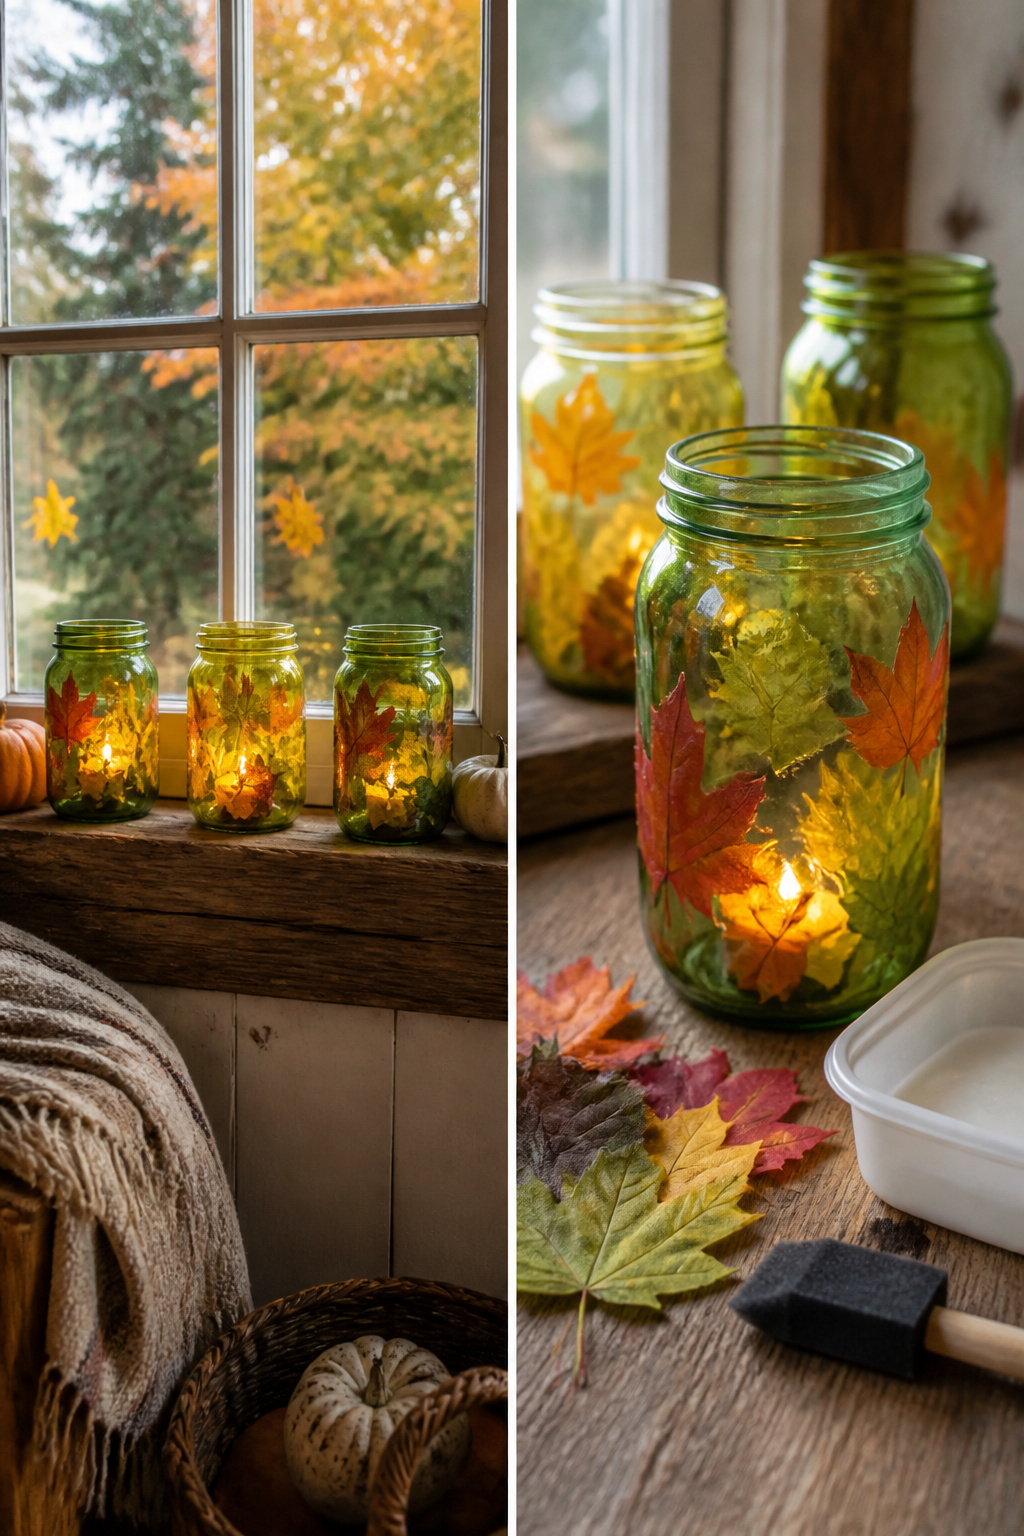
- The label residue is the step that slows you down, so start there. A 15-minute soak in warm water with dish soap takes most paper labels off glass, but the adhesive film underneath needs a scrub with baking soda paste or a swipe of cooking oil to go fully clear. Skip that work and Mod Podge dries cloudy where glue meets grease.
- Leaf placement decides whether you get a stained-glass glow or a mottled shadow. A single layer of artificial leaves, stems snipped flat, lets the most light through. Overlap them and the jar goes dim; space them an inch apart and the flame flickers through the gaps in a pattern that actually moves.
- The jars I collected from neighbors turned out to be three different greens instead of clear. Olive, emerald, and that brownish "recycled" tint each swallowed the warm LED differently. The emerald jar looked almost black with the candle off; the olive one, surprisingly, turned the leaves amber. Clear glass would have been predictable, but the mismatch meant three lanterns that read as a set only because the leaves matched.
Paper Candle Lanterns
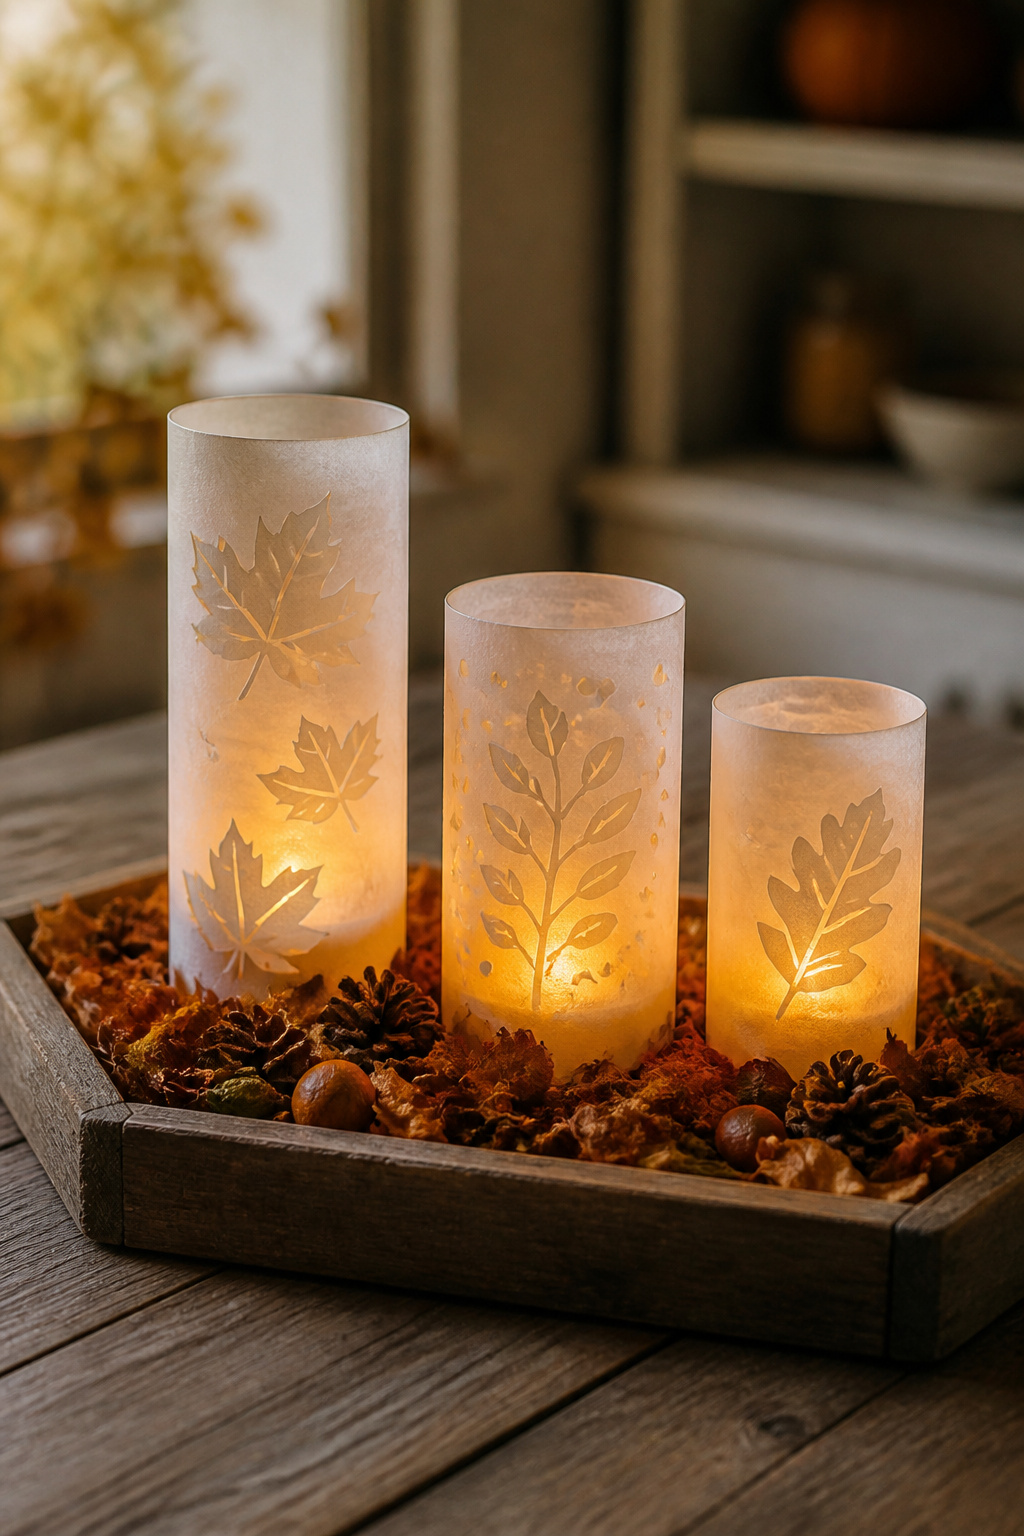
Paper candle lanterns live or die by the weight you choose. Vellum, at around 48–60 lb text weight, lets light through with that soft, hazy texture that reads as rustic fall decor, but it warps fast if a real flame gets close. Cardstock in the 65–80 lb cover range holds its shape and takes a cut pattern cleanly, yet the opacity kills the glow unless you punch enough openings.
My first attempt used a single tea light in a vellum cylinder. The wax softened, the wick tipped, and a scorched hole opened in the paper before I smelled the burn. That was the end of real flames. LED tea lights are the only safe move inside paper; they flicker convincingly, run for hours on a coin battery, and let you cluster lanterns on a wooden tray with potpourri without tending a flame. The slight texture of the paper still shows, the light still reads cozy, and nothing in your centerpiece becomes a fire hazard.
Pressed Leaf Lantern With Mod Podge
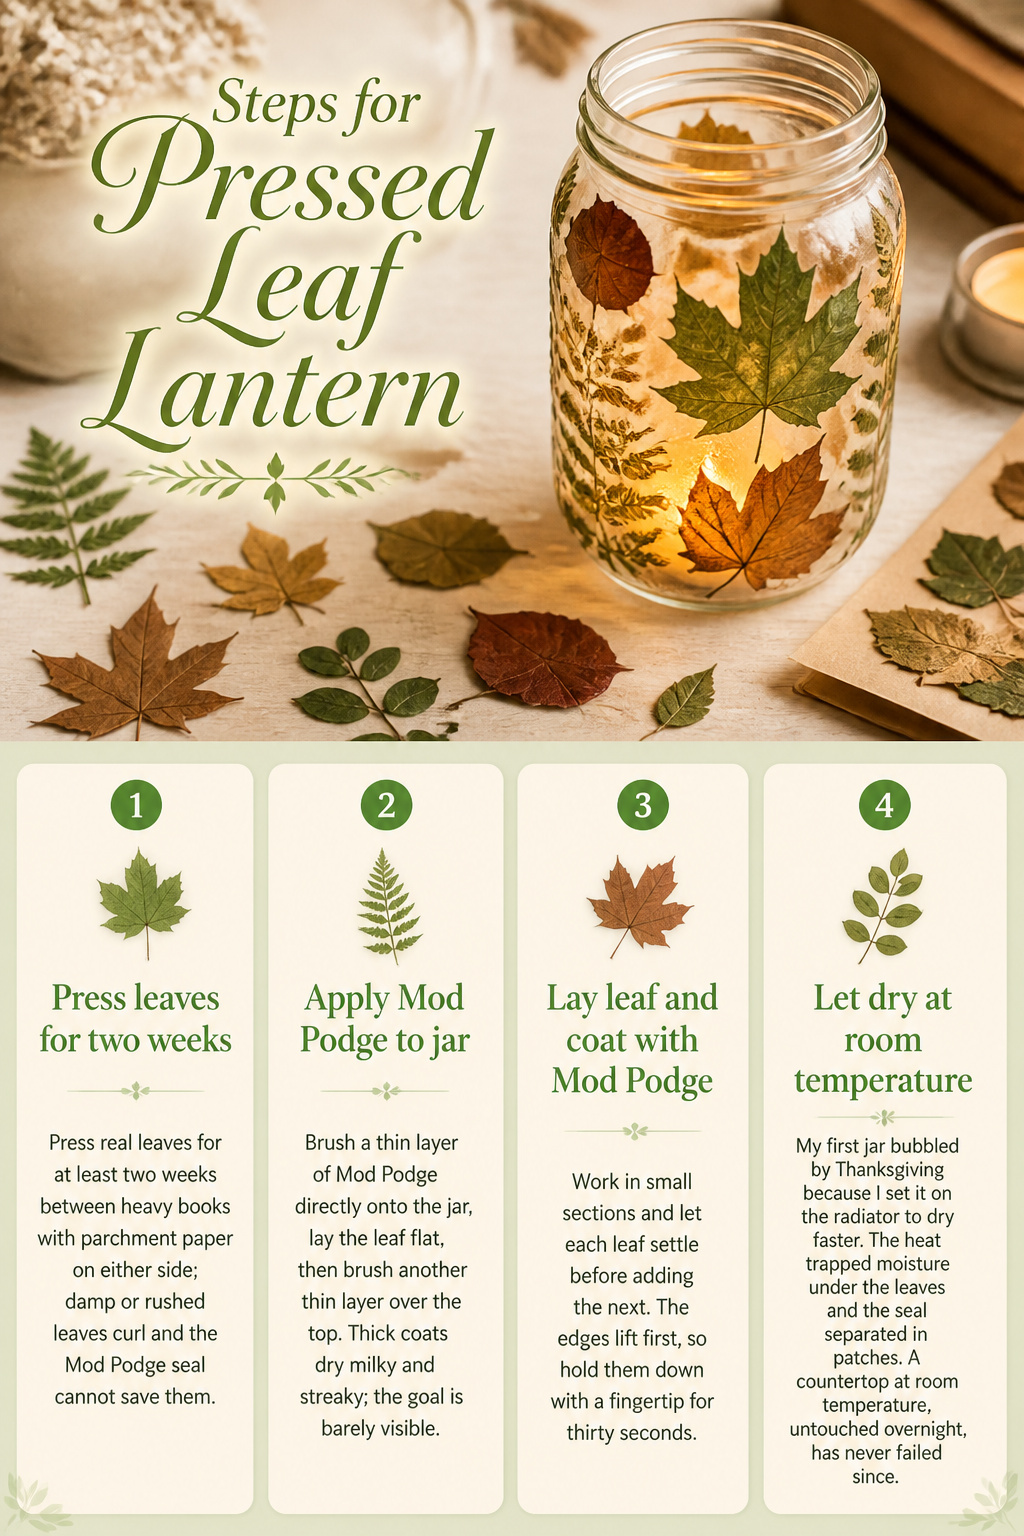
- Press real leaves for at least two weeks between heavy books with parchment paper on either side; damp or rushed leaves curl and the Mod Podge seal cannot save them.
- Brush a thin layer of Mod Podge directly onto the jar, lay the leaf flat, then brush another thin layer over the top. Thick coats dry milky and streaky; the goal is barely visible.
- Work in small sections and let each leaf settle before adding the next. The edges lift first, so hold them down with a fingertip for thirty seconds.
- My first jar bubbled by Thanksgiving because I set it on the radiator to dry faster. The heat trapped moisture under the leaves and the seal separated in patches. A countertop at room temperature, untouched overnight, has never failed since.
Tin Can Lanterns With Leaf Designs
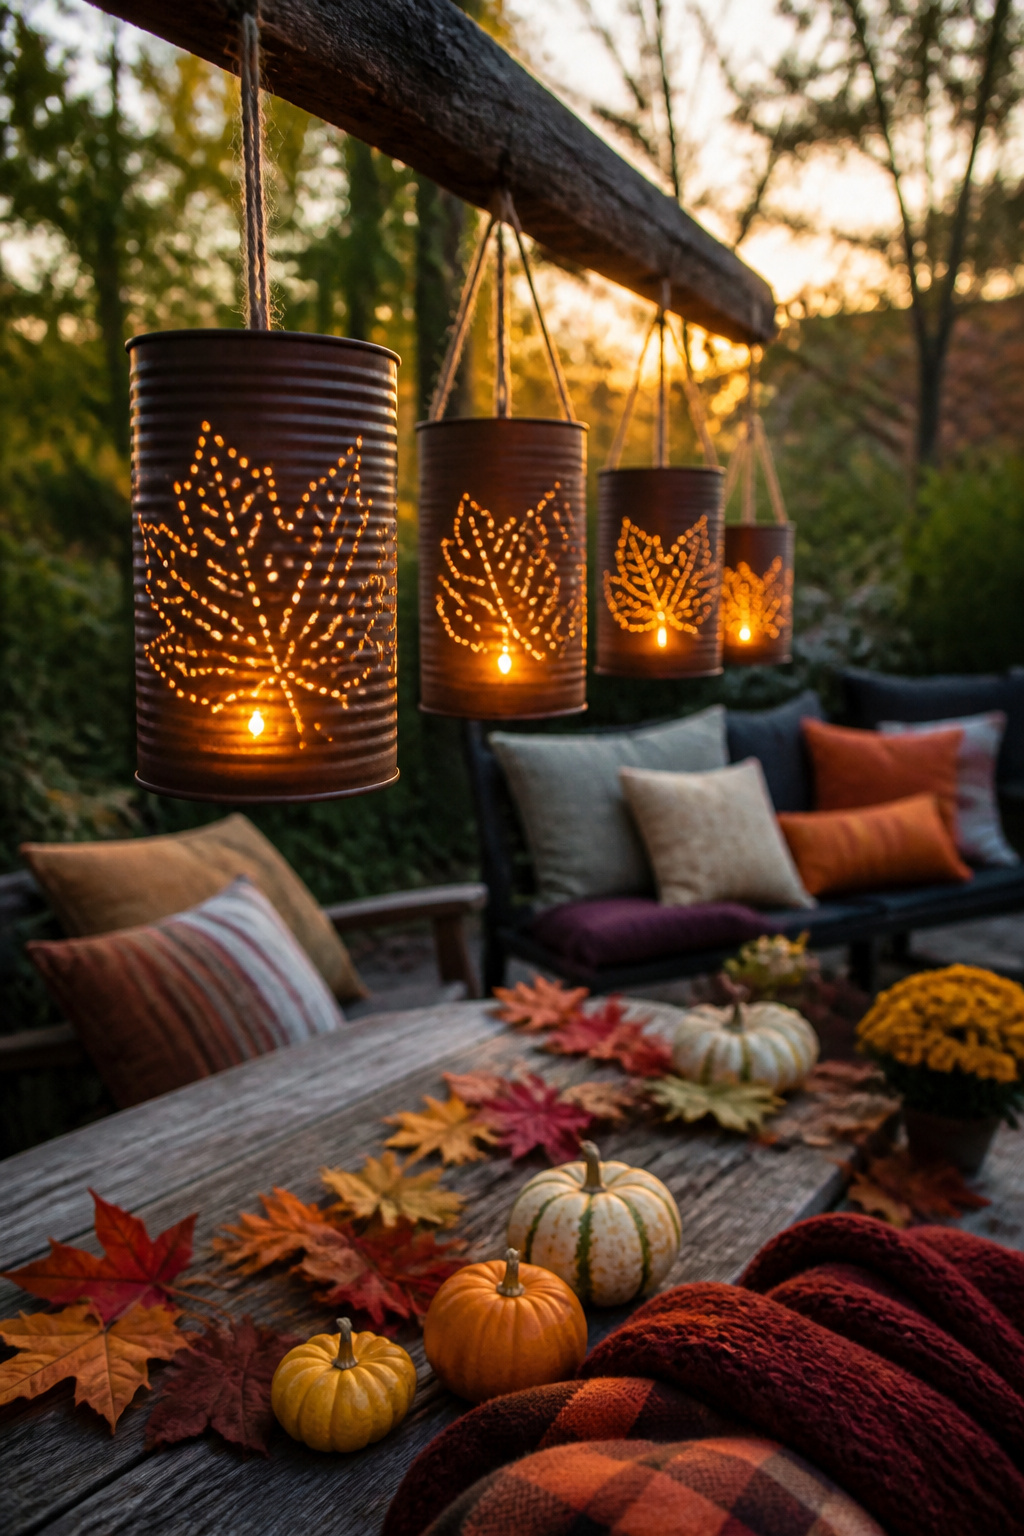
- Clean a soup or coffee can and remove the label, then fill it almost to the top with water and freeze it solid. The ice block keeps the walls from denting when you punch the leaf pattern.
- The ridge left by a standard can opener will stop your punch from seating flat. Hammer that rim down first, or the design comes out ragged and the can walls buckle.
- Sketch your leaves with a marker. A nail and hammer work for simple shapes; a metal punch set gives cleaner veins if you already own one. Space holes about a quarter-inch apart for light to show through without weakening the can.
- Let the ice melt, dry the can thoroughly, and file every cut edge inside and out. The punched rim is sharper than it looks, and filing takes under two minutes if you do it now instead of after the first cut finger.
- Drop in a battery tea light or hang the can with wire for a porch line. Paint the outside matte black or rust-orange if you want color; bare metal rusts eventually outdoors.
Seasonal Fillers
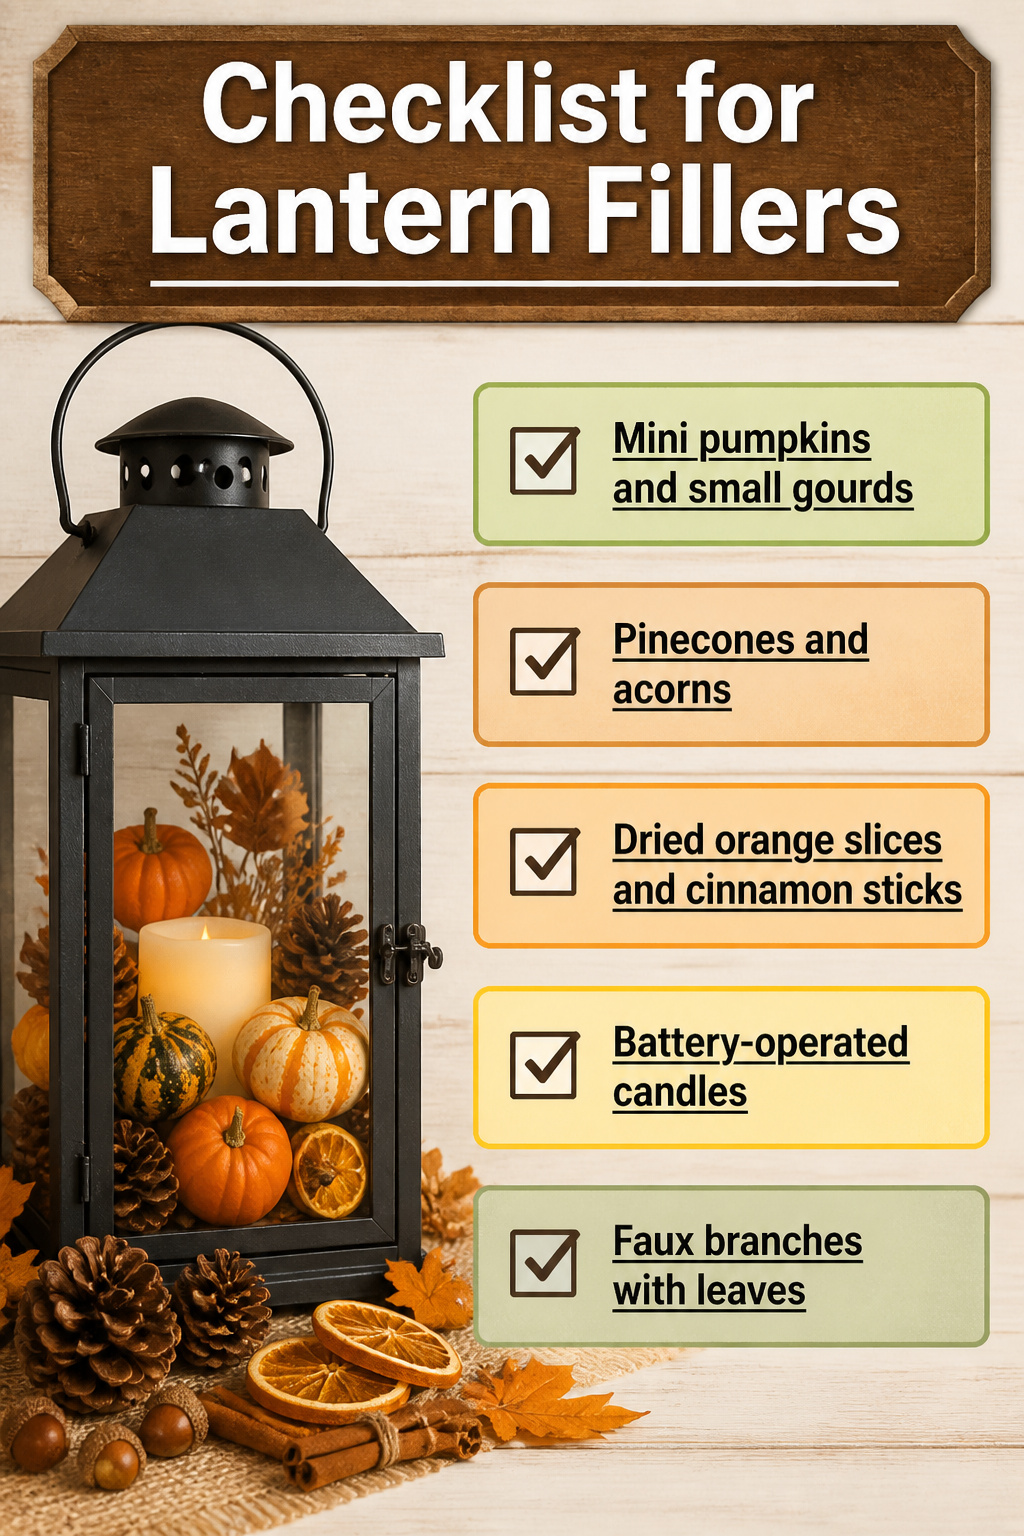
The right filler depends on your lantern’s door size and whether it hangs or sits on a surface.
- Mini pumpkins and small gourds work best on tables and mantels where weight does not matter. A lantern with a narrow door needs petite ones, or you will be wedging them through the frame and scratching the finish.
- Pinecones and acorns look effortless until you try to keep them in place. Acorn caps roll straight through the gaps in glass panel frames. I glued mine to a thin cardboard disk first, then slid the whole base in as one piece. Problem solved.
- Dried orange slices and cinnamon sticks add scent but weigh almost nothing, so they are the safe choice for hanging lanterns where heavy fillers swing and stress the hook.
- Battery-operated candles let you pack fillers tight around the base without worrying about heat. If you use a real candle, set it in a small glass holder so the flame stays clear of anything flammable above it.
- Faux branches with leaves or dried florals need height clearance. Bend the stems to fit the door, or the arrangement will look mashed against the glass.
Lighting Options
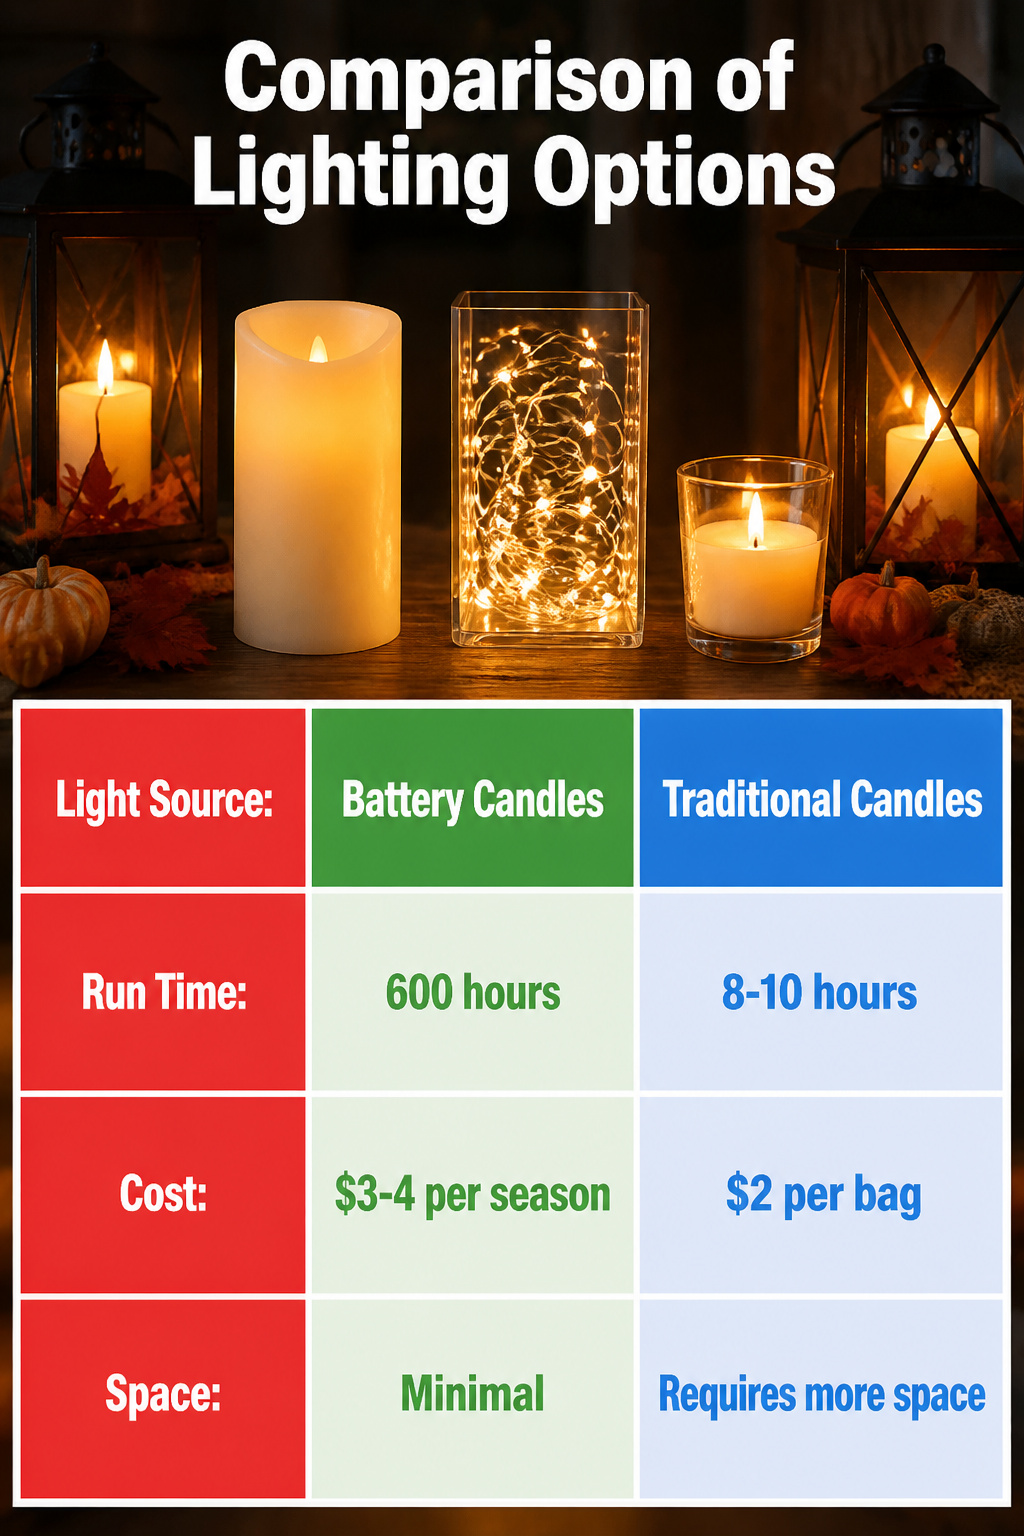
Battery candles, fairy lights, and traditional candles each earn their keep in my lantern box because none of them wins every situation. A flameless pillar with a timer runs for about 600 hours on one set of alkalines, which means a whole October-to-Thanksgiving season on a single swap if you run it four hours a night. That is roughly $3–$4 in batteries per lantern per season, less if you catch a bulk pack. Real votives burn faster, maybe eight to ten hours, and at a couple of dollars a bag they look richer for a dinner table but need babysitting. Fairy lights take up almost no space inside a stuffed lantern, so they are what I reach for when the lantern is already half full of gourds or a scarecrow. I keep a drawer of all three because the timer candle is the only one I trust on the porch overnight, the real flame is the only one that smells like something, and the fairy lights are the only ones that fit after I have packed the lantern tight. The mistake is buying one kind in bulk and finding it does not fit the lantern you actually bought.
Styling Lanterns in Groups
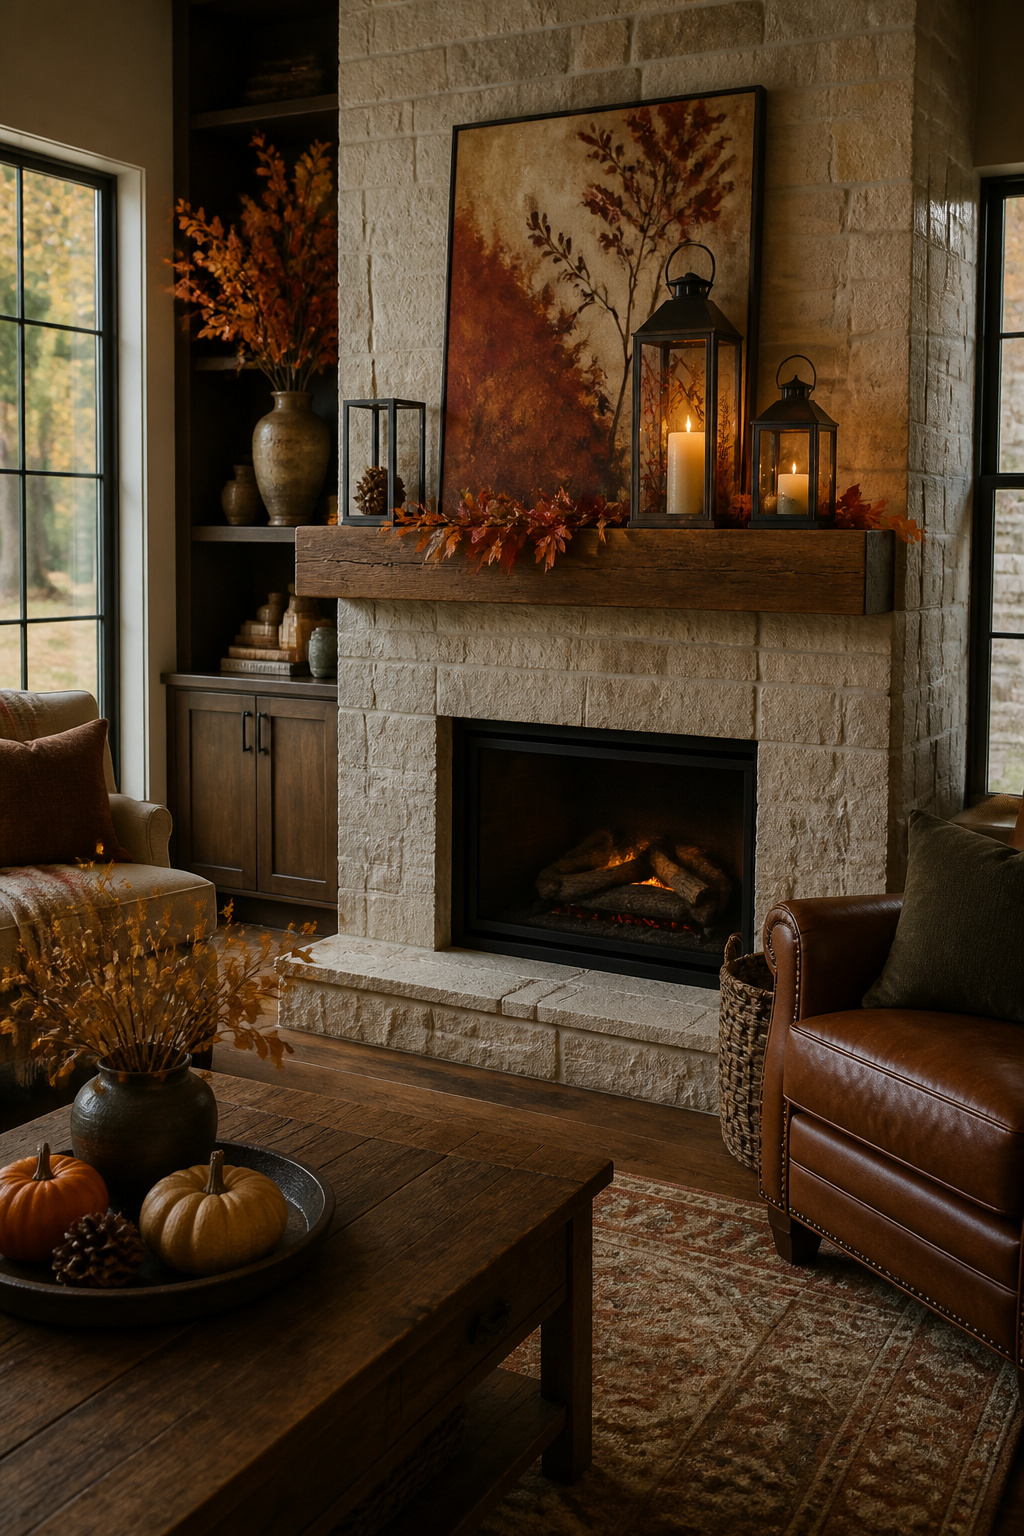
Three lanterns on a mantel sounds simple until you stand back and realize the right side looks like it’s sliding off the ledge. I learned this the hard way with a set of iron lanterns in small, medium, and large heights. From the left, the graduated line looked intentional. From the sofa, the middle piece sat too low and broke the diagonal, so the whole group felt squat. The rule of three works only when the tallest piece hits roughly eye level and the shortest sits no more than six inches below it. Anything tighter, and the eye reads them as a single lump; anything looser, and they stop reading as a group.
Height variation matters most on narrow surfaces. On my mantel, the tallest lantern was about fourteen inches, the smallest around eight. I filled the tallest with a pillar candle and faux branches with colored leaves, the medium with a smaller candle and a single mini gourd, and left the shortest open with just a pinecone inside. The filler stayed cohesive, all natural textures in the same autumn palette, which let the metal frames carry the visual rhythm instead of competing.
For outdoor groupings on a porch step or patio table, the same rule holds, but the scale can stretch. A cluster of iron lanterns in varying sizes with LED candles, plus a few real pinecones or a small mum tucked at the base, reads as one installation rather than scattered objects. The light layers better this way too; one lantern is a point, three become a glow.
Rustic Farmhouse to Modern Metallics
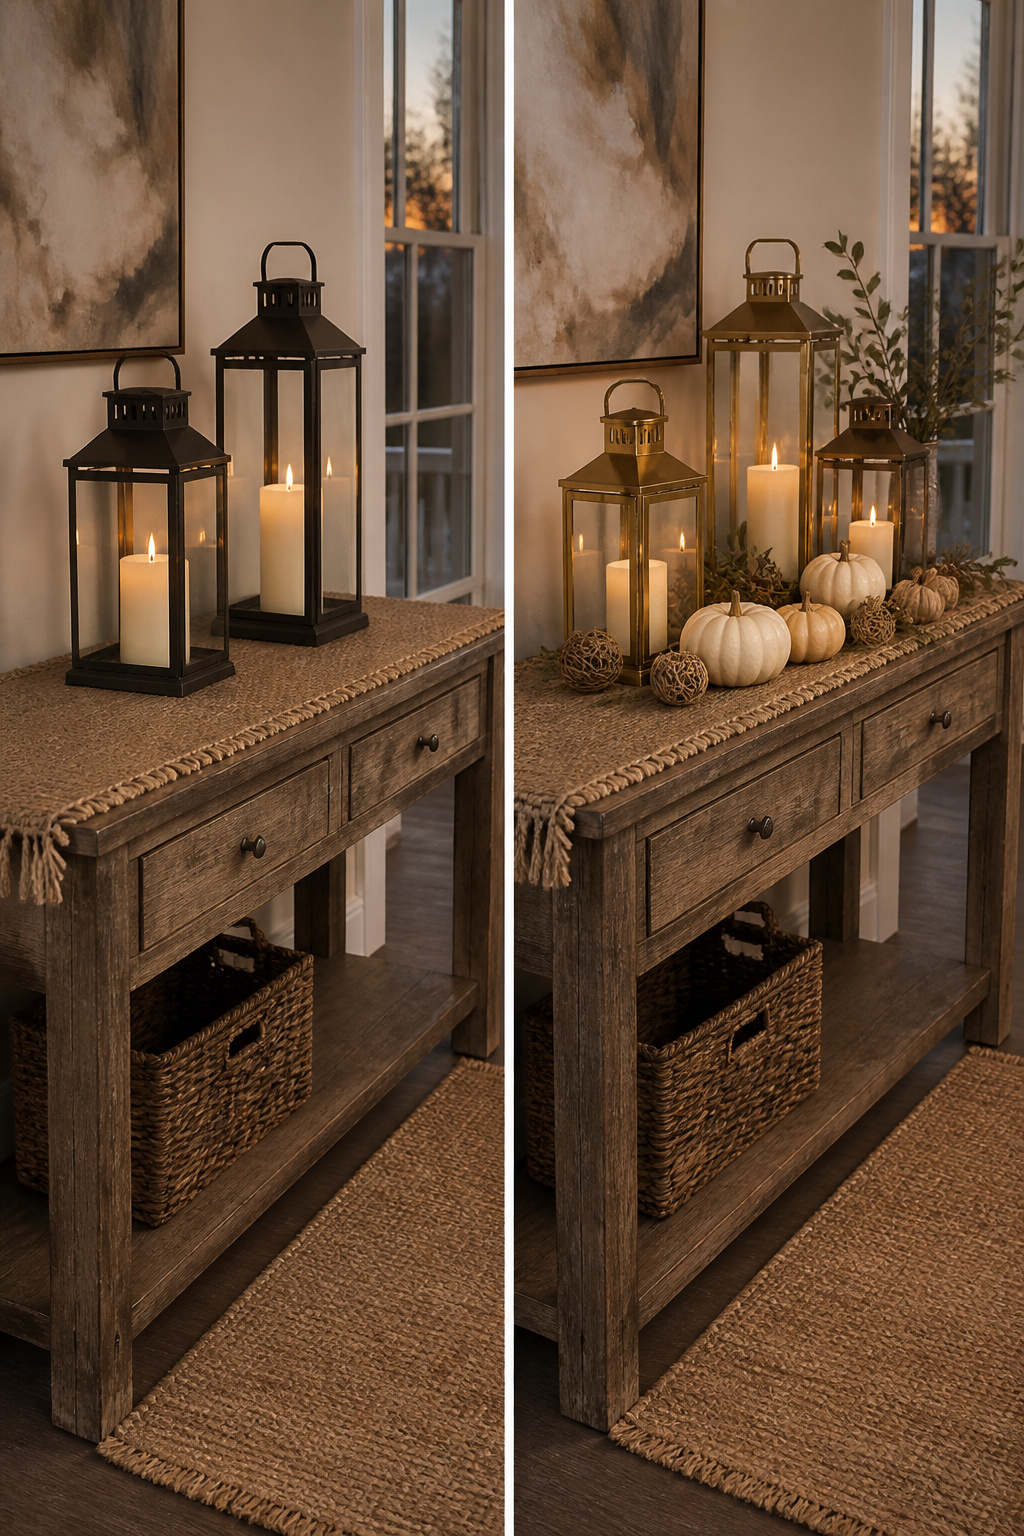
Sorting rustic farmhouse from Halloween is mostly about what you leave out. Scarecrows, silhouettes, and mini trucks crammed inside read October 31st; burlap, twine, and a single candle with a tiny pumpkin read autumn through Thanksgiving. The line blurs on metallic finishes, where brass and copper carry the warmth of turning leaves but silver risks reading wintery unless you pair it with pinecones or amber glass.
My first attempt at a metallic lantern taught me the hard way that not every gold spray paint belongs to fall. The splotchy gold layer I added over white base coat on a tin can looked fine in the garage, but set beside burnt oranges and deep reds it read Easter pastel, not harvest glow. The fix was switching to a deeper, almost-bronze tone that picks up the same light without fighting the season’s palette.
Battery-powered candles on a timer bridge the farmhouse-to-modern gap better than anything else. They let a rustic wooden lantern sit on a mantel next to vintage clock faces without looking like a museum piece, and they keep a clean silver lantern from feeling too cold for a porch that still sees 60-degree evenings.
Upcycling and Sustainability
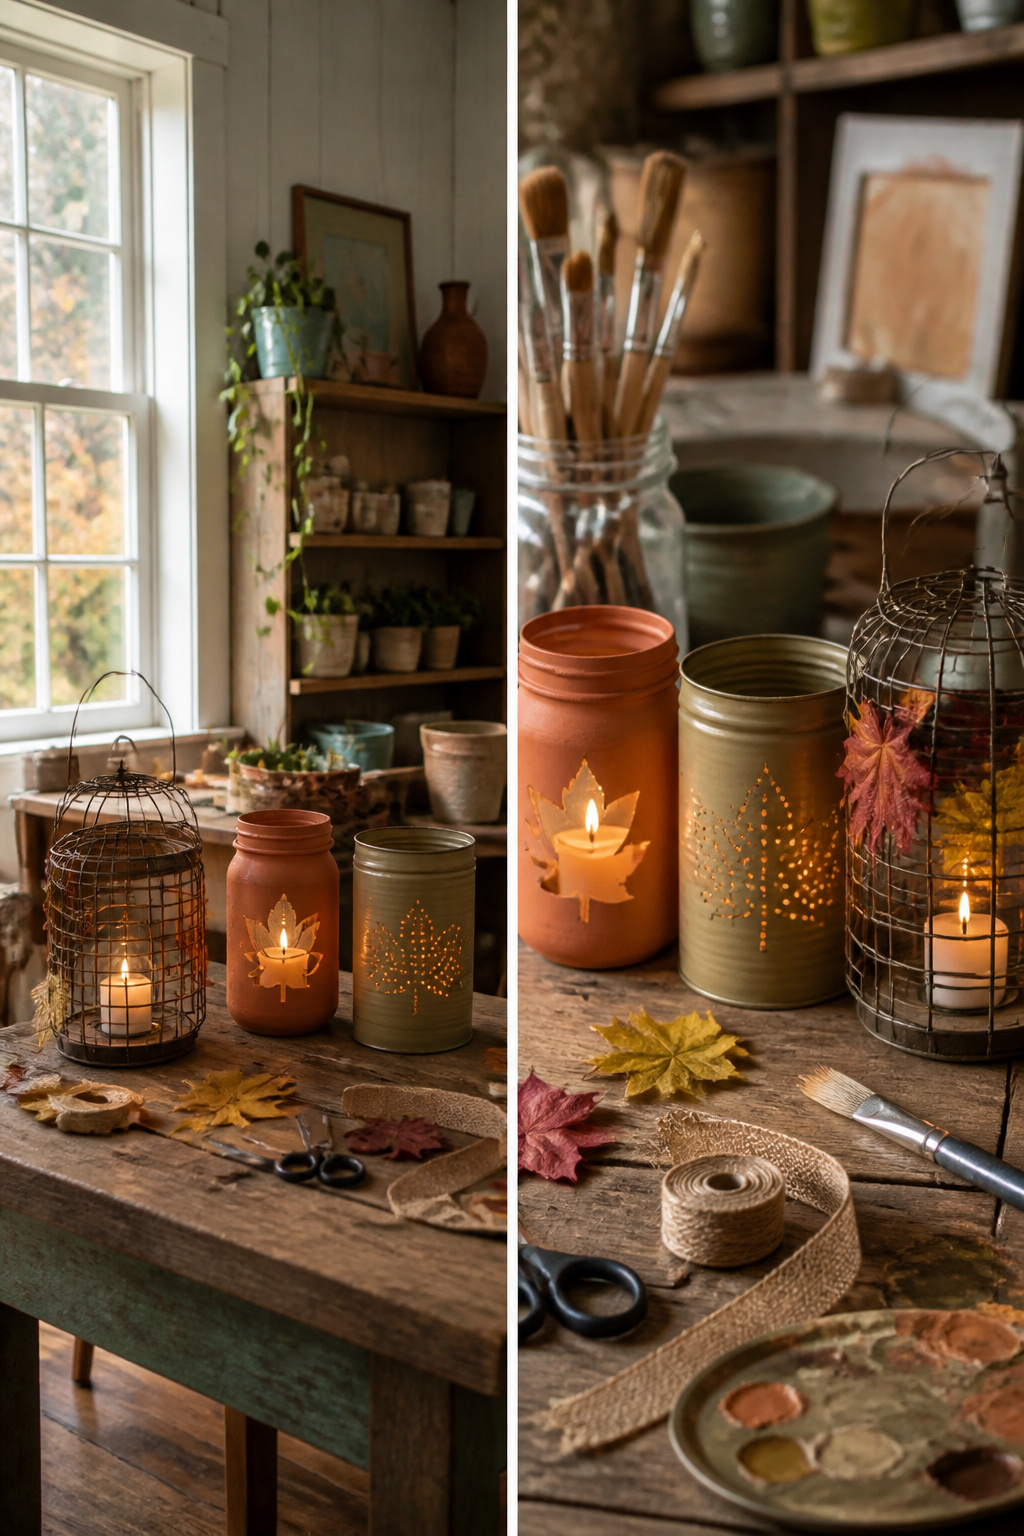
Most of the lanterns on my porch started as something else. Old pickle jars, soup cans, a wire cheese rack from a thrift store that was missing its glass. The jars take paint and wire handles well, and the cans punch clean with a nail and hammer if you fill them with water and freeze them first. That trick took me two ruined cans to learn.
Thrift stores are a weak spot for actual lanterns. You might find one or two in a month of looking, and they run $8–15 for something dented. The better haul is the almost-lanterns: glass cylinders, metal baskets, hurricane shades without bases. Those sit on shelves for $2–3 because nobody knows what to do with them. A $4 battery candle from the hardware store turns a cheese rack into something that reads as intentional.
The slower process is real. Cleaning label glue off a jar or punching a pattern without tearing the can eats an evening where buying new would take ten minutes. I only do it when the object itself adds something, a blue Atlas jar or a can with a vintage label fragment I want to keep visible. That specificity is what makes the extra hour feel like making rather than saving.
Specific Craft Techniques
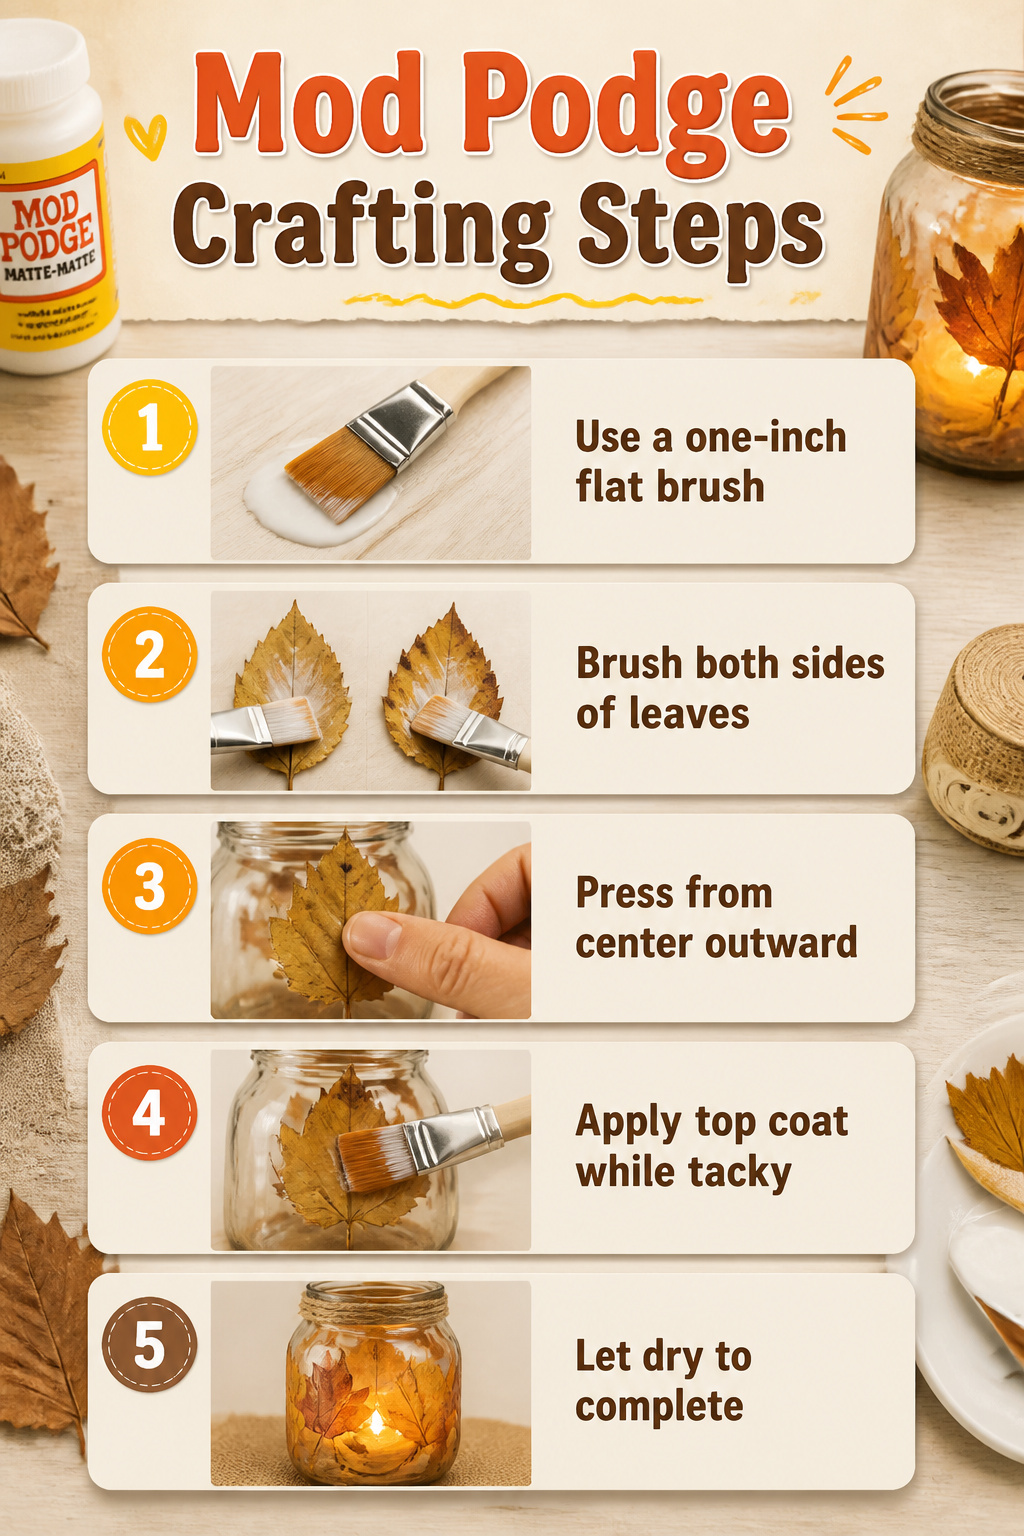
A one-inch flat brush changed how my Mod Podge lanterns look. Wider brushes hold too much glue and leave streaks; anything narrower takes forever and tempts you to hurry. That inch width lets you lay down an even coat in about three strokes on a quart-sized jar.
For pressed leaves, brush both sides of the leaf with Mod Podge before placing it. This softens the leaf so it lies flat and seals the edges that would otherwise lift. Press from the center outward with your fingertip, then brush a thin top coat immediately while the glue underneath is still tacky. Waiting even five minutes creates two dry layers that never bond.
Hot glue works faster for ribbons and heavy stems, but it sits proud and catches light wrong on transparent glass. Mod Podge dries to a slight matte texture that reads as intentional finish, not afterthought.
If leaves keep curling at the edges, a dab of glue underneath before the top coat usually fixes it. Hold the edge down for thirty seconds; the tack sets enough to stay put while you move to the next section.
Frequently Asked Questions
How do I decorate lanterns for fall?
Fill them with seasonal items like mini pumpkins, gourds, pinecones, acorns, dried orange slices, or faux leaves. Keep the arrangement cohesive by repeating similar fillers across multiple lanterns, such as tucking Indian corn toward the back and layering small pumpkins in front. For outdoor displays, vary the heights and mix real gourds with faux ones so the arrangement stays intact through the season.
What are some easy DIY fall lantern ideas?
Mason jars with copper wire fairy lights, tin cans punched with leaf designs, and pressed leaf jars sealed with Mod Podge are all simple builds. For mason jars, skip drilling holes and use wire lights that hide the battery pack inside. For tin cans, freeze water inside first so the walls don’t dent when you punch the pattern. For pressed leaves, use real leaves dried for at least two weeks, then seal with thin layers of Mod Podge at room temperature.
Can I use real candles in my lanterns?
You can, but battery-operated candles are the safer choice, especially outdoors where wind blows out real votives constantly. If you do use a real candle, place it in a small glass holder so the flame stays clear of anything flammable above it. LED candles with timers run about 600 hours on one set of alkalines, roughly $3–$4 per lantern per season, and you can forget them until Thanksgiving.
What fillers can I use for my fall lanterns?
Mini pumpkins and small gourds work best on tables and mantels where weight doesn’t matter. Pinecones and acorns look effortless but roll through gaps in glass frames, so glue them to a thin cardboard disk first. Dried orange slices and cinnamon sticks add scent and weigh almost nothing, making them ideal for hanging lanterns. Battery-operated candles let you pack fillers tight without worrying about heat.
How can I make my lanterns more festive?
Add a burlap bow with loops smaller than the lantern’s roof overhang, seal the cut edges with clear nail polish to stop fraying, and use wired ribbon so it holds shape through wind. For tablescapes, thread faux berry garlands between the lantern base and glass so greenery reads as growing from the bottom. A small bow in fall colors or a twine wrap with plastic maple leaves also adds seasonal flair without much cost.