
DIY Christmas bells are holiday decorations you build from household trash and dollar-store supplies, not craft-store kits. The trick is knowing which plastic cups, toilet paper rolls, or aluminum cans will read as metal once painted, and which finishes actually stick to slick surfaces instead of flaking off by Christmas Eve. A 9 oz. plastic cup stacked with a cut water bottle neck becomes the classic bell shape for about three dollars a batch, but only if you scuff the plastic first and skip the gloss paint.
Materials I Actually Use
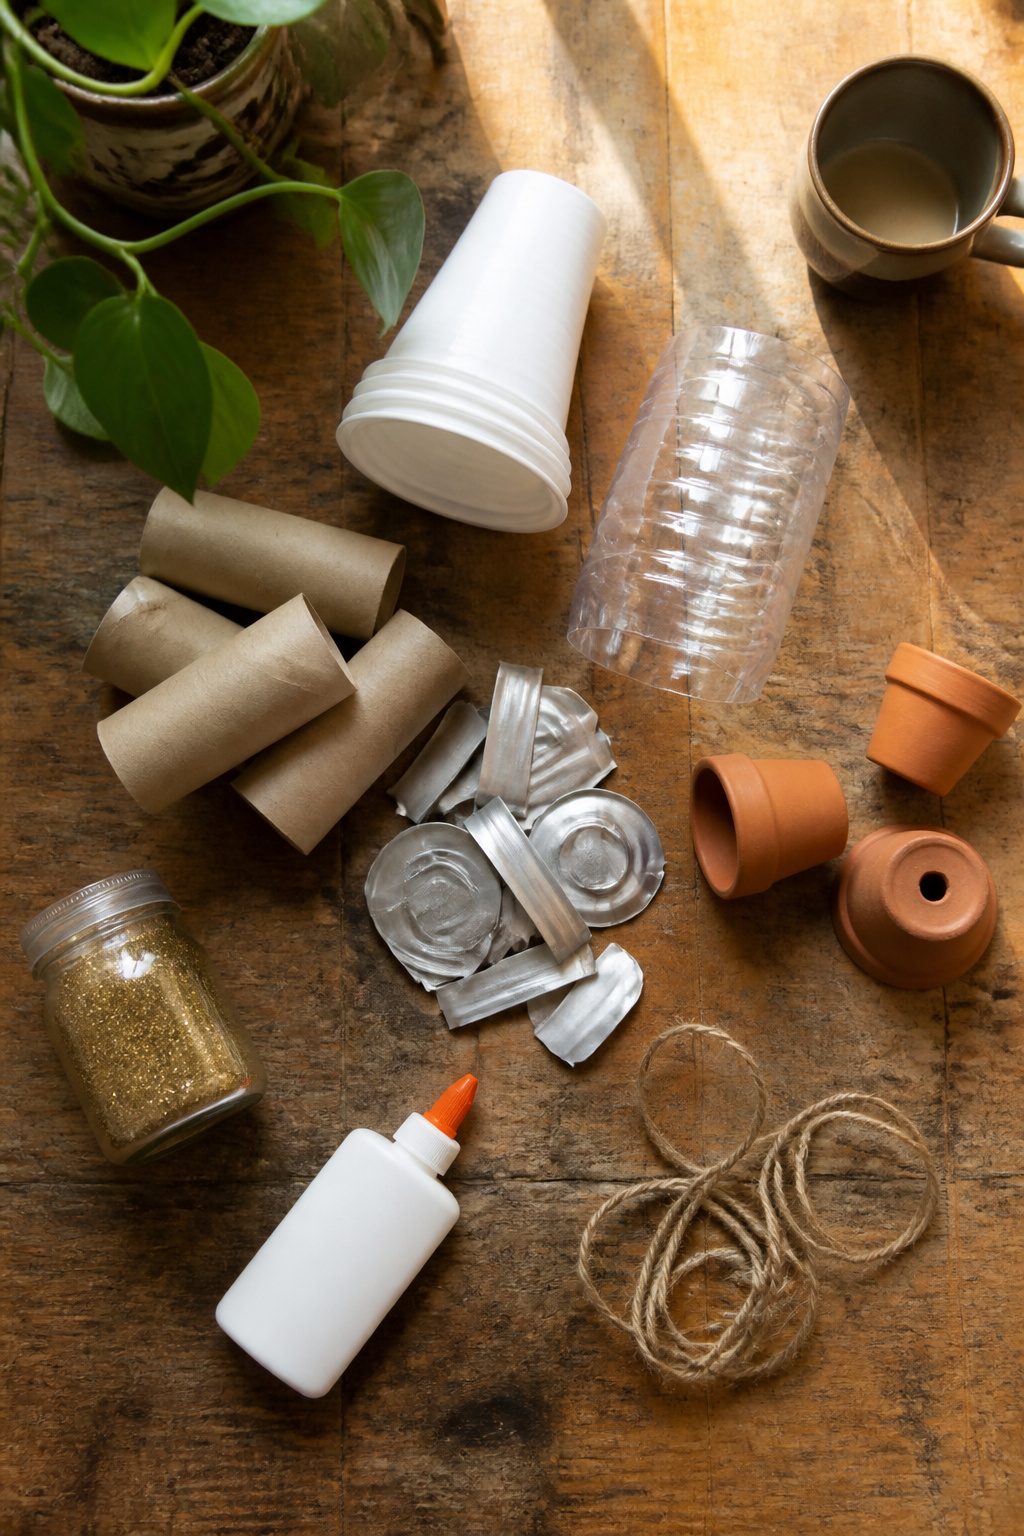
Most of these projects start with something already in the recycling bin. 9 oz. plastic cups stack into a clean bell shape, and an empty Crystal Geyser water bottle tucked inside gives you the neck and that little ridge that reads as vintage metal once it is painted. Toilet paper rolls work the same way, just flatter and more forgiving if your cuts wander. I have seen clay pots turned into bells too; they cost a few dollars at any hardware store but carry real weight on a mantel. Aluminum cans cut and flattened into panels are the most satisfyingly wrong material, the kind of thing that makes people lean in to figure out what they are looking at.
Dollar Tree bells at $1.25 each skip the construction entirely. Strip the factory glitter and hardware-store paint takes them somewhere else completely. Old book pages, jute string, and the cheap holiday berries from the artificial-flower section are the usual finishers. Elmer’s glue and gold glitter cost pocket change if you do not already own them. Rub ‘n Buff in antique gold is the one item worth hunting down specifically; it reads as metal on plastic in a way spray paint alone rarely manages. Most of these builds land under five dollars if you are pulling from supplies already on hand, and even a full shopping trip at Dollar Tree stays under ten.
Plastic Cup Bells
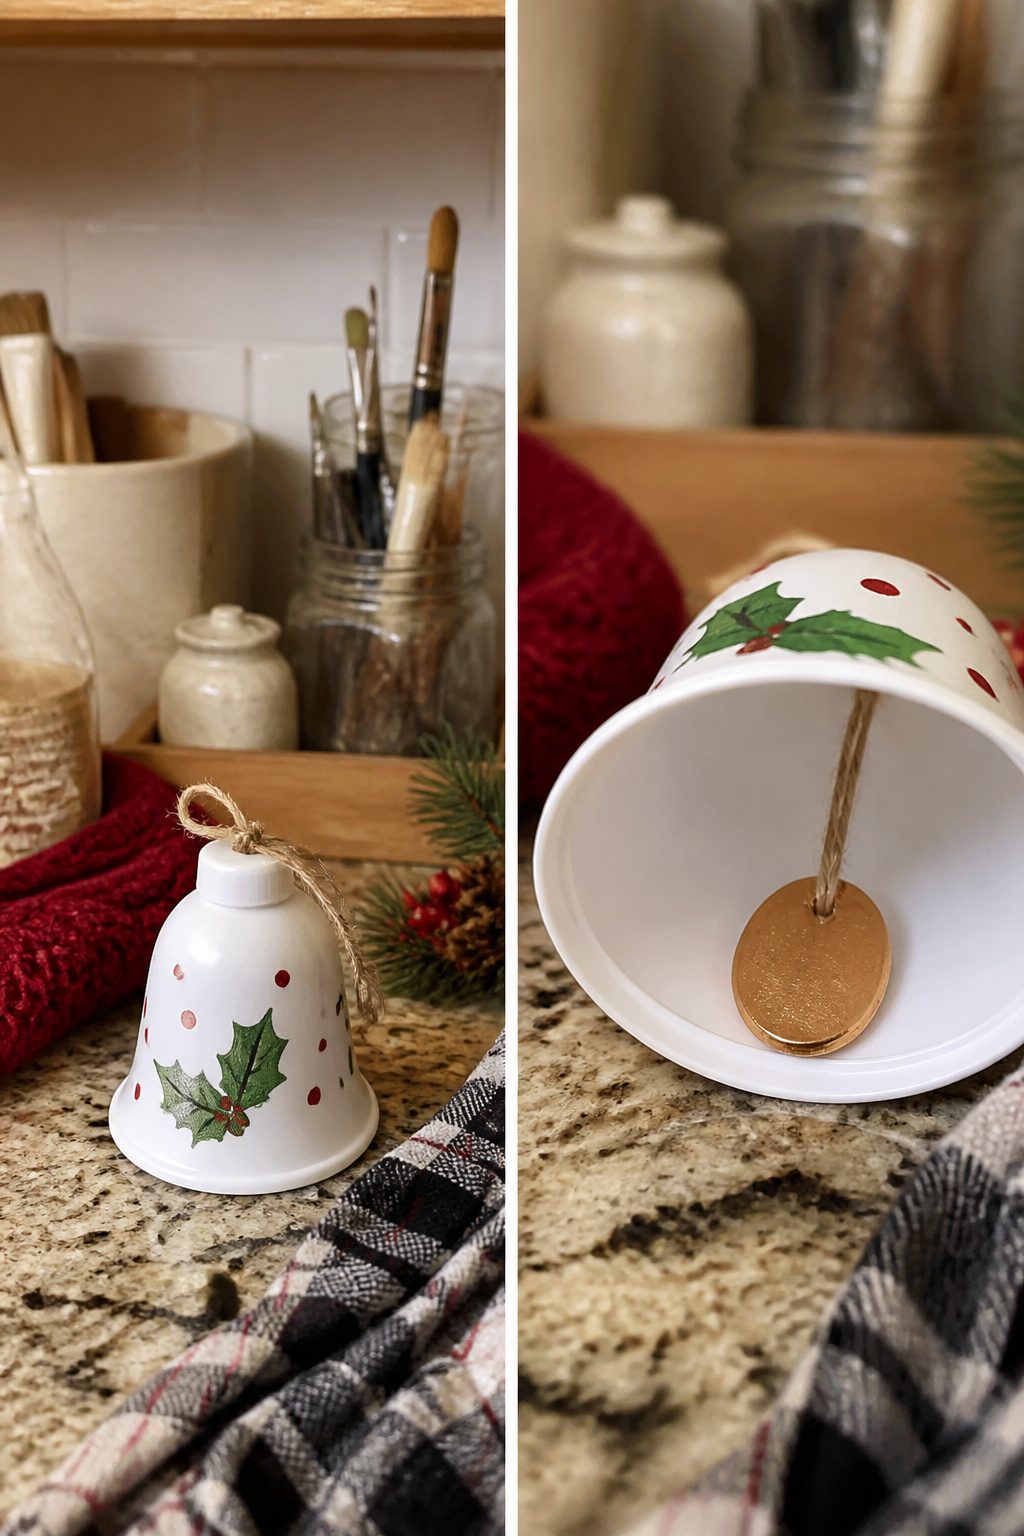
The 9 oz. plastic cup is the body most people start with because it already flares like a bell skirt. A standard water bottle top, cut from the neck, becomes the dome. The cut does not have to be clean. Slight raggedness where the two pieces meet catches light the way cast brass does, and that imperfection reads as age once paint goes on.
Assembly is two dots of hot glue: one inside the rim to seat the bottle top, one at the crown if you want a hanging loop. The whole bell costs about three dollars and change for a batch, since the cups run a few cents each and the bottle tops are already in your recycling. Weight matters for hanging, so a penny glued flat inside the cup lip steadies the bell against a draft. Without it, the piece spins and does not read as a bell at all.
Two top styles are worth trying. The first leaves the bottle cap threads exposed, which looks like a cast finial once painted gold or black. The second flips the top so the smooth dome faces out, subtler and slightly more modern. Either way, the plastic seam on the cup becomes the "mold line" you would see on real metal bells. Do not sand it away. Paint over it with matte acrylic and it does the work of faking manufacture for you.
Toilet Paper Roll Bells
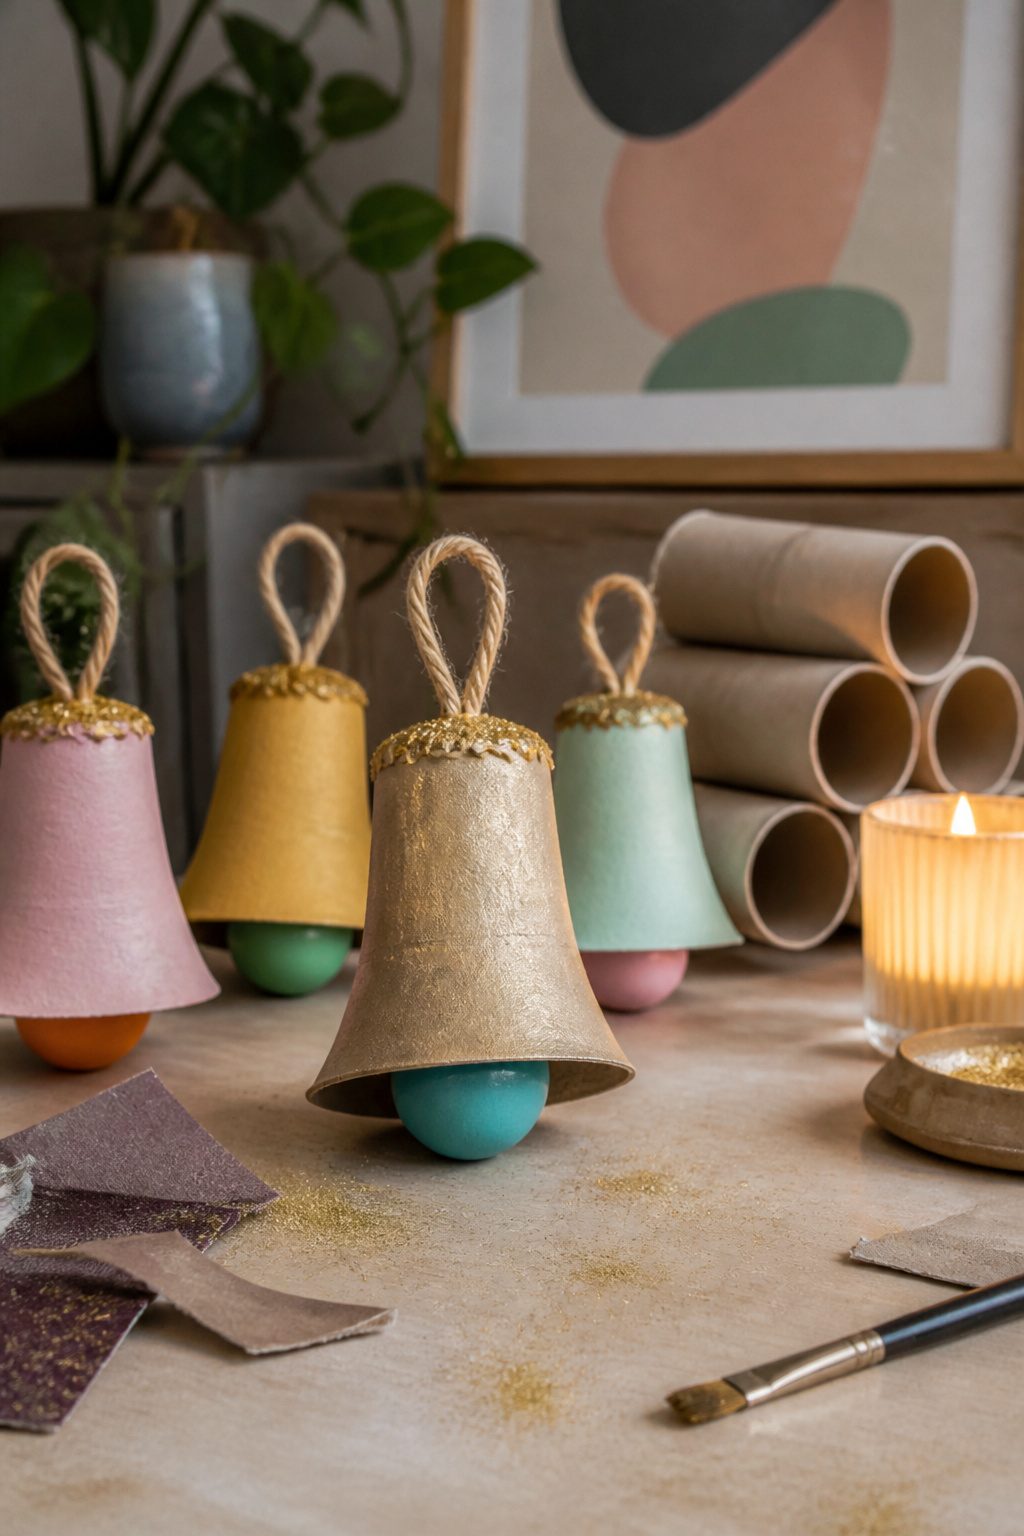
Toilet paper rolls cut to 1 3/4 inches long make a bell body that is already the right proportion, narrow at the top and flaring slightly where the factory seam runs. One full roll yields two bells with a thin strip left over for the hanging loop. The open bottom needs a cap, and a plastic Easter egg pressed into the rim does two jobs at once: it closes the bell and gives it weight so it hangs straight instead of tilting on the tree. Hot glue on the inside rim holds the egg half in place, and a second bead of glue run along the lower edge and seam adds the ridge you see on old cowbells. Sandpaper takes the printed pattern off the cardboard before painting, and the same antique gold Rub ‘n Buff that works on hardware warms up the whole surface without looking like craft-store glitter. The slim craft stick for the clapper gets glued inside the egg half before you seal it, or the bell stays silent.
Old Book Page Bells
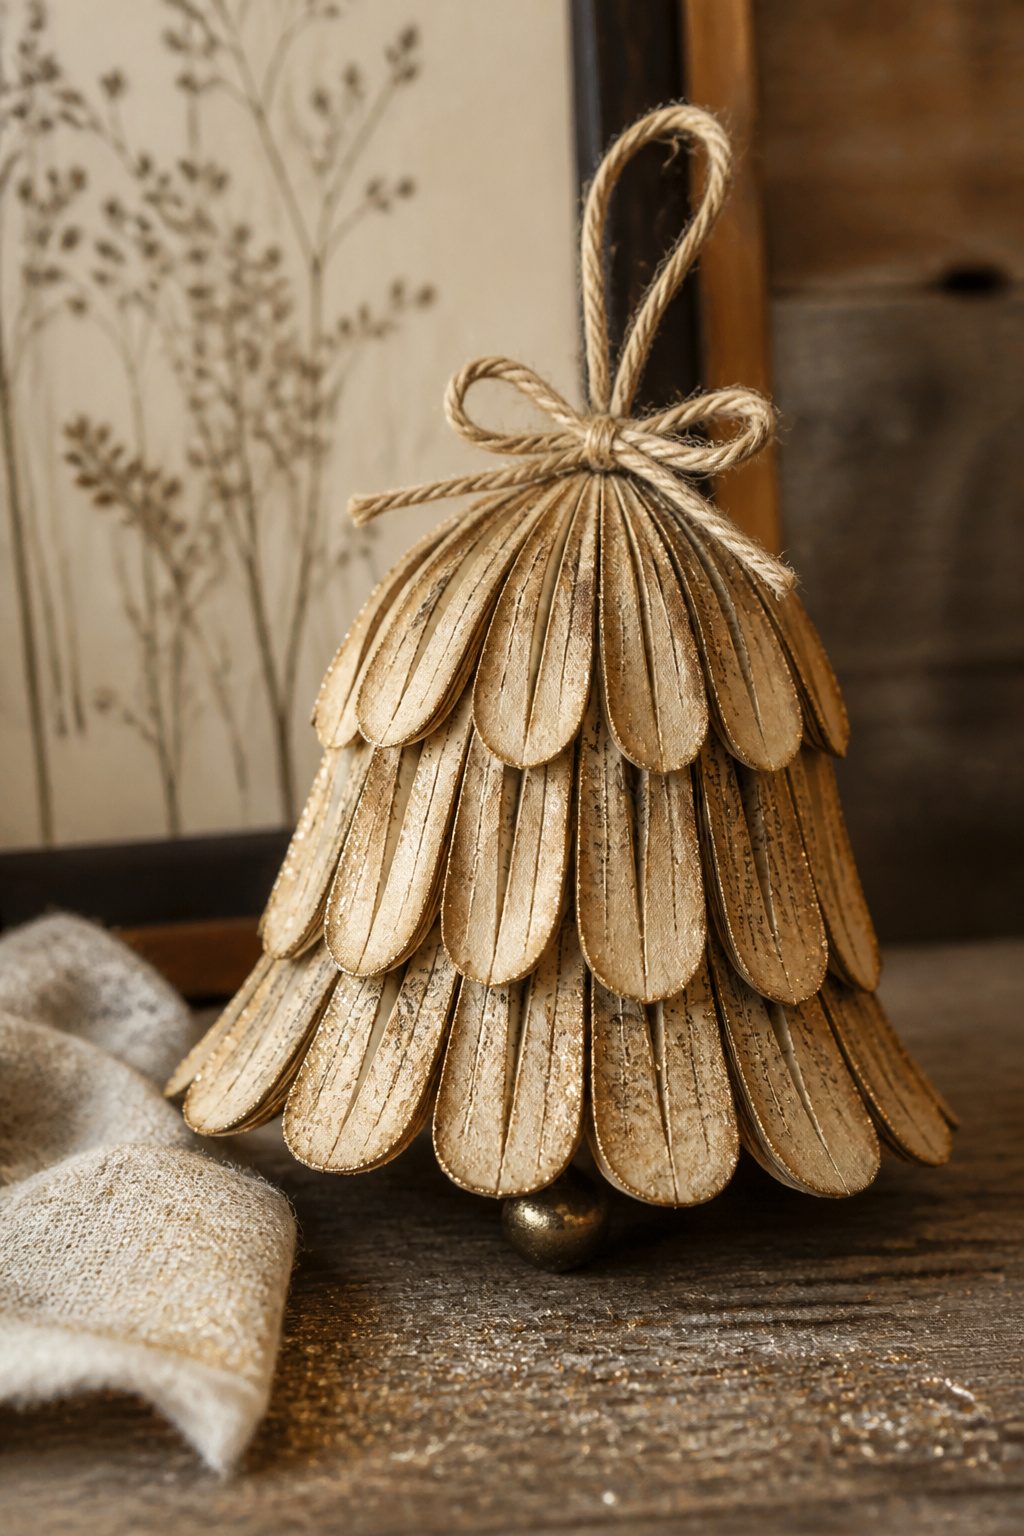
Old book pages give bells a texture that reads as history even from across the room. I cut teardrop shapes roughly three inches tall and one inch wide at the widest point, folding the paper to cut several at once so the sizes vary naturally. A hot glue gun attaches them starting at the bottom of the bell, with each petal extending slightly below the rim and folding over the edge.
The finish is where the vintage look actually happens. Antique Gold Rub N Buff turns plain paper into something that looks like aged brass. I rub it on with an old paintbrush in small circles, then buff with a soft cloth. The wax base catches the raised edges of the paper and settles into the low spots, so the teardrops read as worn metal rather than coated paper. A hair dryer speeds the set time between coats if you are working through a batch. The color shifts from bright gold toward a muted, older tone, the kind that looks like it came out of an attic box rather than a craft store.
Clay Pot and Soda Can Options
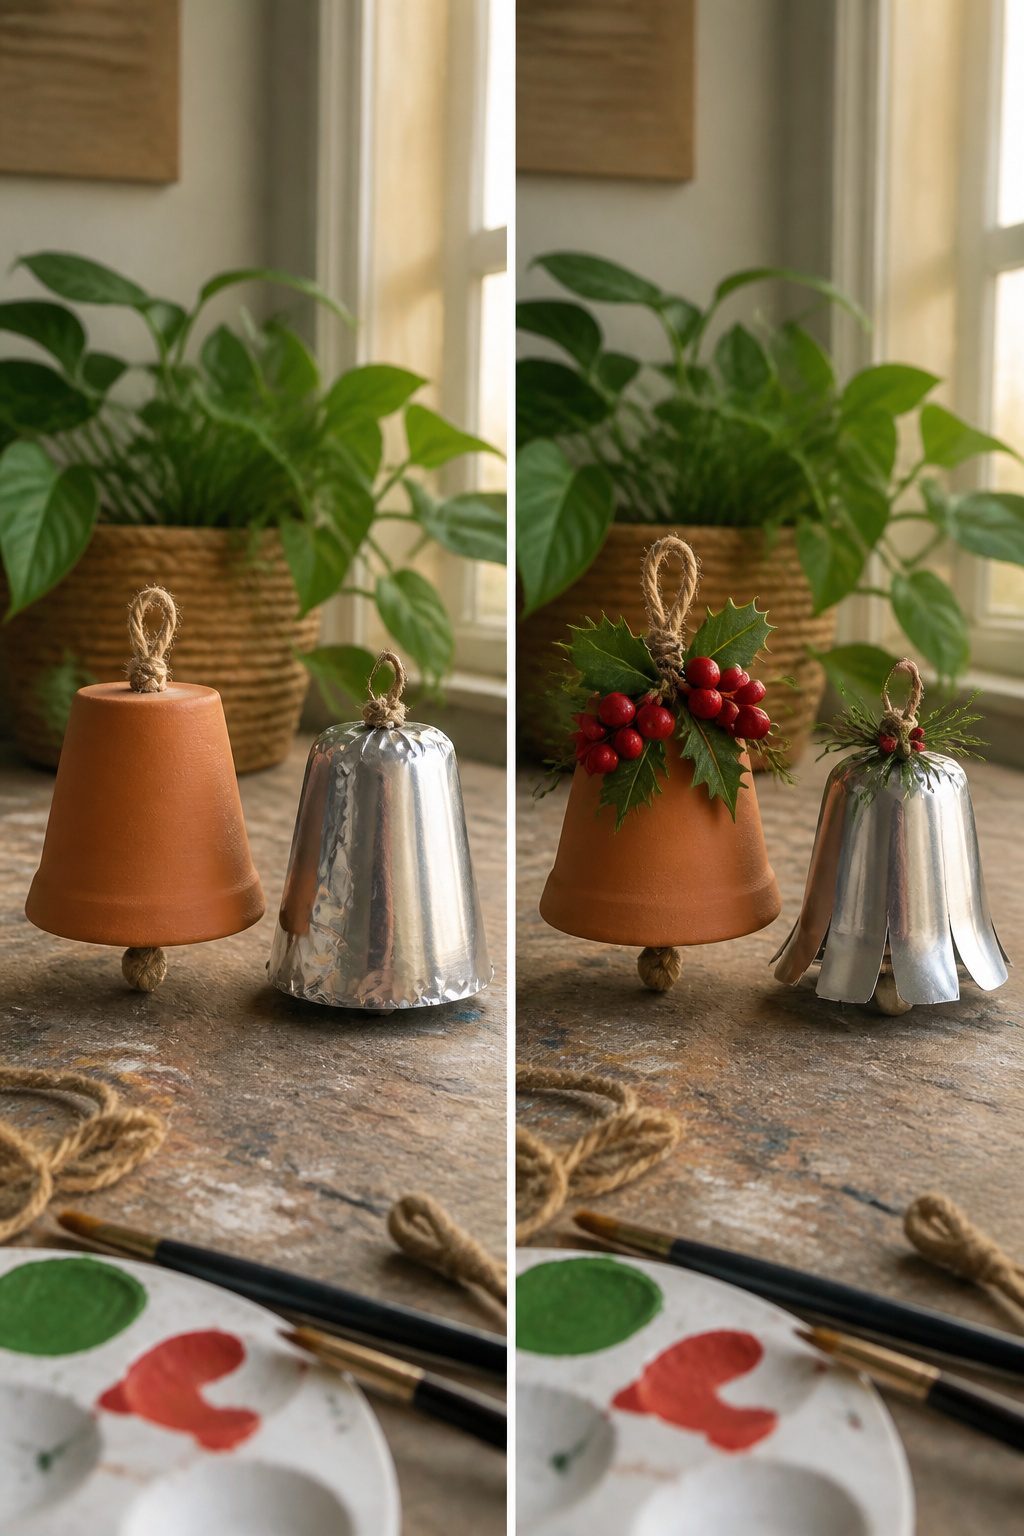
Small terracotta flower pots give a bell shape that is already right there, so the work is mostly surface decoration. Paint goes on in a thin layer of craft paint and needs about an hour to dry, then you can glue artificial leaves and berries around the bottom rim where the pot flares. Thread ribbon through the drainage hole at the top, add a jingle bell or two inside, and the weight of the clay makes it hang straight even in a draft. These are heavier than paper or plastic options, and the finished piece feels closer to something you would buy in a shop.
Aluminum soda cans take more effort but turn into something genuinely metallic. You cut and shape the can body into a flared bell form, then paint it in antique gold or another metallic finish. The thin aluminum is sharp; work gloves are not optional here. The result is light for its size but still reads as metal, and it will last seasons without the softening or denting that paper bells get. The clay pot route takes an afternoon and under ten dollars in supplies; the soda can version rewards an evening of careful cutting with a piece that looks store-bought from across the room.
Dollar Tree and Easter Egg Shortcuts
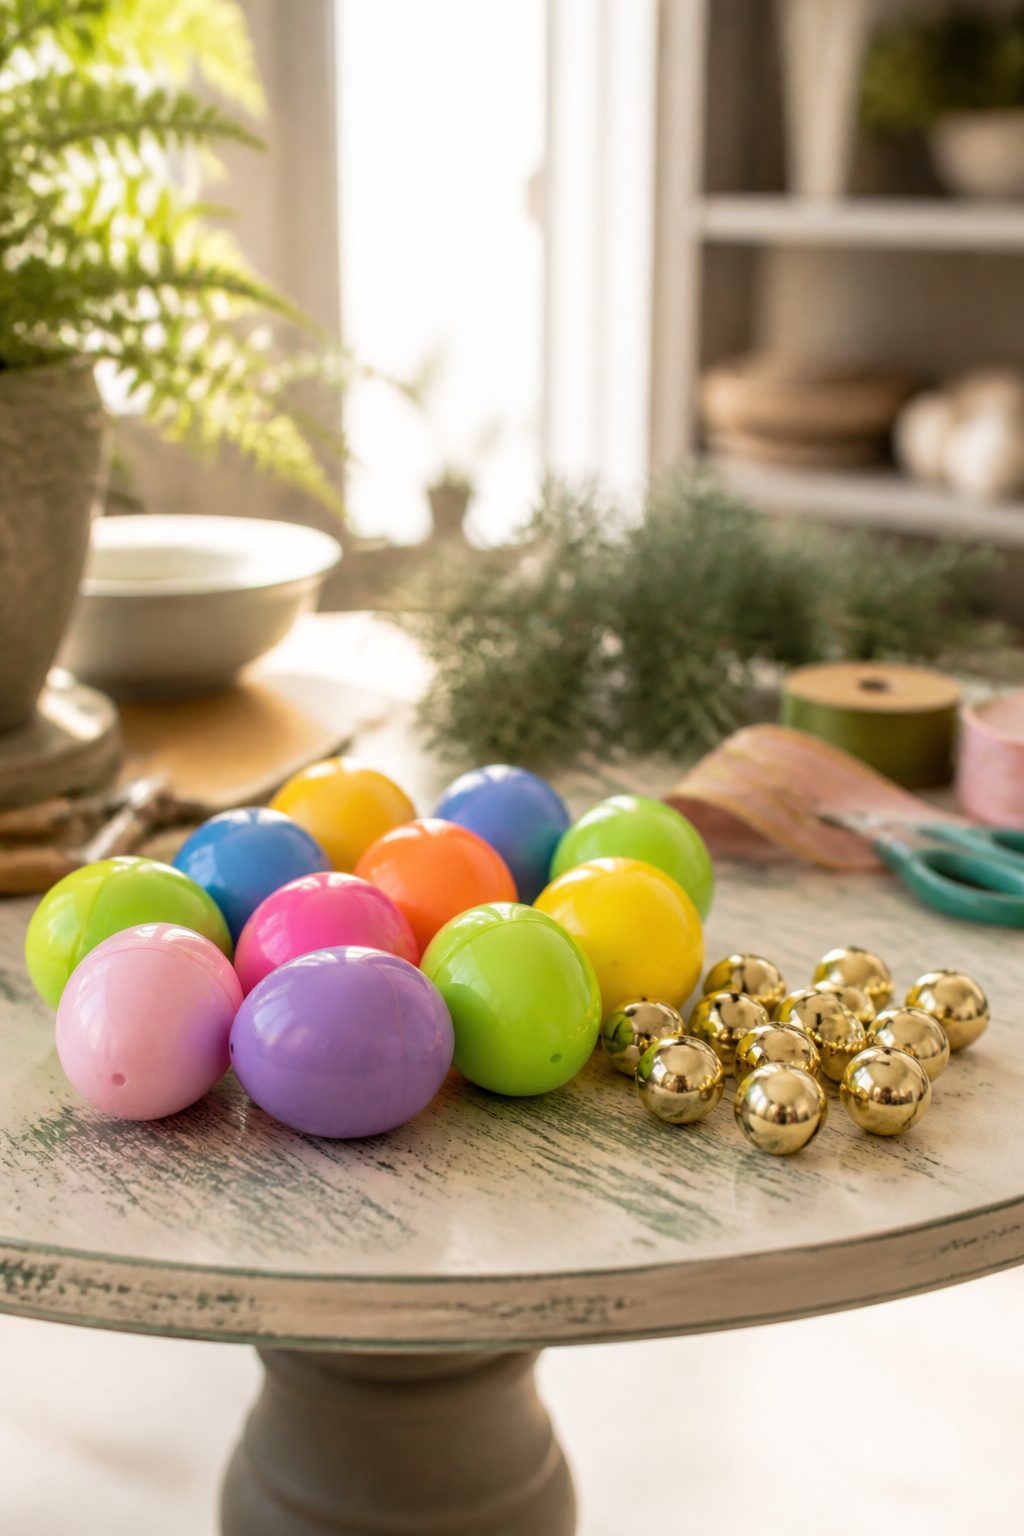
Plastic Easter eggs make a bell body with no shaping at all, and the Dollar Tree bells already have the shape built in. Both shortcuts skip the part where you form something round from something flat.
The Easter egg route needs one prep move: scuff the plastic with sandpaper first. Paint will not grip the slick surface otherwise. Black chalk paint goes on with an old brush in a pouncing motion, which leaves texture on the egg and on any cardboard roll you pair it. A quarter-inch strip and a slim craft stick, also painted black, finish the hardware. Antique gold Rub ‘n Buff and rope or jute turn the plain shell into something that reads as metal.
Dollar Tree bells run $1.25 each and need even less structure. The plastic body is already there; you are embellishing, not building. Black satin spray paint, antique gold Rub ‘n Buff, hot glue, Elmer’s glue, gold glitter, green ribbon, and jute string cover most of what the projects call for. Old book pages or cheap thrift-store magazines layer on with glue for a textured, vintage surface.
Both paths favor the same finish: Rub ‘n Buff in antique gold over a dark base. The Easter egg build uses chalk paint as that base; the Dollar Tree bells use black satin spray. Either way, the dark layer catches in the crevices and the gold sits on the high points. The rope or jute handles hanging.
Cost stays low because the core shape is already manufactured. Time drops to a weekend because drying, not forming, is what you wait for.
Shaping the Bell Body
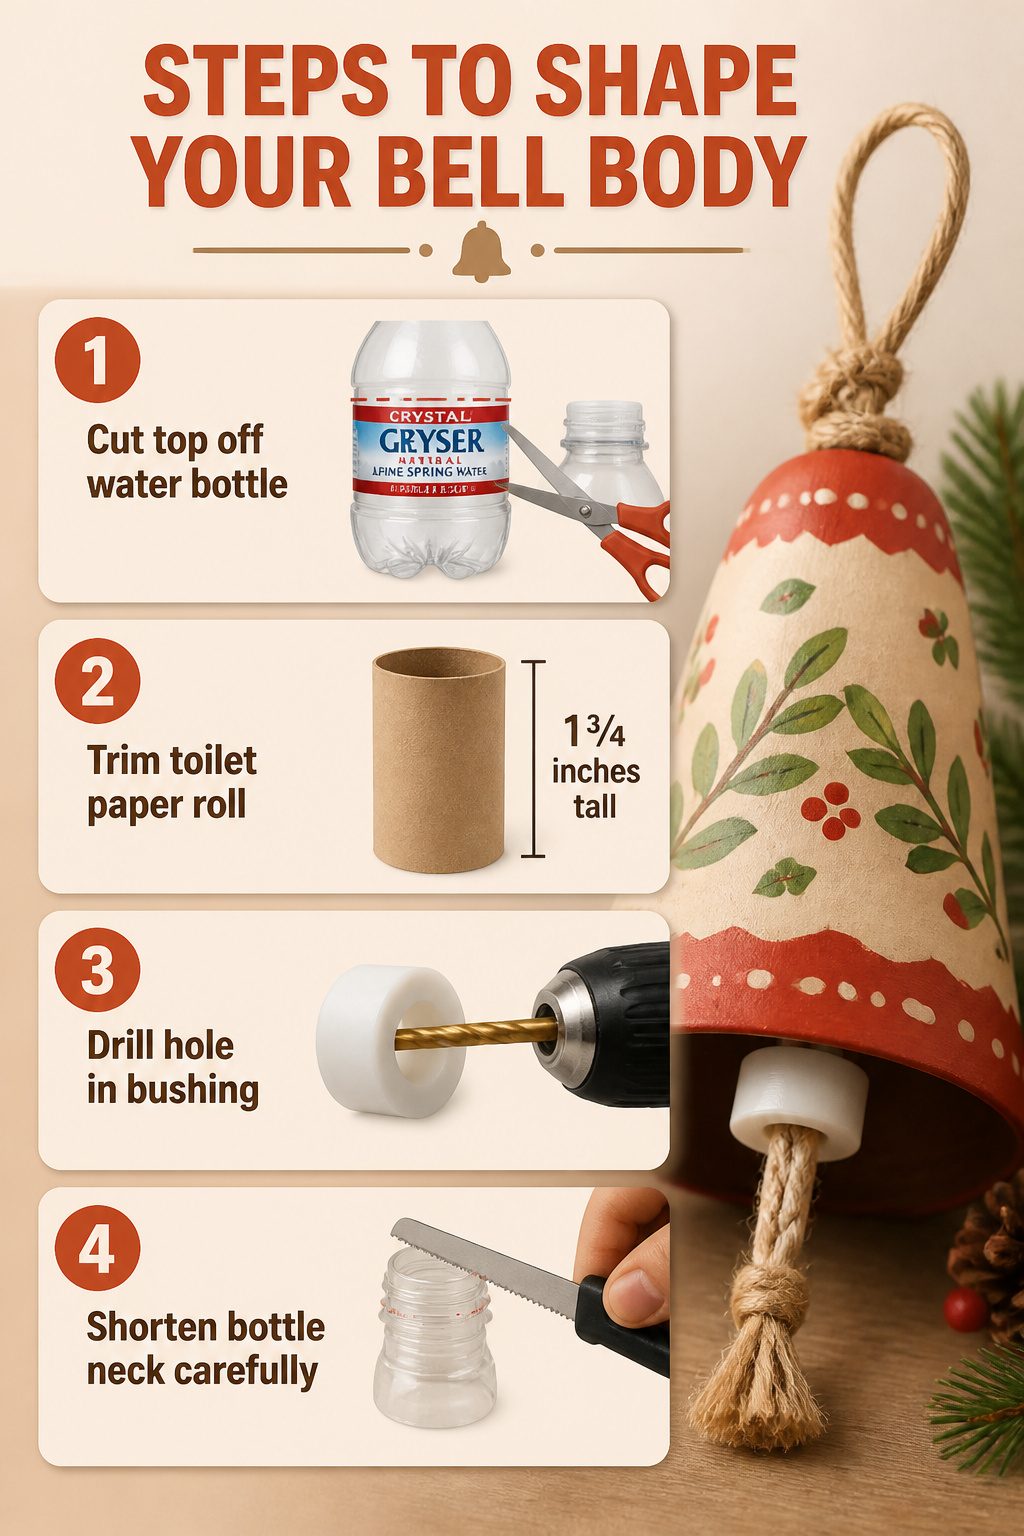
- Cut the top off a water bottle right at the ridge where the label begins; on Crystal Geyser bottles, that ridge gives you a clean guide. The cup-shaped bottom becomes your bell body, and the neck piece you removed can be saved for the loop later.
- For cardboard bells, trim a toilet paper roll to 1 3/4 inches tall. That height keeps the proportions right so the finished piece reads as a bell rather than a tube.
- If you want a clapper that swings properly, drill the hole through a 3/4 inch insulated bushing rather than guessing at placement. The bushing gives you a centered opening and a finished edge that won’t tear twine or jute over time.
- A saw works for shortening the bottle neck if you’re making the more involved top style, but hold it firmly; the plastic jumps and the cut goes crooked otherwise. Hot glue at low temp bonds the bottle rim to a 9 oz cup without melting through, though letting the glue cool a couple seconds longer helps if your gun only runs high temp.
Adding the Clapper
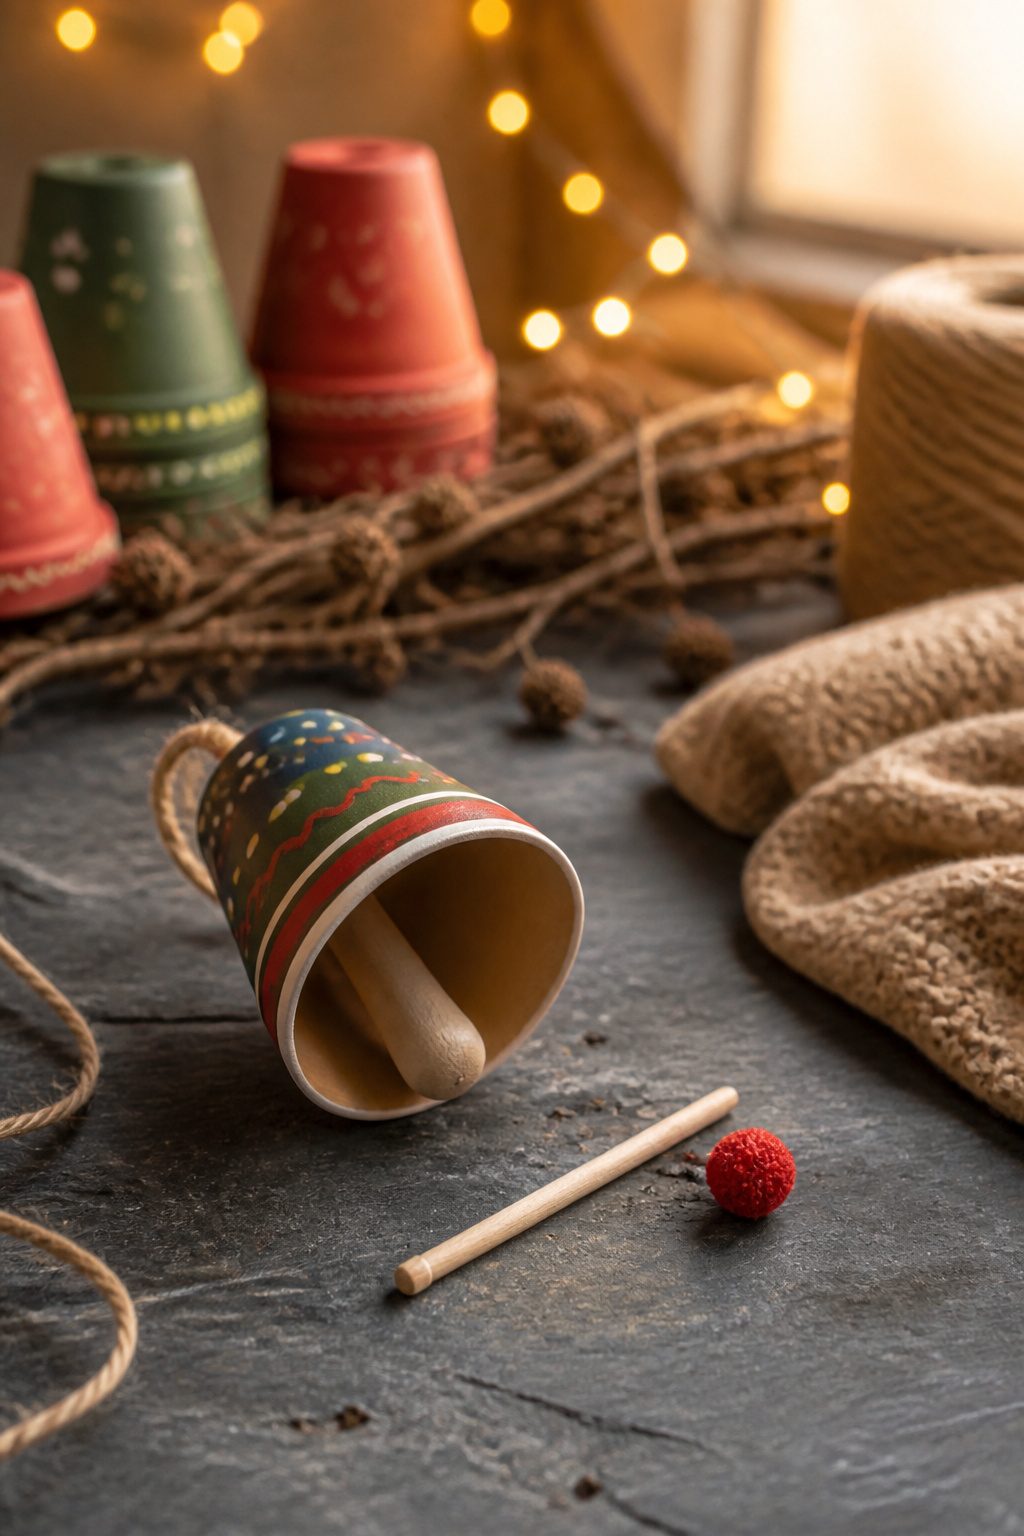
A craft stick cut about a quarter inch longer than the bell body gives the clapper something solid to strike against. Two or three thick glue dots on the end will hold it, or a small puddle of hot glue cooled slightly before insertion does the same job. A reader suggestion beats both: glue a pom pom to the stick end first, then add more hot glue to the pom pom and push it in. The pom pom acts as a buffer so you are not standing there holding the stick while glue sets.
Placement depth is the judgment call. The clapper needs to sit low enough to swing, but a stick hanging too far below the bell rim looks like an afterthought rather than a working part. A quarter inch of overhang is the practical ceiling before the visual starts to break. For actual sound, a real jingle bell tied inside a larger paper or plastic body gives a sharper ring than wood on paper, though it adds weight and needs a sturdier hanger. Leather strips, painted gold and waxed, work for open-bottom vintage styles where the clapper shows, but that is a different construction path entirely.
Painting and Finishing
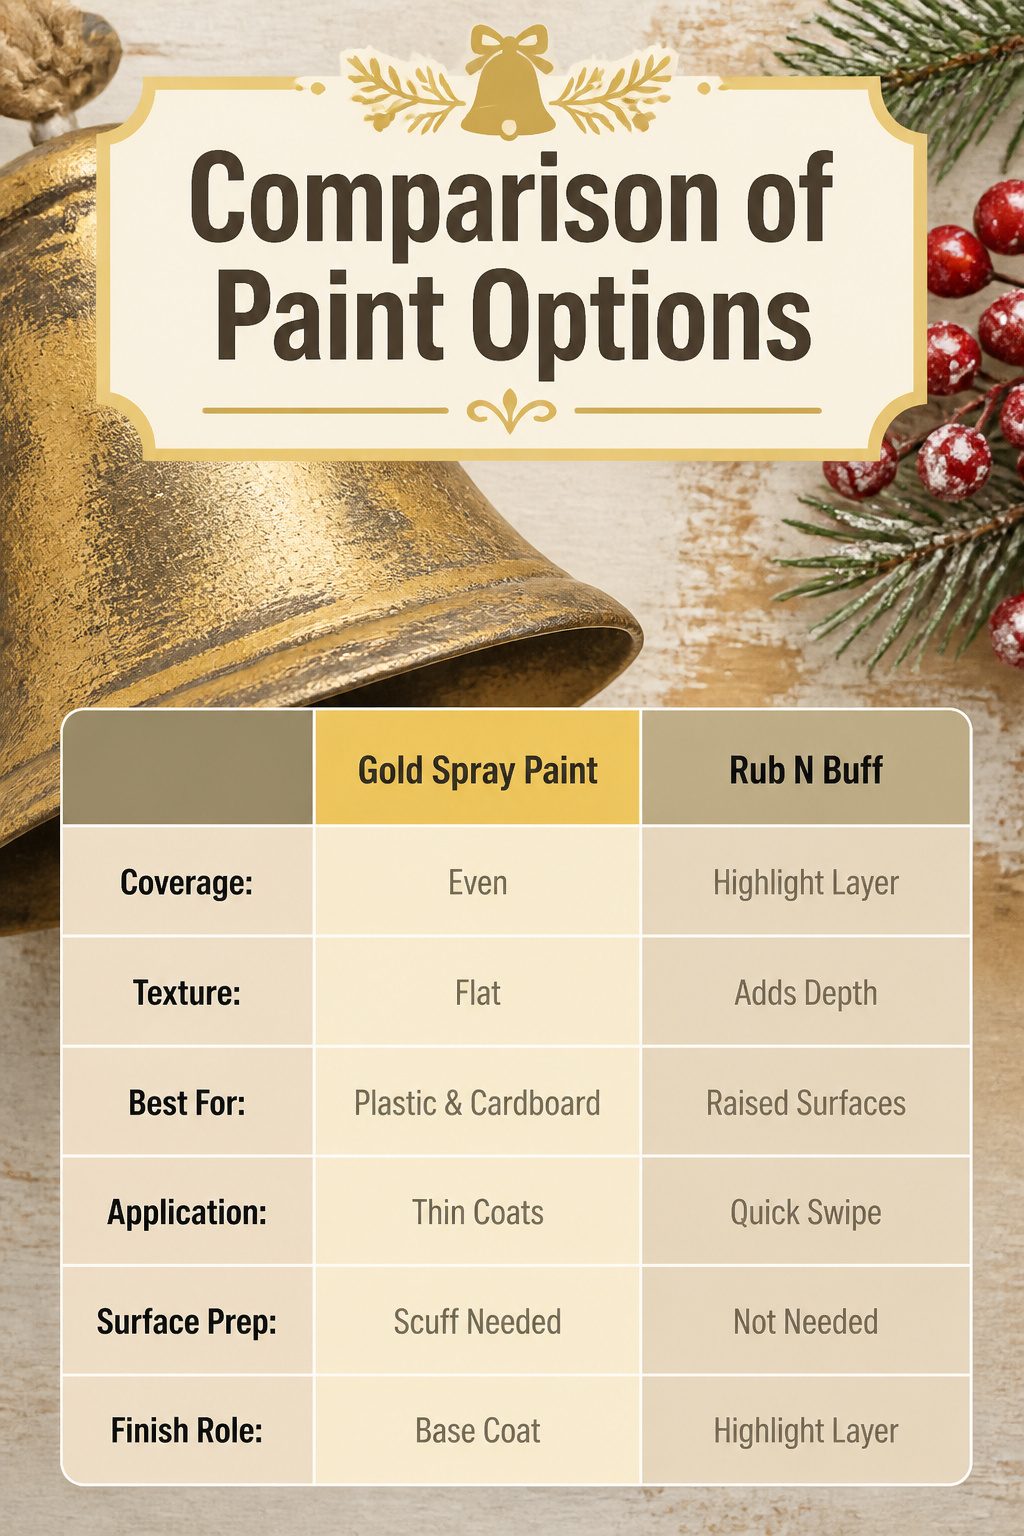
Spray paint and Rub N Buff serve different jobs on a bell, and picking the wrong one for the surface wastes an afternoon. Gold spray paint covers plastic paint buckets and cardboard evenly, but the finish stays flat unless you build thin coats. On slick plastic Easter eggs, that first coat wants to slide right off unless you scuff the surface with sandpaper first. The pouncing motion with a brush, not a smooth stroke, helps black chalk paint grip plastic and paper alike, leaving a little texture that catches light like cast iron.
Rub N Buff, specifically Antique Gold, works best as a highlight layer. A quick swipe across a raised rim or the open top of a book-page bell reads as metal without the overspray risk. It sits on top of other finishes rather than replacing them, so the black chalk base underneath still matters.
For scale, 1 quart paint buckets match the size these projects actually reach. Anything larger stores awkwardly and anything smaller warps under the weight of a clapper and rope hanger. Three of those buckets, painted and waxed, fill a door wreath without crowding it.
Ribbons, Glitter, and Embellishments
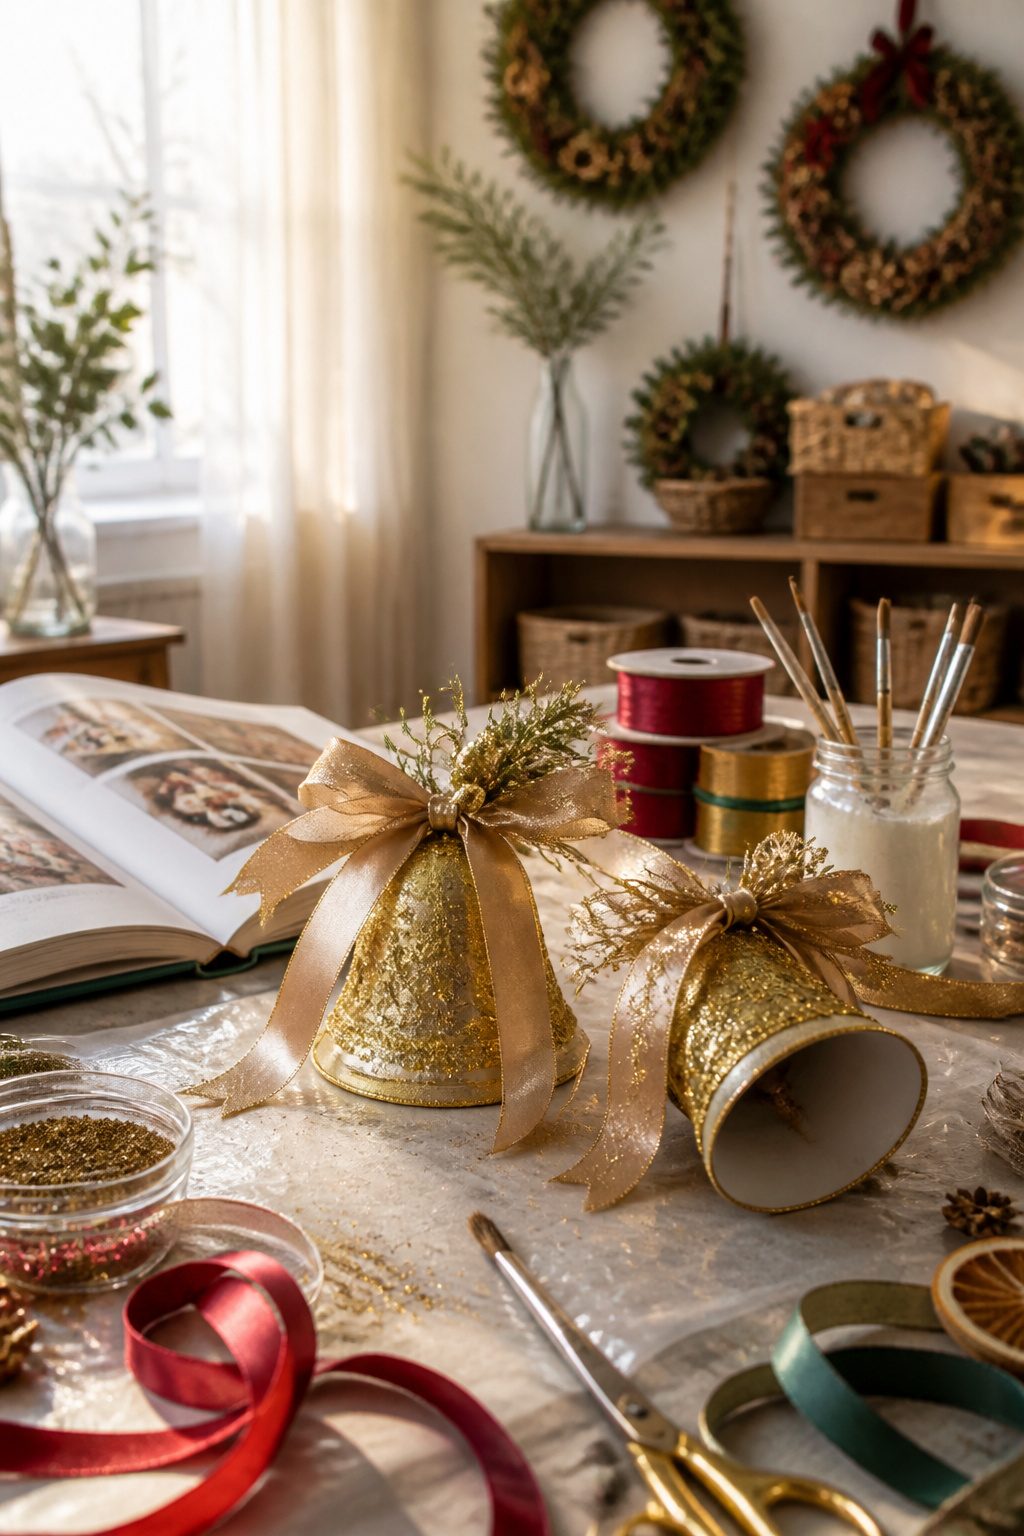
The real test of a finished bell comes after the paint is dry, when the glue and glitter come out. Ribbon choice matters more than you would think: a stiff wired edge holds its shape through a season of door slams, while soft ribbon goes limp by New Year’s. For clay pot bells, thread the ribbon through the drainage hole first, then tie on your jingle bells before you attach anything to the rim. That knot is the only thing holding the whole weight.
Glitter is where most projects self-destruct. I learned to work over wax paper, dotting glue with the end of a paintbrush instead of brushing it on. The glue stays where you put it, and the excess glitter slides right back into the jar. A light wipe of Antique Gold Rub N Buff on paper bells does the same sparkle job without the shed.
Artificial greenery on clay pots needs a glue that flexes. Hot glue works, but it can pop off when the pot shifts in a cold draft. I press leaves and berries around the bottom rim where the curve is gentle, not the vertical sides where gravity pulls everything downward.
Hanging What You Made
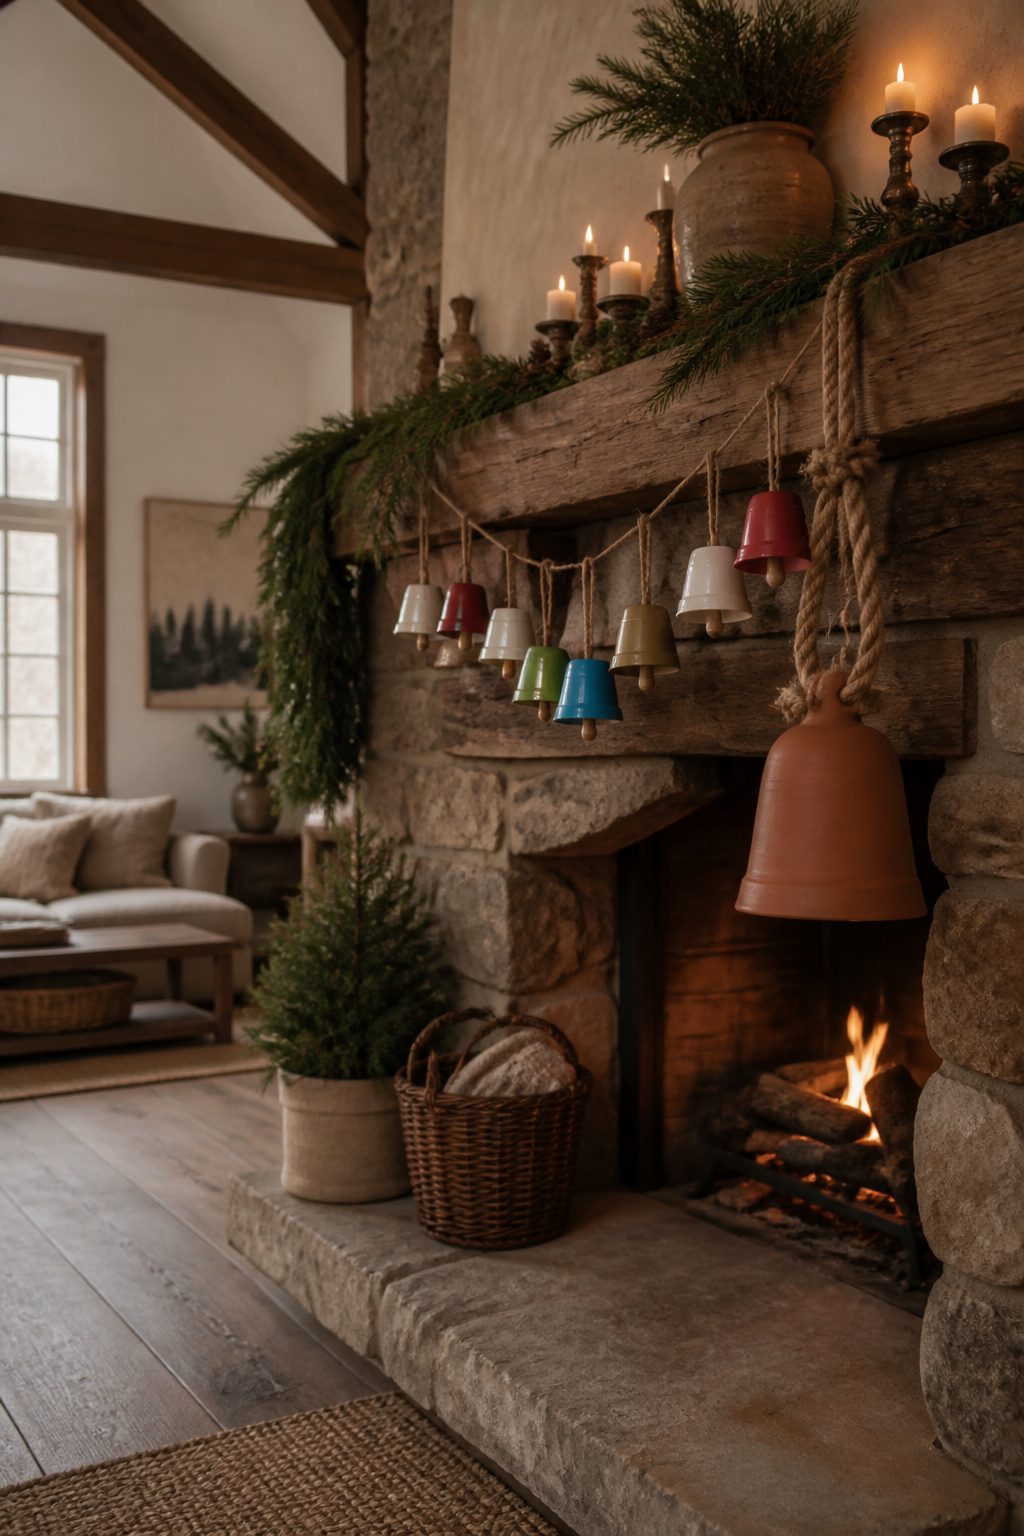
The attachment point depends on what the bell is made of. A plastic cup bell weighs next to nothing, so a loop of twine hot-glued to the inside of the cup or coiled up the outside of the lid will hold just fine on any branch or hook. A clay pot bell is a different story. The pot itself, plus paint, plus a wooden clapper inside, adds up to something that needs rope rather than ribbon, and the loop should anchor through the drainage hole or wrap around the rim rather than relying on glue alone. Ribbon looks festive on the lighter bells, but for the clay pot version it is decorative trim at best, not the actual hanger. If you are hanging either type on a wreath or garland, thread the loop through the greenery and twist it back on itself rather than tying a bow that can slip.
Where I Put Them
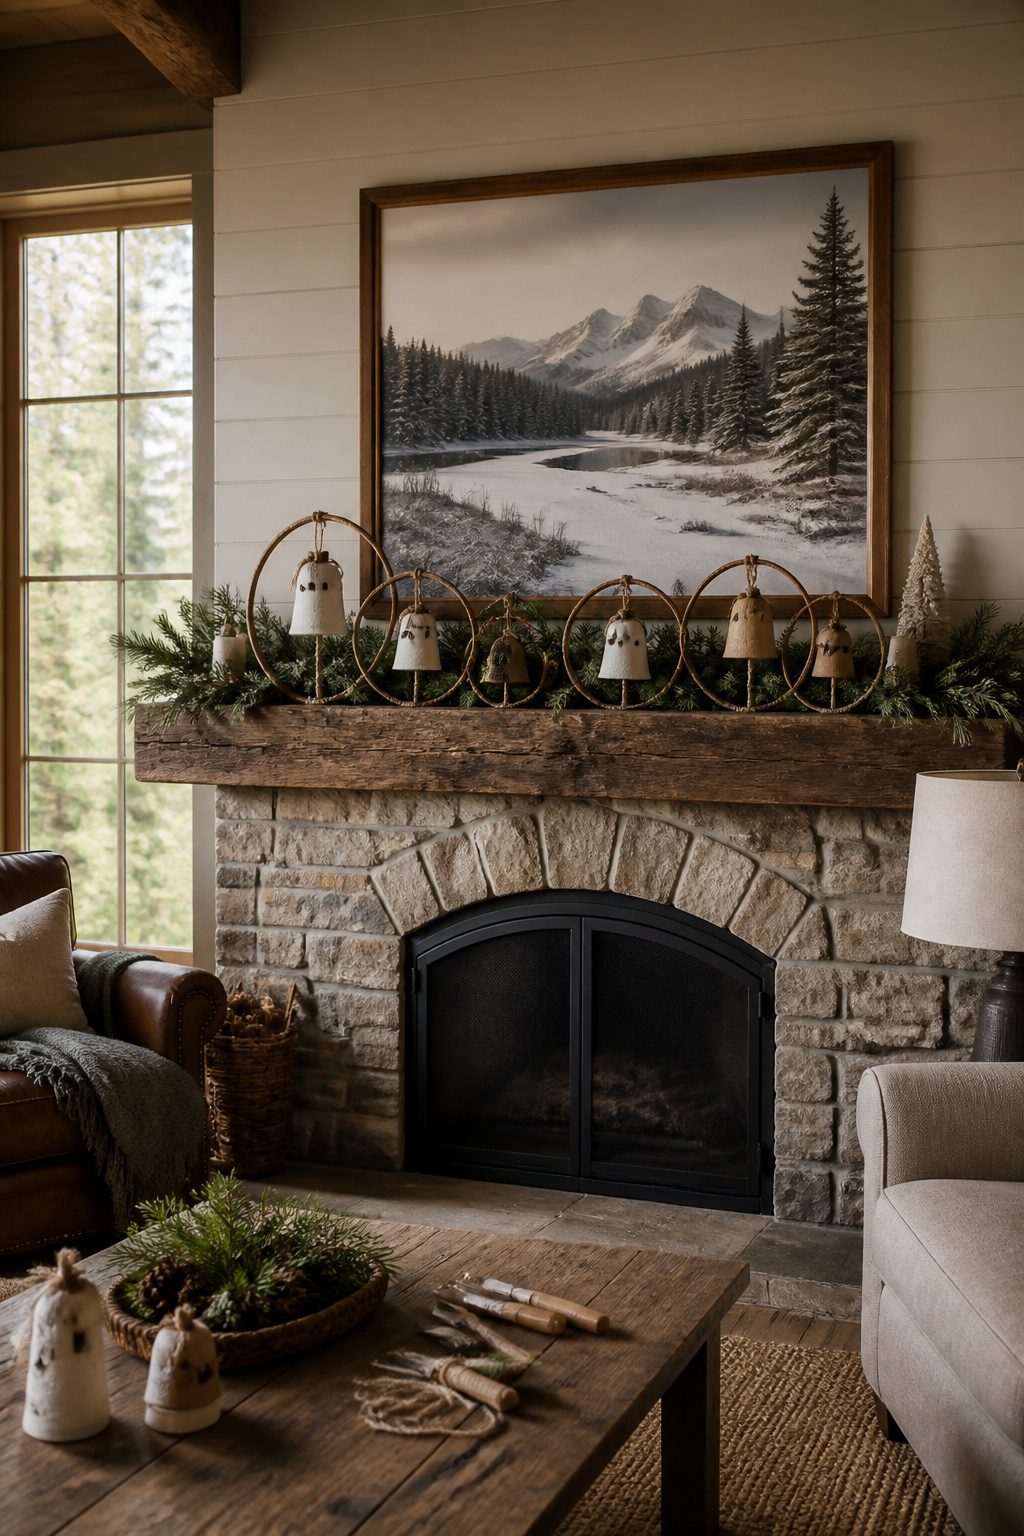
The mantel is where lightweight bells earn their keep. A garland draped along the fireplace can carry three or four toilet-paper-roll bells without sagging, and the layered look hides any uneven paint. Heavier versions, like clay pot or soda can bodies, need a sturdier hook or they slide toward the center by New Year’s. I have not tried railings myself, but the logic holds: a banister wrapped with greenery wants something that will not knock loose every time someone brushes past.
Wreaths are trickier. A cluster of small bells wired to a grapevine base reads as one ornament, while one oversized bell fights the curve and flops to the side. The plastic cup bells I have made stay put; anything with a real clapper inside risks clanging every time the door shuts. For hanging clusters, lightweight wins again. Three or four paper bells at staggered lengths catch air and turn, which is the point, but a single heavy bell just hangs there like a wind chime with no wind. I plan to try a garland across a wide doorway this year, though I suspect the weight limit will mean more bells, smaller, spaced closer than the photos suggest.
What I Messed Up
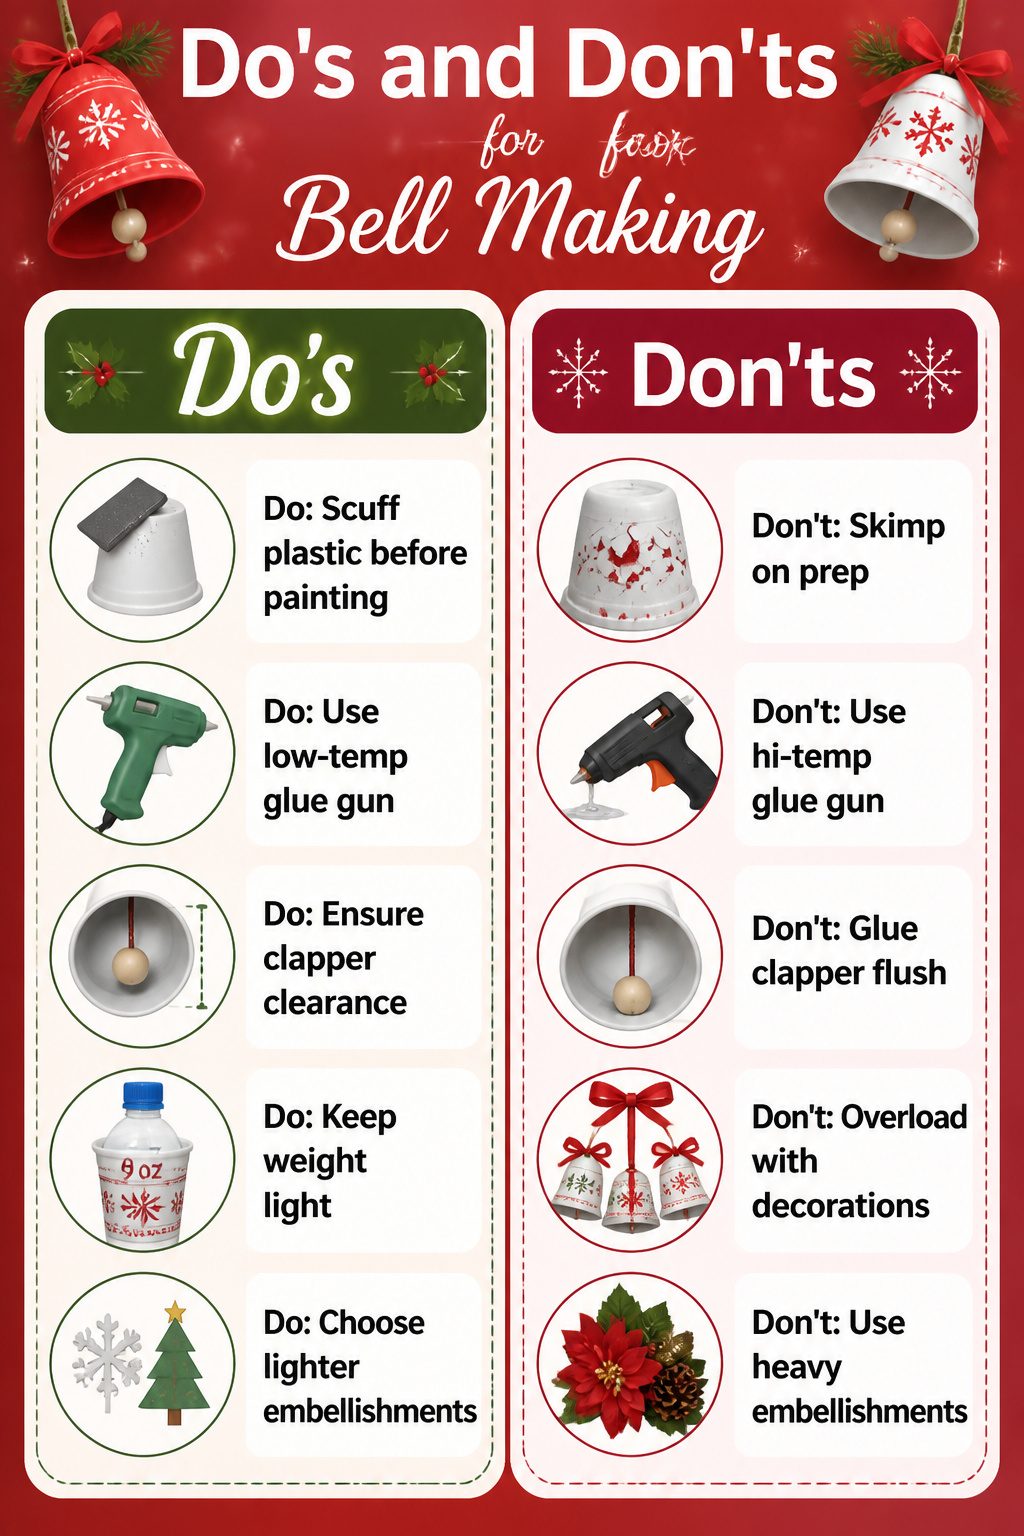
Spray paint on slick plastic cups looks fine in the garage and flakes off by Christmas Eve. The fix costs nothing: a quick scuff with sandpaper gives the paint something to grip, same as you’d do on a plastic Easter egg. I skip gloss finishes entirely now; the matte chalk paints stick better and hide the brush marks from a pouncing motion.
Hot glue guns earn their reputation one melted water bottle at a time. A hi-temp gun will liquefy thin PET plastic before you can pull the trigger; low temp, or waiting that extra second for the bead to cool, keeps the cup rim intact. The scar I carry is from a clapper glued flush to the bottom of a bell. The bead sat too low to swing, so the whole thing stayed silent. Half an inch of clearance changes everything.
Clay pots tempt you to load on snowflakes, leaves, ribbon, bells inside bells. The weight adds up, and a 9 oz cup with a water bottle top glued on is already a top-heavy shape. Three ornaments on one ribbon knot looked balanced in my hand and spun like a lopsided top the second it hung. Fewer embellishments, or lighter ones like paper cut-outs instead of layered artificial flowers, keeps the bell face-forward.
Frequently Asked Questions
How do you make Christmas bells?
You can build the body from a 9 oz plastic cup paired with a water bottle top, a toilet paper roll cut to 1 3/4 inches with a plastic Easter egg cap, a small clay pot, or a shaped aluminum soda can. Each needs a clapper inside, paint, and a hanger to finish. Dollar Tree bells skip the shaping entirely and go straight to embellishing.
What materials do I need for DIY Christmas bells?
Most projects pull from the recycling bin: 9 oz plastic cups, empty water bottles, toilet paper rolls, or aluminum cans. Finishing calls for hot glue, sandpaper, black chalk paint or spray paint, Antique Gold Rub ‘n Buff, rope or jute, and craft sticks for clappers. Dollar Tree bells and plastic Easter eggs are the shortcut versions.
How do you attach the clapper to the bell?
A craft stick cut slightly longer than the bell body works best. Glue a pom pom to the end first, then add hot glue to the pom pom and push it inside so the stick hangs about a quarter inch below the rim at most. For actual ringing sound, tie a real jingle bell inside instead of using wood.
Can I paint my Christmas bells a different color?
Yes. Black chalk paint and Antique Gold Rub ‘n Buff are the finishes the article details, but the techniques work with any color you choose. The key step is scuffing slick plastic with sandpaper first so the paint grips and does not flake off.
Where can I find inexpensive supplies for making Christmas bells?
Dollar Tree sells plastic bells at $1.25 each and carries most of the paint, glue, and embellishments you need. Hardware stores stock small clay pots for a few dollars. Thrift stores yield old books for page-covered bells. Most builds stay under five dollars if you already have cups, bottles, and toilet paper rolls on hand.