
Scrap wood Christmas projects are built from the boards already sitting in your garage: 2×4 offcuts, pallet strips, and plywood scraps that would otherwise hit the trash. The trick is knowing which shapes suit which leftovers, since a split-corner 1×8 still works for a stenciled "Joy" sign while thin plywood scraps become refrigerator magnets. A miter saw and a $4 chip brush are enough to turn either into something that looks finished, not patched together.
Scrap Wood Christmas Trees
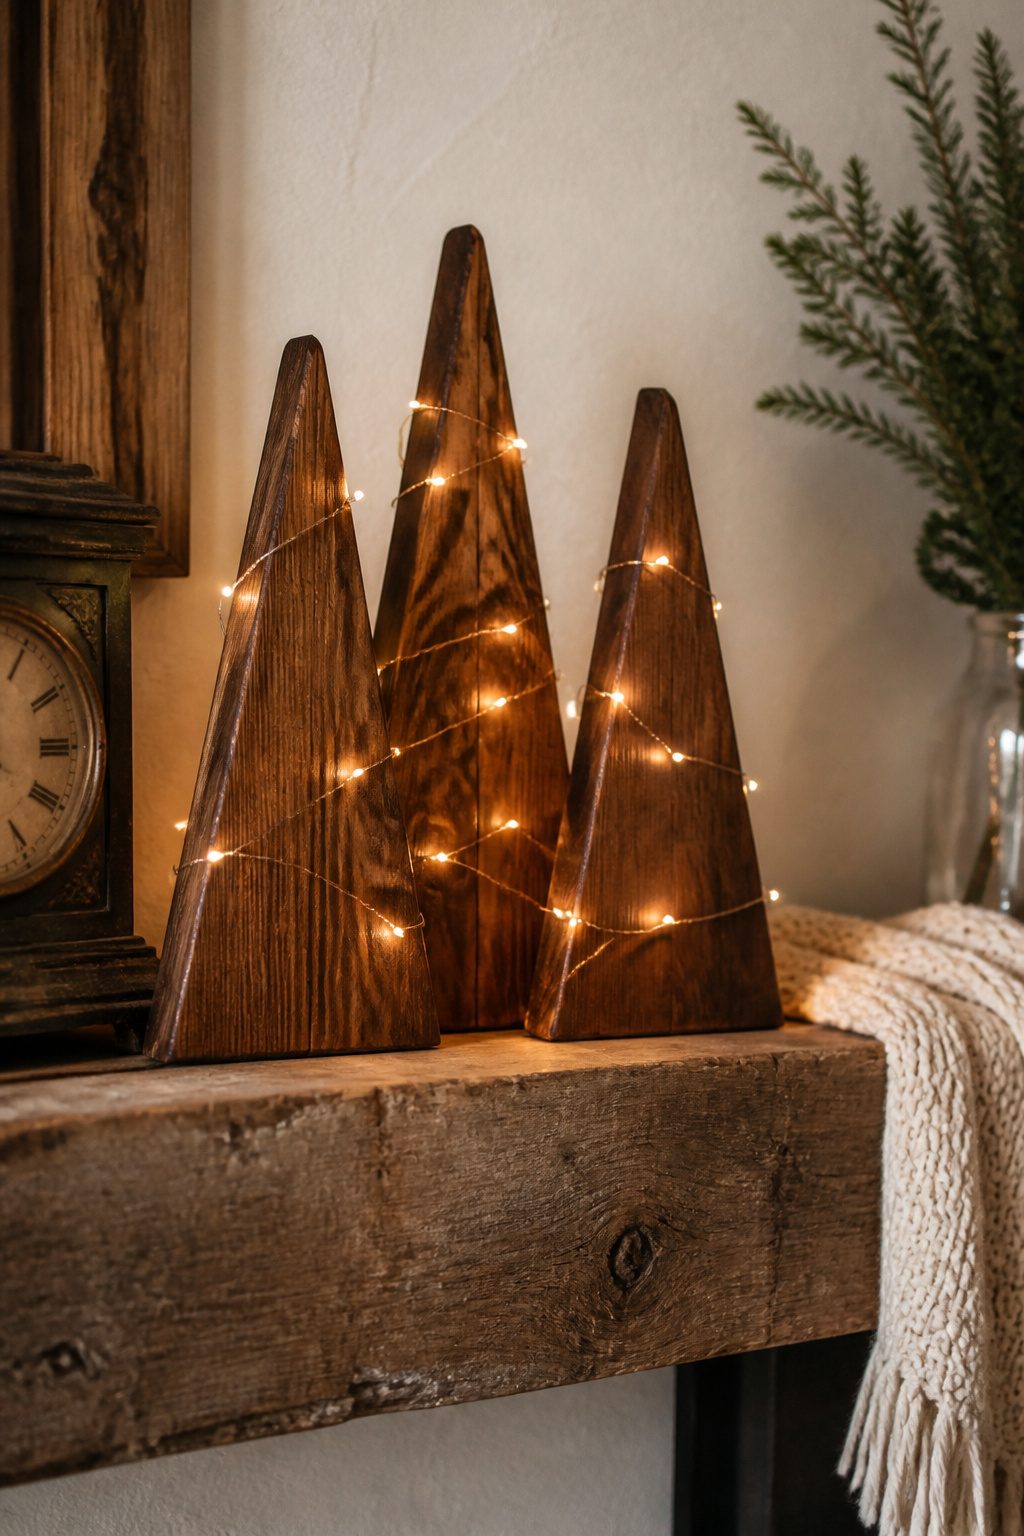
A miter saw turns scrap 2x4s and 1x offcuts into tabletop trees in under an hour. I cut mine with 22.5° angles so the edges meet clean, then run them over an orbital sander to knock off the fuzz. Heights around 20 inches feel right for a mantel without crowding the stockings.
Two finishes keep these from looking like the same project copied ten times. Early American stain gives a warm, vintage look that pairs well with fairy lights. Waverly Moss paint, dry-brushed on, reads as a soft faux-stain and works if you want color without the craft-fair brightness of full-coverage paint.
For the base, a flat scrap board squared off on the miter saw keeps the tree upright without tipping. A 15-gauge finish nailer or 2½-inch screws through the back side hold the stack together; clamps keep everything aligned while you fasten. Hot glue and a stapler handle ribbon or a bow if you want to dress it up, though mini ornaments hung with thread work too.
The real appeal is grouping three at staggered heights on a shelf. They read as a little forest, not a single object, and the scrap-wood irregularities mean no two match. That is the point.
DIY Wooden Ornaments
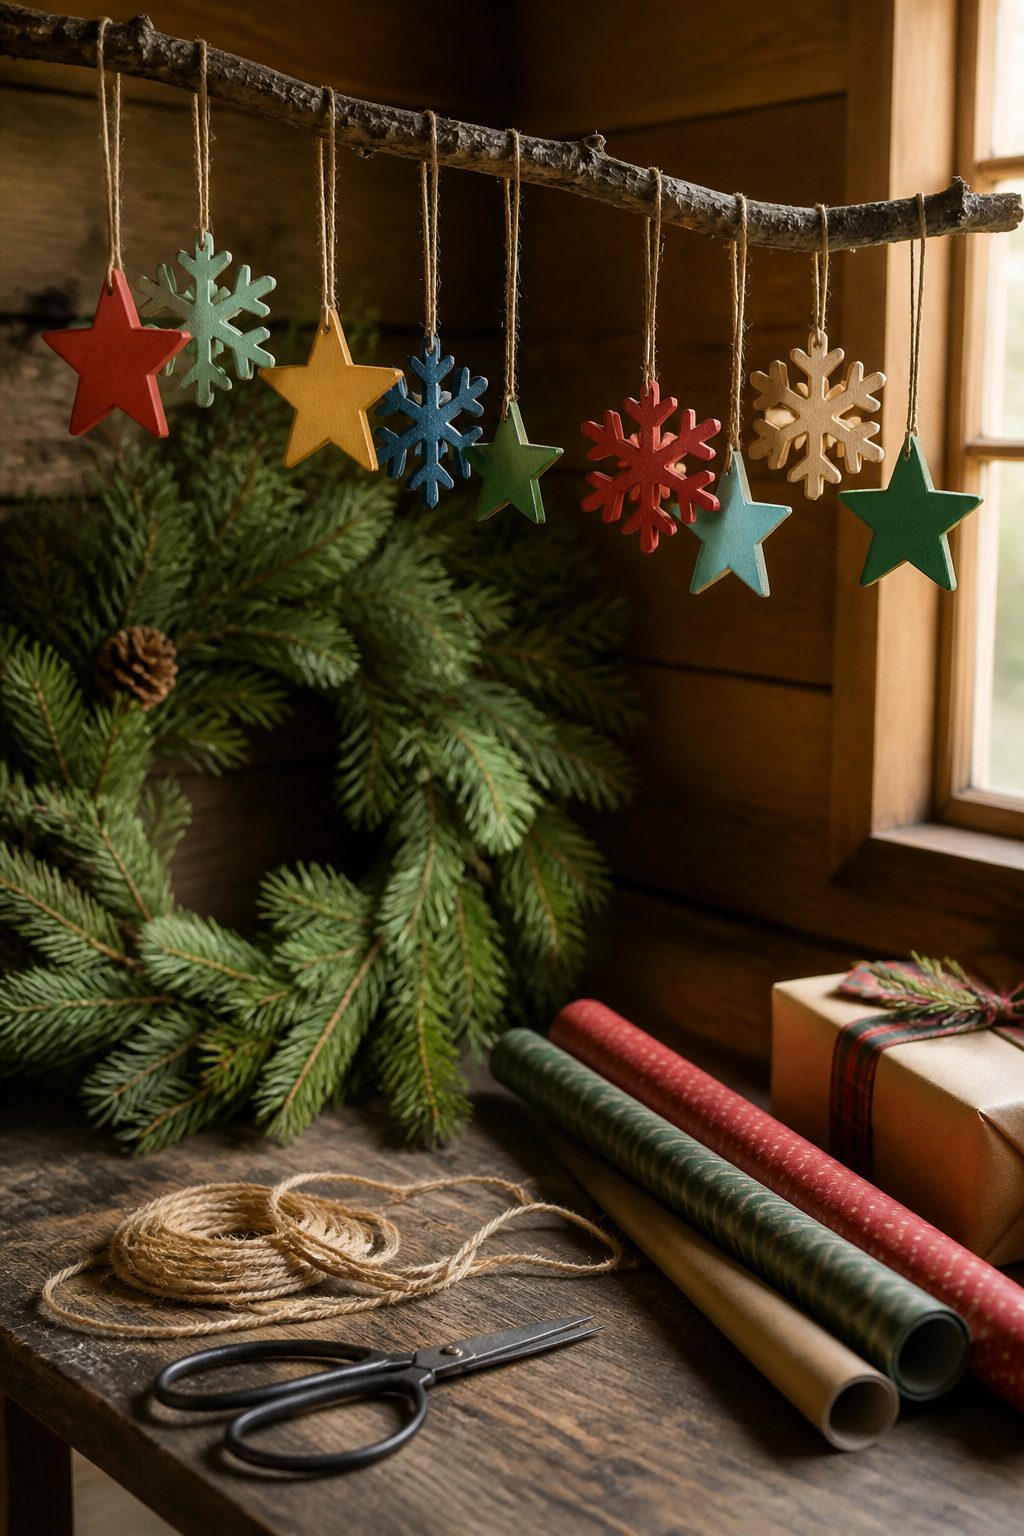
Small wood scraps are ideal for cutting into simple ornament shapes. A jigsaw handles stars and snowflakes well, though a coping saw works if that is what you already own. The key is keeping the pieces light enough to hang without bending branches; under a quarter inch thick and no wider than your palm is the practical limit I have found.
Paint goes on smoother if you sand the cut edges first. Acrylic or chalk paint both stick to raw scrap wood, and a coat of clear spray sealant keeps the color from rubbing off in storage. For the hanger, drill the hole before painting so you are not handling wet finish. Twine threaded through the top loop holds well and looks right with the rustic grain.
These work as tree ornaments, but they also serve as gift tags that outlast the holiday. Paint a name or short greeting on one side with a fine brush or paint pen, and the recipient gets a keepsake after the wrapping is gone. The same piece does both jobs, which matters when you are cutting from scraps that might otherwise hit the trash.
Rustic Holiday Signs
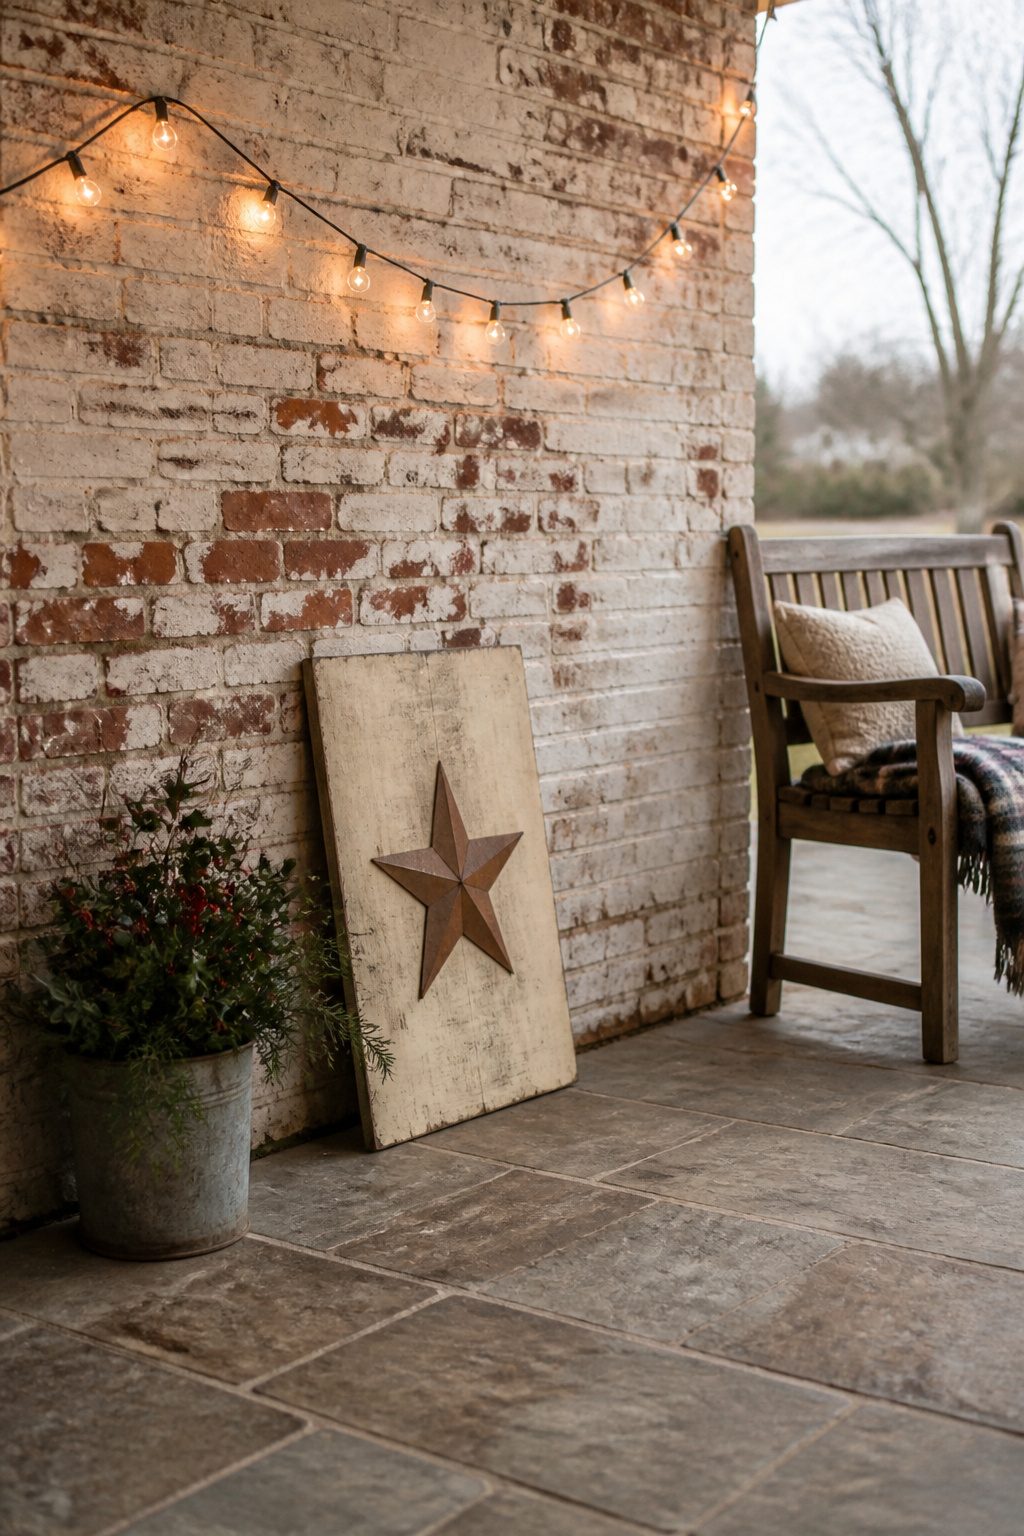
Flat wood scraps turn into holiday signs faster than almost anything else in the pile. A 1×6 or 1×8 offcut, even one with a split corner, becomes the backing for a word like "Joy" or "Peace" once you stencil it on. I trace my letters first with a printout and a ballpoint pen pressed hard enough to leave a slight groove, then fill in with a small flat brush. Butter Cream Chalk Mineral Paint covers in one coat and reads as aged white rather than stark craft-store bright, which matters if the wood underneath is already gray from sitting outside.
The weathered look comes from dry brushing, not from waiting years. Load a chip brush with almost no paint, wipe most of it on a rag, and sweep across the grain in light strokes. What lands highlights the ridges; what skips leaves the darker wood showing through. Two passes this way, letting the first dry ten minutes, gives more control than one heavy coat. Some makers prefer a full wash of thinned white paint over the whole board first, then sand edges to distress. Either route works; the wash reads softer, the dry brush reads more hand-worn. I keep a test scrap from the same batch and try both sides before committing the last good piece.
Snowman Decorations
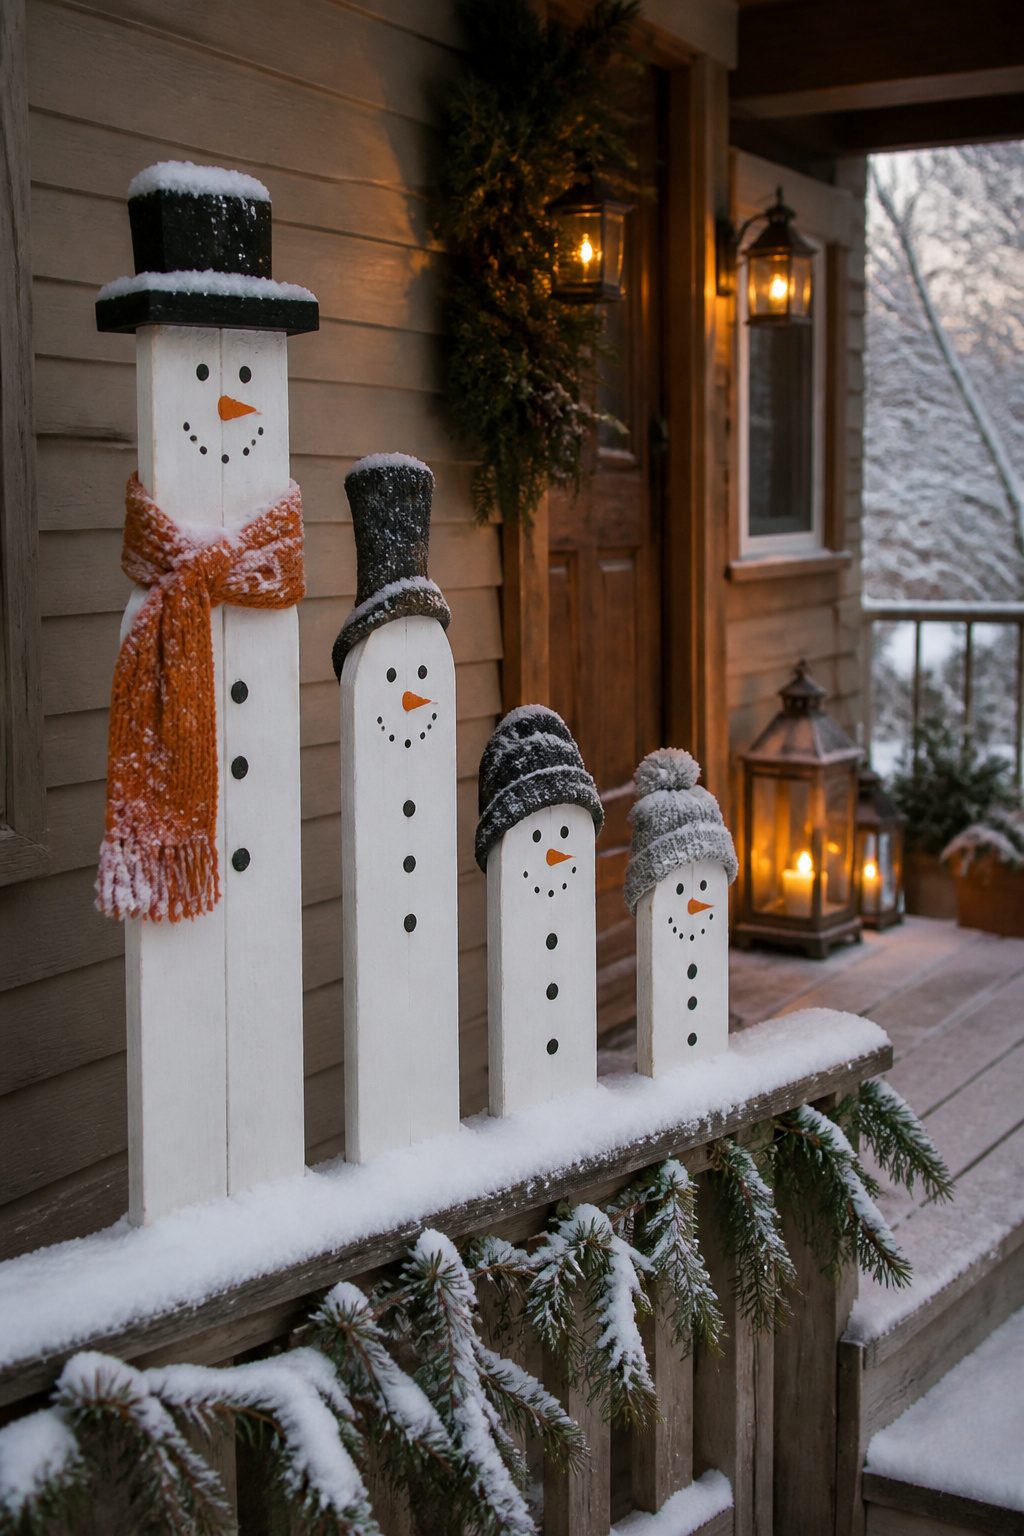
Long wood planks left over from a fence repair or a shelving project are the right starting point for painted snowmen, since the height of the scrap piece sets the snowman’s proportions from the start. A 2-foot length reads as a squat, friendly figure; a 4-foot plank leans into porch-decor territory.
Paint the plank white, then add the face and buttons with whatever craft paint you have on hand. A scarf can be scrap fabric, a ribbon, or even a ribbed sock pulled over the top for a stocking cap if the piece is at least eight inches above where the heel would sit. Assembly runs about twenty minutes per figure, and the finished snowman will not melt.
Standing versions need a brace or a stake driven into the base; hanging versions need a single screw eye or a loop of twine set into the back before you paint, so the attachment point hides. The scrap length decides which route makes sense. A tall plank gets heavy fast, so a leaning stand against the porch rail is often easier than trying to hang it.
Scrap Wood Advent Calendars
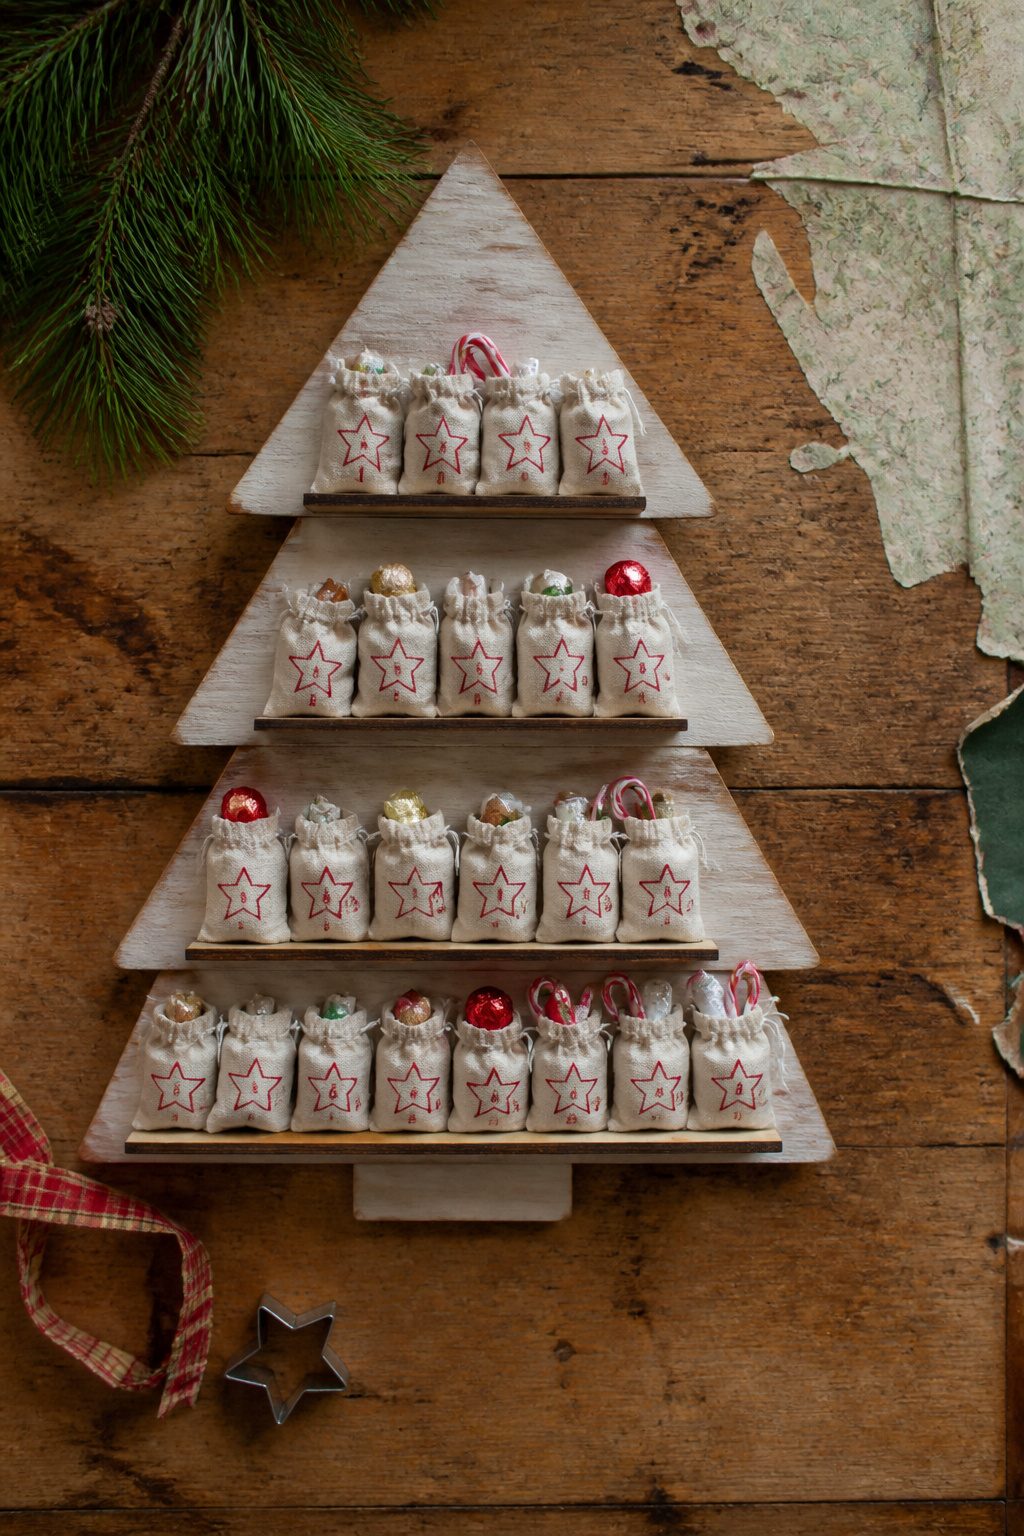
The simplest scrap wood advent calendar starts with a tree-shaped backboard built from 1x material and 1/4-inch plywood, with four shelves and hooks running down the center. Number each day directly on the wood with paint or vinyl, or hang numbered tags from the hooks if you want to reuse the piece year after year. Small cloth bags or matchbox-size boxes fit the shelves; fill them with candy, tea bags, or folded paper slips with activities.
Door or drawer construction adds work but hides the contents better. A 1/4-inch plywood door on a simple butt hinge covers a shelf opening cleanly; a shallow drawer box needs sides and a pull, which means more cuts and more time. For a weekend build, hooks and open shelves win on speed.
Scaling runs from a wall-mounted unit, maybe 3 feet tall with a shelf hanging kit, down to a tabletop version under 18 inches that sits on a sideboard. The wall size holds stockings or Christmas cards when December ends; the small one works as a mantel accent with mini ornaments swapped in for the bags. I have built both, and the tabletop tree gets far more use in apartments where wall space is already claimed by bookshelves.
Mini Wood Presents
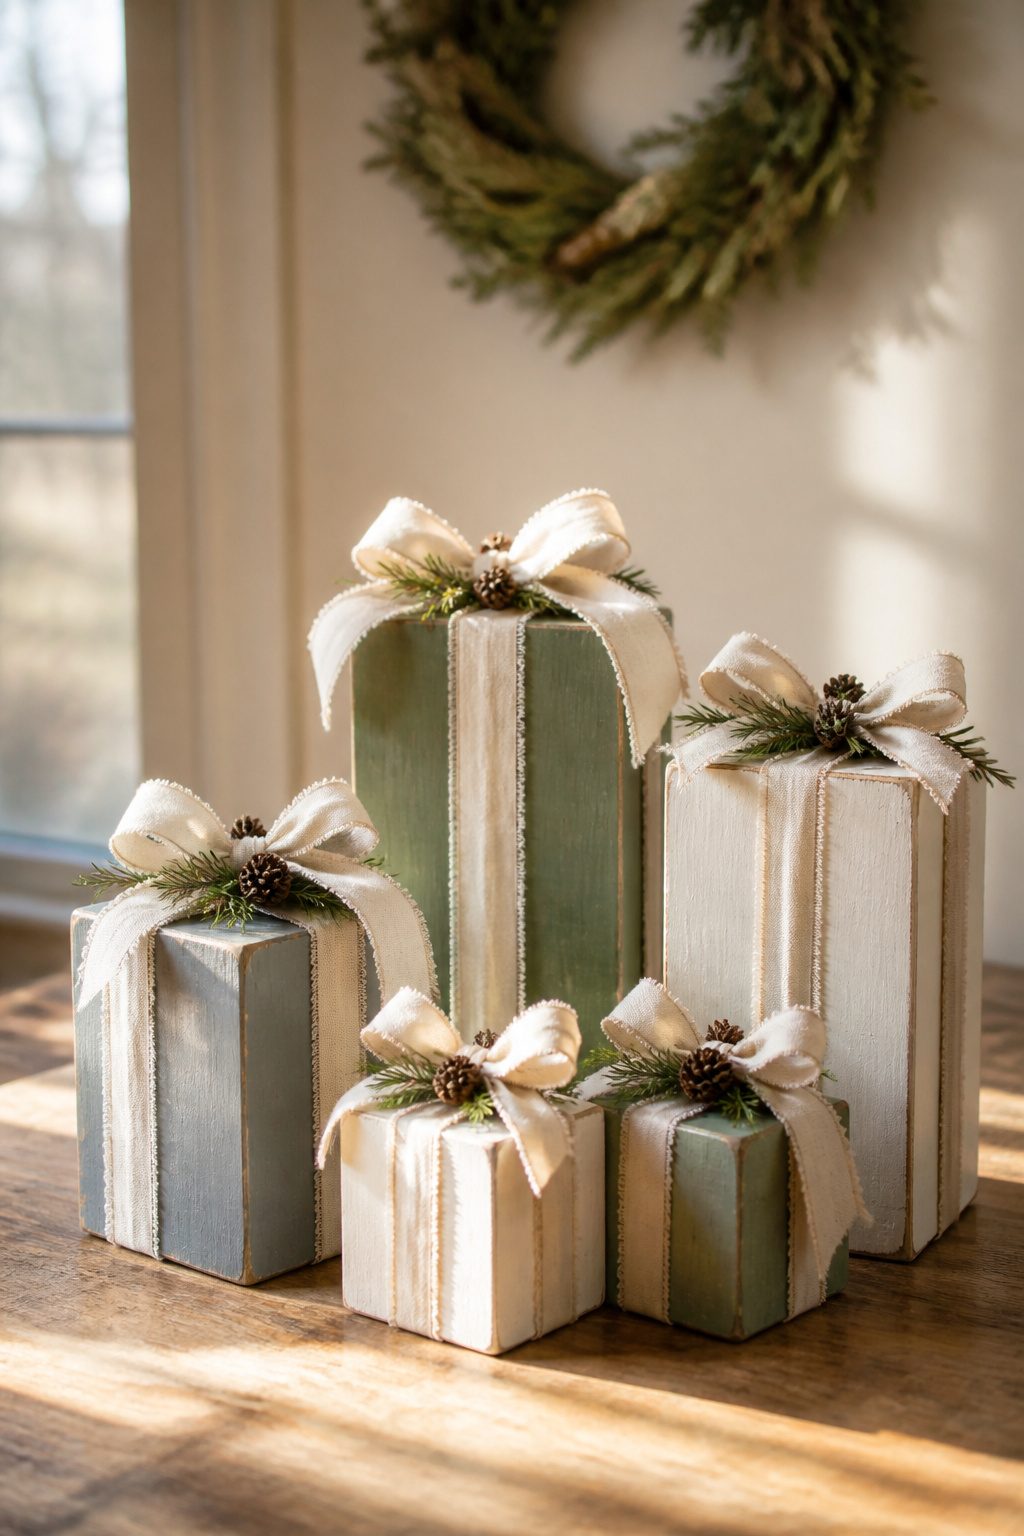
A 2×6 cutoff about six inches long is the right starting stock for a mini wood present that reads as a gift, not a block. The 1½-inch thickness gives it heft without weight, and the 5½-inch width looks convincingly boxy once you add ribbon. I cut mine to rough length on the miter saw, then sand the faces to 120 grit so paint sits flat instead of catching on mill marks.
Joinery can be nothing more than glue and brad nails if the scrap is straight-grained and dry. A simple butt joint with wood glue and two 18-gauge nails per corner holds fine for shelf decor. For tree ornaments, drop to 1×4 stock and keep the height under four inches, or the branch sags.
Paint goes on in two coats: one solid color, then a dry-brushed second in cream or soft gray to fake the look of kraft paper under ribbon. I skip the lid illusion entirely and wrap the block with real cotton ribbon, tacking the cross with a staple on the back where it hides against the mantel. Faux greenery or a tiny name tag finishes it, and the whole thing costs nothing but the scrap pile and a yard of ribbon.
These tuck into tiered trays, line up under a tabletop tree, or cluster on a porch step in graduated sizes. The same block, unstained and stenciled with a single initial, works as a last-minute neighbor gift that does not require a trip to the craft store.
Wooden Christmas Magnets
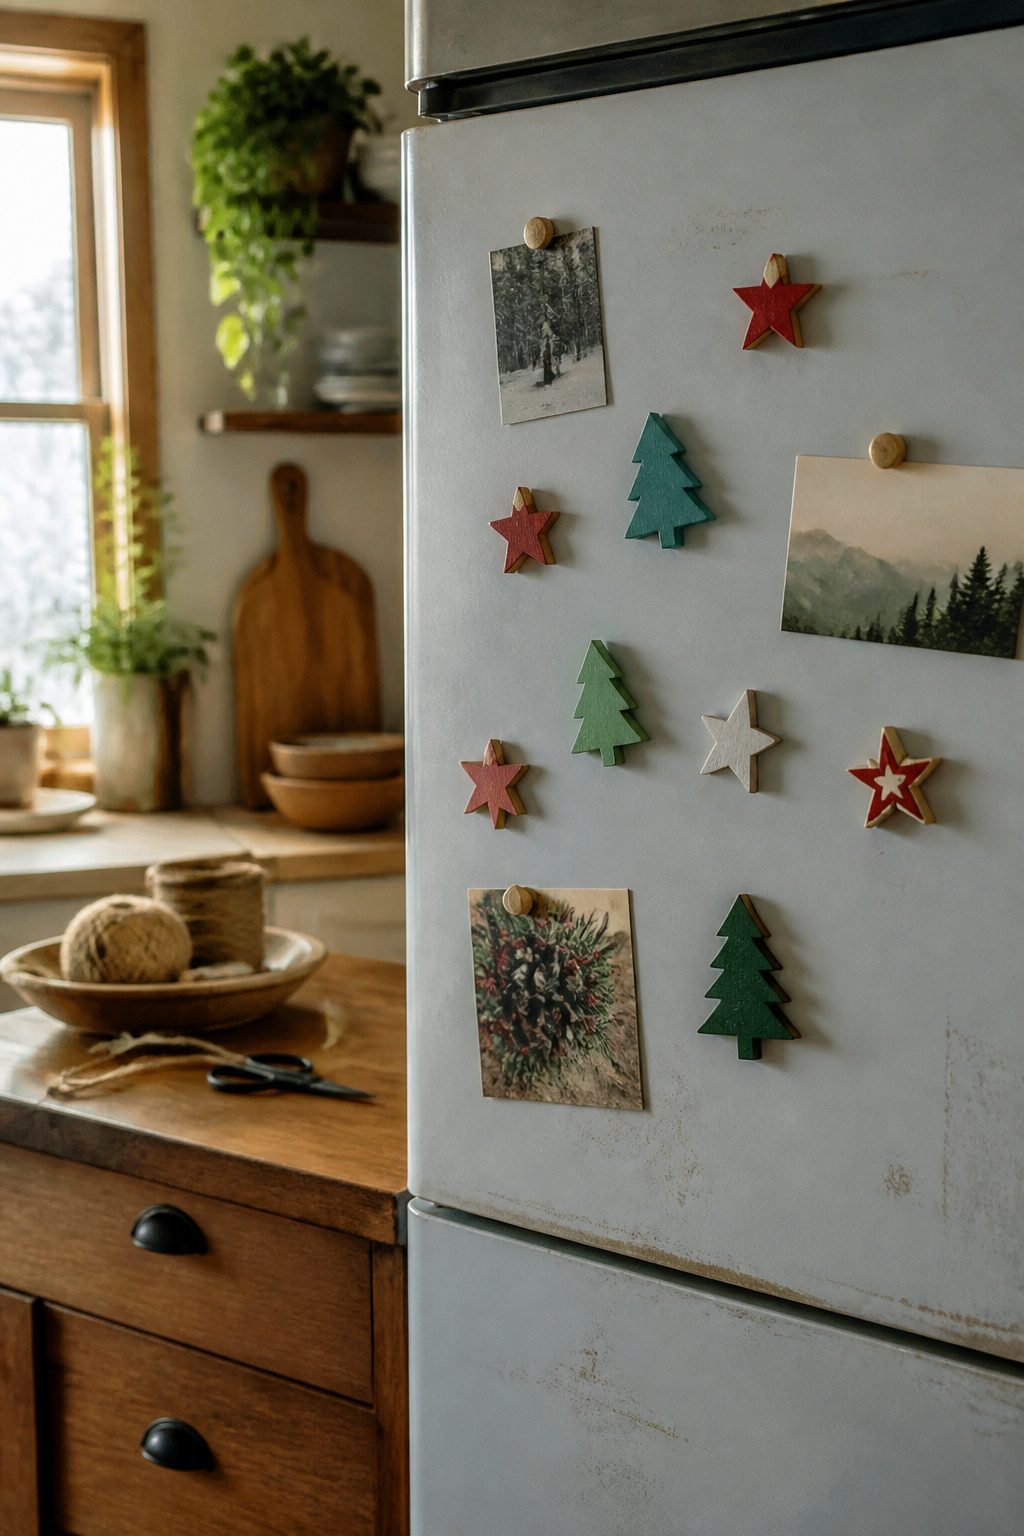
Small wooden shapes for refrigerator magnets hit a sweet spot between using up real scraps and not needing a workshop full of tools. A jigsaw handles trees, stars, or gingerbread men cut from 1/4-inch plywood leftovers, and the small scale means one botched curve costs you maybe a three-inch offcut, not a whole board. Paint or decoupage with wrapping paper or Christmas cards, then attach magnet strips to the back with strong glue centered on the piece.
Keep finished magnets under about two inches tall so they actually hold on a fridge door without sliding or crowding each other off the edge. The size also makes them natural stocking stuffers or advent calendar fillers, something a child can make with supervision and something a craft club can batch out cheaply enough to sell.
Scrap Wood Stocking Holders

A loaded stocking with an orange and a paperback can pull twenty pounds easy, so the base needs real heft. Last year I used a glued-up stack of 2×4 offcuts about eighteen inches long and eight inches deep, drilled for a pair of coat hooks, and the thing still slid until I added weight. Felt or rubber feet matter more than the finish because a scratched mantel outlasts any holiday memory. The Ana White approach keeps the whole build under twenty dollars if you already own the drill; paint it or leave it raw, but sand the edges where small hands will reach. No mantel at all? The same heavy base works on a side table if you extend the footprint another few inches in back, counterbalancing the stockings’ forward pull.
Christmas Card Displays

Holiday cards have a way of spreading across every flat surface in the house until mid-January. A single long plank of scrap wood, hung on the wall or leaned on a mantel, pulls them into one place where people actually look at them.
Two orientations handle most spaces. Horizontal planks run above a sofa or along a hallway, with clothespins or small hooks spaced every few inches to catch cards as they arrive. Vertical planks fit narrow gaps between windows or beside a door, drawing the eye upward and filling height that otherwise goes empty. Twine stretched between two small nails on a horizontal plank gives a slightly different look, the cards clipped in a loose row that sways a little when someone walks past.
The horizontal version solved my own countertop problem two years ago, though I will not pretend the leaning placement against the wall was stable. A single bumped elbow sent the whole thing sliding. A picture hook or a small nail into a stud keeps it where you put it, and the five minutes of finding a stud beats picking cards off the floor for three weeks.
A plank rough-sawn on one edge and painted on the other lets you flip it year to year, rustic or clean depending on the room. The clips do the work of display; the wood just needs to be straight enough that the cards hang level, which most scrap cutoffs manage without any planing.
Oversized Gift Tag Ornaments
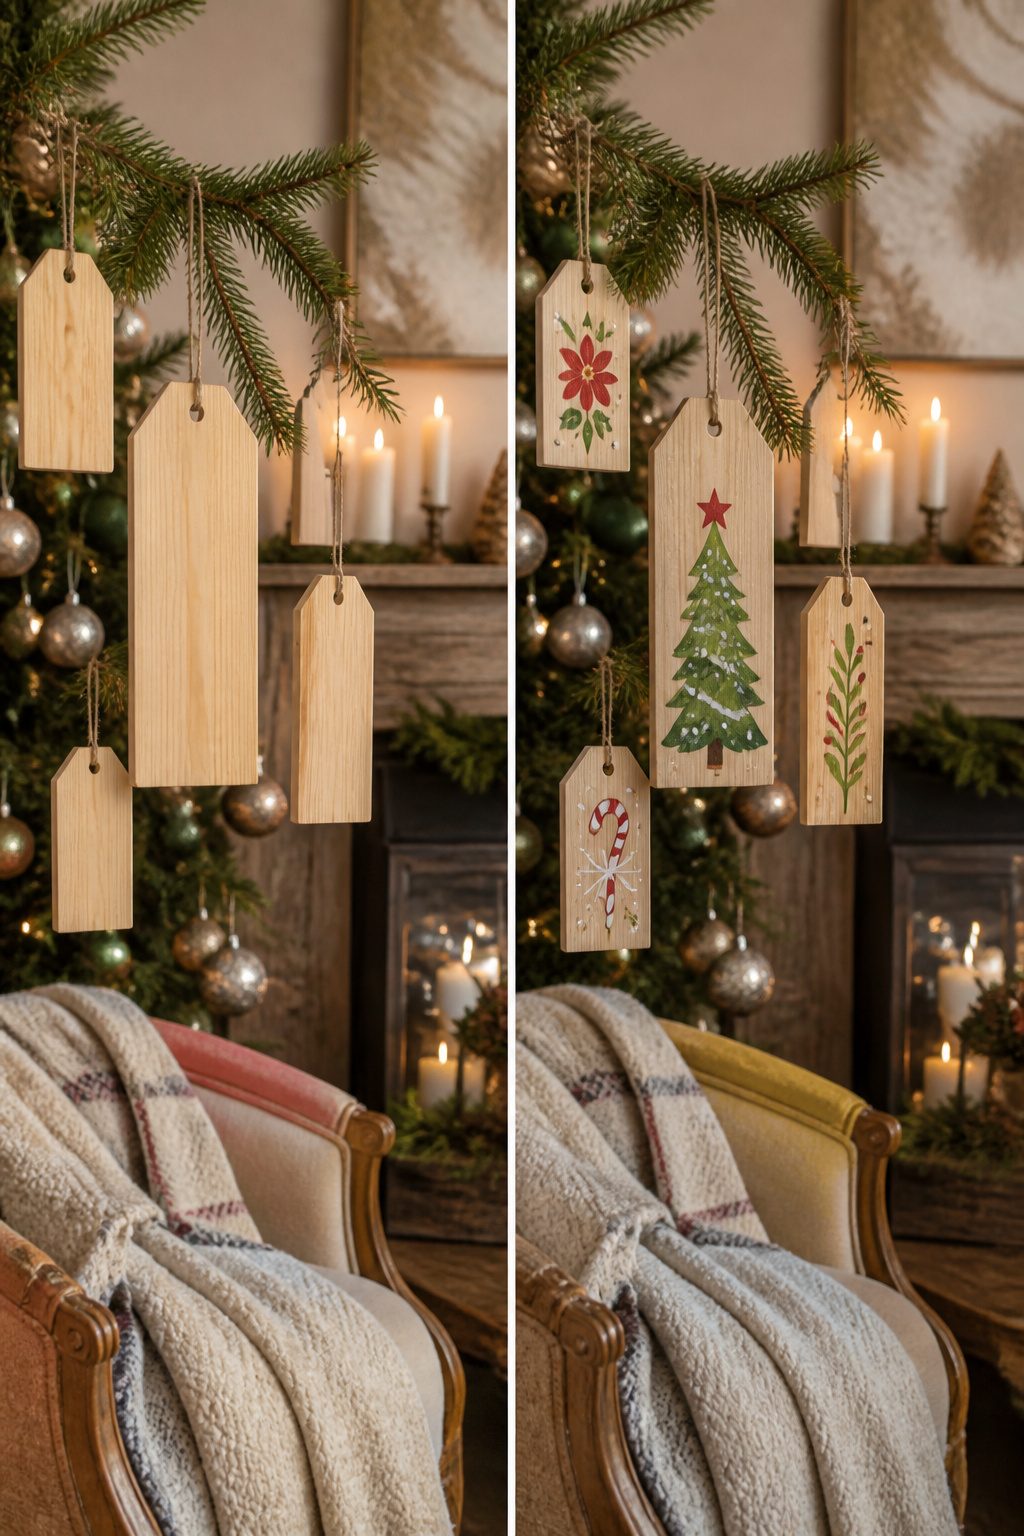
Oversized gift tag ornaments started for me when a shipping crate left behind a slab of pine too thin for shelves but too wide to toss. A 6-inch strip, sanded smooth and drilled with a ¼-inch hole at the top, became the first tag for my sister’s new bike. Paint pens from the craft drawer let me letter her name without the wobble of a brush, and a length of twine through the hole turned it into something she hung on her tree instead of throwing away with the wrapping.
The same size works hung alone: a name on one side, the year on the other, light enough that standard twine won’t stress branches. Two ways to play this. Keep the wood raw and let the grain show through thin paint, or prime it white so colors read like paper. Raw wood wins if you want the scrap to look like something you found; primer wins for readability across a room.
The hole placement matters more than the shape. Too close to the edge and the twine tears through; too low and the tag hangs crooked. I mark mine one inch down from the top corner, centered edge to edge, which leaves enough meat to survive a kid pulling it off a package. For actual gift tags on large boxes, the scale is the point: a 5-by-7-inch tag reads playful on a kitchen appliance box, absurd on jewelry. Match the tag to the gift’s size or commit to the joke.
Materials and Tools
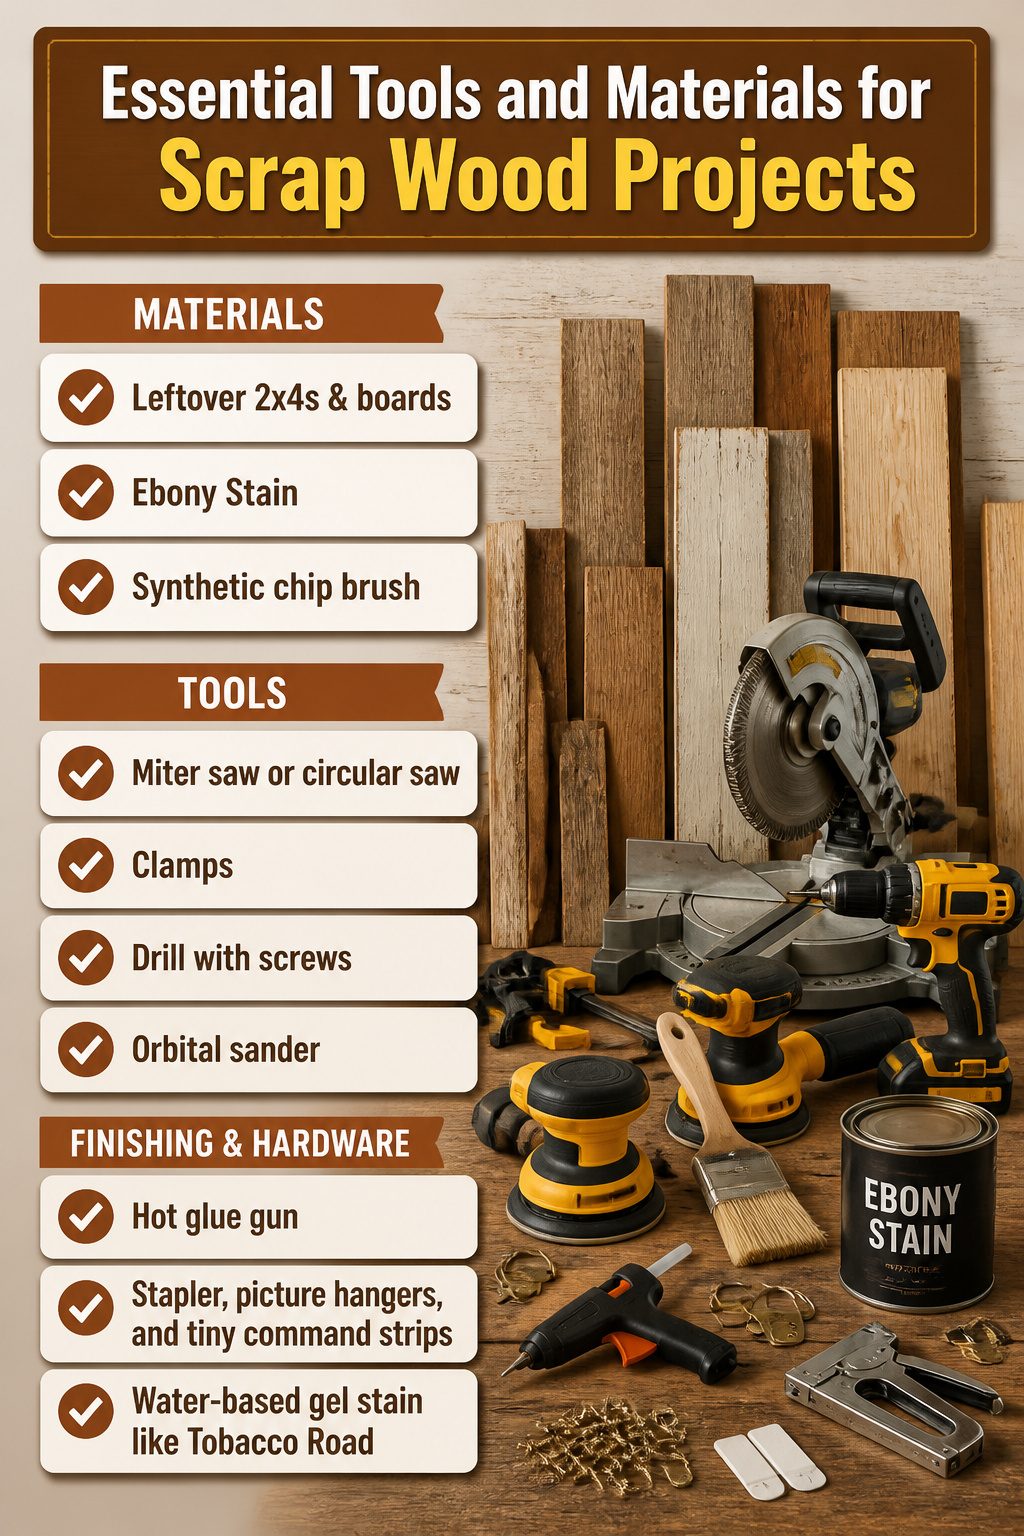
Most of what you need for scrap wood Christmas projects is probably already in a corner of your garage. The wood itself is the free part: leftover 2x4s, 1x boards, or the odd 2×6 and 2×8 from a previous build. Cedar pallet strips work too if you want something lightweight for ornaments.
The tool list stays short. A miter saw handles every cut these projects ask for, though a circular saw will manage if you already own one. Clamps keep boards square while you fasten them, and a drill with 2½-inch screws is enough joinery for most builds. An orbital sander saves time over hand sanding, but sandpaper still gets the job done. For finish, a synthetic chip brush and whatever paint or stain you have on hand will do; Ebony Stain is the one color worth buying if you want that farmhouse contrast under light paint layers, and a water-based gel stain like Tobacco Road gives you the same layered look with faster cleanup. A hot glue gun handles ribbon and trim. Stapler, picture hangers, and tiny command strips finish the hanging hardware.
If you are missing the saw or the sander, either one runs under $50 at a big-box store. The rest is consumable stuff you will use again inside a month.
How I Customize Each Piece
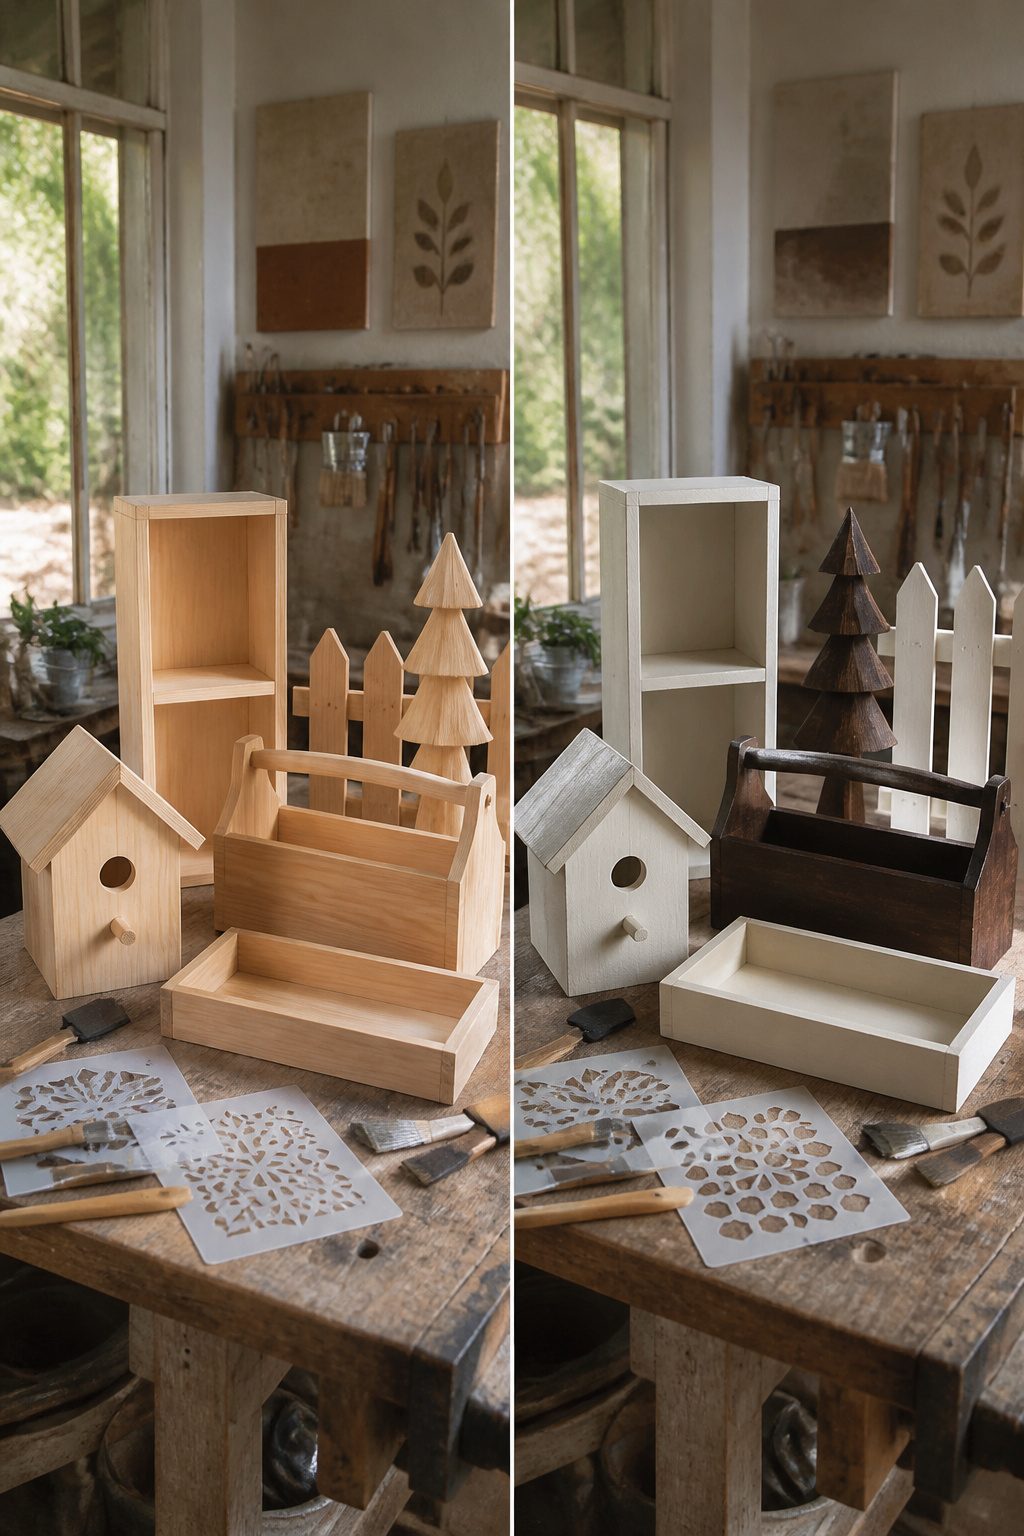
Paint versus stain changes the whole personality of a scrap wood piece before you touch a single stencil. A light buttercream chalk paint over a dark tobacco-road gel stain lets you distress back to that darker layer, and the contrast reads farmhouse without trying too hard. The same shape in a single solid stain with no paint at all goes quieter, more cabin than cottage.
Stencils handle the lettering. Grain Sack Stripe stencils lay down ribbon patterns fast on present bases or sign boards, and the spacing stays consistent even when your hand is not. For detailed images, water slide transfers do work a machine cannot fake by hand. The Hologram Holiday set with ornaments and pine cones prints on four sheets, enough to cover several projects. Cut the design, lay it color-side down on painted wood, and press with a damp cloth until the paper absorbs the water. The backing peels off clean if you moistened it right; too much water and the ink slides, too little and the paper tears.
Hardware finishes the story. Modern pulls against rustic stain feel collected-over-time. Matching rustic hardware against the same stain reads flat, like a kit. The same block of scrap wood can sit on a mantel or sell at a craft fair depending on those three choices: paint over stain for contrast, stencils for speed, transfers for detail, and hardware that either agrees or argues with the surface.
What Sells at Craft Fairs
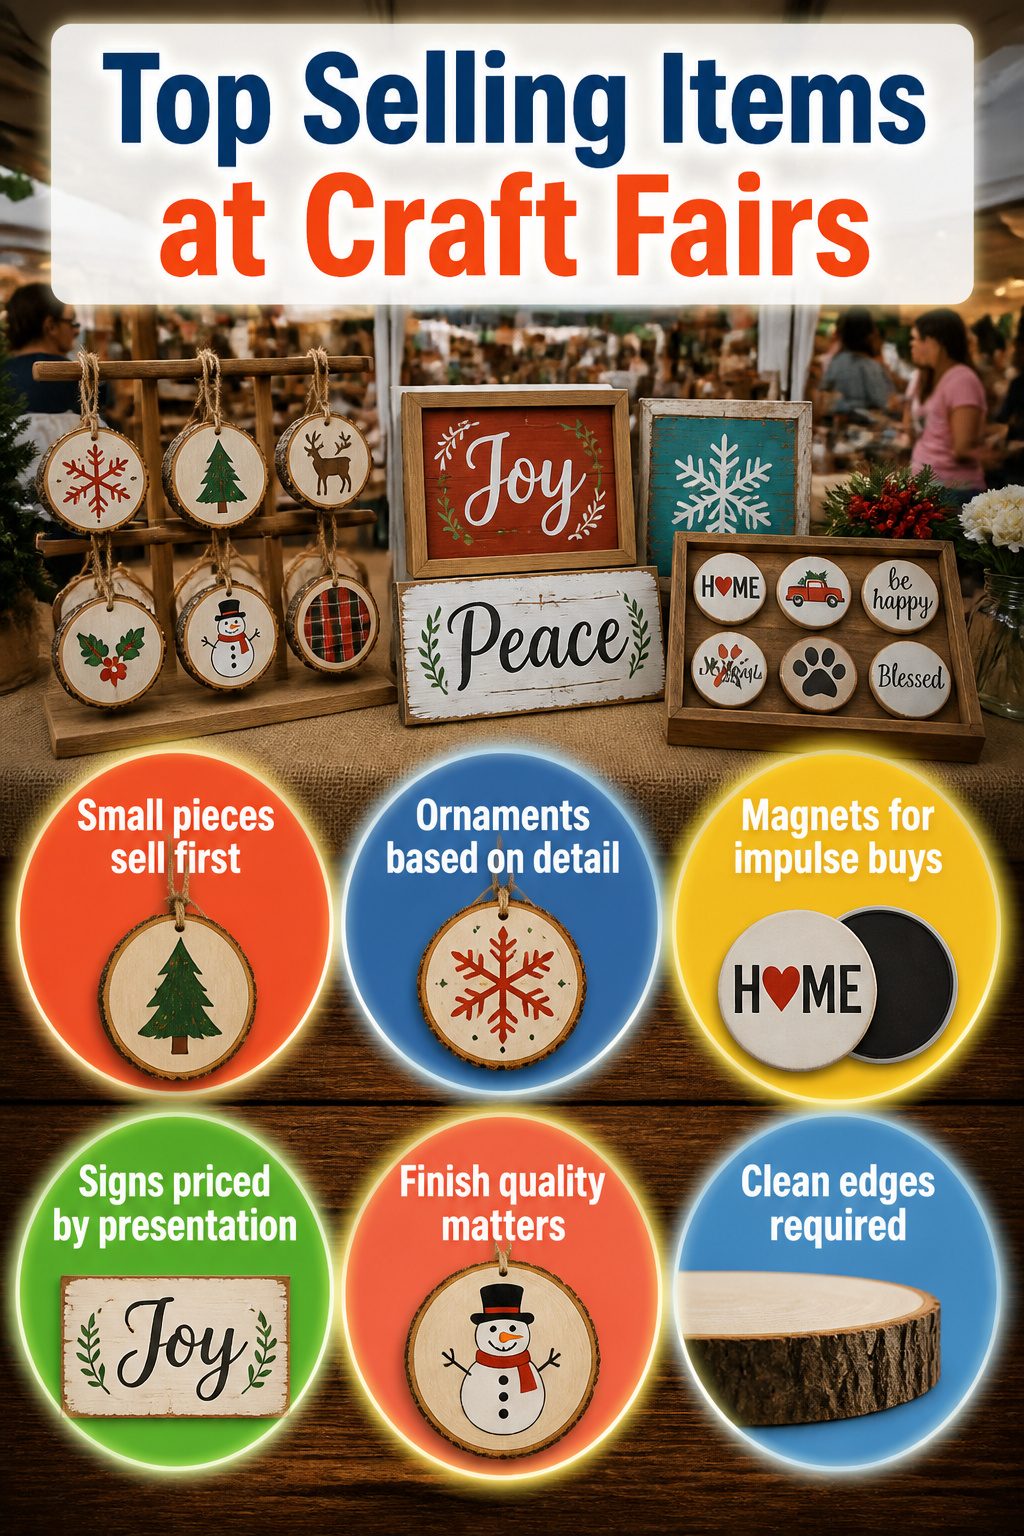
The small pieces move first at any fair I have watched. Ornaments, magnets, and compact signs leave the table while larger builds sit, which makes sense: a shopper can tuck a three-inch wood slice ornament into a bag without debating where it lives. Pricing follows the same logic. The sources point to ornaments priced by how ornate they are made, not by wood cost, and magnets built from the same slices with a backing of strong glue and a magnet strip sit at impulse-buy territory. A small sign stenciled with "Joy" or "Peace" on a distressed flat scrap lands slightly higher but still moves fast because it reads as finished in a way raw edges do not.
What separates a sale from a pass is the back and the edge. The front can carry paint, vinyl, decoupage from wrapping paper, or a wash of white for farmhouse effect, but the back needs that magnet centered and flush, the twine hanger knotted clean, the corners sanded past splinter stage. A piece feels finished when the customer cannot see how little time it took. That is the part worth building into your weekend: an hour on assembly, then the sanding and sealing that let you hand it across the table without apology.
Frequently Asked Questions
What are some easy scrap wood Christmas projects?
Tabletop trees cut from 2×4 and 1x offcuts, wooden ornaments shaped with a jigsaw, rustic holiday signs stenciled on flat boards, painted snowmen from long planks, and mini wood presents wrapped with ribbon all come together quickly. Most builds need only a miter saw, sander, and basic fasteners. Grouping finished pieces in threes or clusters gives the best display.
How do I make a wooden Christmas tree?
Cut graduated lengths of scrap 2×4 or 1x board with 22.5° angles on a miter saw so the edges meet clean, then sand smooth. Stack the pieces from longest at the base to shortest at top, fastening through the back with finish nails or 2½-inch screws while clamps hold everything square. A flat scrap board squared off for the base keeps the tree upright without tipping.
What materials do I need for DIY Christmas crafts?
Scrap lumber, leftover paint or stain, and a short list of tools: miter saw, orbital sander, drill, clamps, and a hot glue gun. Ebony stain and a water-based gel stain like Tobacco Road are the two finishes worth buying if your supply is bare. Everything else is consumable hardware you will use again.
Can I sell my DIY Christmas crafts?
Yes, and small pieces move fastest: ornaments, magnets, and compact signs outsell larger builds at craft fairs because shoppers buy them without debating where they will go. Price by ornamentation, not wood cost. Sand the backs and edges past splinter stage; a piece feels finished when the buyer cannot see how little time it took.
How long does it take to make Christmas wood crafts?
Most projects finish in under an hour of actual cutting and assembly. A tabletop scrap wood tree runs about that; a painted snowman figure takes roughly twenty minutes per piece. The time that matters is the finishing: sanding, sealing, and hardware installation so you can hand the piece across a table or mantel without apology.