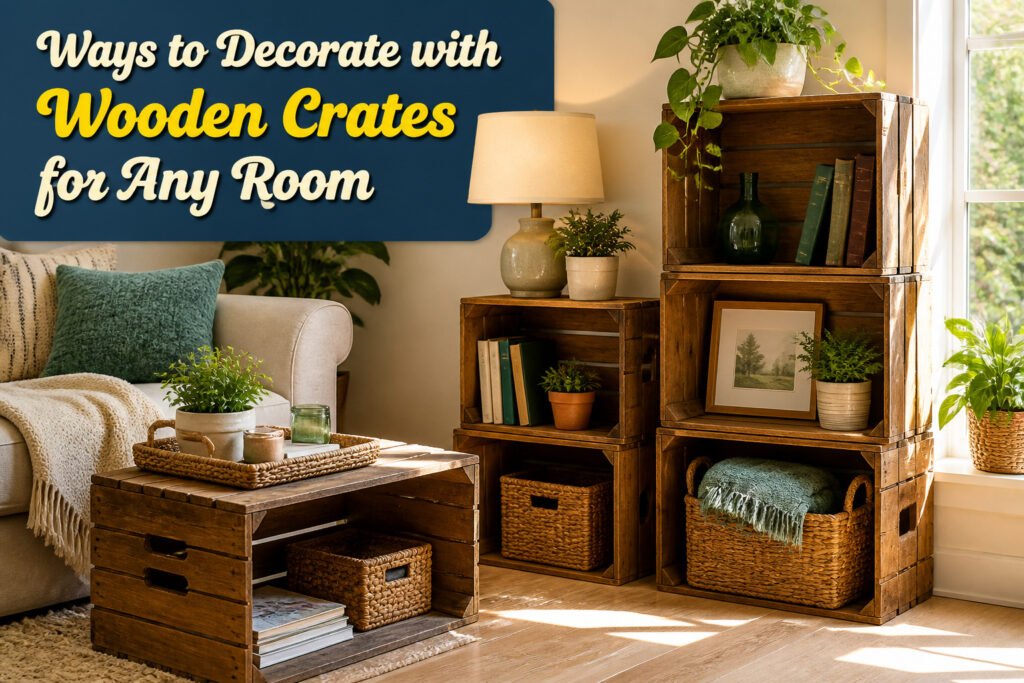
Decorating with crates spans everything from a $9.50 Michaels multipack to a flea-market vintage find, and the single question that decides which route you take is whether you plan to stack or load them with weight. The reproductions work fine for wall displays or seasonal rotation, but vintage hardwood holds up when the crate becomes a coffee table that takes daily kicking.
1. Rustic Shelving
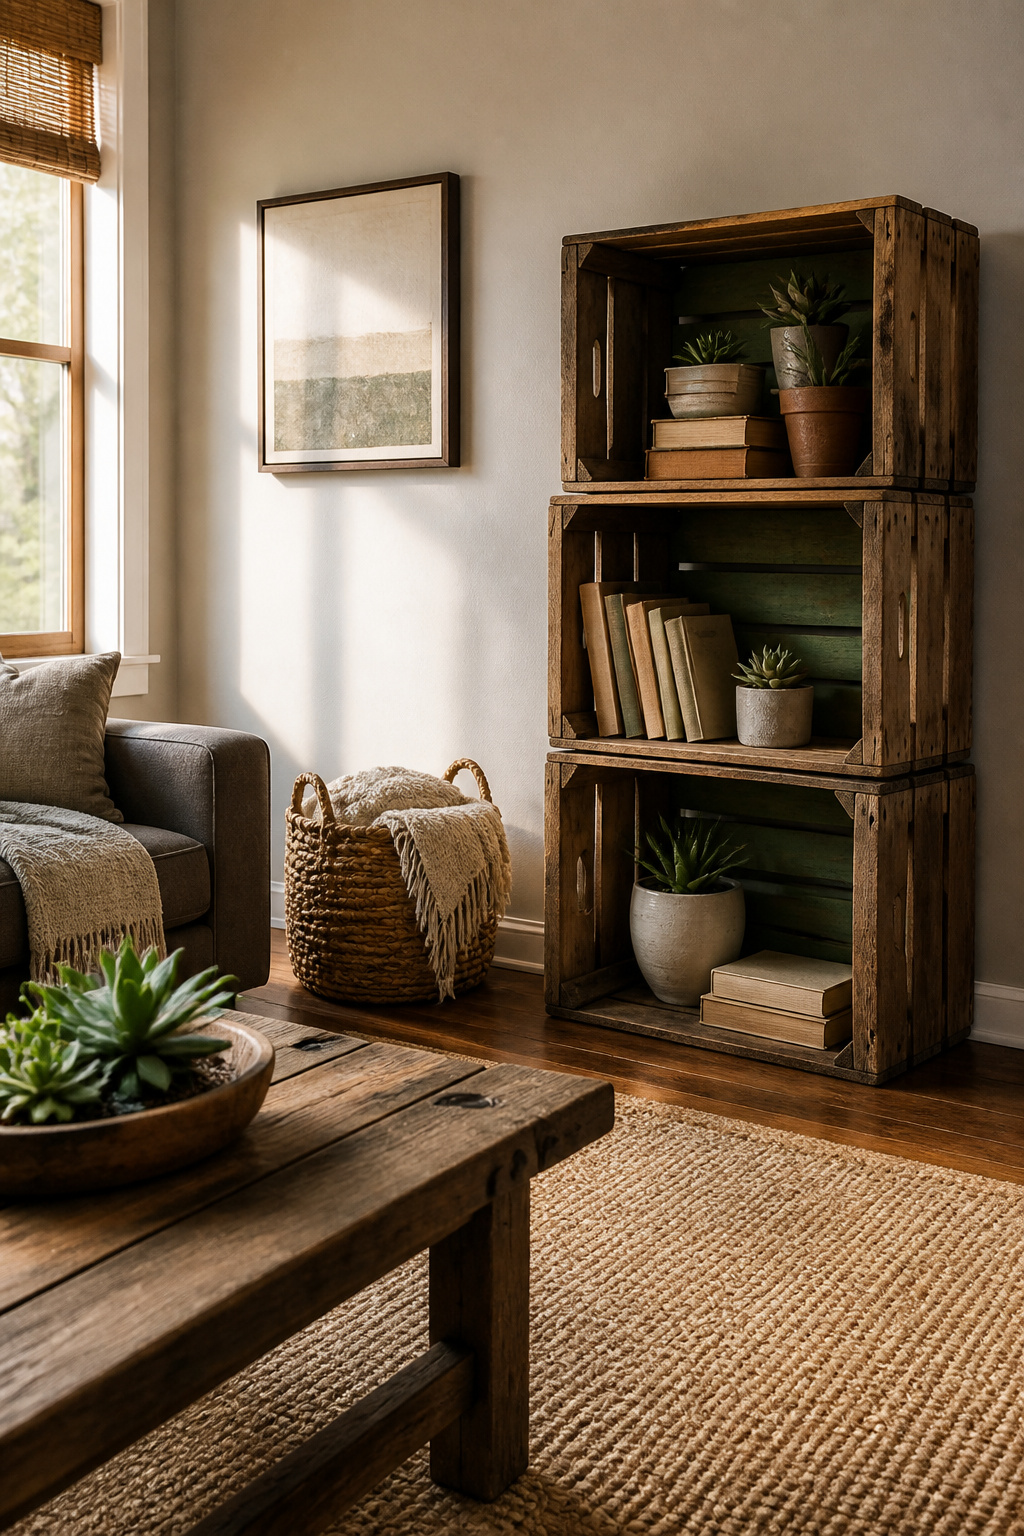
Stacked wooden crates make shelving that actually looks like you built it from found objects, not from a kit. The trick is deciding which direction earns the work. Vertical stacks give you tall, narrow cubbies that read like a bookcase; horizontal runs spread the same footprint wide and low, closer to a credenza. Either way, secure each crate to the one below it, or the whole column walks across the floor every time you pull a book out. A single L-bracket inside each joint, driven in from the side where it hides, is usually enough.
Open backs are the other half of the decision. Against a wall, the gap lets paint color show through and keeps the line light. In the middle of a room, that same gap means your shelf contents get viewed from both sides, which is either the point or a mess, depending on what you store there. Uneven floors will rock a crate stack worse than almost any other furniture because the corners are rigid and the base is small. A felt pad under the low corner fixes most of it; for bigger gaps, a shim cut from a paint stirrer, painted to match the crate, sits invisible underneath.
The look people want here has roots in actual vintage milk and seltzer crates, the kind with compartment dividers that delivery routes left behind. Those originals turn up at flea markets and thrift stores, though truly old ones now run expensive because the demand for decor projects has climbed. Reproductions fill the gap, and for open shelving the reproductions work fine; the compartments only matter if you are standing a divided crate vertically to hold small items like spice jars or bud vases.
2. Storage Coffee Tables
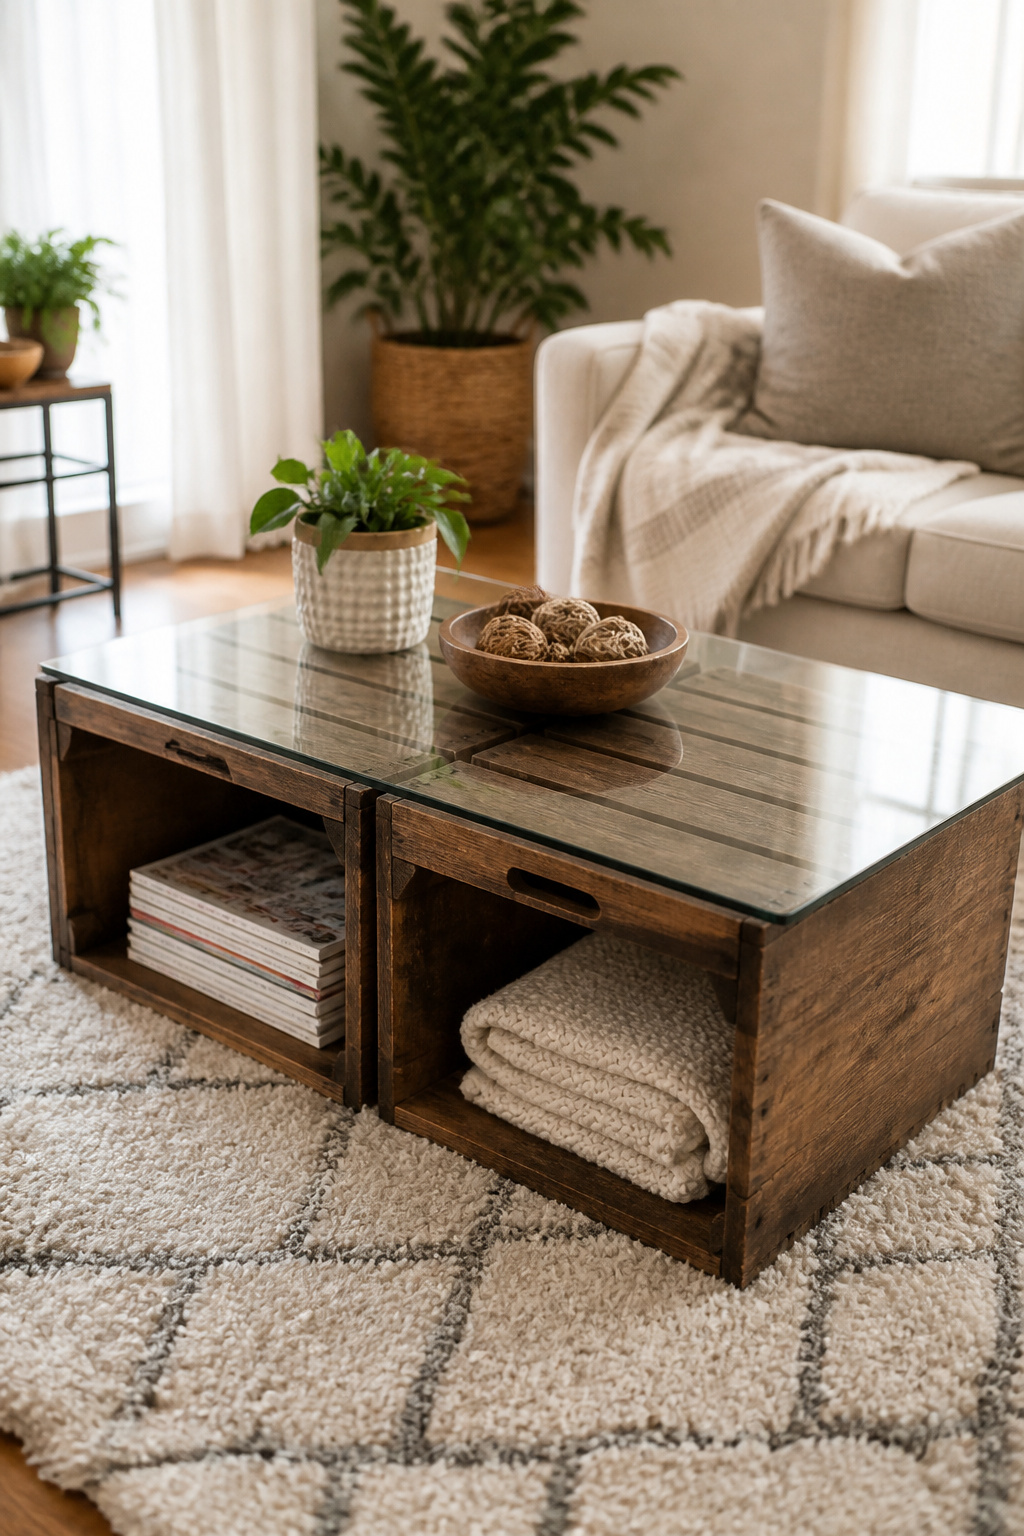
Two crates, laid slats-up and topped with glass, make a coffee table that actually holds things. The storage underneath stays reachable if you hinge the glass or leave one end open, though most arrangements I have seen just rest the top on the crates and lift it off when needed. That resting approach is where the plan usually fails: glass shifts, and a bumped corner sends magazines sliding. A few small silicone bumpers or corner grips keep the top from skating without drilling into the wood.
The slatted sides matter if you store onions, potatoes, or garlic in the crates instead of remotes. Air moves through the gaps, which keeps produce from sweating and spoiling the way it would in a solid box. For blankets or books, the slats are only a visual texture; the circulation does not hurt, but it is not the point. A glass top shows off whatever sits inside, so the coffee table stays honest: clutter looks like clutter.
3. Indoor and Outdoor Planters
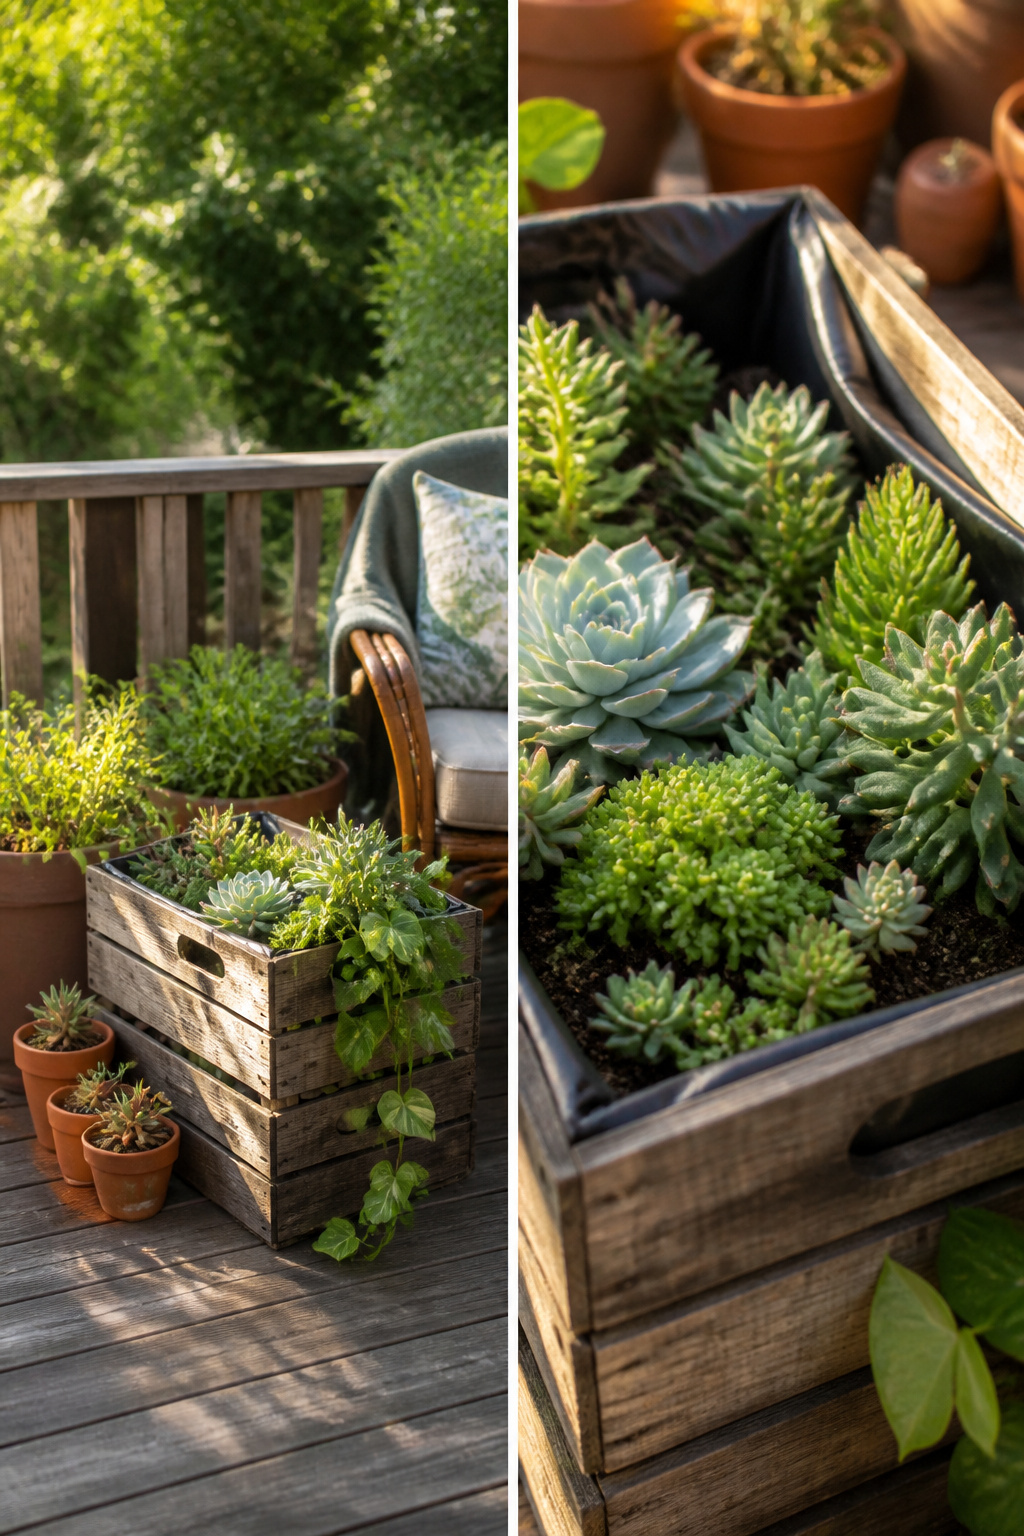
Wooden crates make natural planters, but the wood itself needs protection from damp soil. Two approaches work: slip a waterproof pot inside the crate, or line the interior with a layer of sturdy plastic and plant directly. The plastic route saves space and lets you use the full interior volume, though you will need to be careful when watering, especially with an old crate that was never meant to get wet.
For outdoor use, a weather-resistant sealant on the exterior helps the crate hold up against rain. Indoors or out, the lining is what keeps the bottom from rotting through. Succulents, herbs, and trailing pothos all look right at home spilling over the slats, and the weathered wood against fresh green growth is hard to beat.
4. Bedside Tables
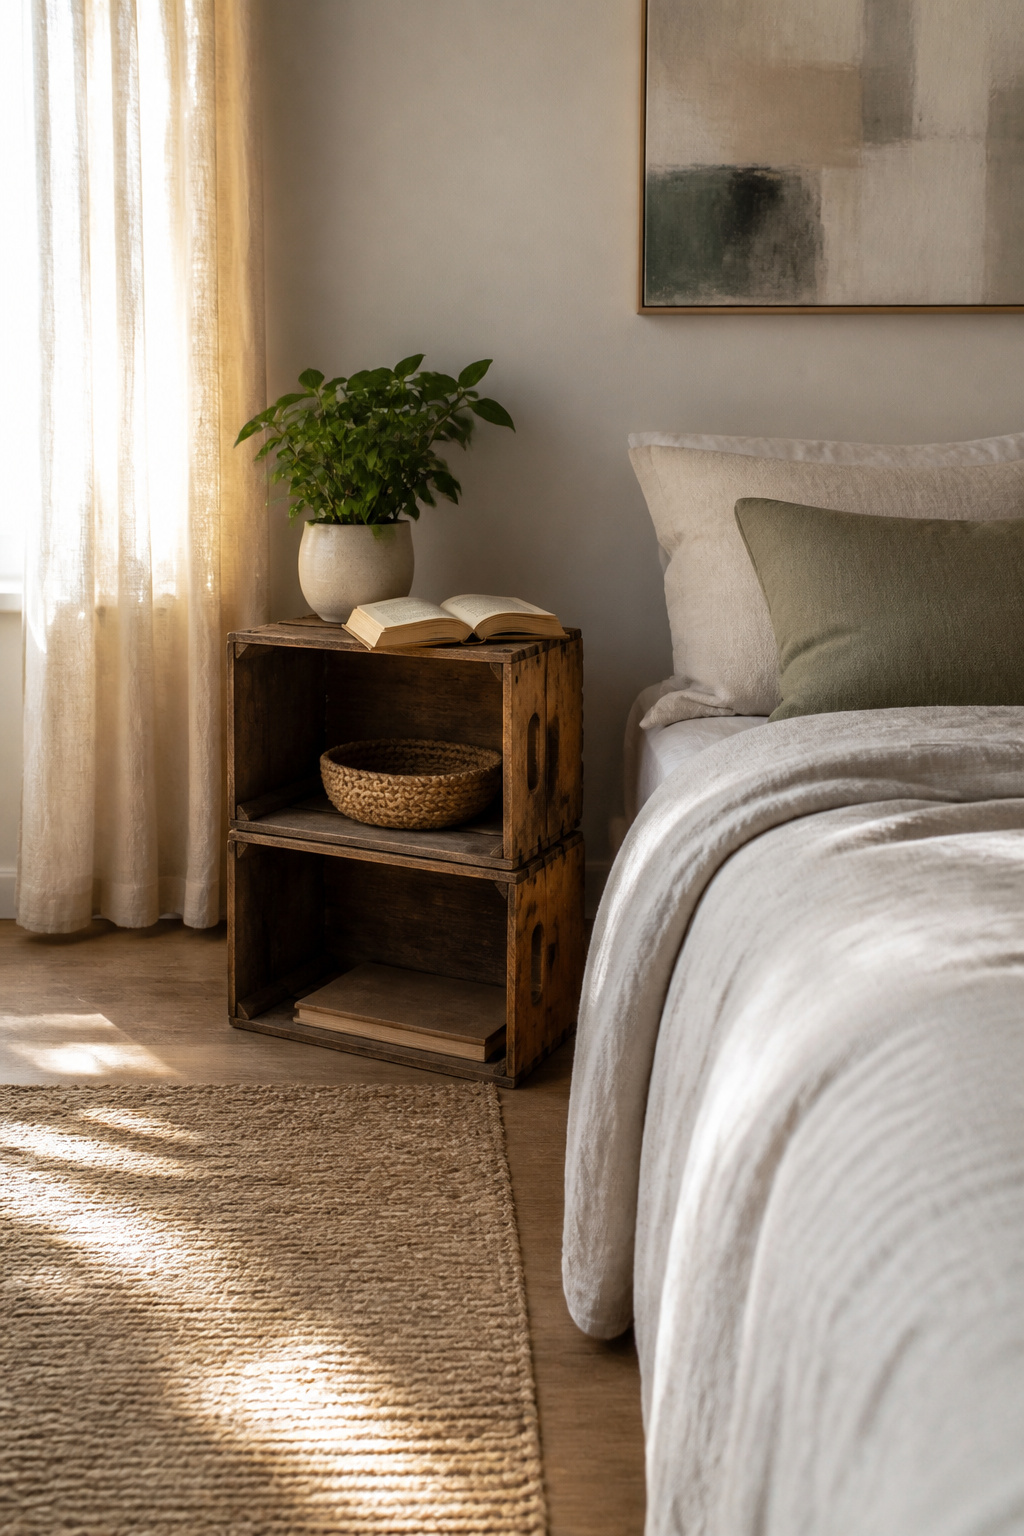
Stacking two crates gives you a surface about knee-high, which looks balanced beside most beds but forces you to reach down for your phone, glasses, or water. Three crates put the top closer to mattress level, where your hand lands naturally, though the tower starts to feel tall and narrow against a low platform frame. I tried both in a guest room and settled on two for a full bed, three for a queen with a thicker mattress. The open back is the part nobody photographs from behind: against a wall you see straight through to dust bunnies and the outlet. A thin plywood panel cut to size, screwed or even wedged into the rear slats, turns the crate into a solid box. Paint it the same color and the fix disappears. Two crates need that backing more than three, since the lower gap sits right at eye level when you’re lying down.
5. Decorative Storage Bins
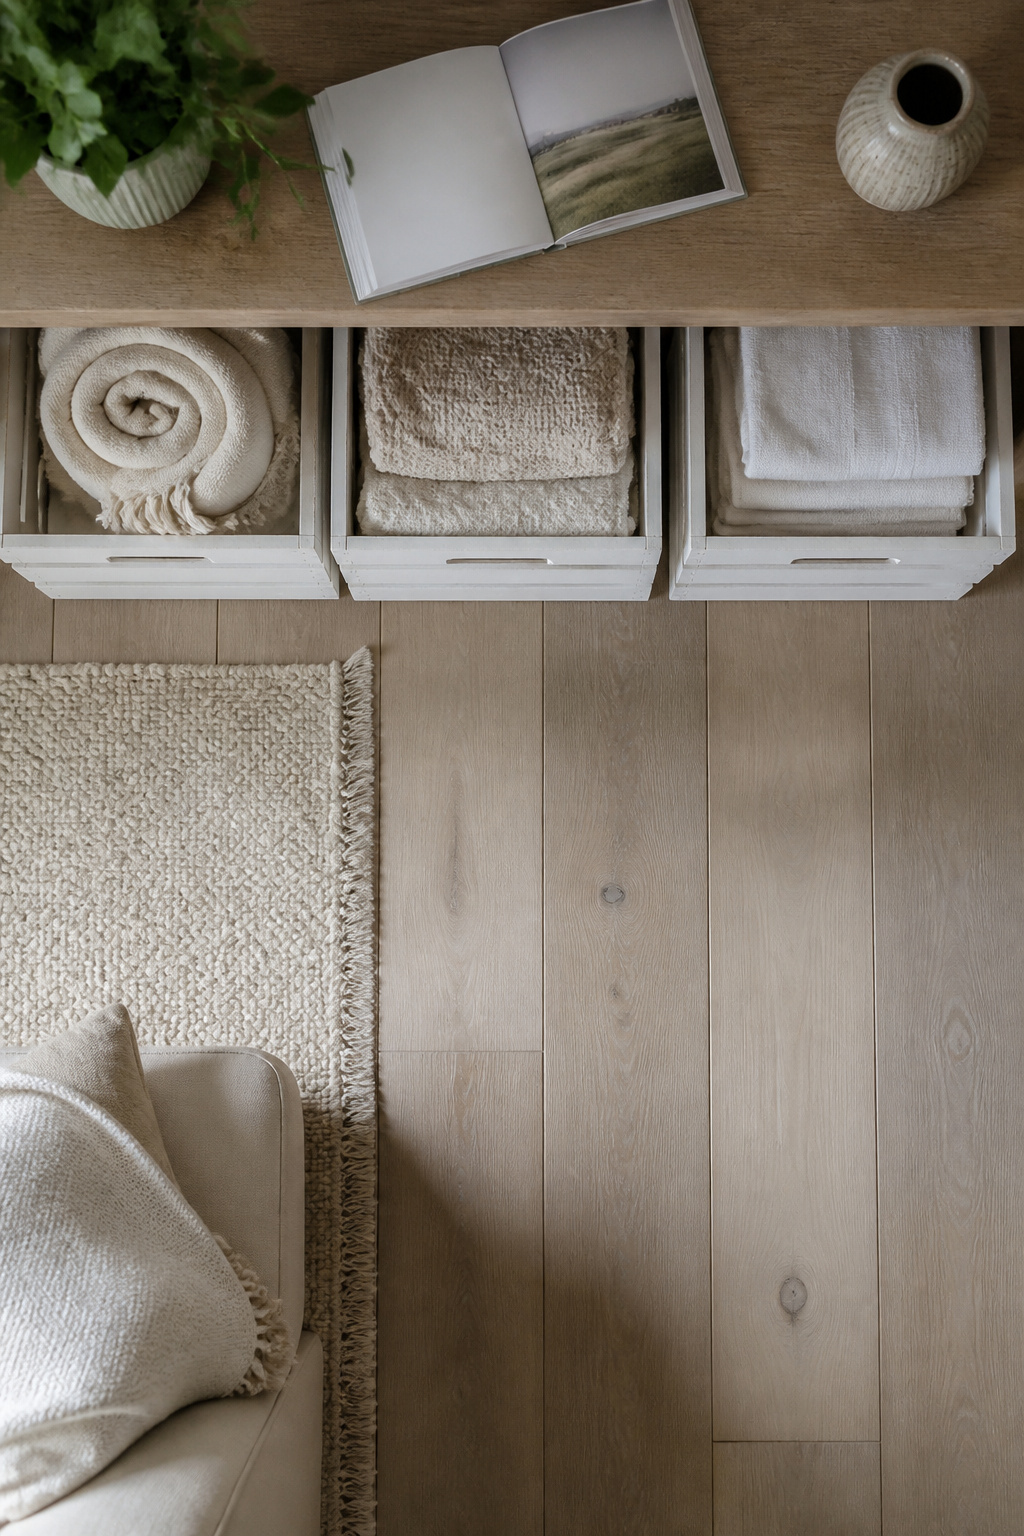
Open storage with wooden crates only works when the contents cooperate. A crate of rolled blankets or neatly folded towels reads as intentional; the same crate catching loose toys, charging cables, and yesterday’s mail looks like clutter that happened to sit still. The difference is usually the material inside, not the crate itself.
I learned this the hard way with a pair of crates I set under a console table for catch-all storage. For two weeks they held everything that came through the door. The visual noise defeated the whole point. Switched to one item per crate, rolled and standing upright, and the same setup suddenly looked like something I had planned.
Labels change the effect in a way that surprised me. A handwritten label, even just "Dog Leashes" or "Winter Scarves," signals that the openness is deliberate, almost pantry-like. Unlabeled crates ask more of the contents; everything inside has to look good enough to be on display. For toys, labels help, but only if the toys inside are the kind that stack or nest. A labeled crate of stuffed animals still reads as chaos unless you are aiming for a very specific nursery aesthetic.
Paint helps too. A white or stained crate holding neutral household goods fades into the background of a room. Raw unfinished wood with bright plastic toys inside fights for attention in a way that no arrangement solves. The crate is cheap; the discipline of what goes in it is what costs the effort.
6. Wall Displays
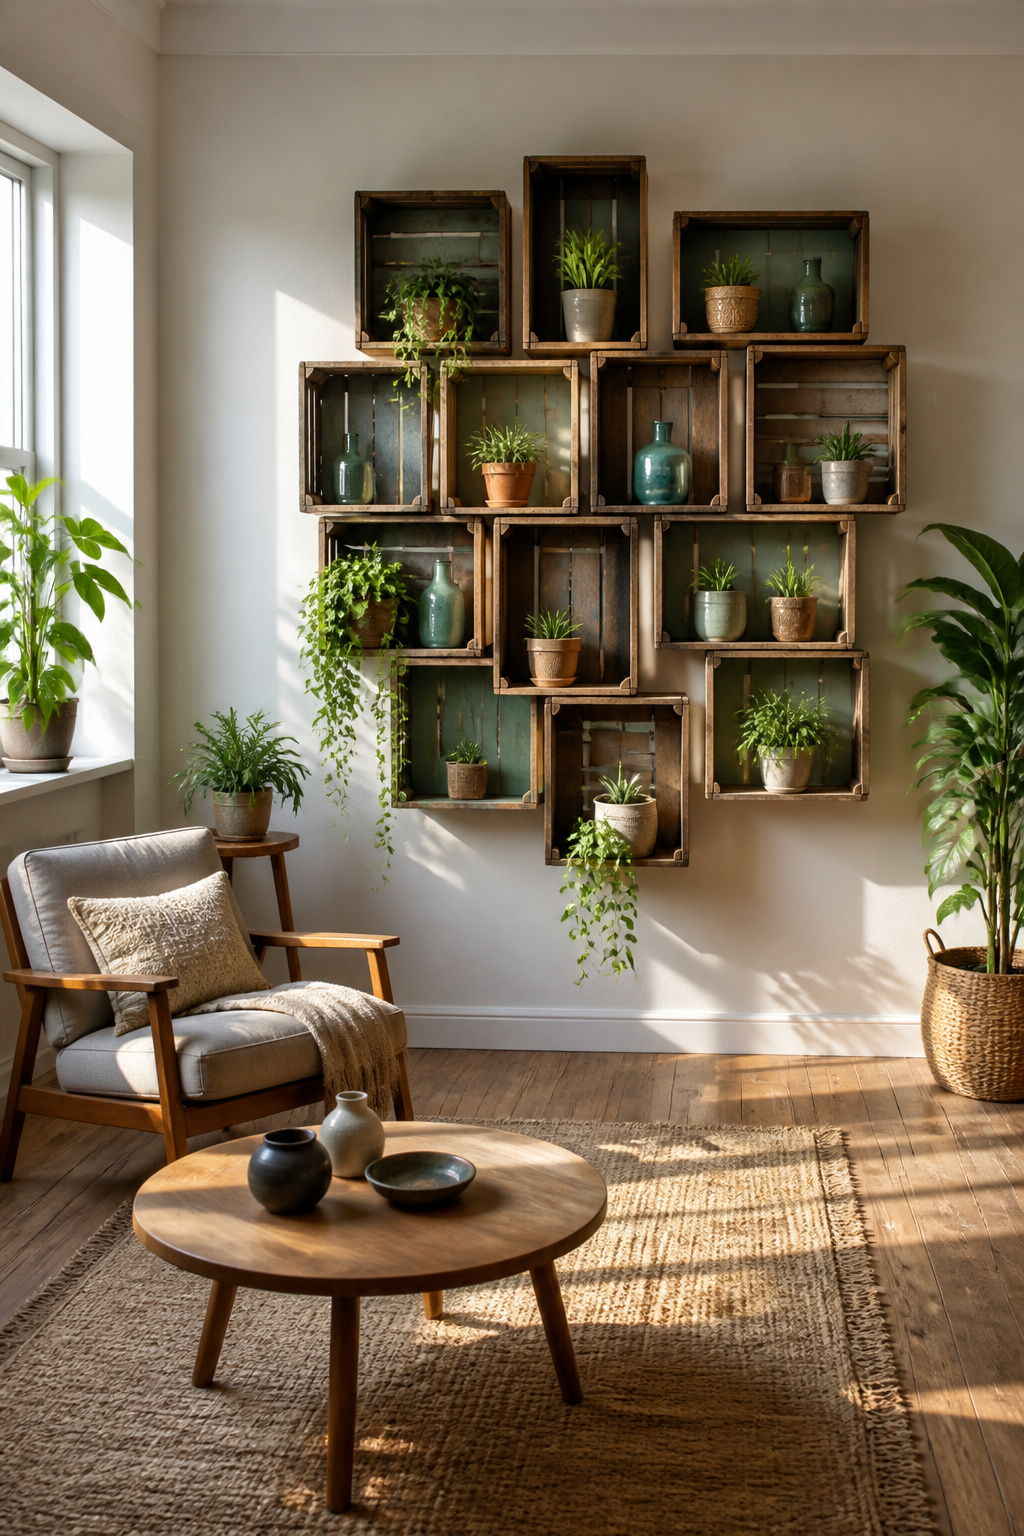
A standard wooden crate runs about eighteen inches deep, which sounds reasonable until you try to walk past it in a hallway. Wall-mounted as a shadow box, that same depth swallows mason jars, small potted plants, or the stack of paperbacks you were tired of picking up off the floor. The trick is anchoring into a stud, not just drywall, because a loaded crate at arm height pulls outward with surprising force. Skip the stud finder and you will eventually find the crate on the floor, the drywall anchors trailing behind like pulled stitches. For a lighter look, shallower crates exist; half-depth versions still hold a framed photo or a trailing pothos without projecting into the room. Grouping mixed sizes turns the wall itself into a three-dimensional display, though the arrangement only stays satisfying if each crate is independently secure. A single loose corner and the whole grid starts to read as temporary, which defeats the point of using real wood in the first place.
7. Kitchen Storage
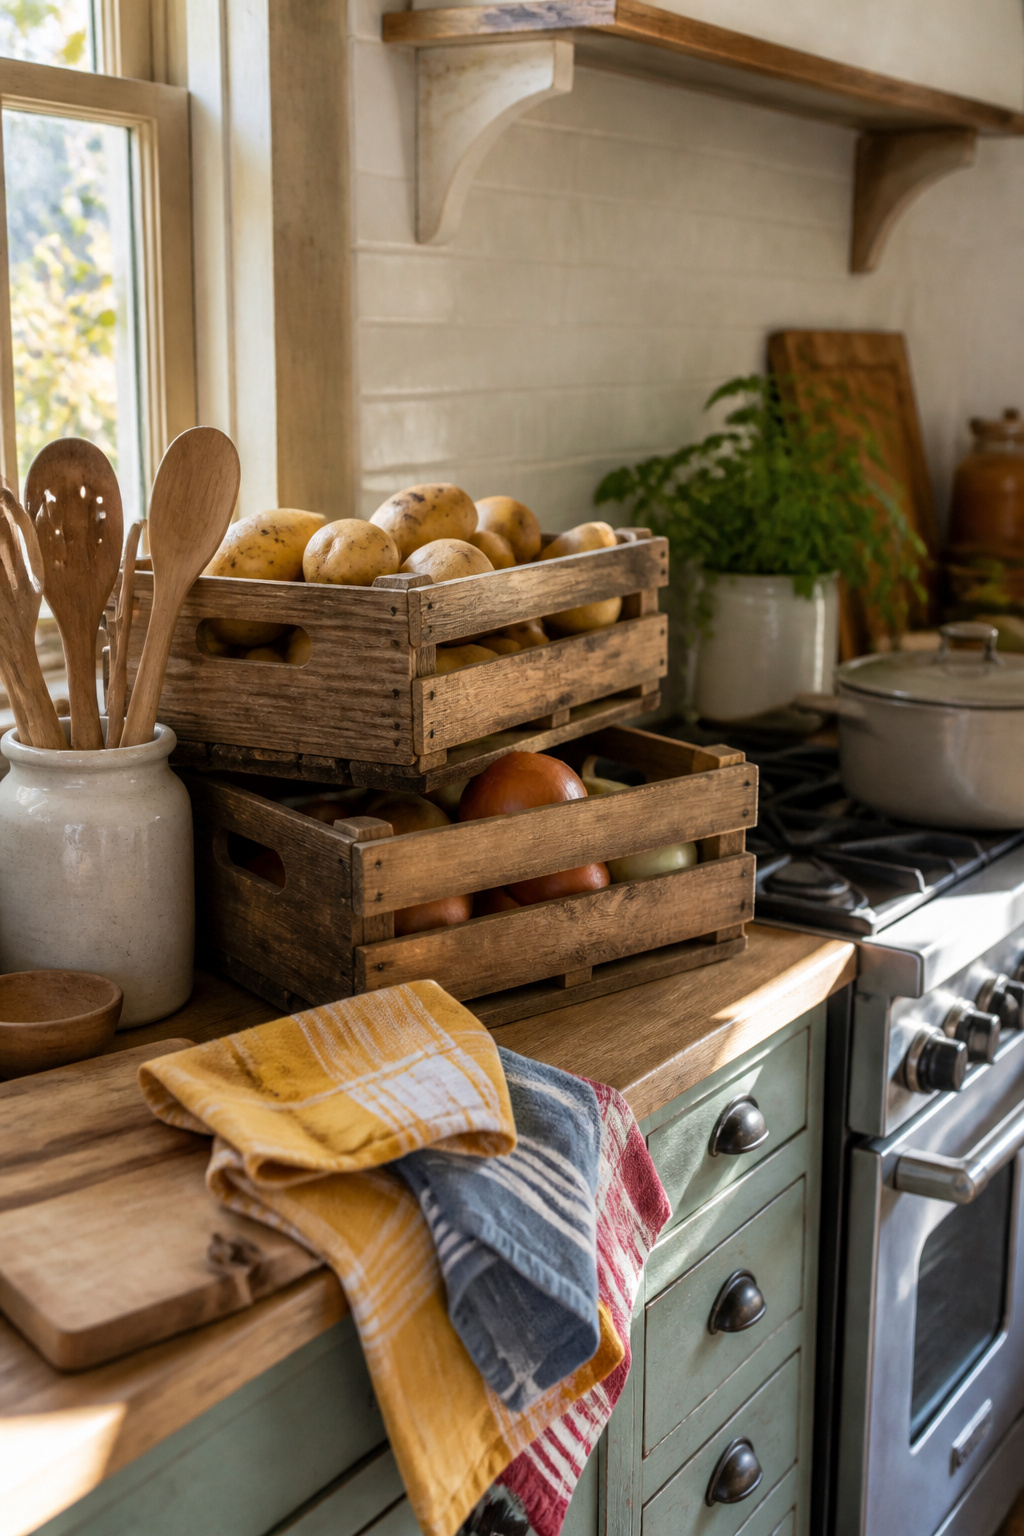
Wooden crates with slatted sides handle kitchen produce better than solid boxes because the gaps let air move around fruits and vegetables. I keep mine on the counter for onions and garlic, though potatoes go on the floor where the weight does not matter.
Countertop placement works until you run out of space. Stacking two crates creates instant open shelving without mounting anything to the wall, which matters in a rental where cabinet upgrades are not an option. I skipped upper cabinets near my sink once and used stacked crates instead; they held dishes and dry goods for two years before I moved.
Near the stove, the wood takes a beating. Steam and grease settle into the grain and eventually warp the slats. Floor placement by the sink risks the same from splatter, though a tray underneath buys time. For anything damp, stick to the counter where you can wipe the crate down weekly and rotate it so the same side does not always face the heat.
8. Seasonal Displays
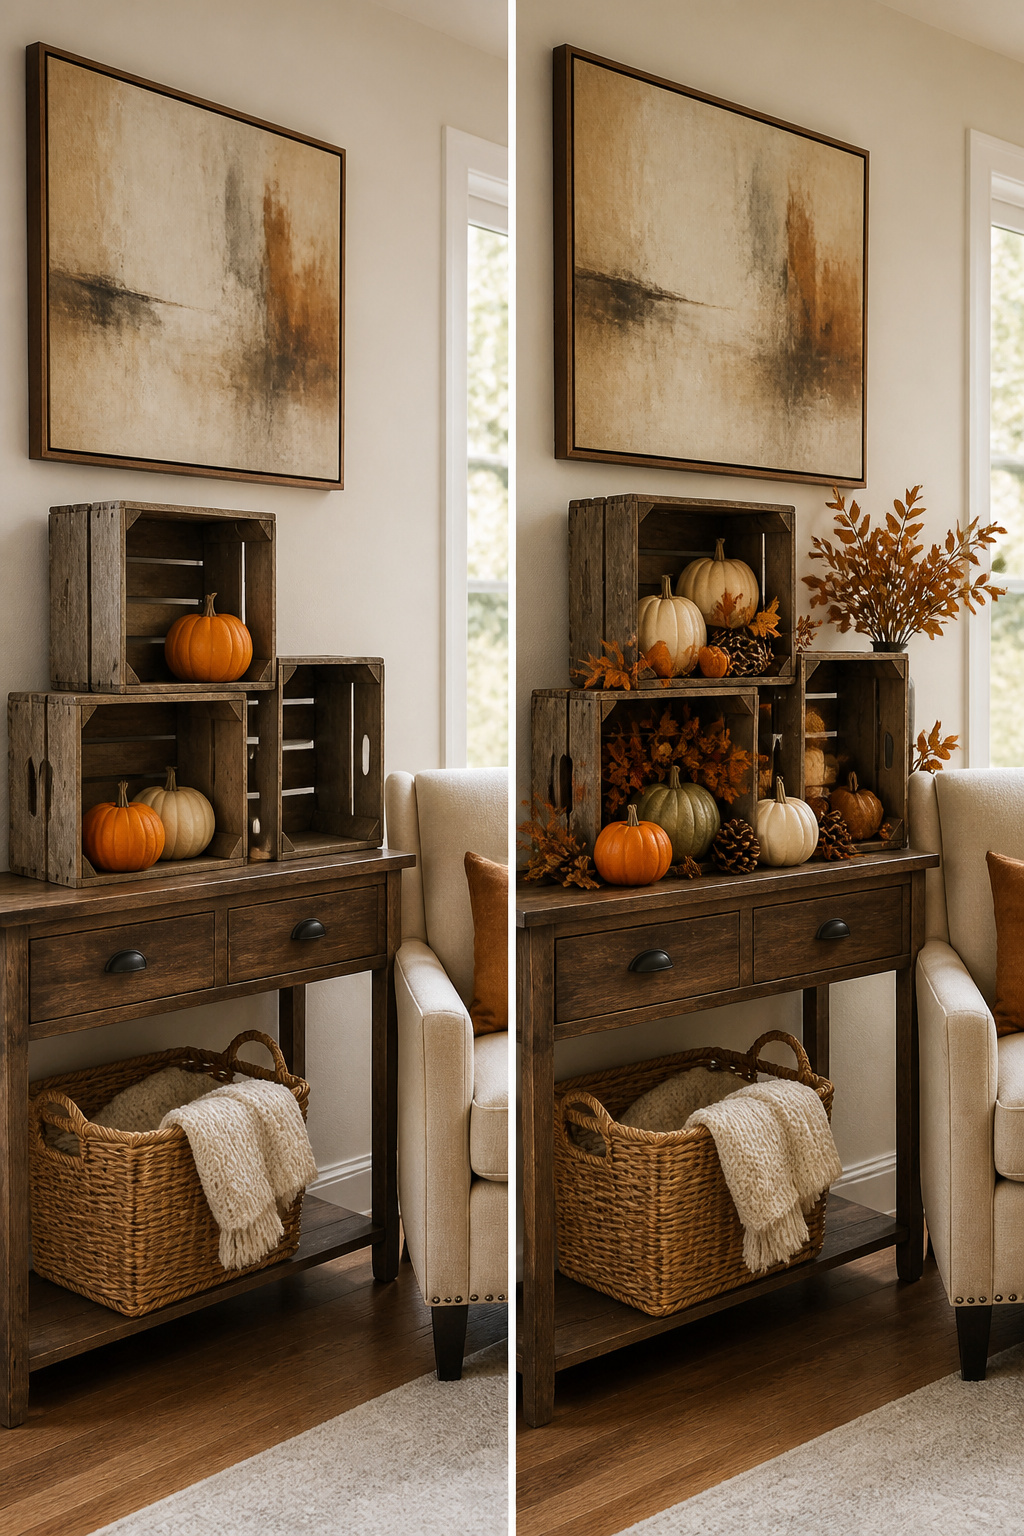
Autumn crates fill fast with pumpkins and pinecones, and the same box holds ornaments come December once you clear out the husks. Three crates, maybe four, is the practical ceiling for a rotating seasonal display; beyond that, you are running a storage unit, not a living room. The off-season stuff lives in the same crates it will sit in, just flipped to a closet shelf or slid under a bed. Vintage soda crates with their little compartments keep small ornaments from rolling into a jumble, though the truly old ones cost plenty now. Similar divided wooden crates turn up online for less. I have watched friends dedicate a full wall to holiday rotation, and the charm thins out fast; two or three spots that actually get seen beat a dozen that collect dust. The crate itself stays year-round, which is the point. The shells or gourds or eggs inside are what swap out, usually with no careful arrangement needed, just dumped in and looking right against the worn wood.
9. Flower Displays
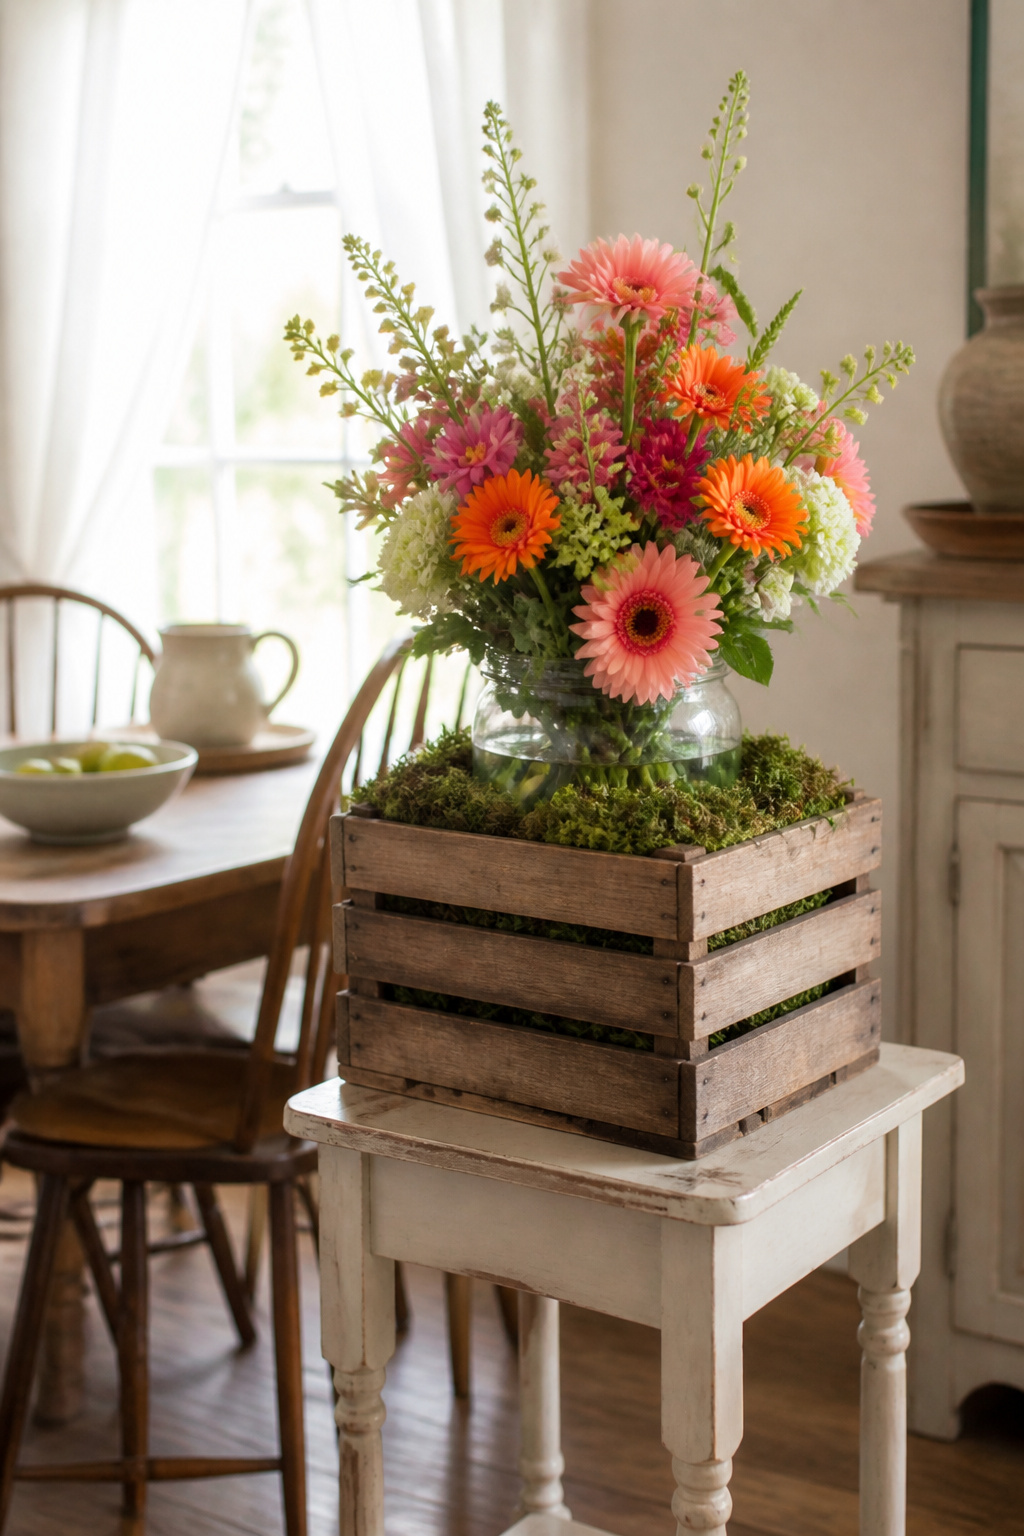
Crates solve the one problem every floral arrangement has on a table: everything sits too low to notice. A crate adds six to eight inches of height without a pedestal or a stack of books that looks like an afterthought. Set a mason jar or a small vase inside, and the flowers sit at eye level when someone walks into the room.
The wood itself will wick water straight through the slats if you set a leaking vessel down raw. That stain on my parents’ porch table never fully sanded out. Cut flowers stay in their own container, period. Potted plants are a different job entirely; if you want a crate to hold actual soil and roots, you need a waterproof liner or a plastic pot nested inside, because the wood was never meant to stay wet.
Fresh blooming plants arranged inside crates, still in their nursery pots, give the same full look without the rot risk. Slide three or four in tight, moss tucked around the gaps, and the crate reads as a planter while the pots do the containment work. For a weekend centerpiece, that is the safer play.
10. Bathroom Storage
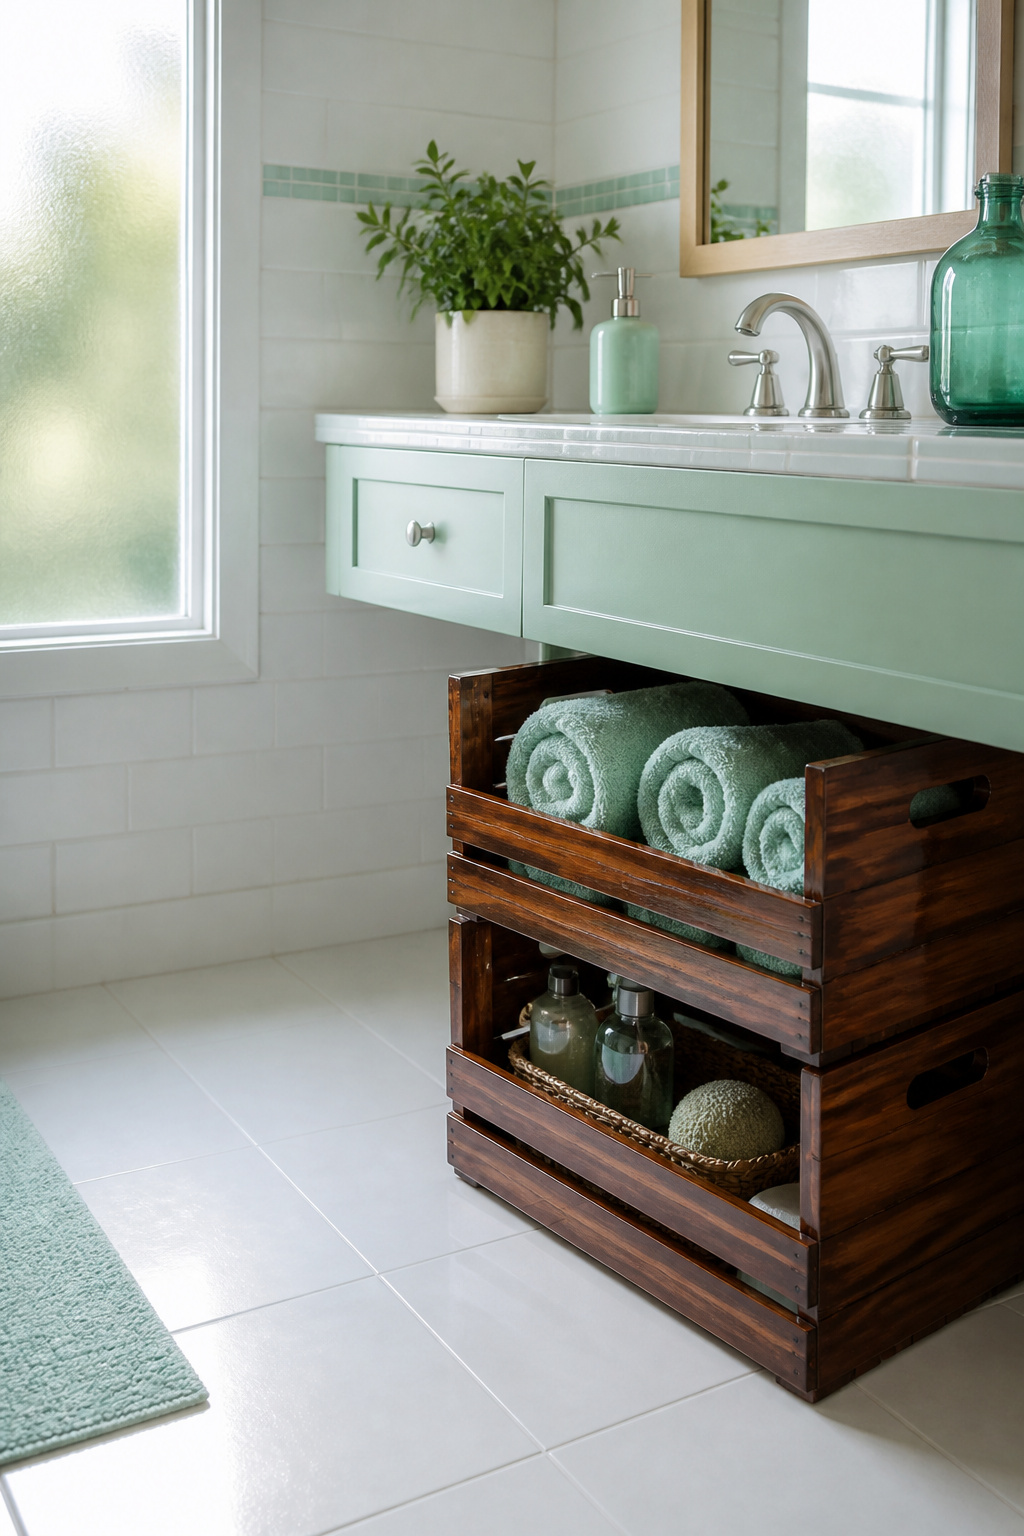
Bathroom moisture turns raw wood fuzzy in about a season, so polyurethane or a marine-grade sealant is non-negotiable before a crate touches this room. I learned that the hard way with a crate that held rolled hand towels; the bottom slats swelled and the whole thing sat crooked against the wall for months.
Open crates work best for items with their own structure. Rolled towels stay put, and a stack of washcloths fills a crate face neatly enough that nothing reads as clutter. Toiletries are trickier. A bottle of shampoo will slide through slats unless the crate sits on a solid surface, not hung, and even then a pump bottle tips when the next person grabs a towel. Small loose things like cotton rounds or travel-sized tubes turn an open crate into visual noise fast.
Wall mounting buys back floor space in a small bathroom, but a stud anchor matters more here than in dry rooms. The weight of damp towels adds up, and drywall anchors I have used in bedrooms pulled loose within a year under that load. Two crates stacked vertically, one for fresh towels and one for the backup supply, keeps the system readable without looking like a storage unit.
11. Christmas Decor
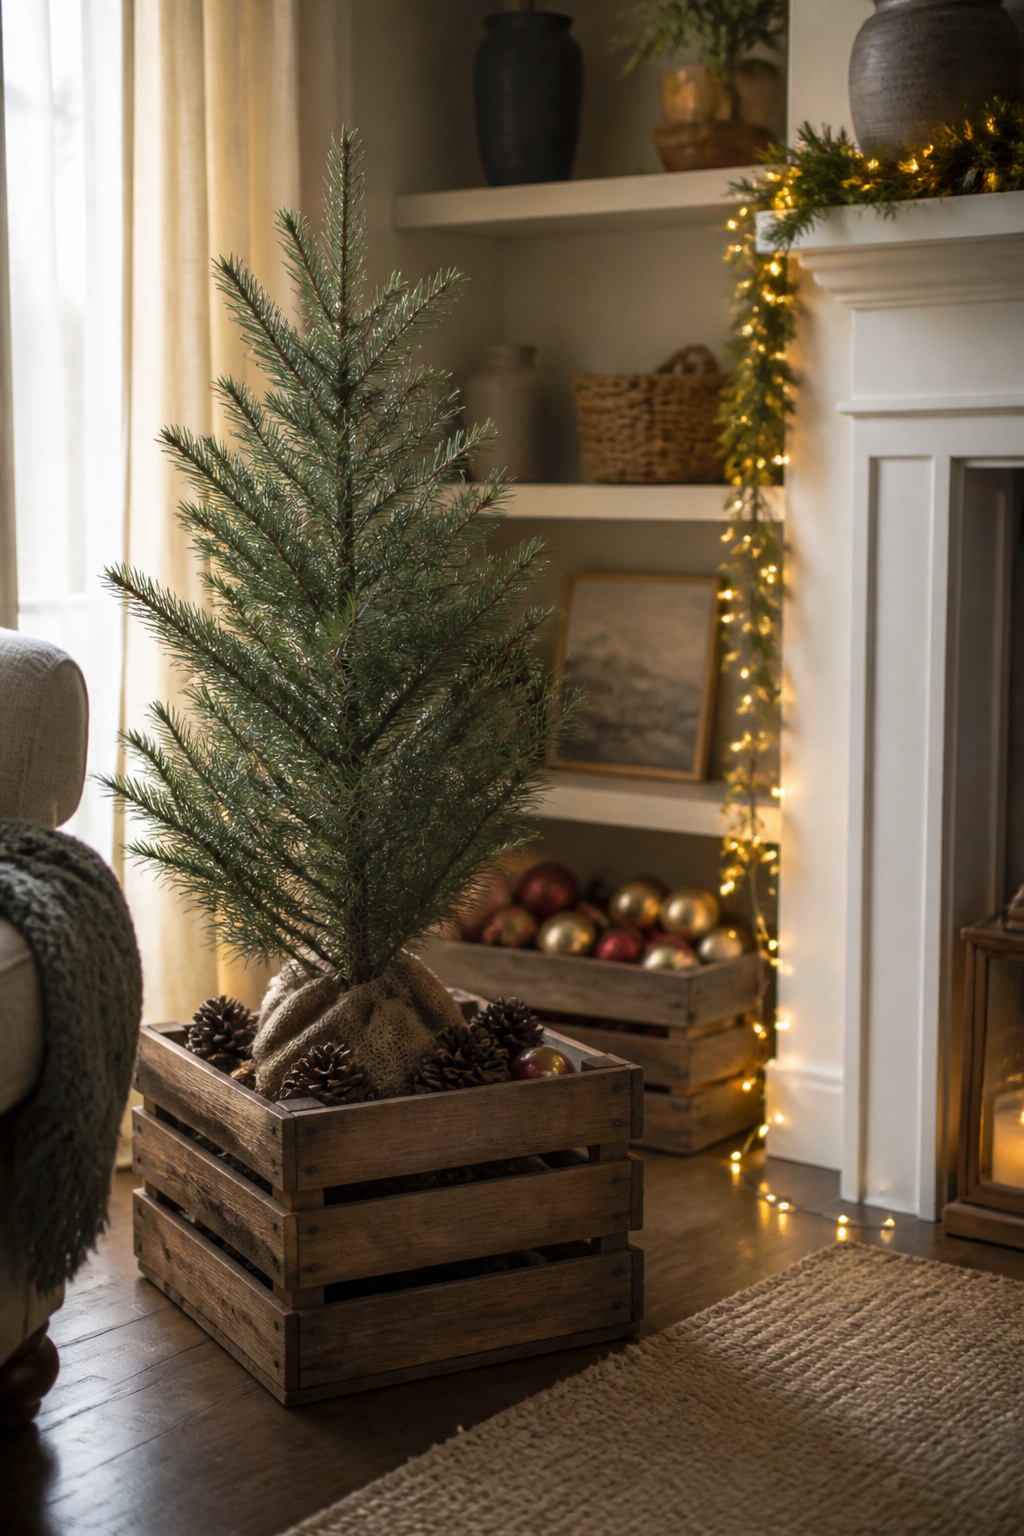
A Christmas tree dropped straight into an unfinished crate looks more intentional than half the tree skirts I have tried. The gaps between slats let the trunk breathe, and a rolled burlap scrap or a handful of pinecones tucked around the base hides the stand without the fuss of fitting a fabric circle. Pine needles will work themselves into raw wood grain, though, so I line the bottom with a plastic boot tray cut to fit. It catches the fallout and slides out for dumping.
Vintage soda crates with their little compartments were built for bottles and work the same way for ornaments. Each ball sits in its own square, no tissue paper required, and the whole box moves from closet to hutch without repacking. I have seen these crates priced steeply at antique shops, but the same grid effect comes from any slatted crate plus a cardboard egg carton cut down to size.
For wrapping stations, a crate on its side becomes a vertical caddy: paper rolls in the back, ribbon spools on dowels through the front slats, tape and tags in the top opening. The whole thing migrates from guest room to living room as December progresses, then collapses back into flat storage when the plastic tray comes out of the tree crate.
Cleaning and Sealing
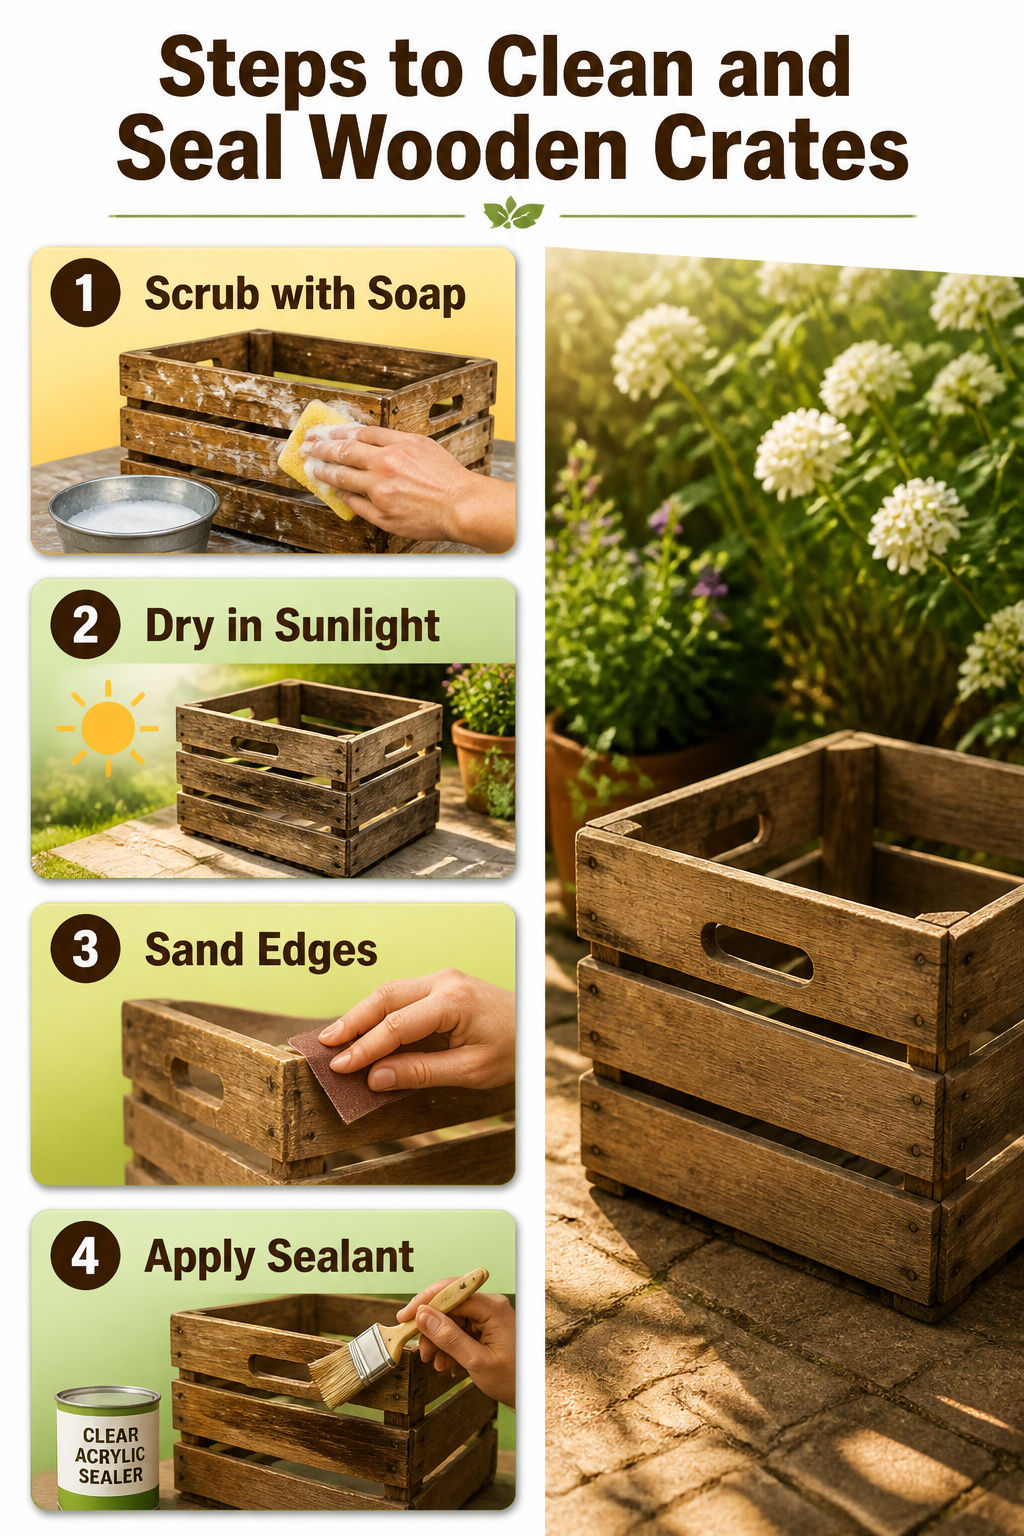
A crate that still smells like the grocery warehouse needs more than a quick wipe. I scrub mine with dish soap and warm water, then let them dry in the sun for a full afternoon. Skip the sanding step and you will catch splinters every time you reach for a book or a blanket. Rough edges on crate slats tear fabric and skin alike; 80-grit paper takes the bite off in about ten minutes per crate.
Sealants split into two camps. For anything staying indoors, a basic clear acrylic sealer keeps the raw look without the dust. Outdoor crates, or bathroom crates near the shower, need a weather-resistant sealant that blocks moisture and the pests that follow it. You will know a crate needs more than cleaning when the wood feels soft, when nails have loosened their grip, or when the corners show the pale, crumbly rot that no amount of sanding will fix. That one goes back to the curb.
Finding Crates
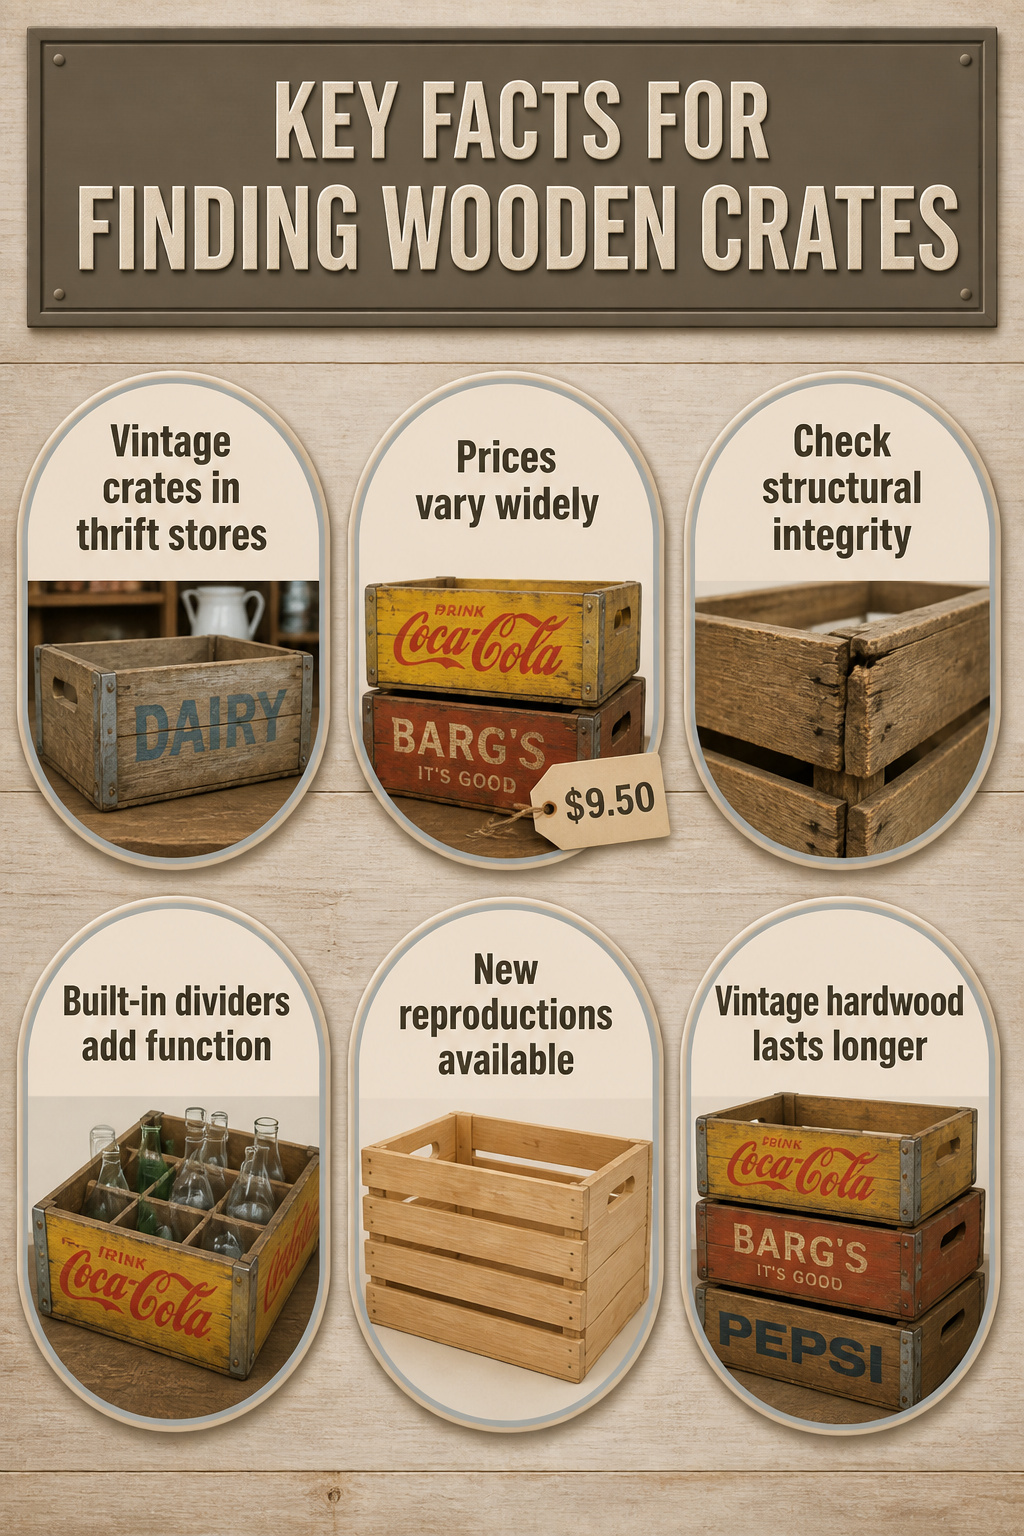
Vintage wooden crates turn up almost anywhere secondhand goods are sold. Flea markets and thrift stores usually have stacks of them, since these were the standard shipping containers for everything from milk to soda long before cardboard took over. The stamped labels and worn paint are half the appeal, but structural integrity matters more than age when you’re planning to stack or load them with books. A crate that rattles when you lift it has dry rot in the corners; pass on it even if the patina is perfect.
Prices swing wildly depending on where you shop. I’ve seen simple slatted crates at Michaels for around $9.50 apiece when they run multipack deals online, though you usually can’t stack coupons on those. The single-item 40% off coupons come and go with the retail calendar, so timing a bigger project to a sale cycle saves real money. Thrift stores and estate sales are harder to predict, but the hunt itself is part of the process. The vintage Coca-Cola crates with their built-in dividers cost more and weigh more, yet the compartments make them genuinely useful for sorting small items rather than just looking nostalgic.
New reproductions at H&M Home, Anthropologie, or Target give you clean corners and no splinters, which matters if you’re building something a child will use. The tradeoff is obvious up close: the wood is softer, the hardware is smaller, and the artificial aging looks exactly like what it is. For wall-mounted display or seasonal rotation, that’s fine. For a storage coffee table that takes daily kicking, vintage hardwood holds up longer.
Painting and Stenciling
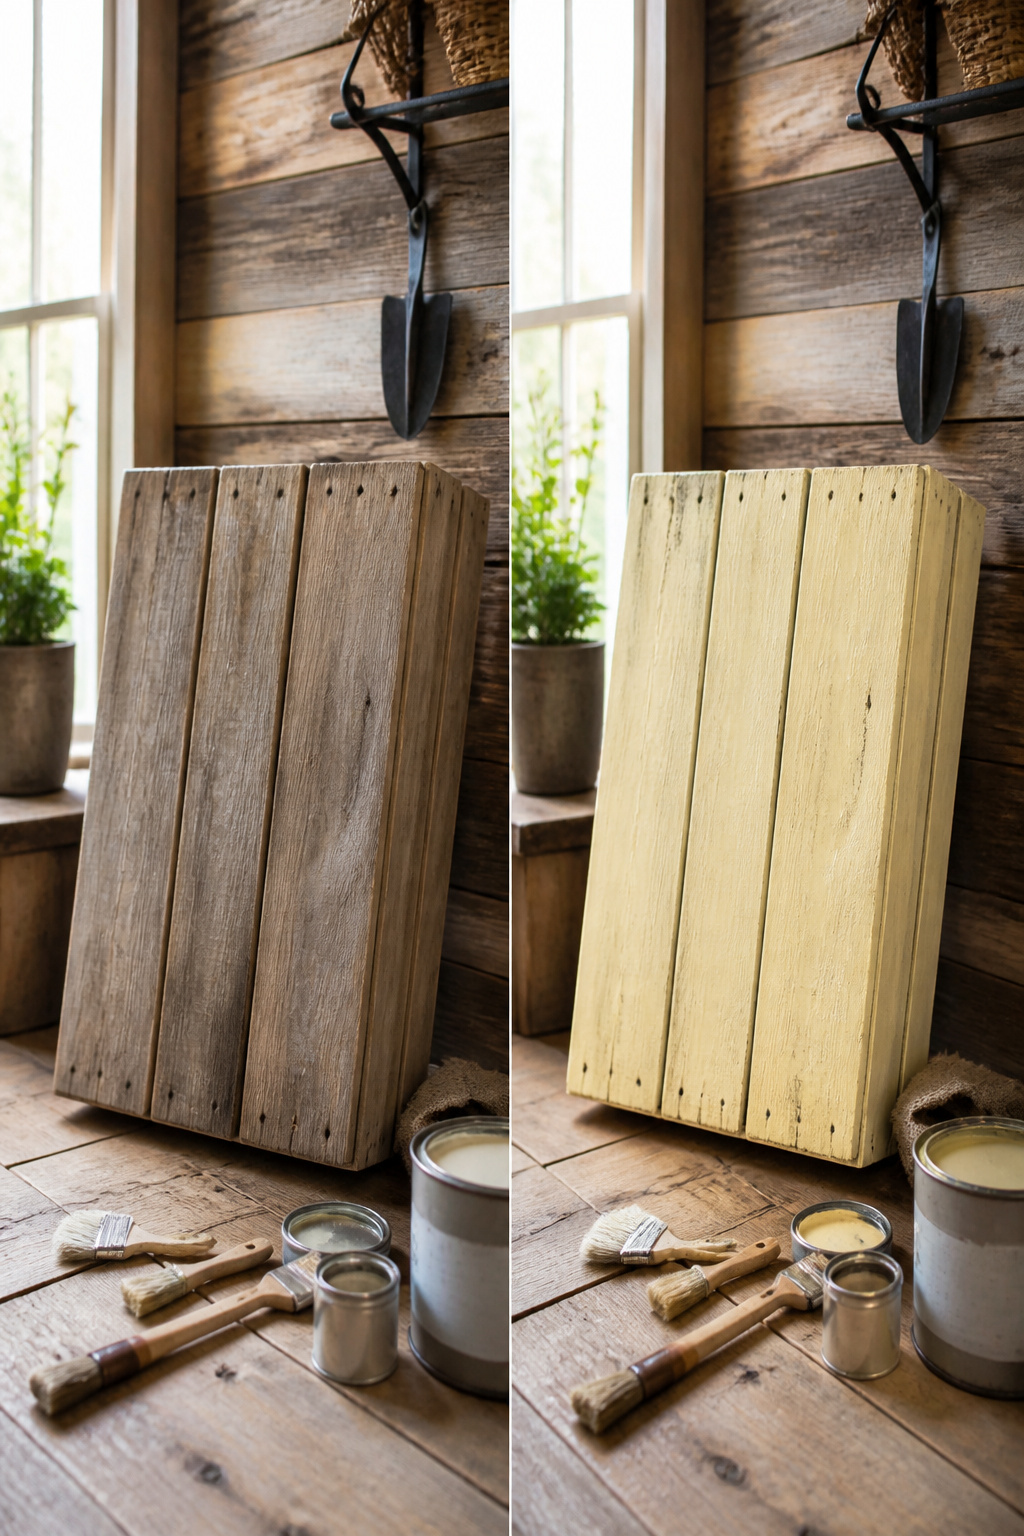
Open-grain wood like you find on most crates drinks paint unevenly if you brush it straight on. The first crate I tried came out blotchy, with the slats looking almost striped where the grain raised and the pigment settled. A wash works better for evening things out: about one tablespoon of light yellow paint to a half cup of water, brushed on and left to dry, gives you a tint that still lets the grain read through. For deeper color that actually protects, stain is the smarter move. It soaks in instead of sitting on top, so you do not get that thick, plastic look that chips when you stack crates or slide them across a floor.
Stenciling is where I wasted an afternoon. Rough-sawn crate slats have enough texture that a flat stencil gaps and bleeds; my Grainsack Stripe looked like a road map the first try. Sealing first with a coat of poly, then stenciling over that cured surface, is the order that actually works. Feed-sack and grainsack patterns suit the farmhouse vibe crates already carry, but only if the base is smooth enough for clean edges. Skip the stencil on raw wood entirely; the time you save by not sanding is lost twice over in touch-ups.
Frequently Asked Questions
What is the best way to prepare wooden crates for decoration?
Scrub the crate with dish soap and warm water, then let it dry in the sun for a full afternoon. Sand rough edges with 80-grit paper, which takes about ten minutes per crate and prevents splinters from tearing fabric or skin. For crates with vintage labels, adhere any frayed edges first so the graphics survive cleaning.
Are wooden crates suitable for outdoor use?
Yes, but only with a weather-resistant sealant on the exterior. The sealant blocks moisture and the pests that follow it, since the wood was never meant to stay wet. Indoors or out, lining planters with sturdy plastic is what actually keeps the bottom from rotting through.
How can I use wooden crates for seasonal decorations?
Fill them with pumpkins and pinecones in autumn, then swap in ornaments come December after clearing out the husks. Three or four crates is the practical ceiling for a rotating display; beyond that you are running a storage unit, not a living room. The crate itself stays year-round while the contents swap out, usually with no careful arrangement needed.